To install a pull out garbage can, you need to measure the cabinet opening, attach the sliders, and secure the bin to the sliders with screws. This step-by-step guide will walk you through the process of installing a pull out garbage can in your kitchen cabinet effortlessly.
Introducing a pull out garbage can in your kitchen can make waste disposal more convenient and efficient. No more unsightly trash cans taking up floor space; instead, you can hide them neatly inside a cabinet. Installing a pull out garbage can is a straightforward task that can be completed by following a few simple steps.
In this guide, we will walk you through the process of measuring your cabinet opening, attaching the sliders, and securing the bin to the sliders. By the end, you’ll have a functional, easily accessible pull out garbage can that will streamline your kitchen waste management.
Choosing A Pull Out Garbage Can
Factors to consider when choosing a pull out garbage can
When it comes to selecting a pull out garbage can for your kitchen, there are several important factors to consider. Choosing the right garbage can will not only help keep your kitchen organized and clean, but it will also make your daily chores more convenient. Here are some key factors to keep in mind:
- Capacity: Determine the amount of waste your household generates to select a garbage can with the appropriate capacity. Consider factors such as the number of family members and the frequency of garbage disposal.
- Material: Opt for a pull out garbage can made of durable materials, such as stainless steel or heavy-duty plastic, that can withstand regular use and resist odors.
- Design: Take into account your kitchen’s aesthetic and choose a garbage can that complements your decor. Many pull out garbage cans are available in various finishes, allowing you to find one that matches your kitchen cabinet.
- Ease of installation: Look for a pull out garbage can that is easy to install, preferably one that comes with clear instructions and necessary mounting hardware.
- Secure lid: Consider selecting a garbage can with a secure lid to prevent odors from spreading and pests from accessing the waste.
- Accessibility: Ensure the garbage can is easy to access, with a smooth gliding mechanism and a handle that allows you to effortlessly pull it out.
Understanding the different types of pull out garbage cans available
Before making a decision, it’s essential to understand the different types of pull out garbage cans available in the market. Here are the common options to consider:
1. Single bin: These pull out garbage cans feature a single compartment, perfect for households that generate a moderate amount of waste. They are ideal for small to medium-sized kitchens with limited cabinet space.
2. Dual bin: Dual bin pull out garbage cans consist of two separate compartments, allowing you to separate recyclables from regular waste conveniently. This type of garbage can is ideal for eco-conscious households and those with ample cabinet space.
3. Triple bin: Triple bin pull out garbage cans offer three separate compartments, enabling easy separation of trash, recyclables, and organic waste. They are suitable for larger families or those who generate a significant amount of waste daily.
4. Under sink style: Under sink pull out garbage cans are designed to fit neatly under your kitchen sink. They help optimize space and keep the garbage can hidden from view, offering a cleaner look to your kitchen.
How to select the right size for your kitchen cabinet
Choosing the right size pull out garbage can is crucial to ensure a proper fit within your kitchen cabinet. Here’s how you can determine the right size:
1. Measure the cabinet opening width: Take accurate measurements of the width of your cabinet opening to find a garbage can that fits snugly.
2. Consider the depth and height: Measure the depth and height of your cabinet to ensure the pull out garbage can will fit comfortably inside without any obstruction.
3. Allow space for the gliding mechanism: Take into account the space required for the pull out mechanism while choosing the size of your garbage can. Ensure there is enough clearance for smooth operation.
By considering these factors and understanding the different types available, you can select the perfect pull out garbage can that meets your specific needs and enhances the functionality of your kitchen.
Preparing For Installation
Before installing a pull-out garbage can, it is crucial to prepare the cabinet space properly. This involves clearing out any items that may hinder the installation process, taking accurate measurements of the cabinet dimensions, and gathering the necessary tools and materials. By following these steps, you’ll set yourself up for a hassle-free installation of your new pull-out garbage can.
Clearing out the cabinet space
Start by clearing out the cabinet space where you plan to install the pull-out garbage can. Remove all items, such as cleaning supplies or unused pots and pans, to create an empty space. This not only ensures a clean working environment but also allows you to assess the available space accurately.
Measuring the dimensions for the garbage can installation
Accurate measurements are essential for a seamless installation process. Use a measuring tape to measure the height, width, and depth of your cabinet. Jot down these measurements so that you can refer to them when selecting an appropriate pull-out garbage can that fits perfectly within the available space.
Gathering the necessary tools and materials
Now that you’ve cleared out the cabinet space and taken measurements, it’s time to gather the tools and materials you’ll need for the installation. Here’s a handy list:
|
|
Double-check that you have all the necessary tools and materials to avoid any interruptions during the installation process. Having everything at hand will make the installation more efficient.
With your cabinet space cleared, accurate measurements in hand, and tools and materials gathered, you are well-prepared to proceed with the installation of your pull-out garbage can. In the next section, we will guide you through the step-by-step process of installing the garbage can, ensuring a smooth and functional addition to your kitchen.
Step-By-Step Installation Process
Installing a pull out garbage can in your kitchen is a great way to keep your space clean and organized. With a step-by-step installation process, you can easily add this convenient feature to your cabinet. This guide will walk you through each step of the installation, from removing the cabinet door to securing all the components in place. Follow along to transform your kitchen into a more efficient and functional space.
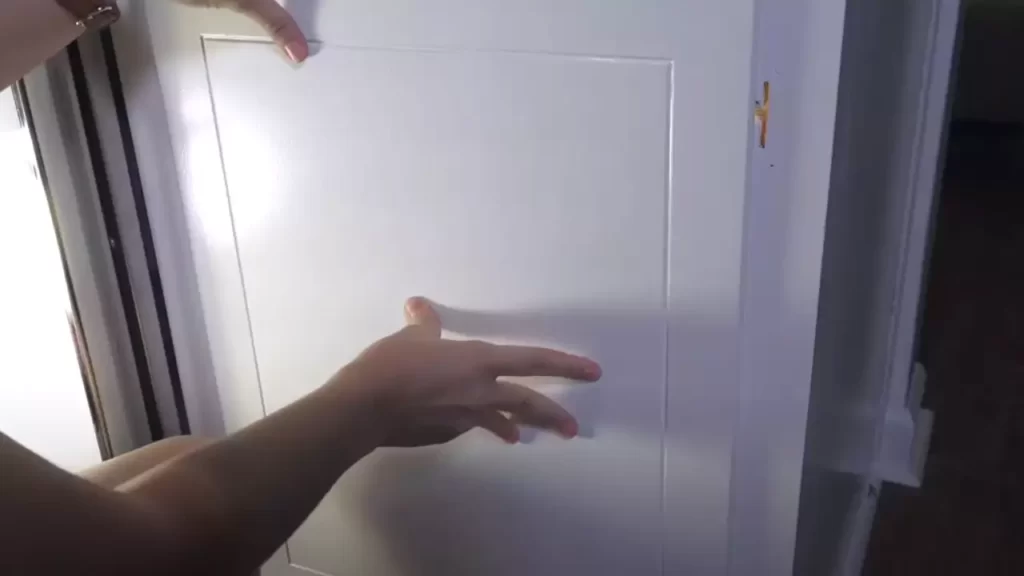
Removing the cabinet door
The first step in installing a pull out garbage can is to remove the cabinet door. This will provide easy access and clearance for the pull out mechanism. Start by opening the cabinet door and locating the hinges. Unscrew the hinges from the cabinet frame using a screwdriver. Carefully remove the door and set it aside. By removing the cabinet door, you’ll create a clear pathway for the installation process to proceed smoothly.
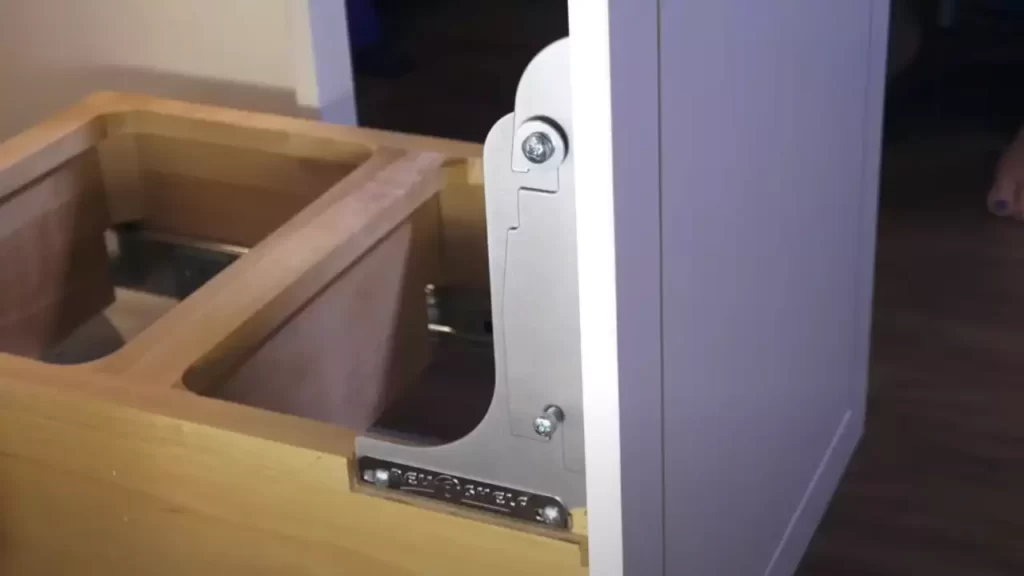
Installing the pull out garbage can frame
Next, it’s time to install the pull out garbage can frame. This frame will serve as the foundation for the pull out mechanism. Start by positioning the frame inside the cabinet, ensuring that it is centered and level. Use a pencil or a marker to mark the placement of the screw holes on the cabinet floor. Then, attach the frame using screws, making sure it is securely fastened. The pull out garbage can frame should fit tightly and securely within the cabinet, providing a stable platform for the garbage can.
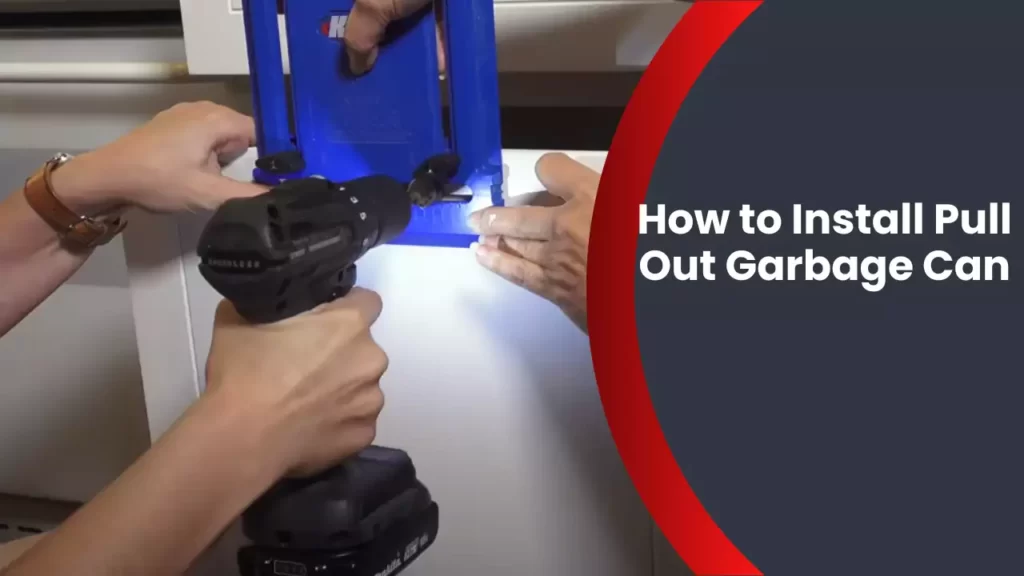
Attaching the slides for smooth operation
For smooth operation, it’s important to attach the slides to the pull out garbage can frame. The slides will allow the garbage can to slide in and out effortlessly. Begin by positioning the slides on both sides of the frame. Use a screwdriver to attach the slides using the provided screws. Make sure the slides are aligned and securely fastened to ensure smooth and reliable operation of the pull-out mechanism.
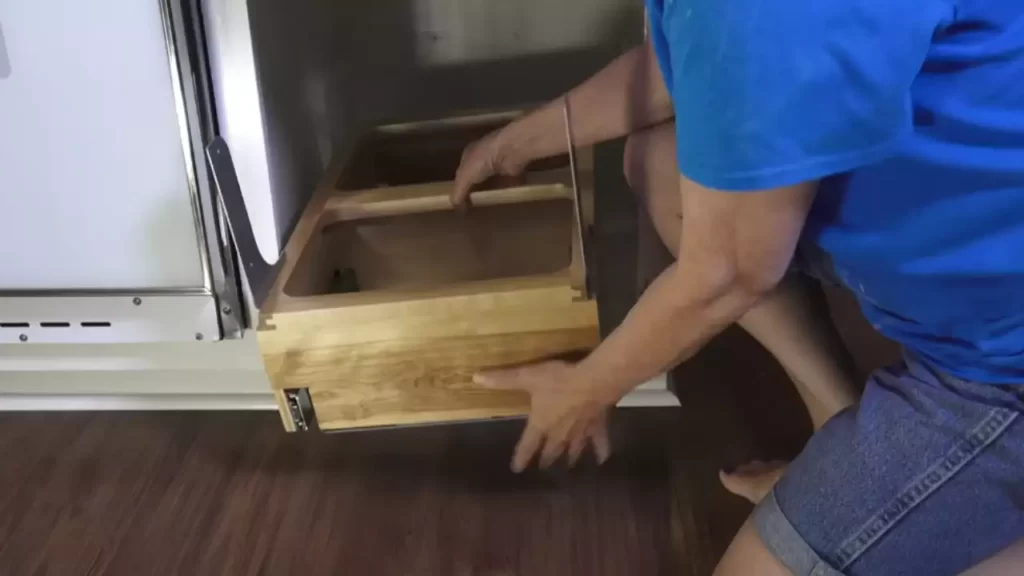
Mounting the garbage can onto the frame
With the frame and slides in place, it’s time to mount the garbage can onto the frame. Start by positioning the garbage can on the frame, ensuring that it fits securely. Most pull out garbage cans come with brackets or clips that attach the can to the frame. Use these to secure the garbage can tightly in place. Double-check that the can is securely attached and can slide in and out smoothly along the slides.
Adjusting the height and alignment of the garbage can
Once the garbage can is installed, take a moment to adjust its height and alignment. This will ensure that the can operates smoothly and that it aligns properly with the cabinet door. Use the provided adjustment screws or brackets to fine-tune the height and alignment of the garbage can. Check that the can opens and closes without any obstructions or difficulties.
Securing all the components in place
The final step in the installation process is to secure all the components in place. Ensure that all screws and brackets are tightly fastened. Give the pull out garbage can a few test runs to ensure it moves smoothly along the slides and aligns properly with the cabinet door. Make any necessary adjustments to ensure optimal performance.
Congratulations! You’ve successfully installed a pull out garbage can in your kitchen cabinet. Enjoy the convenience of having a hidden and easily accessible space for your garbage, while keeping your kitchen clean and organized.
Essential Tips For Successful Installation
When it comes to installing a pull out garbage can in your cabinet, there are a few essential tips that can ensure a successful installation. These tips include ensuring proper alignment and smooth operation, maximizing space utilization, keeping the garbage can securely in place, and regular maintenance and cleaning. By following these tips, you can make the most of your pull out garbage can and keep your kitchen organized and efficient.
Ensuring proper alignment and smooth operation of the pull out garbage can
Proper alignment and smooth operation are key to ensuring that your pull out garbage can functions correctly and effortlessly. To achieve this, start by ensuring that the mounting brackets or slides are properly aligned with the cabinet walls.
Next, make sure that the slides are securely attached to the cabinet floor or base. Use screws or other suitable fasteners to ensure that they are firmly in place.
To test the smoothness of the operation, gently slide the garbage can in and out of the cabinet. It should move freely without any obstructions or resistance. If there are any issues, check for misalignment or obstructions and make necessary adjustments.
Maximizing space utilization in the cabinet
One of the main advantages of installing a pull out garbage can is the ability to maximize space utilization in your cabinet. To make the most of this feature, consider the following:
- Choose a pull out garbage can that fits the dimensions of your cabinet perfectly, maximizing the available space.
- Position the garbage can in a way that allows easy access to other items in the cabinet without obstruction.
- Utilize additional accessories, such as door-mounted organizers or divider systems, to further maximize space and enhance organization.
Keeping the garbage can securely in place to prevent tipping or sliding
It is important to keep the pull out garbage can securely in place to prevent any accidental tipping or sliding. Here are a few tips:
- Ensure that the garbage can is securely attached to the mounting brackets or slides.
- Double-check that all fasteners are tightened properly.
- If necessary, use additional support brackets or reinforcements to enhance stability.
Regular maintenance and cleaning of the pull out garbage can
To keep your pull out garbage can in optimal condition and prevent any odors or buildup, regular maintenance and cleaning are essential:
- Regularly empty and clean the garbage can to prevent the accumulation of debris or unpleasant odors.
- Wipe down the slides or tracks with a damp cloth to remove any dirt or grime.
- Inspect the mounting brackets and fasteners periodically to ensure they remain secure.
By following these tips for successful installation, you can enjoy the convenience and functionality of a pull out garbage can in your kitchen for years to come.
Troubleshooting Common Issues
When it comes to installing a pull-out garbage can, it’s important to ensure that everything functions smoothly. However, like any household installation, there may be some common issues that arise during the process. In this section, we will discuss troubleshooting the most common issues that you might encounter when installing a pull-out garbage can. By addressing these problems, you can enjoy a hassle-free experience and have an efficient waste management system in your kitchen.
Identifying and fixing issues with slide alignment or operation
If you find that your pull-out garbage can is not sliding in and out smoothly or is misaligned, there are a few troubleshooting steps you can take to resolve the issue:
- Check for any obstructions: Ensure there are no objects blocking the path of the garbage can. Remove any items that may hinder its movement.
- Inspect the slides: Examine the slides and tracks to ensure they are not damaged or obstructed. Clean any debris or dust that may be affecting the smooth operation of the garbage can.
- Adjust the alignment: If the garbage can is still misaligned, adjust the slides by loosening the mounting screws and carefully repositioning them until the can operates smoothly. Retighten the screws once the alignment is corrected.
Addressing problems with excessive noise or difficulty in pulling out the garbage can
Excessive noise or difficulty in pulling out the garbage can can be frustrating. Follow these troubleshooting tips to resolve these issues:
- Apply lubrication: Apply a lubricant, such as silicone or grease, to the slides and tracks of the garbage can. This will reduce friction and allow for smoother movement.
- Check for loose components: Tighten any loose screws or bolts that may be causing the noise or difficulty. Ensure all components are securely fastened.
- Inspect the garbage can: If the noise persists, inspect the garbage can itself for any loose or damaged parts. Replace any faulty components to eliminate the problem.
Resolving issues with the garbage can not staying in place
If your garbage can tends to move or does not stay in place when you try to pull it out, follow these troubleshooting steps:
- Check the installation: Ensure that the garbage can is properly installed and securely mounted. Verify that all screws or bolts are tightened.
- Use stabilizing brackets: If the issue persists, consider installing stabilizing brackets. These brackets help prevent the garbage can from shifting or moving during use.
- Upgrade the slides: If the problem continues, it may be beneficial to upgrade the slides to a higher quality or heavier-duty model. This can provide better stability and prevent the garbage can from moving.
Safety Considerations
When it comes to installing a pull out garbage can, ensuring safety is of utmost importance. Taking the necessary precautions not only prevents accidents and injuries but also ensures the longevity and functionality of the garbage can. In this section, we will discuss three key safety considerations that should be adhered to during the installation process. Following these guidelines will help you successfully install your pull out garbage can without any mishaps and enjoy it for years to come.
Tips for safely working with tools and equipment during installation
Working with tools and equipment can pose potential hazards if not handled properly. To avoid accidents, injuries, and damage to the pull out garbage can, there are a few essential tips to keep in mind:
- Always wear appropriate personal protective equipment (PPE) such as safety goggles, gloves, and earplugs.
- Familiarize yourself with the user manual or instruction guide of the tools you will be using.
- Inspect tools and equipment for any damage or defects before using them.
- Ensure that tools are used only for their intended purpose and follow the manufacturer’s recommendations.
- Maintain a clean and well-organized workspace to avoid tripping hazards.
- When using power tools, make sure to secure cords and cables to prevent accidental pulling or tripping.
Ensuring proper weight distribution and avoiding overloading the garbage can
Proper weight distribution and avoiding overloading the pull out garbage can contribute to its stability and prevent structural damage. Here are a few tips to ensure you maintain the appropriate weight:
- Refer to the manufacturer’s recommendations for the maximum weight capacity of the garbage can.
- Divide heavier items between multiple trash bags instead of loading all the weight onto one bag.
- Consider distributing the weight evenly throughout the garbage can compartments to maintain balance.
- If you anticipate frequently disposing of heavy items, opt for a pull out garbage can with a higher weight capacity.
- Regularly inspect the garbage can for signs of strain or stress and replace any damaged parts promptly.
Child-proofing the pull out garbage can for enhanced safety
Child-proofing the pull out garbage can adds an extra layer of safety, ensuring that little hands and curious minds are kept away from any potential dangers. Here are some steps you can take to child-proof your pull out garbage can:
- Install child-proof locks or latches on the cabinet doors that house the garbage can.
- Ensure that the pull out mechanism is smooth and doesn’t have any exposed sharp edges.
- Consider placing the garbage can in a higher cabinet or using a child-lock mechanism on the pull-out feature.
- Educate children about the potential hazards of playing with or climbing on the garbage can.
- Regularly inspect child-proofing mechanisms to ensure they are functioning correctly.
By following these safety considerations, you can ensure a smooth and secure installation of your pull out garbage can. Remember, safety should be a top priority at all times, and these measures will help you protect yourself, your loved ones, and your pull out garbage can.
Additional Accessories And Features
When it comes to installing a pull out garbage can, there are a variety of additional accessories and features that can enhance your experience. These optional extras can make your daily waste management routine easier, more convenient, and even more hygienic. Let’s explore some of the most popular choices in detail.
Exploring optional accessories for the pull out garbage can
Customizing your pull out garbage can with optional accessories can help you maximize both space and efficiency in your kitchen. Here are a few options to consider:
- Trash Bag Holders: These practical add-ons keep your trash bags securely in place, preventing them from slipping or getting caught when you pull out the can.
- Lid Options: Some pull out garbage cans offer the choice of lids, which help keep odors contained and unwanted critters away. Whether you prefer a simple flip-top lid or the convenience of a touchless sensor, there is an option to suit your needs.
- Dividers and Compartments: If you’re looking to separate your trash from your recyclables or want to keep different types of waste separate, dividers and compartments are a fantastic solution. They allow you to easily sort and organize your garbage and recyclables, promoting eco-friendly habits.
- Drawer Organizers: Make the most of the space available by adding drawer organizers to your pull out garbage can. These handy inserts allow you to neatly store additional items, such as kitchen utensils or cleaning supplies, right alongside your waste bin.
Understanding special features like soft close mechanisms or odor control systems
In addition to optional accessories, pull out garbage cans also come with a range of special features to enhance their functionality. Here are two key features to be aware of:
- Soft Close Mechanisms: Tired of the sound of a slamming garbage can? Look for pull out garbage cans equipped with soft close mechanisms. These mechanisms ensure that the can smoothly and silently glides back into place, preventing any noise disruptions in your kitchen.
- Odor Control Systems: Nobody wants unpleasant kitchen odors to permeate throughout their home. Fortunately, pull out garbage cans with built-in odor control systems help combat this issue. They employ various methods, such as carbon filters or charcoal inserts, to keep odors at bay and maintain a fresh-smelling space.
Customizing the pull out garbage can to meet your specific needs
One of the great advantages of pull out garbage cans is their versatility. You can easily customize them to meet your specific needs and preferences. Here are a few ways to tailor your pull out garbage can:
- Size and capacity: Pull out garbage cans come in various sizes and capacities, allowing you to choose the ideal option based on the amount of waste your household generates.
- Installation flexibility: Depending on your kitchen layout, you can install your pull out garbage can under the sink, in a cabinet, or even directly in the pantry. This flexibility ensures that your garbage can seamlessly integrates into your kitchen design.
- Material and finish: Pull out garbage cans are available in different materials and finishes, allowing you to select the one that matches your kitchen décor. From stainless steel for a modern look to wood for a rustic feel, the choice is yours.
By exploring and understanding additional accessories, special features, and customization options for your pull out garbage can, you can create a waste management system that perfectly suits your needs and enhances your overall kitchen experience.
Frequently Asked Questions
How Do You Install A Garbage Pull Out?
To install a garbage pull out, follow these steps: 1. Measure and mark the cabinet for the pull out unit. 2. Install the mounting hardware and brackets as per the instructions. 3. Attach the slides to the brackets and ensure they are properly aligned.
4. Mount the pull out unit onto the slides and secure it in place. 5. Test the unit for smooth operation and adjust if necessary.
How Do I Install A Pull Out Garbage Can?
Installing a pull out garbage can is a straightforward process. Start by measuring the cabinet opening to ensure the can will fit properly. Then, attach the slides to the cabinet and the can, following the manufacturer’s instructions. Finally, slide the can into place and make any necessary adjustments.
What Tools Do I Need To Install A Pull Out Garbage Can?
To install a pull out garbage can, you’ll need a few basic tools. These include a measuring tape, a drill, screws, and a screwdriver. You may also need a level and a pencil to ensure proper alignment during installation.
How Long Does It Take To Install A Pull Out Garbage Can?
The time it takes to install a pull out garbage can depends on your level of experience and the complexity of the installation. On average, it can take anywhere from 30 minutes to an hour to complete the installation. Following the manufacturer’s instructions and having the right tools can help expedite the process.
Conclusion
Installing a pull-out garbage can can significantly improve kitchen functionality and organization. By following the step-by-step instructions discussed in this blog post, you can easily and efficiently complete the installation process. Remember to gather the necessary tools, measure accurately, and secure the unit properly.
With this addition, you can streamline your waste management system and enjoy a clutter-free and convenient kitchen. Start your installation today!