To install a cable outlet, locate the desired location on the wall and use a stud finder to find a suitable spot. Then, use a utility knife to cut a hole for the outlet box and insert it into the wall.
Connect the cable and tighten the screws to secure it in place. Finally, attach the faceplate and test the outlet to ensure it is working properly. Installing a cable outlet in your home can provide you with convenient access to television channels and internet connectivity.
Whether you want to avoid cable clutter or need to relocate your existing outlet, knowing how to install a cable outlet is essential. By following a few simple steps, you can ensure a successful installation and enjoy seamless connection throughout your home. In this guide, we will walk you through the process of installing a cable outlet, from finding the ideal location to connecting the cables and testing the functionality. With the right tools and a little patience, you’ll be able to enjoy your favorite shows and browse the web effortlessly. So, let’s get started!
Planning And Preparations
Before you start installing a cable outlet in your home or office, it’s essential to plan and prepare accordingly. Taking the time to carefully consider the location, gather the necessary tools and materials, and properly measure and mark the outlet position will ensure a successful installation process. In this section, we will guide you through each step of the planning and preparation phase.
Choosing the Right Location for the Outlet
When selecting the location for your cable outlet, there are a few important factors to keep in mind. Consider the proximity to the main cable line, as well as the accessibility and visibility of the outlet. You’ll want to choose a location that is easily reachable for both installation purposes and future cable maintenance.
Furthermore, it’s crucial to consider the placement of the outlet in relation to the devices you’ll be connecting. Think about where your TV, modem, or other cable-dependent devices are located, and choose a spot that minimizes cable clutter and provides convenient access.
Gathering the Required Tools and Materials
Before you begin the installation, ensure that you have all the necessary tools and materials on hand. This will help you save time and prevent any unnecessary delays or interruptions. Here is a list of the most common tools and materials you will need:
| Required Tools | Required Materials |
|---|---|
|
|
Measuring and Marking the Outlet Position
Once you have chosen the ideal location and gathered all the necessary tools, it’s time to measure and mark the precise position for the cable outlet. Start by locating the nearest cable line and determine the shortest and most efficient route to run the cable towards your desired location.
Use the stud finder to locate any studs or obstructions in the wall that may affect the installation process. This will help you avoid drilling into any structural components and ensure a secure and stable outlet placement.
Grab your level and mark the desired height for the outlet using a pencil. This will help you maintain a straight and uniform installation. Then, using the measurements you have obtained, mark the positions where you need to drill holes for cable routing.
Remember to double-check your measurements and marks to ensure accuracy before proceeding to the next phase of the installation process. Taking the time to do this correctly will result in a more professional and seamless installation.
Preparing The Wall For Installation
Turning off the Power Supply
To begin preparing the wall for cable outlet installation, the first crucial step is turning off the power supply. This is crucial for your safety and to prevent any electrical shock or damage to the existing wiring. Locate the main electrical panel in your home, usually found in the basement or utility room. Once you’ve located the panel, open it and find the circuit breaker that controls the power to the area where you’ll be working.
Flip the switch to the “off” position to cut off the power supply to that specific area. Double-check that the power is indeed off by using a voltage tester on the outlet you’ll be working with. Remember, safety should always be the top priority, so take your time and ensure that the power supply is properly shut off.
Carefully Removing the Wall Covering
After turning off the power supply, the next step in preparing the wall for cable outlet installation is carefully removing the wall covering. This can be wallpaper, paint, or any other type of covering. Start by using a putty knife or a scraper to gently loosen the edges of the wall covering.
Slowly and carefully peel away the covering, working from top to bottom. Be cautious not to damage the underlying drywall or plaster as you remove the covering. If necessary, use a heat gun or a steamer to soften stubborn or adhesive-based coverings. Take your time during this step to ensure a clean removal, as it will make the next steps much easier and prevent any unnecessary repairs.
Drilling Holes for Wiring
Once the wall covering is removed, it’s time to drill holes for the wiring. This step is essential to ensure a neat and organized cable outlet installation. Start by deciding where you want the cable outlet to be placed on the wall. Use a measuring tape to determine the exact location and mark it with a pencil. Next, choose an appropriate-sized drill bit that matches the diameter of the cable you’ll be installing. Attach the drill bit to your power drill and, holding it steady, slowly drill a hole through the marked location.
Be careful not to drill too deep or apply too much pressure, as this may damage the underlying structure. Once the hole is drilled, remove any excess debris or dust around the area. Repeat this process for any additional cable outlets you plan to install, ensuring each hole is positioned correctly and cleanly drilled.
By following these steps, you can successfully prepare the wall for cable outlet installation. Remember to turn off the power supply, carefully remove the wall covering, and drill holes for the wiring. This preparation will set you on the right path towards a safe and efficient cable outlet installation in your home.

Installing The Cable Outlet
When it comes to setting up your home entertainment system or ensuring a stable internet connection, installing a cable outlet is a crucial step. A cable outlet allows you to connect your devices directly to the main source, providing a seamless and uninterrupted experience. In this article, we will guide you through the process of installing a cable outlet, covering each step in detail. So, let’s get started!
Running the Coaxial Cable from the Main Source
Before you can install the cable outlet, you need to ensure that there is a coaxial cable running from the main source to the desired location. Here’s how you can do it:
- Identify the main source: Locate the central point where your cable signal enters the building. This is typically where the cable service provider’s feed is connected.
- Plan the cable route: Determine the path the cable will take to reach the desired outlet location. It’s essential to choose the most direct and least obstructed route.
- Measure the cable length: Using a measuring tape, measure the distance between the main source and the intended outlet. Add a few extra feet to account for any unforeseen obstacles or adjustments.
- Secure the cable: Using cable clips or staples, secure the coaxial cable along the planned route. Make sure to maintain a neat and tidy appearance while avoiding any sharp bends or kinks that may affect signal quality.
Mounting the Outlet Plate and Box
Once you have the coaxial cable running from the main source to the desired location, it’s time to mount the outlet plate and box. Follow these steps:
- Select the appropriate outlet plate and box: Choose an outlet plate and box that match the color and style of your room. Ensure that the box has enough space to accommodate the coaxial cable and any necessary connectors.
- Choose the location: Determine the ideal position for the outlet plate, considering factors such as accessibility and aesthetics.
- Mark the mounting holes: Hold the outlet plate against the wall at the chosen location and mark the positions of the mounting holes using a pencil or marker.
- Drill the holes and install the box: Use a power drill to create holes at the marked positions. Insert plastic anchors or wall plugs into the holes, then mount the box securely using screws.
- Attach the outlet plate: Align the outlet plate with the box and secure it in place using the screws provided. Ensure that it sits flush against the wall for a professional look.
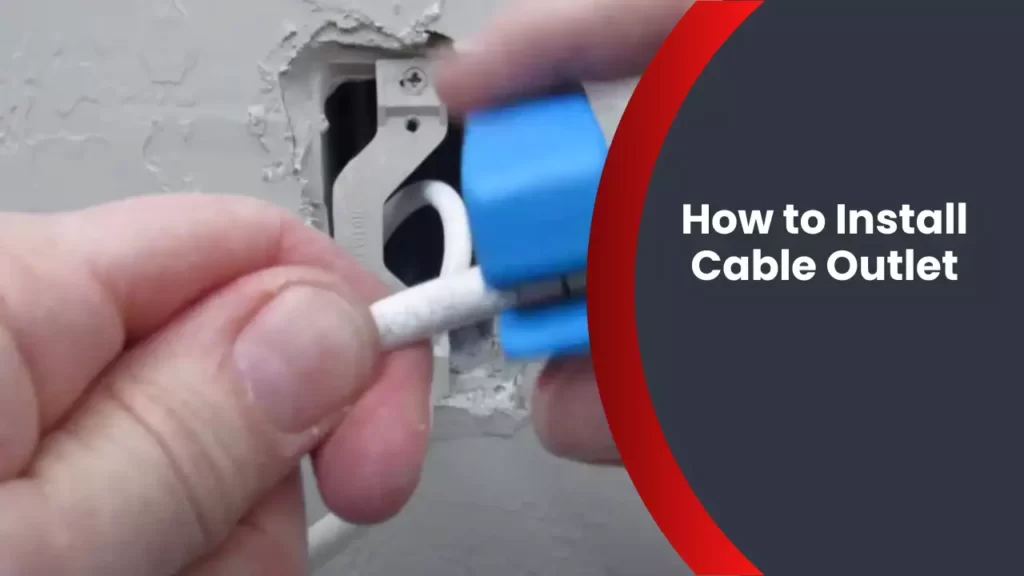
Connecting the Cable to the Outlet Plate
Now that the outlet plate and box are installed, it’s time to connect the coaxial cable to the outlet plate. Follow these steps:
- Prepare the cable: Strip off approximately one inch of the plastic coating from the end of the coaxial cable to expose the inner wire and shielding.
- Insert the cable into the plate: Locate the coaxial connector on the outlet plate and unscrew the outer nut. Slide the nut and any necessary washers onto the cable, then insert the exposed end into the connector.
- Tighten the connection: Firmly hold the connector while tightening the outer nut by hand. Be careful not to overtighten, as it may damage the cable or the plate.
- Test the connection: Once the cable is securely connected, test the signal by connecting a compatible device to the outlet plate. Check for a clear and stable signal, ensuring there are no distortions or interruptions.

Testing And Finishing Touches
Checking the Cable Signal Strength
After successfully installing the cable outlet, it’s crucial to check the cable signal strength to ensure optimal performance. Follow these steps to determine if there are any flaws in the cable connection:
- Connect your television or cable receiver to the newly installed cable outlet.
- Turn on the television and navigate to the cable input.
- Check for any pixelation, distortion, or picture freezing while browsing through different channels.
- If you encounter any of these issues, it may indicate a weak cable signal.
- To check the signal strength, access the cable receiver’s menu by pressing the menu button on your remote control.
- Find the “Signal Strength” or “Signal Quality” option in the menu, and select it.
- A window will appear displaying the signal strength and quality values in percentages or dB.
- Ensure that the signal strength is above 75% or the dB value is around -10. This indicates a strong signal.
- If the signal strength falls below the recommended values, consider contacting your cable provider for assistance.
Securing and Tidying the Cable Wiring
Once you have verified the cable signal strength, it’s time to secure and tidy the cable wiring in order to maintain a neat and organized setup. Follow these simple steps to achieve a professional finish:
- Ensure that the cables are firmly connected to both the cable outlet and the devices they are connected to.
- Use cable clips or zip ties to secure the cables along the baseboard or wall, keeping them out of sight and preventing them from becoming tangled.
- Hide any exposed cables behind furniture, such as entertainment centers or bookshelves, to maintain a clean and clutter-free appearance.
- Consider using cable covers or conduits to conceal any visible cables running vertically or horizontally along the wall.
Reinstalling the Wall Covering
The final step in installing a cable outlet is to reinstall the wall covering to achieve a seamless look. Follow these guidelines to ensure a smooth and polished finish:
- Remove any protective coverings or tapes from the outlet itself.
- If necessary, clean the surrounding surface to remove any dirt, dust, or debris.
- Align the wall covering with the cable outlet, making sure the outlet is centered if it is visible.
- Press the wall covering gently against the wall to adhere it in place.
- If you had to cut a hole for the outlet, use a drywall repair kit or spackle to patch up any imperfections.
- Allow the spackle to dry, then sand it down smoothly.
- Apply a fresh coat of paint or wallpaper to match the surrounding area, ensuring a seamless and cohesive appearance.
Frequently Asked Questions
Can You Have A Cable Outlet Installed?
Yes, you can have a cable outlet installed.
What Happens If You Don’T Have A Cable Outlet For Wifi?
If you don’t have a cable outlet for WiFi, you won’t be able to connect your WiFi router directly. However, you can use alternative methods such as a wireless mobile hotspot or powerline adapters to connect to the internet wirelessly without a cable outlet.
How Do I Connect Coaxial Cable To Wall Outlet?
To connect a coaxial cable to a wall outlet, follow these steps: 1. Identify the coaxial cable’s plug and the wall outlet’s coaxial port. 2. Ensure the plug is clean and undamaged. 3. Insert the coaxial cable’s plug firmly into the wall outlet’s port.
4. Ensure a secure connection by tightening any screws or nuts on the wall outlet’s port. 5. Test the connection by checking if the signal is properly transmitted.
How Do You Activate A Cable Outlet On The Wall?
To activate a cable outlet on the wall, you can follow these simple steps. Locate the cable outlet on the wall. Disconnect any devices connected to the outlet. Connect the coaxial cable from your cable service provider to the outlet.
Finally, connect your cable box or TV to the outlet and enjoy your cable service.
Conclusion
Installing a cable outlet may seem daunting, but with the right steps, it can be a straightforward process. By following the guidelines discussed in this blog post, you can successfully install a cable outlet in your home. Remember to gather all the necessary tools, plan the location carefully, and take safety precautions.
With some patience and attention to detail, you’ll soon be enjoying high-quality cable connections in your space. Happy installing!