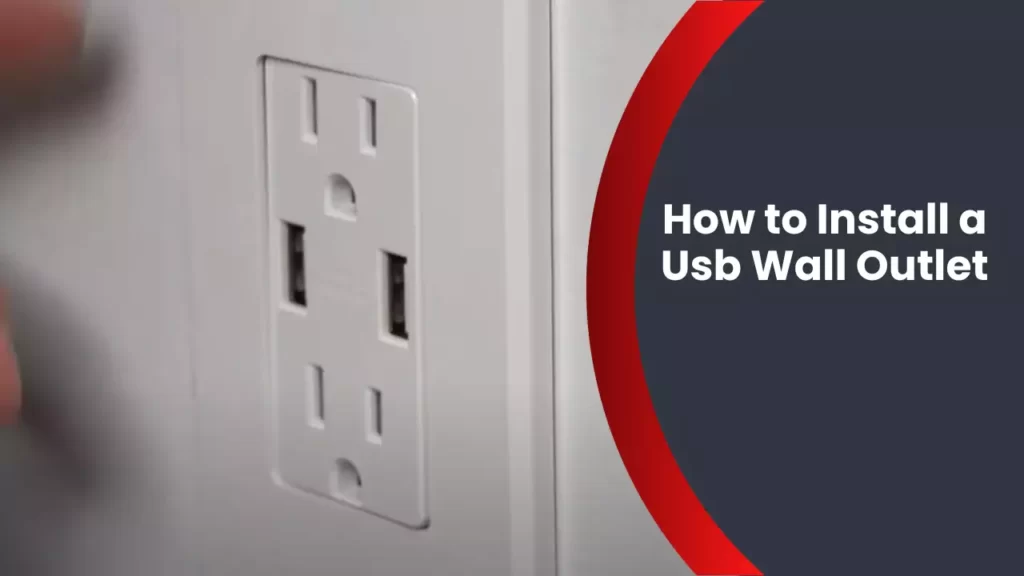
To install a USB wall outlet, first turn off the power to avoid electrical shock. Then, remove the existing outlet from the electrical box, connect the USB outlet’s wires to the corresponding wires in the box, and secure the outlet in place.
Finally, turn the power back on to test the functionality. Now you can conveniently charge your devices directly from the wall. Introducing a USB wall outlet to your home or office can greatly enhance convenience when it comes to charging your devices.
With this simple installation, you can eliminate the need for bulky adapters and free up your other outlets for additional use. Whether you’re adding the outlet for personal or professional purposes, this step-by-step guide will help you install a USB wall outlet quickly and safely. So, let’s get started and bring power and efficiency to your space.
Choosing The Right Usb Wall Outlet
When it comes to installing a USB wall outlet, choosing the right one is essential. With so many options available, it’s important to understand the factors to consider when selecting a USB wall outlet. By considering these factors, you can ensure that you choose an outlet that meets your needs and provides convenience and functionality. In this article, we will take a look at the different USB wall outlet options available and explore the factors you should keep in mind while making your decision.
Factors to Consider When Selecting a USB Wall Outlet
1. Charging Speed: One of the most important factors to consider is the charging speed offered by the USB wall outlet. Different outlets come with different charging capabilities, ranging from 1 amp to 4 amps. If you have multiple devices that require fast charging, look for an outlet that offers higher amperage to ensure quick and efficient charging.
2. USB Ports: Consider the number of USB ports you need on your wall outlet. USB wall outlets typically come with 1, 2, or 4 ports. If you have multiple devices that require charging simultaneously, opting for an outlet with multiple USB ports will be beneficial.
3. Electrical Rating: It is crucial to ensure that the USB wall outlet you choose has an appropriate electrical rating. This rating determines the maximum power that the outlet can handle. Make sure the outlet can handle the voltage and current requirements of your electronic devices without any risk of overloading.
4. Compatibility: Check the compatibility of the USB wall outlet with your electronic devices. Some outlets are specifically designed for Apple devices, while others are universal and compatible with a wide range of devices, including Android smartphones and tablets.
5. Safety Features: Prioritize outlets that come with built-in safety features such as overcurrent protection, overload protection, and short circuit protection. These features add an extra layer of safety and help prevent damage to your devices and electrical systems.
6. Installation: Consider the ease of installation when selecting a USB wall outlet. Some outlets require professional installation, while others are designed for easy DIY installation. Choose accordingly based on your comfort level with electrical work.
Understanding these factors will help you make an informed decision when choosing a USB wall outlet that best suits your needs. Now, let’s delve into the different options available in the market.
Tools And Materials Needed For Installation
List of Tools Required for the Installation Process
Before beginning the installation of a USB wall outlet, there are several essential tools that you will need to ensure a successful installation. These tools will help you complete the process smoothly and efficiently. Make sure you have the following tools handy:
- Screwdriver (Phillips and flathead)
- Wire cutters/strippers
- Electrical tester
- Needle-nose pliers
- Electrical tape
- Voltage detector
- Utility knife
- Measuring tape
Necessary Materials Needed for a Successful Installation
In addition to the tools mentioned above, there are specific materials that you will require to install a USB wall outlet properly. These materials will help you complete the installation safely and efficiently. It is important to have the following materials on hand:
- USB wall outlet
- Electrical box
- Wire connectors
- Electrical screws
- Wire nuts
- Electrical wires
- Decorator wall plate
Before beginning the installation process, make sure you have all the necessary tools and materials listed above. Having them readily available will save you time and effort. Once you have gathered everything you need, you can move on to the next step of the installation process.

Preparing For Installation
Preparing for installation is an important step when installing a USB wall outlet. By taking the time to properly prepare, you can ensure a safe and successful installation process. In this section, we’ll guide you through the necessary steps to turn off the power to the outlet, remove the existing wall plate and outlet, and check the wiring in the electrical box. Let’s get started!
Turning off the power to the outlet
Before you begin any electrical work, it’s crucial to turn off the power to the outlet you’ll be working on. This will prevent the risk of electric shock or damage to the outlet. Follow these steps to turn off the power:
- Locate your home’s electrical panel. This is usually found in a utility room, basement, or garage.
- Open the electrical panel door by removing the screws or latches.
- Locate the circuit breaker that corresponds to the outlet you’ll be working on. The breakers are labeled with numbers or descriptions, so look for one that’s labeled for the area where the outlet is located.
- Switch the breaker to the “off” position by firmly pushing it to the opposite side.
- Double-check that the power is indeed off by testing the outlet with a non-contact voltage tester. This device will detect the presence of electricity and confirm that the power is off.
Removing the existing wall plate and outlet
With the power turned off, it’s now safe to remove the existing wall plate and outlet. Follow these steps to remove them:
- Using a screwdriver, remove the screws securing the wall plate to the outlet.
- Gently pull the wall plate away from the wall to expose the outlet.
- Next, remove the screws securing the outlet to the electrical box.
- Carefully pull the outlet out of the electrical box.
- Inspect the wiring connections on the outlet to ensure they are secure. If any wires appear loose or damaged, you may need to rewire them or seek assistance from a qualified electrician.
Checking the wiring in the electrical box
Before installing the USB wall outlet, it’s important to check the wiring in the electrical box to ensure it is in good condition. Here’s how to do it:
- Inspect the wiring connections in the electrical box. Look for any signs of damage, such as exposed wires or frayed insulation.
- Ensure that the wiring is properly secured and connected to the outlet. Check for any loose or disconnected wires.
- If you notice any issues or are unsure about the wiring, it’s best to consult a professional electrician for assistance.
By following these steps to prepare for the installation of a USB wall outlet, you’ll be well-equipped to start the installation process with confidence. Remember to prioritize safety and consult a professional if needed. Stay tuned for the next section where we’ll guide you through the installation steps!
Installing The Usb Wall Outlet
Installing a USB wall outlet is a convenient upgrade for any home or office space. With the ability to charge your devices directly from the wall, it eliminates the need for bulky power adapters and frees up valuable outlet space. In this guide, we will walk you through the process of installing a USB wall outlet, step by step.
Connecting the wires to the new USB wall outlet
Before you begin, ensure that the power to the outlet is turned off at the circuit breaker. This will help prevent any accidents or electrical shocks during the installation process. Once you have confirmed that the power is off, follow these steps to connect the wires to the new USB wall outlet:
- Start by removing the cover plate from the existing electrical outlet using a screwdriver.
- Next, remove the screws that are securing the outlet to the electrical box. Carefully pull the outlet out, taking note of how the wires are connected.
- Disconnect the wires from the old outlet by loosening the terminal screws. Make sure to label each wire for easy identification later on.
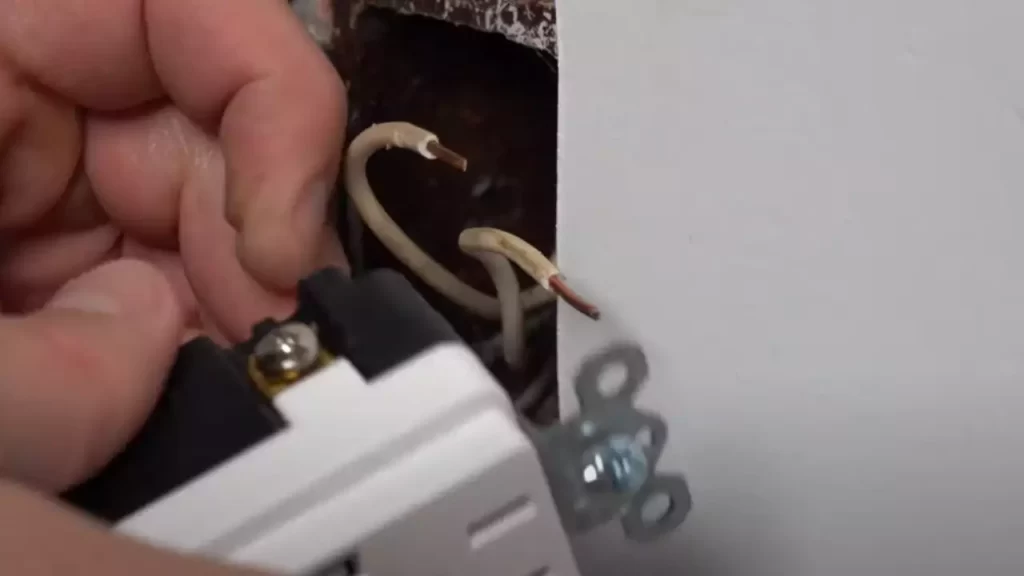
- Take your new USB wall outlet and insert the wires into the corresponding terminals. Typically, there are two sets of terminals – one for the hot wires (typically black or red) and one for the neutral wires (typically white or gray). Ensure that the wires are securely tightened under the screws.
- If your USB wall outlet has a ground wire, connect it to the grounding screw on the outlet.
- Once all the wires are connected, carefully push the outlet back into the electrical box.
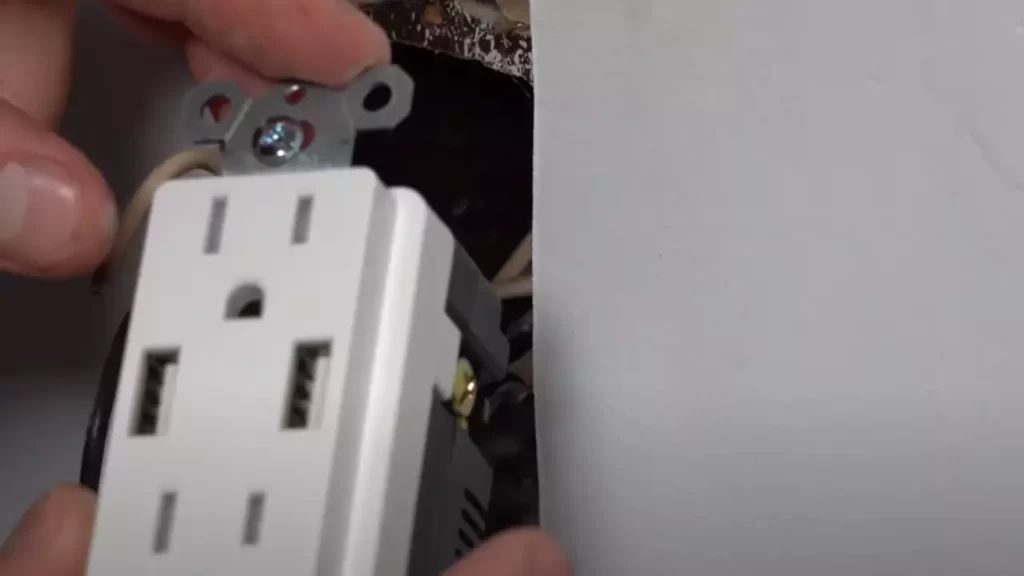
Mounting the USB wall outlet onto the electrical box
Now that the wires are properly connected, it’s time to mount the USB wall outlet onto the electrical box. Follow these steps:
- Align the screw holes on the outlet with the holes on the electrical box.
- Using the provided screws, secure the outlet to the electrical box. Ensure that the outlet is firmly attached and doesn’t wobble.
Installing the new wall plate
With the USB wall outlet securely mounted, the final step is to install the new wall plate. Here’s how:
- Take the new wall plate and align it with the screw holes on the outlet.
- Using the provided screws, attach the wall plate to the outlet. Make sure the screws are tightened enough to hold the plate in place, but not too tight to damage the plate or outlet.
Once the wall plate is installed, you can turn the power back on at the circuit breaker and test the USB wall outlet. Simply plug in your device, and you should see it charging. Congratulations, you have successfully installed a USB wall outlet!
Finishing And Testing The Usb Wall Outlet
Once you have successfully connected all the wiring for your USB wall outlet, it’s time to finish up the installation process and test the outlet to ensure everything is working properly. This final step is crucial to ensure the safety and functionality of the outlet. Follow the steps below to complete the installation:
Checking the wiring connections for any loose ends
Before proceeding with the testing, it’s important to double-check all the wiring connections to ensure they are secure and there are no loose ends. Inspect each wire and ensure it is properly connected to its respective terminal. Loose connections can result in poor performance or even electrical hazards.
To check the wiring connections:
- Inspect each wire and make sure they are securely attached to their corresponding terminal screws.
- Tighten any loose screws using a screwdriver, ensuring a snug fit.
- If you find any damaged or frayed wires, replace them immediately to avoid any potential risks.
Turning the power back on and testing the USB wall outlet
Once you have confirmed that all the wiring connections are secure, you can proceed to turn the power back on and test the USB wall outlet. This step will help you ensure that the outlet is functioning correctly and that the USB ports are providing power.
To turn on the power and test the USB wall outlet:
- Locate your home’s circuit breaker box and flip the switch that controls the power to the outlet back to the “ON” position.
- Plug in a device or charging cable into one of the USB ports and check if it starts charging. You can use a smartphone, tablet, or any other USB-powered device for this test.
- If the device starts charging, congratulations! Your USB wall outlet is successfully installed and functional. If not, proceed to the troubleshooting section below.
Troubleshooting common issues with installation
In some cases, you may encounter issues even after completing the installation process correctly. Troubleshooting these common issues can help identify any underlying problems and resolve them promptly.
If you experience any issues with your USB wall outlet, follow these troubleshooting steps:
- Check if the circuit breaker for the outlet has tripped. If it has, flip it to the “ON” position.
- Inspect the wiring connections again and ensure they are secure. Loose or improperly connected wires may disrupt the outlet’s functionality.
- Use a voltage tester to check if the outlet is receiving power. If there is no power, it may indicate a larger electrical problem that requires professional assistance.
- If the troubleshooting steps do not resolve the issue, consider consulting a licensed electrician to diagnose and fix the problem.
By following these steps and testing the USB wall outlet, you can ensure a safe and successful installation. Enjoy the convenience of charging your devices without the need for additional adapters or power bricks!
Tips For Maintenance And Safety
Installing a USB wall outlet is an excellent investment that enhances convenience and functionality within your home or office. However, ensuring the long-lasting performance of your USB wall outlet requires proper maintenance and adherence to safety precautions. By following these tips for cleaning, maintenance, and safety, you can keep your USB wall outlet in optimal condition while minimizing the risk of electrical accidents.
Cleaning and Maintaining the USB Wall Outlet
Regular cleaning and maintenance play a vital role in the performance and longevity of your USB wall outlet. Here are some easy-to-follow guidelines to keep your USB wall outlet clean and working flawlessly:
1. Power Off: Before attempting any maintenance on your USB wall outlet, always turn off the power supply by shutting off the corresponding circuit breaker in your electrical panel. This ensures your safety during the cleaning process.
2. Gentle Cleaning: Start by gently wiping the surface of the USB wall outlet using a soft, lint-free cloth. This helps remove dust, dirt, or any other debris that may have accumulated over time. Avoid using abrasive cleaners or harsh chemicals, as they can damage the outlet.
3. Compressed Air: To remove debris from hard-to-reach areas, you can use a can of compressed air to blow away dust particles. Be sure to aim the nozzle away from your face and keep a safe distance.
4. Inspect for Damage: Regularly inspect the USB wall outlet for any signs of damage, such as cracks or loose parts. If you notice any issues, contact a professional electrician to assess and repair the outlet.
Safety Precautions to Take When Working with Electrical Outlets
Working with electrical outlets requires caution and adherence to safety precautions. Here are some essential measures you should follow to ensure your safety:
1. Always Turn Off the Power: Before installing, repairing, or conducting any maintenance on a USB wall outlet, switch off the power supply from the electrical panel. Use a voltage tester to verify that the power is fully off and that there is no electrical current flowing through the outlet.
2. Wear Protective Gear: When working with electrical outlets, wear proper protective gear, such as insulated gloves and safety glasses, to protect yourself from potential electrical shocks or debris.
3. Proper Wiring: If you are installing a USB wall outlet yourself, carefully refer to the manufacturer’s instructions and ensure correct wiring connections. If you are uncertain about the wiring process, it is recommended to hire a professional electrician to handle the installation.
4. Avoid Overloading: USB wall outlets often come with additional electrical sockets, but it is crucial not to overload them. Overloading the USB wall outlet can lead to overheating, which can pose fire hazards. Follow the manufacturer’s guidelines on the maximum load capacity and distribute the load evenly across the available outlets.
5. No Water Contact: Never touch a USB wall outlet with wet hands or attempt to clean it while it’s in use. Water and electricity do not mix, and contact with moisture can lead to electrical shock or even electrocution.
By following these maintenance and safety tips, you can enjoy the benefits of your USB wall outlet while ensuring the safety of yourself and others. Keep your USB wall outlet clean and well-maintained, and always prioritize safety when working with electrical outlets. Remember, if you are unsure or uncomfortable with any electrical work, it is best to consult a licensed electrician for assistance.
Additional Considerations And Upgrades
When installing a USB wall outlet, there are some additional considerations and upgrades you may want to keep in mind. These can enhance both the functionality and convenience of your USB outlet, providing you with an even better charging experience.
Upgrading to a USB wall outlet with additional features
If you’re looking to add more functionality to your USB wall outlet, there are upgrade options available. These enhanced outlets often come with additional features that can further streamline your charging process.
One popular upgrade feature is the inclusion of multiple USB ports. Instead of just one or two USB ports, these outlets typically have four or more, allowing you to charge multiple devices simultaneously.
Another upgrade option is the integration of a power indicator light. This small but noticeable feature can provide visual confirmation that your USB outlet is powered and ready to charge your devices.
Furthermore, some USB wall outlets offer built-in surge protection. This helps safeguard your devices against sudden power surges or fluctuations. It’s particularly useful if you’re charging expensive and sensitive devices like smartphones, tablets, or laptops.
Exploring smart USB wall outlet options
Smart technology has made its way into various aspects of our daily lives, and USB wall outlets are no exception. Smart USB outlets offer advanced features that go beyond basic charging capabilities.
One such feature is the ability to control your USB outlet remotely. With the help of a smartphone app, you can conveniently turn the outlet on or off from anywhere in your home. This is particularly useful if you want to conserve energy or if you want to ensure devices are fully charged upon your arrival.
Additionally, some smart USB outlets come equipped with voice control functionality. By integrating with virtual assistants like Amazon Alexa or Google Assistant, you can simply use voice commands to control the outlet without even needing to touch a button.
Moreover, smart USB outlets often provide real-time energy monitoring, allowing you to keep track of your devices’ power consumption. This can help you identify energy-efficient charging habits and make adjustments if necessary.
In conclusion, when installing a USB wall outlet, consider upgrading to one with additional features and explore the world of smart USB outlets. With these enhancements, you can enjoy the convenience of charging multiple devices, enhanced surge protection, and the flexibility of remote or voice-controlled operations. Upgrade your charging experience today!
Frequently Asked Questions
Do Usb Outlets Require Special Wiring?
No, USB outlets do not require special wiring. They can be easily installed into existing electrical circuits without any additional wiring modifications.
Is It Easy To Install Usb Outlets?
Installing USB outlets is easy. It requires basic electrical knowledge and tools. Simply turn off the power, remove the existing outlet, connect the USB outlet wiring, and secure it in place. Remember to test it before using. Always seek professional help if you’re unsure or uncomfortable with electrical work.
Can You Replace Any Outlet With A Usb Outlet?
Yes, you can replace any outlet with a USB outlet.
Are Usb Wall Outlets Worth It?
USB wall outlets are worth it because they provide convenience by allowing you to charge your devices directly from the outlet. They also save space by eliminating the need for bulky adapters. With the increasing use of USB devices, having USB wall outlets can be a practical and efficient upgrade for your home or office.
Conclusion
Installing a USB wall outlet is a simple and convenient way to enhance your charging capabilities. With the right tools and a step-by-step approach, anyone can complete this task successfully. By following the suggestions in this blog post, you can enjoy the benefits of having USB ports readily available in your home or office.
So, go ahead and get started on upgrading your wall outlets to make charging your devices easier and more efficient.