To install a 220 breaker, shut off the power, remove the panel cover, connect the breaker to the bus bar, and reattach the cover. Are you looking to install a 220 breaker but don’t know where to start?
In this guide, we will walk you through the process step by step. Installing a 220 breaker can be intimidating, but with the right tools and precautions, it can be done safely. Whether you need to install a breaker for a new appliance or upgrade your electrical panel, this guide will provide you with the knowledge and confidence to tackle the job.
So, let’s dive in and get started with the installation process.
Understanding The Basics Of 220 Breakers
When it comes to electrical installations in your home or office, understanding the basics of 220 breakers is essential. These breakers are crucial components that help distribute electrical power to high-powered appliances, such as air conditioners, electric ranges, and clothes dryers. In this section, we will delve into what a 220 breaker is, different types of 220 breakers available, and the importance of proper installation.
What is a 220 breaker?
A 220 breaker, also known as a double-pole breaker or a 240-volt breaker, is an electrical switch designed to provide electricity to appliances and heavy-duty equipment that require substantial power. Unlike regular single-pole breakers, which handle 120-volt circuits, 220 breakers handle the higher voltage of 240 volts.
Key Components of a 220 Breaker:
- Two Poles: A 220 breaker consists of two separate poles, each handling one phase of the electrical current.
- Handles: There are two handles on a 220 breaker, which trip together to disconnect the circuit and ensure no power is flowing to the connected device.
- Bimetallic Strip: Inside the breaker, there is a bimetallic strip that helps detect an excessive amount of electrical current passing through the circuit. If the current exceeds the breaker’s capacity, the strip bends, causing the breaker to trip and interrupt the power supply.
Different types of 220 breakers
There are two common types of 220 breakers that you may come across during installation:
- Two-Pole Circuit Breakers: These breakers consist of two separate switches connected together, each controlling one phase of the electrical supply. They are commonly used in residential and commercial applications.
- GFCI Circuit Breakers: Ground Fault Circuit Interrupter (GFCI) breakers are designed to protect individuals from electrical shocks. They monitor the flow of electricity and trip the circuit if there is a ground fault, providing extra safety in areas where electrical equipment may come into contact with water, such as bathrooms or outdoor outlets.
Importance of proper installation
The proper installation of a 220 breaker is crucial for the safe and reliable operation of your high-powered appliances. Incorrect installation can lead to electrical hazards, including electrical shock, fires, and damage to the connected equipment. Here are a few reasons why proper installation is essential:
- Electrical Safety: A correctly installed 220 breaker ensures that the electrical current is safely delivered to the appliance, reducing the risk of electrical accidents.
- Equipment Protection: By following proper installation techniques, you can safeguard your expensive appliances and prevent damage caused by power surges or overloaded circuits.
- Compliance with Electrical Codes: Professional installation ensures compliance with electrical codes and regulations, keeping your installation within the legal requirements and avoiding potential fines or insurance issues.
Overall, understanding the basics of 220 breakers is essential to ensure the proper functioning and safety of your high-powered appliances. By familiarizing yourself with the different types of breakers available and ensuring proper installation, you can enjoy reliable electrical power with peace of mind.

Tools And Materials Required For Installation
Installing a 220 breaker requires a few essential tools, electrical materials, and safety equipment precautions. To ensure a successful installation process, it is crucial to gather everything you need before beginning. In this section, we will provide you with a comprehensive list of the necessary tools, required electrical materials, and safety equipment precautions.
List of Necessary Tools
- Screwdriver Set: You will need a set of screwdrivers, including both flathead and Phillips head, to remove and secure electrical panel covers and connections.
- Wire Strippers: Wire strippers are essential for removing the insulation from the wires so that you can make proper connections.
- Lineman’s Pliers: These pliers will come in handy for cutting, bending, and gripping wires during the installation process.
- Wire Cutters: Wire cutters are necessary to precisely trim any excess wire length and ensure clean cuts.
- Voltage Tester: A voltage tester is critical for checking if wires are properly disconnected and determining if there is any live electricity present.
- Drill: You will need a drill to create holes for mounting the breaker and running wires.
- Hammer: A hammer may be required for securing grounding connections.
- Measuring Tape: A measuring tape will help you determine the correct lengths for cutting wires.
- Level: A level will assist you in ensuring that the breaker is properly aligned and mounted.
Required Electrical Materials
- 220 Breaker: The main component needed for the installation is the 220 breaker itself. Make sure to select a breaker appropriate for your specific electrical panel.
- Electrical Wire: You will need the appropriate gauge of electrical wire to connect the breaker to the circuit. Consult an electrician or reference local electrical codes for the correct wire size.
- Wire Nuts: Wire nuts are essential for securely connecting wires together.
- Mounting Hardware: Mounting hardware such as screws and brackets will be necessary to securely mount the breaker and fasten wires.
- Grounding Wire: Ensure you have an adequate grounding wire to establish a safe grounding connection for the breaker.
- Electrical Tape: Electrical tape is useful for insulating exposed wires and preventing any potential electrical hazards.
Safety Equipment Precautions
- Safety Glasses: Protect your eyes from potential hazards by wearing safety glasses throughout the installation process.
- Gloves: It is advisable to wear gloves to protect your hands from any sharp edges or potential electrical shocks.
- Electrical Safety Mat: An electrical safety mat provides an insulated surface to stand on, reducing the risk of electrical shock.
- Hearing Protection: If the installation involves loud drilling or hammering, wearing hearing protection is important to prevent any hearing damage.
- Non-Contact Voltage Tester: A non-contact voltage tester can be used to double-check if any wires are live before handling them.
By ensuring you have all the necessary tools, electrical materials, and safety equipment precautions, you will be well-prepared to install a 220 breaker safely and efficiently. Remember to always follow local electrical codes and consult a professional if you have any doubts or questions regarding the installation process.
Step 1: Preparing For Installation
Before jumping into the installation process of a 220 breaker, it’s crucial to properly prepare for the task at hand. This step is crucial to ensure a safe and successful installation. Here’s what you need to do in this initial stage:
Turn off the power supply
Begin by turning off the power supply to the area in which you’ll be installing the 220 breaker. Safety should always come first, and working with live electricity can be dangerous. Locate your main electrical panel and find the corresponding circuit breaker. Flip the switch to the “Off” position to prevent any accidental electrical shocks.
Identify the circuit and breaker panel
Next, it’s important to identify the specific circuit and breaker panel to which the 220 breaker will be connected. Look for the appropriate circuit that will carry the load of the 220-volt appliance or equipment you are installing. Once you’ve located the circuit, make sure to identify the corresponding breaker panel. It’s essential to choose the correct breaker and panel to ensure compatibility and prevent any electrical hazards.
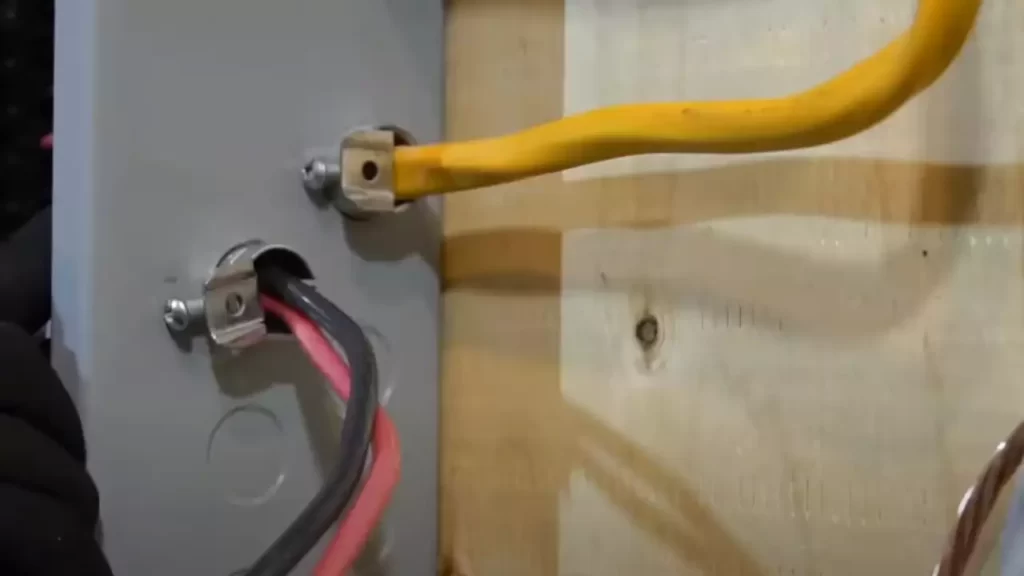
Ensure proper grounding
Proper grounding is crucial to ensure electrical safety and the effective operation of the 220 breaker. Before proceeding with the installation, double-check that the electrical system has a reliable grounding system. This grounding system helps prevent electrical shocks and ensures that excess electrical current is diverted safely into the earth. Consult a professional electrician if you have any doubts about the grounding of your electrical system.
By following these steps in preparing for the installation of a 220 breaker, you can ensure a safe and successful process. Remember, electrical work should only be carried out by qualified individuals to minimize the risk of accidents and ensure compliance with local electrical codes. Once you have completed the necessary preparations, you can move on to the next steps of the installation process.
Step 2: Removing The Old Breaker
Once you’ve safely disconnected the power and identified the correct breaker, it’s time to move on to the next step — removing the old breaker. This process requires caution and attention to detail to ensure a smooth and successful installation. Follow the steps below to safely remove the old breaker:
Safely Disconnecting Wires
The first order of business is to safely disconnect the wires from the old breaker. To do this, follow these steps:
- Ensure that you are wearing protective gloves and goggles to protect yourself from any potential harm.
- Using a screwdriver, gently loosen the terminal screws on both sides of the breaker.
- Once the screws are loosened, carefully remove the wires from the terminal by gently pulling them out. Take note of the wire colors and their corresponding positions for future reference.
Removing the Old Breaker
Now that the wires are safely disconnected, it’s time to remove the old breaker. Here are the steps to follow:
- Find the retaining clip or latch that holds the breaker in place. It is typically located at the bottom or side of the breaker.
- Using your fingers or a screwdriver, release the clip or latch by pushing it towards the breaker or lifting it up, depending on the design.
- Once the clip or latch is released, carefully pull the old breaker out of the panel. Take care not to tug on the wires or apply excessive force, as this could cause damage.
Inspecting the Circuit for Damage
Before proceeding with the installation of the new breaker, it’s crucial to inspect the circuit and ensure there is no visible damage. Here’s what you need to do:
- Check the wires for any signs of fraying, burns, or loose connections. If you notice any damage, it’s important to address it before proceeding.
- Inspect the breaker panel for any signs of overheating, discoloration, or corrosion. Any abnormalities indicate potential issues that should be resolved before continuing.
- If everything looks intact and there are no visible problems, you can proceed to the next step with confidence.
Following these steps will help you safely remove the old breaker and inspect the circuit for any damage. Once you’ve completed this step, you’ll be well on your way to installing the new 220 breaker and ensuring the safety and efficiency of your electrical system.
Step 3: Choosing The Right 220 Breaker
Understanding your electrical needs
Before you can choose the right 220 breaker for your installation, it’s essential to have a clear understanding of your electrical needs. This step ensures that your breaker is compatible with your power requirements and avoids potential safety hazards.
In order to determine your electrical needs, first, assess the appliances or equipment that you plan to connect to the 220 volt circuit. These devices typically require higher voltage to operate efficiently, such as heavy-duty power tools, air conditioners, or electric water heaters.
Make a list of the wattage or amperage rating for each device. This information is often provided on the device itself or can be found in the product manual. Adding up the total wattage or amperage of all the devices will give you an idea of the power demand your breaker needs to handle.
Selecting the appropriate breaker rating
Once you have a clear understanding of your electrical needs, it’s time to select the appropriate breaker rating. Breaker ratings are designated in amperage and indicate the amount of current the breaker can handle before tripping and shutting off the circuit.
Refer to the total wattage or amperage you calculated earlier and match it with the appropriate breaker rating. It’s important to choose a breaker rating that exceeds your power demand to ensure safe and efficient operation.
For example, if your total power demand is 40 amps, selecting a 50 amp breaker would be a suitable choice. This provides a buffer for any additional power requirements or fluctuations that may occur.
Compatible breaker brands and types
When it comes to breaker brands and types, it’s crucial to choose compatible options that are suitable for your specific electrical panel and installation requirements. Different electrical panels may have specific compatibility requirements, so it’s essential to refer to the panel’s documentation or consult with a licensed electrician if necessary.
Some popular breaker brands include Siemens, Square D, and Eaton. These brands offer a wide range of breaker types, such as single-pole breakers for 120 volt circuits, double-pole breakers for 240 volt circuits, or combination breakers for handling both voltages.
Ensure that the breaker you choose is specifically designed for a 220 volt circuit and is compatible with your electrical panel. This information can typically be found on the breaker itself or in its product documentation.
Remember, safety should always be a top priority when installing a 220 breaker. If you are not comfortable or familiar with electrical work, it is highly recommended to seek the assistance of a qualified electrician.
Step 4: Installing The New Breaker
Now that you have prepared the electrical panel and removed the old breaker, it’s time to install the new breaker. This step requires careful positioning, proper alignment, and secure connections. Follow these guidelines to ensure a successful installation:
Proper positioning and alignment
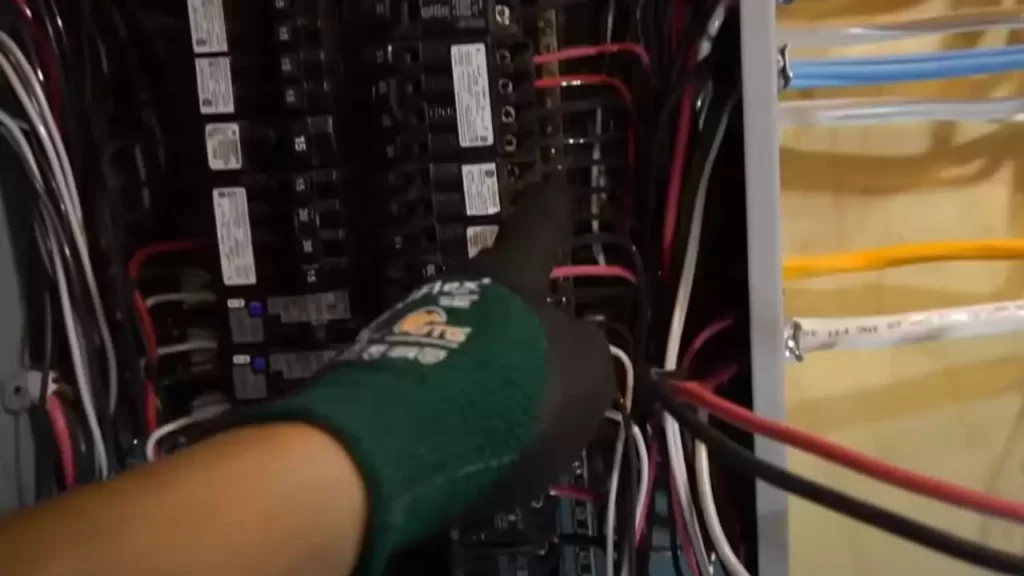
Begin by identifying the slot where the new breaker will be installed. Refer to the electrical panel diagram or the instructions provided with the breaker to determine the appropriate slot. It’s crucial to position the breaker correctly to avoid any electrical hazards or circuit malfunctions.
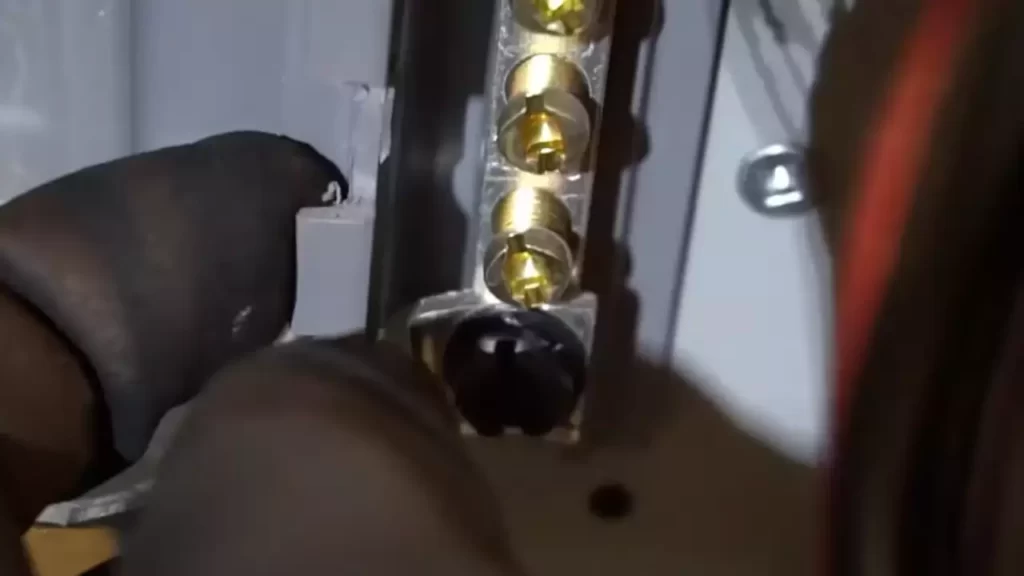
Once you have identified the correct slot, carefully align the breaker with the panel’s bus bar. The bus bar is the metal strip inside the panel that distributes electricity to the circuit breakers. Ensure that the breaker’s metal clips align with the bus bar to establish a secure connection and optimal electrical flow.
Connecting wires to the new breaker
Before securing the breaker in place, connect the wires to it. Start by stripping the insulation from the exposed ends of the wires using a wire stripper. Make sure to remove just enough insulation to expose the metal conductor without damaging it. Inspect the wire ends for any fraying or damage, and trim as necessary.
Next, insert the stripped ends of the wires into the appropriate terminals of the new breaker. Each wire should be inserted into an individual terminal and secured tightly. Double-check that the wires are connected to the correct terminals and are not crossing or touching any other wires or metal parts within the panel.
Tightening connections and ensuring proper fit
With the wires securely connected to the new breaker, it’s crucial to tighten the connections to ensure a proper fit. Use a screwdriver or the appropriate tool specified in the breaker’s instructions to secure the terminals firmly.
After tightening the connections, gently push the breaker into its designated slot on the panel. Apply steady pressure until you hear a satisfying click, indicating that the breaker is properly seated and engaged with the bus bar. Do not force the breaker or attempt to install it in a different slot than the one designated.
Finally, inspect the connections and make sure they are snug and free of any visible gaps. Loose connections can lead to overheating and potential circuit failure. Take a moment to review each connection before proceeding to the next step.
Once you have completed the installation of the new breaker and ensured all connections are secure, you are ready to move onto the next step of the installation process. Remember, if you are unsure about any aspect of this process or encounter any difficulties, it’s best to consult a licensed electrician to ensure your safety and the proper functioning of your electrical system.
Step 5: Testing And Safety Measures
Once you have successfully installed the 220 breaker, it is crucial to test its functionality and ensure your installation adheres to all necessary safety measures.
Verifying proper installation
Before proceeding with testing, it’s important to visually inspect the breaker installation to ensure correctness. Check the breaker’s orientation, making sure it is securely attached to the electrical panel. Additionally, examine the wire connections to confirm they are tight and properly connected. Any loose or damaged wires should be addressed before moving forward.
Conducting a voltage test
To ensure the breaker is operating correctly and providing the required voltage, it is necessary to conduct a voltage test. Here’s how:
- First, turn off the main power switch to cut off the electricity supply to the panel. This step is crucial to prevent any accidents during the testing process.
- Next, using a voltage tester or a multimeter, test the voltage on the breaker’s terminals. Touch one lead of the tester to the breaker’s terminal screw and the other lead to the neutral or ground bar in the panel. It is important to record the voltage reading for future reference.
- If the voltage reading is not within the expected range, it indicates a problem with the breaker or the installation. It is advisable to consult a qualified electrician to resolve the issue.
Additional safety measures for circuit protection
While installing a 220 breaker, it’s essential to take necessary precautions to protect the circuit and prevent any electrical hazards:
- Always use the appropriate wire size for the breaker’s amperage rating. Undersized wires can overheat and pose significant safety risks.
- Ensure the circuit is properly grounded to protect against electrical faults. Use a ground wire connected to the grounding bar in the electrical panel.
- Consider installing surge protectors to safeguard valuable electronic equipment from power surges and fluctuations.
- Regularly inspect the breaker and panel for any signs of damage, such as loose connections or burnt marks. If any issues are detected, consult a professional electrician for immediate repairs.
By following these testing and safety measures, you can ensure a properly installed and functioning 220 breaker, providing a reliable power supply for your electrical needs.
Troubleshooting Common Issues
When it comes to installing a 220 breaker, it’s important to troubleshoot common issues that may arise during the process. By understanding and addressing these issues, you can ensure that your installation goes smoothly and successfully. In this section, we will discuss some of the common problems that you may encounter and provide solutions to help you overcome them.
Identifying and Addressing Wiring Problems
One of the common issues that many people face when installing a 220 breaker is wiring problems. Identifying and addressing these problems is crucial to ensure the safe and effective functioning of your circuit. Here are some steps you can follow:
- Inspect the wiring connections to ensure they are secure. Loose or improper connections can cause issues with the circuit.
- Check for any damaged or frayed wires. If you notice any, they should be replaced to avoid potential hazards.
- Verify that the wiring is done according to the manufacturer’s instructions and local electrical codes. Following the proper guidelines ensures the integrity of your electrical system.
- Consider using a voltage tester to test the wiring for any abnormalities or faults. This will help you identify any potential issues that need to be addressed.
Dealing with Circuit Overloads
Another common issue that can occur when installing a 220 breaker is circuit overloads. Circuit overloads happen when there is too much electrical load on a circuit, which can lead to tripped breakers or even fire hazards. Here are some steps to deal with circuit overloads:
- Calculate the total electrical load of the circuit to ensure it does not exceed the capacity of the breaker. This can be done by adding up the wattage of all the devices connected to the circuit.
- If the total load is too high, consider redistributing the load to multiple circuits or upgrading to a higher capacity breaker.
- Unplug any unnecessary devices or appliances to reduce the electrical load on the circuit.
- If the circuit continues to overload, it may indicate a problem with the circuit’s wiring or appliances. In such cases, it is recommended to seek professional assistance.
Seeking Professional Help When Necessary
While many individuals are capable of installing a 220 breaker themselves, it’s important to recognize when professional help is needed. Some instances where seeking professional assistance is warranted include:
- If you are unsure about any aspect of the installation process, it’s best to consult with a licensed electrician who can guide you through the process.
- If you encounter complex wiring issues or if the installation requires modifications to the existing electrical system, professional assistance is strongly recommended.
- When dealing with older homes or buildings, it may be necessary to have a professional evaluate the electrical system to ensure it can handle the installation safely.
- Remember, safety should always be a top priority when working with electricity, and seeking professional help can provide peace of mind.
Frequently Asked Questions
Does It Matter Which Wire Goes Where On A 220 Breaker?
It does matter which wire goes where on a 220 breaker. Incorrect wiring can lead to electrical hazards or damage to appliances. Follow the manufacturer’s instructions or consult a professional electrician to ensure proper installation.
Can You Run Two 220V Outlets On One Breaker?
Yes, you can run two 220V outlets on one breaker as long as the breaker’s capacity can handle the combined load of both outlets. It is important to consult a licensed electrician to ensure proper installation and to avoid any potential electrical hazards.
What Kind Of Breaker Do You Need To Run 220?
To run a 220V electrical circuit, you’ll need a double-pole breaker. It’s capable of handling the higher voltage and is specifically designed for 220V power supply. Make sure to consult a professional electrician for proper installation and safety measures.
How Do I Get 220V In My House?
To get 220V in your house, hire a licensed electrician who will install a 220V circuit breaker in your electrical panel. This will require running new wiring to accommodate the higher voltage and may involve updating outlets, switches, and appliances that can handle 220V.
Conclusion
To sum it up, installing a 220 breaker might seem daunting at first, but with the right tools and understanding of the process, it can be easily accomplished. By following the step-by-step guide provided in this blog post, you can ensure a safe and efficient installation.
Remember to always prioritize safety and consult a professional if you’re unsure. With a bit of patience and effort, you’ll have a new 220 breaker up and running in no time. Happy DIY-ing!