To install a woven wire fence, start by measuring and marking the perimeter of your desired fence line. Next, dig holes for your fence posts at regular intervals and insert the posts into the holes.
Then, unroll the woven wire and attach it to the posts using fencing staples or wire clips. Finally, tighten the wire and secure it in place using tension wire or hog rings.
Choosing The Right Materials For Your Woven Wire Fence
When it comes to installing a woven wire fence, one of the most vital aspects to consider is choosing the right materials. The durability, strength, gauge, mesh size, coating, finish, and budget can all impact the overall effectiveness and longevity of your fence. In this section, we will delve into the factors you should consider when selecting materials for your woven wire fence.
Factors to consider
Before delving into the specifics, it’s crucial to understand the factors that should guide your decision-making process. Here are some key factors to consider when choosing the materials for your woven wire fence:
- Durability and strength of the wire
- Gauge and mesh size options
- Coating and finish options
- Budget considerations
Durability and strength of the wire
Ensuring the durability and strength of the wire is essential to the overall effectiveness and security of your woven wire fence. The wire should be able to withstand pressure, impacts, and tension without compromising its structural integrity. When selecting the wire, opt for a high-tensile option that offers superior strength and resilience.
Gauge and mesh size options
The gauge and mesh size options play a crucial role in determining the level of security provided by your woven wire fence. The gauge refers to the thickness of the wire, while the mesh size refers to the size of the openings in the woven wire. A lower gauge and tighter mesh size provide increased strength and security. Consider the intended purpose of your fence, as well as the type and size of animals you aim to contain or keep out.
Coating and finish options
Coating and finish options can significantly impact the longevity and appearance of your woven wire fence. A variety of coatings and finishes are available, including galvanized, vinyl-coated, and powder-coated options. Galvanized wire is resistant to rust and corrosion, while vinyl-coated and powder-coated options offer additional protection and aesthetic appeal. Consider the environmental conditions and specific requirements of your fence when choosing the appropriate coating and finish.
Budget considerations
When selecting materials for your woven wire fence, it’s essential to consider your budget constraints. While high-quality materials may come at a higher price point, they often offer better durability and longevity. Assess your budget and weigh the trade-offs between cost and quality to ensure you choose the best materials within your financial means.
In summary, choosing the right materials for your woven wire fence is crucial to its effectiveness, longevity, and overall value. Consider factors such as wire durability and strength, gauge and mesh size options, coating and finish options, as well as your budget constraints. By carefully evaluating these factors, you can make an informed decision and select the materials that best meet your specific needs.

Preparing The Area For Fence Installation
Before proceeding with the installation of a woven wire fence, it is vital to prepare the area properly. By following a few essential steps, you can ensure that the installation process goes smoothly and that your fence stands securely for years to come. In this section, we will cover all the necessary tasks needed to prepare the area for fence installation.
Measuring and marking the boundaries
To start, accurately measuring and marking the boundaries of your fence is crucial. This step helps define the area where the fence will be installed, ensuring that you stay within the property lines. Remember to consider any setback requirements or local regulations when determining the location of your fence.
Here’s how you can measure and mark the boundaries:
- Using a measuring tape, measure the length of the desired fence line from one corner of your property to another.
- Use stakes or markers to mark the corner points of the fence line.
- Stretch a string between the corner markers to create a straight guideline for your fence installation.
- Place additional stakes or markers along the line at equal intervals to indicate where each fence post will be installed.
Clearing vegetation and debris
Before you can install a woven wire fence, it’s important to clear the area of any vegetation, debris, or obstacles that may interfere with the installation process or compromise the integrity of your fence. Remove any shrubs, plants, or trees that are in the way, and clear the ground of rocks, branches, and other obstructions that could affect the fence’s installation or performance.
Here are some steps to clear the area effectively:
- Trim or remove any overhanging branches or shrubs along the fence line.
- Use a shovel or a rake to clear away any rocks, roots, or debris from the surface.
- Ensure that the ground is level and free from any large bumps or uneven areas.
- Dispose of the vegetation and debris properly, following local regulations.
Checking for underground utilities
Before digging any holes for your fence posts, it’s essential to check for underground utilities to avoid any accidental damage or disruption to utility lines. This includes gas, water, electric, and cable lines that may run beneath the surface of your property. Carefully identifying and marking the location of these utilities will help you plan the positioning of the woven wire fence and prevent any potential hazards.
To check for underground utilities, follow these steps:
- Contact your local utility companies to request a utility line locate service.
- Wait for the utility companies to visit your property and mark the location of underground utilities.
- Take note of the marked lines and ensure they are considered when determining the position of your fence.
- Adjust the fence line if necessary to avoid digging near utility lines.
Leveling the ground
Creating a level ground surface is vital for the stability and longevity of your woven wire fence. A level ground ensures that the fence is installed correctly and stands straight, providing the necessary support and preventing any uneven pressure on the fence posts. Take the time to level the ground, and if needed, make adjustments to ensure the fence installation is on a stable foundation.
Here’s how you can level the ground:
- Using a shovel or a rake, remove any excess soil or fill in low areas to achieve an even ground surface.
- Compact the ground using a hand tamper or a plate compactor to ensure stability.
- Check the levelness of the ground using a carpenter’s level or a string level.
- Make any necessary adjustments by adding or removing soil until the ground is level.
Installing The Fence Posts
When it comes to installing a woven wire fence, one of the most crucial steps is properly installing the fence posts. The fence posts provide the structure and stability for your fence, ensuring its longevity and strength. In this section, we will guide you through the process of installing the fence posts for your woven wire fence.
Determining the placement of posts
Before you begin digging post holes, it is important to determine the proper placement of your fence posts. This step is essential as it ensures the even distribution of the fence and maintains its integrity. Here are the key factors to consider when determining the placement:
- Measure the length of your fence line: Start by measuring the total length of the fence line. This will help you determine the number of fence posts you will need.
- Mark the corners and ends: Identify the corners and ends of your fence line and mark them clearly. These points will serve as a guide for the placement of the fence posts.
- Consider the slope of the terrain: If your terrain has a slope, you need to take it into account when placing the fence posts. Adjust the placement to ensure the fence follows the contour of the land.
- Space the posts evenly: For a sturdy woven wire fence, it is important to space the fence posts evenly along the fence line. Typically, posts should be spaced 8 to 12 feet apart, depending on the terrain and the type of animals you are containing.
Digging post holes
Once you have determined the placement of your fence posts, it’s time to dig the post holes. Here are the steps to follow:
- Use a post hole digger or an auger: Start by using a post hole digger or an auger to dig the holes for your fence posts. The size of the holes should be at least one-third the length of the fence post and should be deep enough to provide stability.
- Remove any obstructions: While digging the post holes, be on the lookout for any rocks, roots, or other obstructions that may hinder the installation of the fence post. Clear them out as you go.
- Ensure consistent hole depth: Make sure that the depth of the post holes is consistent throughout the entire fence line. This will ensure that your fence maintains a uniform height.
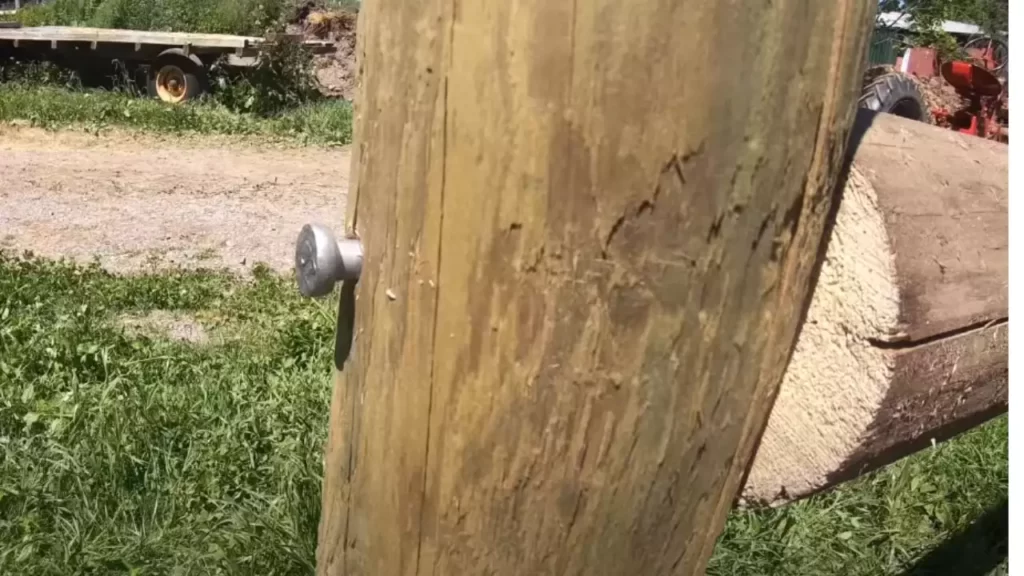
Setting the posts
After the post holes have been dug, it’s time to set the fence posts securely in place. Follow these steps:
- Place gravel or concrete at the bottom: To provide additional stability, place a layer of gravel or pour concrete at the bottom of each post hole.
- Set the fence posts vertically: Carefully insert each fence post into its respective hole, making sure it is standing upright. Use a level to ensure that the post is perfectly vertical.
- Backfill the holes: Once the posts are set, backfill the holes with soil, tamping it down firmly around the posts. This will provide additional support for the fence.
Ensuring proper alignment and spacing
To achieve a professional and polished look for your woven wire fence, it is essential to ensure proper alignment and spacing of the fence posts. Here are a few tips to help you accomplish this:
- Double-check alignment: Use a level and a string line to double-check the alignment of your fence posts. This will ensure that your fence remains straight and true.
- Measure the distance between posts: Measure the distance between each fence post to ensure proper spacing. Use a measuring tape or a pre-cut spacer to maintain consistent spacing along the fence line.
- Adjust as needed: If any post seems misaligned or spaced incorrectly, make the necessary adjustments before proceeding with the installation of the woven wire fence.
By following these steps and paying attention to detail, you can install the fence posts for your woven wire fence with precision and confidence. Taking the time to properly install the fence posts will not only improve the overall appearance of your fence but also ensure its durability for years to come.
Securing The Fence To The Posts
Once you have prepared the fence posts and positioned them in a straight line, it’s time to securely attach the woven wire fence to the posts. This step is crucial in ensuring the stability and longevity of your fence. In this section, we will discuss the step-by-step process of securing the fence to the posts, from attaching the wire to the first post all the way to properly tensioning the wire and trimming any excess.
Attaching the wire to the first post
To start securing the fence to the posts, begin at one end by attaching the wire to the first post. Start at the bottom of the post and work your way up. Here’s how:
- Hold the end of the wire against the first post, ensuring the bottom of the wire aligns with the bottom of the post.
- Using fencing staples or u-nails, secure the wire to the post by driving the staples through the wire and into the post. Place the staples approximately every 12 inches.
- Make sure the wire is taut and aligned properly before securing it to the post. This will prevent any sagging or misalignment.
Unrolling and stretching the wire
After attaching the wire to the first post, continue unrolling the wire along the fence line. Stretching the wire properly is essential for a sturdy and secure fence installation. Follow these steps:
- Unroll the wire along the length of the fence line, making sure it remains aligned with the posts.
- Using a come-along or fence stretcher, apply tension to the wire to remove any slack. This will help maintain the strength and integrity of the fence.
- Continue stretching the wire until it is taut and evenly tensioned across the entire length of the fence line.
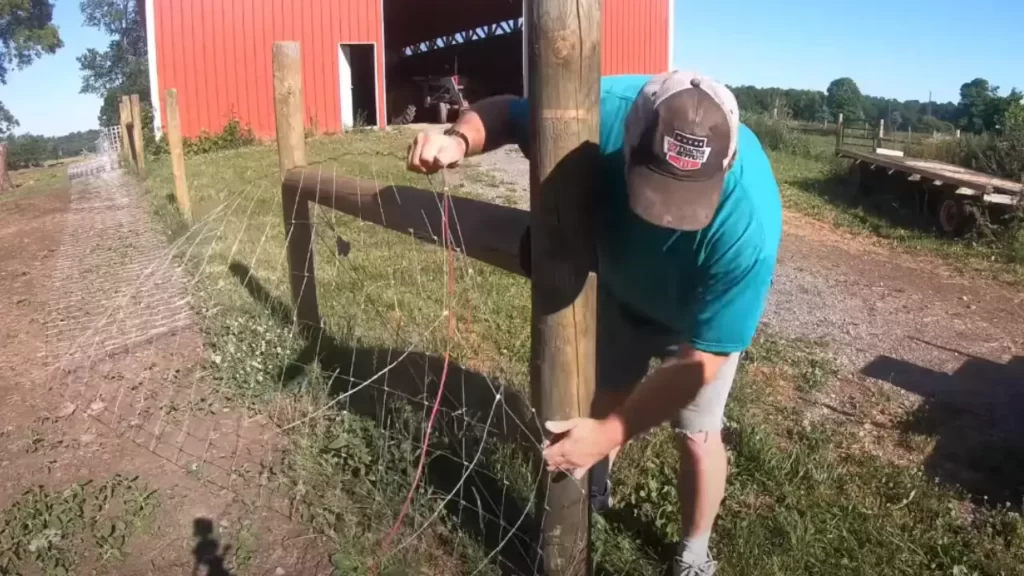
Fastening the wire to subsequent posts
As you progress along the fence line, it’s important to secure the wire to each subsequent post. This ensures the fence remains stable and resistant to external forces. Follow these steps:
- Position the wire against the next post, starting from the bottom and working your way up.
- Secure the wire to the post using fencing staples or u-nails, similar to the process used with the first post.
- Ensure the wire is properly aligned and tensioned before fastening it to the post.
Properly tensioning the wire
Properly tensioning the wire is crucial for maintaining the strength and stability of the fence. Follow these steps:
- Periodically check the tension of the wire along the fence line to ensure it remains taut.
- If any areas of the wire have become loose or sagging, use a come-along or fence stretcher to reapply tension.
- Make adjustments as necessary to maintain a consistent and even tension across the entire fence.
Trimming any excess wire
Once the entire fence has been securely fastened to the posts and properly tensioned, it’s time to trim any excess wire. This helps create a neater and more visually appealing fence. Here’s how:
- Use wire cutters to trim any excess wire protruding beyond the last post.
- Ensure each cut is clean and straight, avoiding any jagged edges that could pose a safety risk.
- Dispose of the trimmed wire appropriately to maintain a clean and hazard-free work area.
By following these steps to secure the woven wire fence to the posts, you can ensure a sturdy and long-lasting installation. Take your time during this process to achieve the desired results, and enjoy the benefits of a secure and reliable fence.

Installing Gates And Accessories
Installing gates and accessories is an important part of putting up a woven wire fence. These components not only provide access to fenced areas but also contribute to the overall security and functionality of the fence. In this section, we will guide you through the process of choosing the right gate type, installing gate posts, hanging the gate, and adding accessories such as latches and locks.
Choosing the right gate type
When selecting a gate for your woven wire fence, it’s essential to consider the specific requirements of your property. Different gate types serve different purposes, from pedestrian entrances to large vehicle access points. Here are some common gate types to choose from:
- Walk-through gates: These gates are designed for easy access on foot and are ideal for everyday use on pedestrian paths.
- Double-drive gates: These gates are wider and more robust, making them suitable for driveway entrances or areas where larger vehicles need to pass through.
- Livestock gates: If your woven wire fence is intended for containing livestock, consider installing a livestock gate that allows for safe and easy movement of animals.
Installing gate posts
Gate posts play a crucial role in providing stability and support to your gate. Follow these steps to install gate posts securely:
- Measure and mark the desired location for your gate posts, ensuring they are evenly spaced and level with the fence line.
- Use a post hole digger or an auger to dig holes at least one-third of the total post length deep.
- Place the gate post into the hole, making sure it is plumb and level. Fill the hole with concrete mix around the post to provide stability.
- Allow the concrete to cure according to the manufacturer’s instructions before proceeding to hang the gate.
Hanging the gate
Once the gate posts are securely in place, it’s time to hang the gate. Follow these steps for a successful installation:
- Measure the width of the gate and the distance between the gate posts to ensure a proper fit.
- Attach gate hinges to the gate frame, aligning them with the desired height and ensuring they are level.
- With the assistance of another person, carefully lift the gate and position it between the gate posts.
- Align the gate hinges with the hinge pins on the gate posts and secure them in place.
- Check the gate for proper alignment and adjust if necessary.
Adding accessories such as latches and locks
Accessories like latches and locks enhance the security and functionality of your woven wire fence. Here’s how you can add them:
- Select a latch or lock that is compatible with your chosen gate type and offers the desired level of security.
- Follow the manufacturer’s instructions to install the latch or lock on the gate frame, ensuring it engages properly with the corresponding receiver on the gate post.
- Test the latch or lock to ensure it operates smoothly and securely closes the gate.
By carefully following these steps for installing gates and accessories, you can ensure that your woven wire fence provides not only a reliable barrier but also convenient access to your property.
Maintaining Your Woven Wire Fence
Regular Cleaning and Debris Removal
Maintaining a woven wire fence is essential to prolong its lifespan and keep it in optimal condition. One of the key aspects of maintenance is regular cleaning and debris removal. Over time, dirt, leaves, and other debris can accumulate on and around the fence, causing potential damage and deterioration. To prevent this, make it a habit to clean your woven wire fence at least once every few months.
To clean the fence effectively, start by removing any large debris such as fallen branches or leaves that may have accumulated on the wires. Use a broom, rake, or leaf blower to clear away the debris. Once the larger items are removed, wash the fence using a mild detergent mixed with water. Scrub the wires gently with a soft brush or sponge to remove any stubborn dirt or grime. Rinse the fence thoroughly with a hose, ensuring all soap residue is removed.
Remember: Cleaning your woven wire fence regularly not only enhances its appearance but also helps prevent corrosion and the growth of mold or mildew.
Inspecting for Any Damage or Wear
Regular inspections are crucial to identify any damage or wear on your woven wire fence. By performing periodic inspections, you can catch problems early on and address them before they escalate into more significant issues. It is recommended to inspect the fence at least once a month.
During your inspection, carefully examine each section of the fence, paying close attention to the wires, posts, and support structures. Look for signs of rust, broken wires, loose connections, or bent components. If you spot any damage or wear, mark the area and proceed to repair it as soon as possible.
Repairing and Replacing Worn Components
When it comes to maintaining a woven wire fence, repairing and replacing worn components is a vital task. Over time, certain parts of the fence may become damaged, worn out, or weakened due to weather conditions, animal activity, or general wear and tear. By promptly repairing or replacing these components, you can ensure the fence remains strong, secure, and effective.
Start by assessing the extent of the damage and determine whether the component can be repaired or needs to be replaced entirely. For minor damage, such as small tears or loose wires, use pliers or fence repair tools to secure and mend the affected area. In cases where the damage is extensive or irreparable, it is recommended to replace the component with a new one to maintain the fence’s integrity.
Applying Protective Coatings if Necessary
An additional step in maintaining your woven wire fence is applying protective coatings if necessary. Coating the fence with a suitable protective layer can help prevent rust, corrosion, and deterioration. The type of coating you choose will depend on the material of your fence and the environmental conditions it faces.
Before applying the protective coating, make sure the fence is clean and dry. Use a paintbrush or roller to evenly apply the coating to the wires and metal components. Allow the coating to dry completely according to the manufacturer’s instructions before exposing the fence to any moisture or weather elements.
By regularly maintaining your woven wire fence through cleaning, inspecting, repairing, and applying protective coatings if necessary, you can extend its lifespan and ensure optimal functionality. Dedicate time and effort to caring for your fence, and it will continue to serve its purpose effectively for many years to come.
Frequently Asked Questions
How Far Apart To Put Fence Posts For Woven Wire?
Place fence posts for woven wire at intervals of 8 to 12 feet. This spacing provides adequate support for the wire and ensures a sturdy fence.
Does Woven Wire Fence Need To Be Stretched?
Yes, woven wire fences need to be stretched. Stretching ensures proper tension, prevents sagging, and improves durability and appearance. Proper installation and tightening of the wires are essential for an effective and long-lasting fence.
How Do You Staple A Woven Wire Fence?
To staple a woven wire fence, follow these guidelines: 1. Use galvanized staples that are compatible with the fence material. 2. Insert staples at regular intervals, securing the fence to wooden posts or other support structures. 3. Ensure the staples penetrate both the wire and the support structure for a secure attachment.
4. Repeat the process along the entire length of the fence, taking care to maintain consistent tension. 5. Inspect and re-staple any loose areas to ensure the fence is properly secured.
How Do You Attach Woven Wire To A Post?
To attach woven wire to a post, you can follow these steps: 1. Start by wrapping the wire around the post tightly. 2. Secure the wire by twisting it with pliers or using staples or U-nails. 3. Make sure the wire is straight and properly tensioned.
4. Repeat the process at regular intervals along the post. 5. Trim any excess wire and ensure a tight and secure attachment.
Conclusion
To wrap up, installing a woven wire fence can be a beneficial investment for your property’s security and aesthetic appeal. By following the step-by-step guide provided in this blog post, you have learned how to install a woven wire fence with ease.
Remember to carefully select the right materials and plan your installation process accordingly. With proper installation and maintenance, your woven wire fence will serve its purpose for years to come. So go ahead and enhance the security and beauty of your property with a well-installed woven wire fence.