To install wall plugs, start by selecting the appropriate wall plug size for your project. Then, using a drill, create a hole in the wall where you want the plug to go.
Finally, insert the wall plug into the hole and tap it gently with a hammer until it is flush with the wall. Installing wall plugs is a simple and essential task for any DIY enthusiast or homeowner. Whether you’re hanging shelves, mounting a TV, or securing fixtures to the wall, wall plugs provide the necessary support to hold screws securely in place.
By following a few easy steps, you can ensure that your wall plugs are installed correctly and effectively. In this guide, we will walk you through the process of installing wall plugs, from selecting the right size to tapping them into place. So, let’s get started and learn how to install wall plugs in a few simple steps.
Selecting The Right Wall Plug
When it comes to installing wall plugs, selecting the right type can make a significant difference in the success of your project. Choosing the wrong wall plug can lead to weak anchor points, unstable fixtures, and potential damage to your walls. Thus, it’s essential to understand the different types of wall plugs available and consider key factors before making your selection. In this section, we will explore the purpose of wall plugs, the various types to choose from, and the factors to consider when selecting the right wall plug for your needs.
Understand the Purpose of Wall Plugs
Wall plugs, also known as anchors or wall anchors, serve as a support system for screws and nails when attaching objects to walls. They provide stability and reinforcement by gripping onto the wall material and distributing the weight of the fixture being hung. Wall plugs are particularly useful when dealing with hollow materials such as drywall, where a screw or nail alone would not securely hold the object in place. Now that we understand the purpose of wall plugs, let’s explore the types available.
Types of Wall Plugs to Choose From
When it comes to wall plugs, there are several types available, each designed to accommodate different materials and weight capacities. The table below provides a quick overview of the most commonly used wall plugs:
| Type of Wall Plug | Suitable Material | Weight Capacity |
|---|---|---|
| Plastic Expansion | Plasterboard, Drywall | Light to Medium |
| Hollow Wall | Hollow Doors, Panels | Medium |
| Metal Toggle Bolt | Concrete, Brick, Block, Tile | Heavy |
Understanding the various types of wall plugs available will help you choose the right one for your specific project. Now, let’s delve into the factors to consider when selecting a wall plug.
Factors to Consider When Selecting Wall Plugs
Several factors come into play when selecting the right wall plug for your project. These factors include the weight of the object to be hung, the material of the wall, and the location of the installation. By considering these factors, you can ensure a secure and long-lasting fixture. Here are the key factors to keep in mind:
- Weight Capacity: Determine the weight of the item you plan to hang and choose a wall plug with a corresponding weight capacity.
- Wall Material: Identify the type of wall material (e.g., drywall, concrete, brick) to select a wall plug compatible with the material.
- Location: Consider the location of the installation, such as whether it’s indoors or outdoors, to choose a wall plug suitable for the environment.
- Installation Method: Different wall plugs may require specific tools or techniques for installation, so ensure you have the necessary equipment and knowledge.
By taking these factors into account, you can confidently select the right wall plug for your project, ensuring a secure and stable installation.
Essential Tools And Materials
Installing wall plugs is an essential skill for any DIY enthusiast or homeowner. Whether you’re hanging shelves, mirrors, or fixing a precarious curtain rail, wall plugs provide the necessary support to keep things securely in place. To ensure a successful installation, having the right tools and materials at your disposal is crucial. In this section, we’ll delve into the list of tools required for installing wall plugs, as well as the necessary materials for a successful installation.
List of Tools Required for Installing Wall Plugs
Having the right tools on hand simplifies the process of installing wall plugs and ensures a precise and secure fit. Here’s a comprehensive list of tools you’ll need:
- Drill – A power drill makes drilling holes easier and more efficient.
- Masonry Drill Bit – Choose the correct size bit for the diameter of the wall plugs you’ll be using.
- Hammer – Although it’s not always necessary, a hammer can be useful for stubborn or difficult surfaces.
- Screwdriver – For fastening screws into the wall plugs once they’re inserted.
- Measuring Tape – To accurately measure and mark the positions for installation.
- Pencil – To mark the drill points on the wall.
- Level – Ensures that your installation is straight and aligned correctly.
- Dust Mask and Safety Glasses – Important for protecting yourself from debris or dust while drilling.
Required Materials for Successful Installation
Alongside the necessary tools, there are a few materials that are essential for a successful installation. These include:
- Wall Plugs – The foundation of your installation, wall plugs come in various sizes to accommodate different screw diameters.
- Screws – Choose screws that are compatible with the wall plugs you’ll be using and appropriate for the weight of the item you’re hanging.
- Wall Anchors (if needed) – In some cases, extra support may be necessary, especially if you’re installing heavy objects or mounting on a weak wall material.
- Cleaning Cloth – Wipe away any debris or dust from the drilling process before inserting the wall plugs.
By ensuring you have the correct tools and materials ready before you start, you’ll be well-prepared for a smooth and hassle-free installation of wall plugs. Armed with this knowledge, you can confidently tackle any home improvement project that requires this essential technique. So go ahead, gather your tools, and let’s get started!
Step-By-Step Installation Process
Installing wall plugs is a simple and essential task that can help you securely hang objects on your walls. Whether you’re putting up shelves, mounting artwork, or installing light fixtures, wall plugs provide the necessary support to ensure a sturdy and long-lasting fit. Follow these step-by-step instructions to learn how to install wall plugs and achieve professional and neat installation every time.
Preparation and Safety Measures
Before you begin the installation process, it’s crucial to take adequate safety measures and create a safe and clean work environment.
Necessary Safety Equipment:
- Safety goggles to protect your eyes from debris
- Dust mask to prevent inhalation of dust particles
- Work gloves to keep your hands safe during drilling
Marking the Drill Points
Once you’ve gathered the necessary safety equipment, it’s time to mark the drill points on your wall. Take the following steps to ensure accurate markings:
- Identifying the Mounting Location: Determine the ideal location for your wall plug by considering the weight of the object you wish to hang.
- Using a Pencil or Marker to Mark the Spot: Mark the drill point on your wall using a pencil or marker. Use a level to ensure the mark is straight and aligned with your desired mounting location.
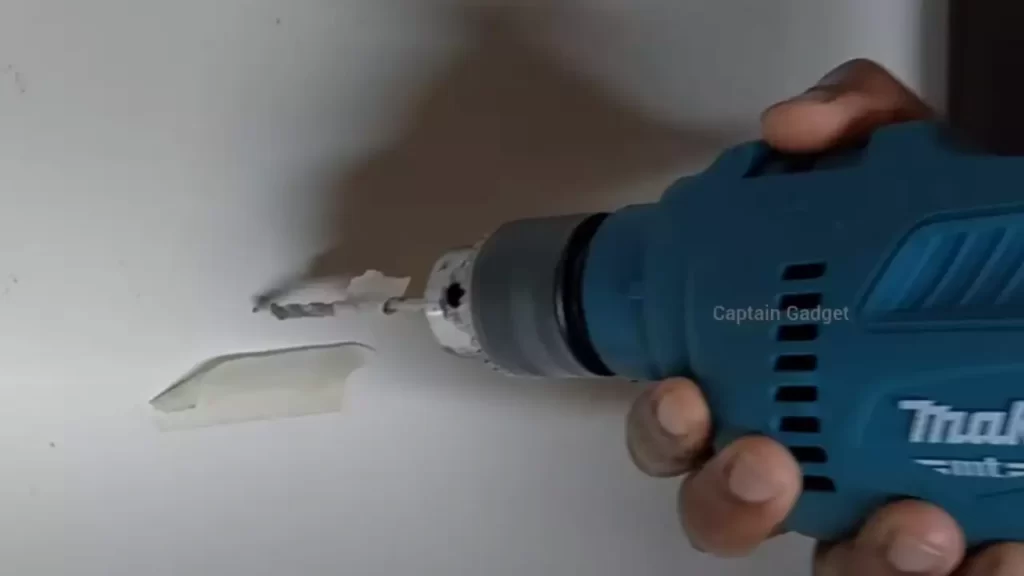
Drilling the Wall
With the drill points marked, it’s time to drill the wall to create space for the wall plug. Follow these guidelines for a successful drilling process:
Choosing the Right Drill Bit
When selecting a drill bit, choose one that matches the size of your wall plug. The packaging for the wall plug typically indicates the recommended drill bit size.
Drilling Techniques for Different Wall Types
The technique for drilling may vary depending on the material of your wall. Here are some general guidelines:
| Wall Type | Drilling Technique |
|---|---|
| Plasterboard | Use a forward and backward motion while drilling to avoid damaging the wall. |
| Brick or Concrete | Use a slow and steady motion while applying firm pressure to penetrate the wall. |
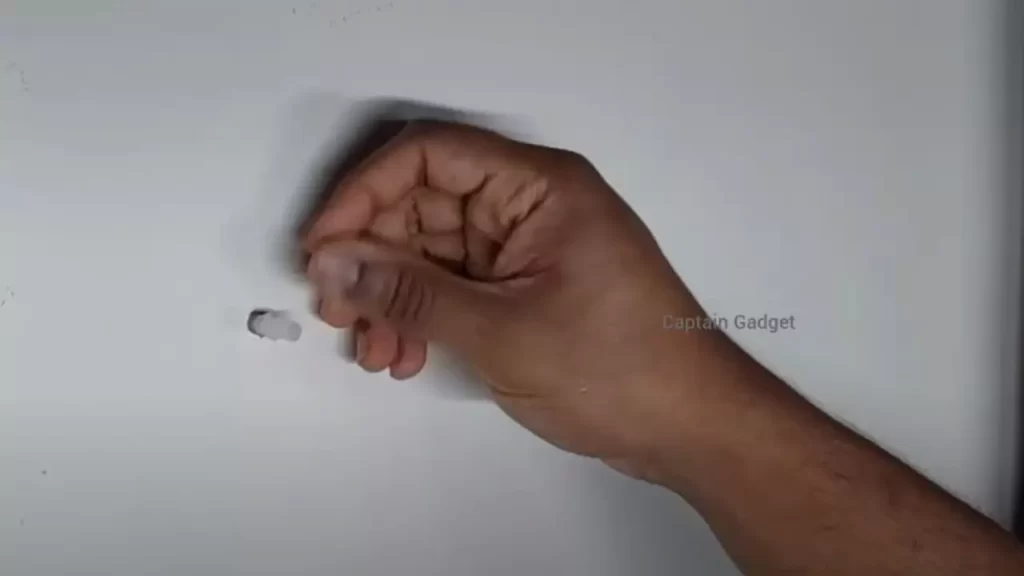
Inserting the Wall Plug
Once the hole is drilled, it’s time to insert the wall plug. Follow these steps for proper placement and alignment:
Suitable Sizes and Depths for Wall Plugs
Choose a wall plug that matches the size of the hole you drilled. The length of the wall plug should be enough to ensure a secure fit within the wall.
Proper Placement and Alignment
Insert the wall plug into the hole, ensuring it sits securely and flush with the wall surface. Use a hammer or mallet to gently tap the wall plug if necessary.
Securing the Wall Plug
The method of securing the wall plug may differ based on the type of wall material. Use the following techniques:
Techniques for Different Wall Materials
- Plasterboard: Insert a screw into the center of the wall plug and use a screwdriver to tighten it until it is secure.
- Brick or Concrete: Insert a screw into the wall plug and drill it into the wall using a suitable drill bit.
Ensuring a Sturdy and Stable Fit
To ensure your installation is sturdy and stable, follow these additional steps:
Finishing Touches
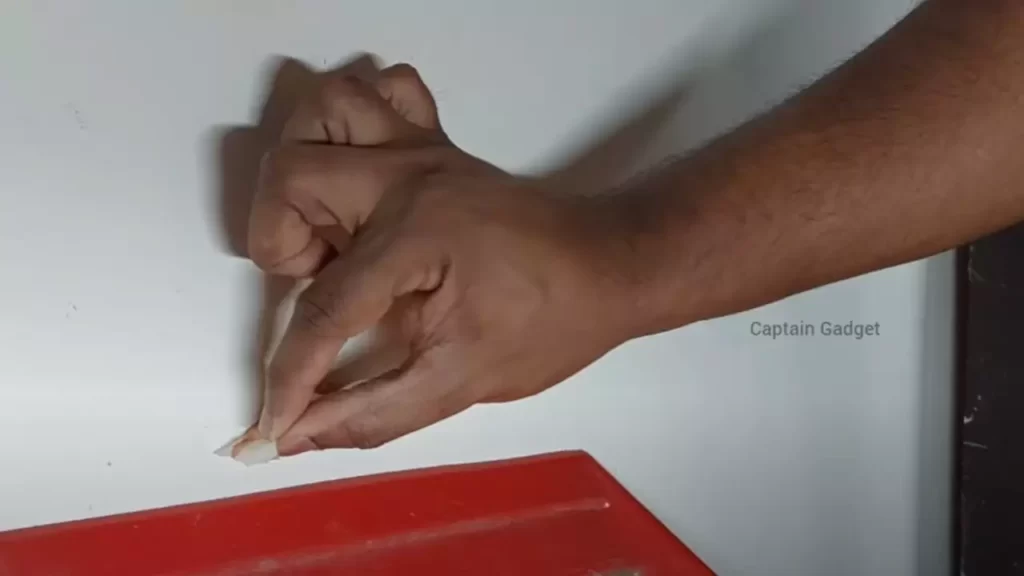
Remove any excess material, such as dust or debris, from the drilled hole and around the wall plug.
By following these step-by-step instructions, you can confidently install wall plugs and achieve a secure and professional fit for your wall-mounted objects. Now you’re ready to take on your next DIY project with ease!
Troubleshooting Common Issues
Wall Plugs Not Fitting Properly
If you’ve ever encountered the frustrating task of trying to install a wall plug only to find that it doesn’t fit properly, you’re not alone. This common issue can lead to a lack of stability and support for your fixtures or shelving units. Thankfully, there are a few potential causes and solutions to consider.
Potential Causes and Solutions
When wall plugs don’t fit properly, it could be due to a few different factors. Here are some of the most common causes along with their respective solutions:
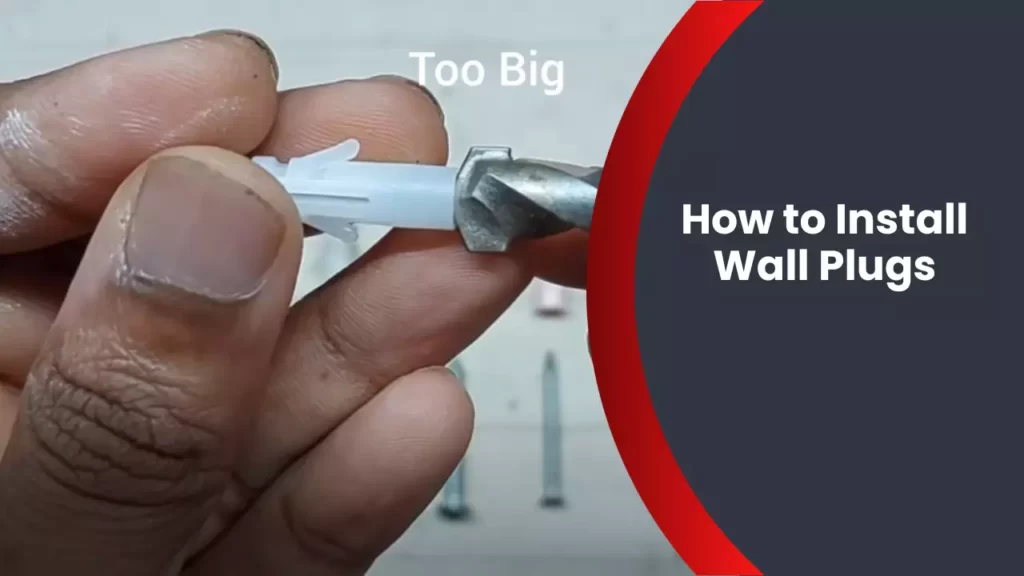
- A mismatch between the wall plug size and the drill bit size can lead to a loose fit. To ensure a snug fit, make sure the drill bit you use matches the size of the wall plug.
- If the wall material is soft or crumbly, it may not provide enough support for the wall plug. In this case, you may need to use a wall anchor or find a sturdier section of the wall to install the plug.
- In some instances, the wall plug itself may be faulty or low-quality. Consider investing in higher-quality wall plugs or try a different brand to see if that resolves the issue.
Wall Plugs Coming Loose
Another common issue with wall plugs is when they come loose over time. This can be particularly concerning as it can compromise the stability of your fixtures. However, identifying the problem and solving it effectively can help prevent any mishaps.
Identifying the Problem and Solving it Effectively
If you notice that your wall plugs are coming loose, here are a few steps you can take to address the issue:
- First, remove the fixture or object that is attached to the wall plug.
- Check if the wall plug has become worn or damaged. If so, replace it with a new one.
- Inspect the hole in the wall. If it has become enlarged or damaged, you may need to patch it up or use a larger wall plug.
- Consider using a stronger adhesive, such as construction adhesive, to secure the wall plug in place.
- Before reinstalling the fixture, make sure the wall plug is securely in place and tighten it if necessary.
Wall Plugs Breaking or Cracking
If you’ve noticed that your wall plugs are breaking or cracking during installation or over time, it’s important to address the issue promptly to avoid further damage or potential hazards. Understanding the reasons behind the damage and taking preventive measures can help ensure a more durable installation.
Reasons Behind the Damage and Preventive Measures
Several factors can contribute to wall plugs breaking or cracking. Consider the following reasons and take preventive measures as necessary:
| Reasons | Preventive Measures |
|---|---|
| The wall material is too hard or dense. | Use a masonry drill bit and drilling technique suitable for harder materials. Consider using wall anchors for added support. |
| Applying excessive force during installation. | Apply gentle, steady pressure when installing the wall plug. Avoid using power tools or excessive force. |
| Low-quality or worn-out wall plugs. | Invest in higher-quality wall plugs made from durable materials. Replace worn-out wall plugs as soon as possible. |
By addressing these common issues and implementing the appropriate solutions and preventive measures, you can ensure that your wall plugs provide the stability and support your fixtures or shelving units require.
Tips For Using Wall Plugs Effectively
When it comes to installing wall plugs, it’s important to use them effectively in order to maximize their performance and ensure their longevity. By following some simple tips, you can ensure that your wall plugs are strong and secure, holding up even heavy loads. In this post, we’ll discuss the load-bearing capacity of wall plugs, how to maximize their performance and longevity, and common mistakes to avoid.
Load-Bearing Capacity of Wall Plugs
In order to ensure that your wall plugs can effectively hold the weight of the object being mounted, it’s crucial to consider their load-bearing capacity. Wall plugs come in different sizes and materials, each with its own maximum weight tolerance. Consult the packaging or product specifications to determine the load-bearing capacity of the wall plugs you are using. Make sure that the weight of the object being mounted does not exceed this limit to prevent any accidents or damage to your walls.
Maximizing Wall Plug Performance and Longevity
In order to maximize the performance and longevity of your wall plugs, there are a few key tips to keep in mind. Firstly, ensure that the hole you drill into the wall is the correct size for the wall plug. Using a drill bit that matches the diameter of the wall plug will ensure a snug fit and prevent any wobbling or instability. Secondly, clean out any debris from the hole before inserting the wall plug to ensure optimal anchoring. Finally, consider the type of wall material you are working with and use the appropriate wall plug to ensure a secure hold. For example, if you are working with drywall, use plastic wall plugs specifically designed for this material.
Common Mistakes to Avoid
When using wall plugs, there are a few common mistakes that should be avoided. Firstly, avoid over-tightening screws or bolts into the wall plugs, as this can weaken the anchor and compromise its integrity. Secondly, do not reuse wall plugs once they have been removed from the wall, as they may have suffered damage during removal. It is always best to use new wall plugs for each installation.
Additionally, be cautious of choosing the wrong size or type of wall plug for your wall material, as this can result in an insecure mount and potential damage to your walls. Finally, ensure that you are using the correct tools and techniques for installation to avoid any mishaps or accidents.
By following these tips for using wall plugs effectively, you can ensure that your mounted objects are securely and safely fastened to the wall. Remember to always consider the load-bearing capacity, maximize performance and longevity, and avoid common mistakes for a successful installation every time.
Additional Considerations
Removing Wall Plugs Safely
When it comes to installing wall plugs, it’s essential to have a plan in place for removing them safely. Whether you’re replacing the plug or need to remove it for other reasons, you’ll want to avoid any potential damage to the wall. Here are some steps to help you remove wall plugs safely:
- Start by gently unscrewing the screw counterclockwise until it is loose.
- Use a pair of pliers or a screwdriver to grip the plug securely and pull it straight out of the wall.
- If the plug doesn’t come out easily, avoid applying excessive force that could cause damage. Instead, try gently twisting or wiggling the plug while pulling it out.
- Once the plug is removed, you may need to use a putty knife to scrape away any excess material left in the hole.
- Remember to dispose of the plug properly to minimize any environmental impact.
Reusing Wall Plugs
If you’re looking to save money or reduce waste, reusing wall plugs can be a great option. Here are some steps to help you reuse wall plugs effectively:
- Inspect the wall plug to ensure it is still in good condition. Check for any cracks or damage that could affect its stability.
- If the plug is in good condition, you can reuse it by following these steps:
- Carefully remove the plug from the wall using the steps mentioned earlier.
- Clean the plug thoroughly by removing any debris or old adhesive.
- Inspect the screw that was used with the plug. If it is still in good condition, you can reuse it as well.
- When reinstalling the plug, make sure it fits snugly in the hole and the screw securely attaches it to the wall.
Upgrading to Stronger Wall Plugs
If you’re looking to enhance the strength and durability of your walls, upgrading to stronger wall plugs can be a wise decision. Here are some considerations to keep in mind when upgrading:
- Determine the weight and load capacity required for your specific purpose. This will help you choose the appropriate wall plug.
- Consider the material of your walls. If you have a plasterboard or drywall, consider using different types of wall plugs specifically designed for these materials.
- Research different wall plug options available in the market. Look for customer reviews and expert opinions to find the best one for your needs.
- Follow the installation instructions provided with the wall plugs to ensure a secure and effective installation.
Frequently Asked Questions
How Do You Put Wall Plugs In The Wall?
To put wall plugs in the wall, follow these steps: 1. Mark the spot where the plug will go. 2. Use a drill to create a hole in the marked spot. 3. Insert the plastic wall plug into the hole until it is flush with the wall.
4. Use a screwdriver to insert the screw into the wall plug. 5. Tighten the screw until it is secure.
Do You Need A Drill To Put Wall Plugs In?
No, a drill is not necessary to put wall plugs in. Wall plugs can be inserted manually using a hammer or mallet. However, using a drill can make the process quicker and easier.
Do You Hammer Or Screw Wall Plugs?
To secure wall plugs, use a hammer for solid walls and screws for hollow walls.
How Do You Install Wall Plugs Without A Drill?
To install wall plugs without a drill, use adhesive hooks or anchors and screws. Clean the wall surface, peel off the adhesive backing on the hook, then press it firmly against the wall. Alternatively, insert an anchor into the wall, then screw the hook into the anchor for a secure hold.
Conclusion
To conclude, installing wall plugs is an essential skill for any DIY enthusiast or homeowner. By following the step-by-step instructions in this blog post, you can easily and safely install wall plugs to support various fixtures and fittings around your home.
Remember to choose the right size wall plugs for the job and use the correct tools for efficient installation. With a little practice, you’ll become confident in your ability to complete this task with ease. Start transforming your walls today!