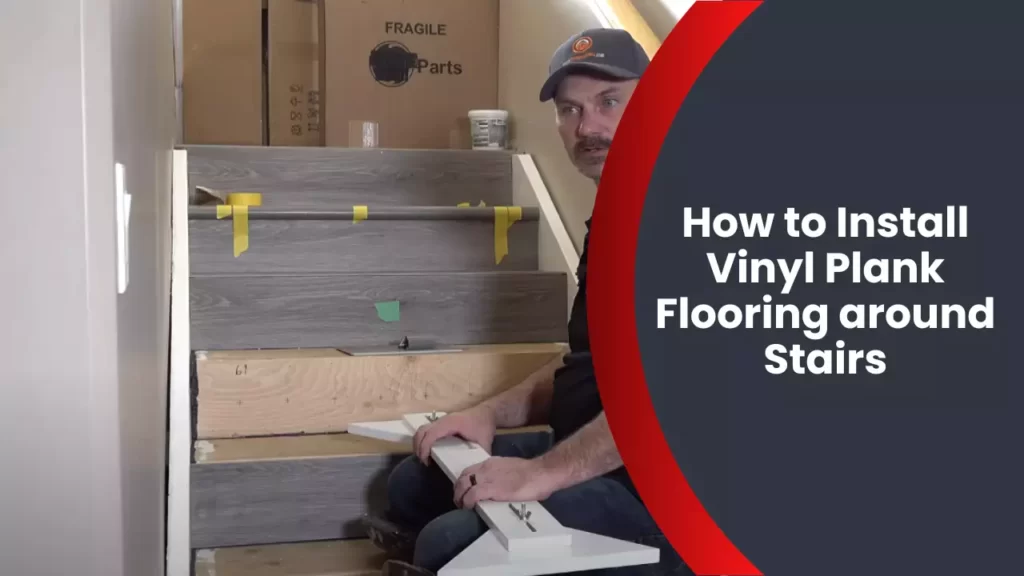
To install vinyl plank flooring around stairs, measure and cut the planks to fit the stair treads, risers, and nosing, then secure them with adhesive or double-sided tape. Additionally, use a hand saw or jigsaw to make precise cuts for a seamless finish.
Preparing The Staircase For Vinyl Plank Flooring
Before you can install vinyl plank flooring on your stairs, it is crucial to properly prepare the staircase. This involves several important steps that need to be taken to ensure a successful and durable installation. By following these guidelines, you can ensure that your vinyl plank flooring will look great and last for years to come.
Measuring and calculating the material needed
Properly measuring your stairs is the first step in preparing them for vinyl plank flooring installation. To accurately calculate the amount of material you’ll need, measure the width and depth of each stair tread as well as the height of each riser. Make sure to account for any overhang on each stair tread as well. Once you have these measurements, you can calculate the total square footage needed, allowing for some extra material for cuts and waste.
Inspecting the existing stairs for any repairs or adjustments
Before installing vinyl plank flooring, it’s important to carefully inspect the existing stairs for any repairs or adjustments that need to be made. Look for any loose or damaged stair treads, and repair or replace them as necessary. Check for any squeaks or loose parts, which can be fixed by adding reinforcing screws or brackets. Additionally, if your stairs have any uneven or protruding surfaces, it’s essential to address these issues before installing the vinyl plank flooring.
Removing any existing carpet or flooring from the stairs
If your stairs currently have carpet or any other type of flooring, it must be removed before installing vinyl plank flooring. Start by pulling up the carpet, being careful not to damage the underlying stairs. Use pliers or a pry bar to remove any tack strips or adhesive residue. If there is any other type of flooring on the stairs, such as laminate or hardwood, use a crowbar or scraper to carefully lift and remove it. With the old flooring removed, you’ll have a clean and level surface to work with.
Sanding or leveling the surface for a smooth installation
To ensure a smooth installation of vinyl plank flooring on the stairs, it may be necessary to sand or level the surface. Use sandpaper or a sander to smooth out any rough spots or imperfections on the stair treads and risers. Pay close attention to any areas that may have been damaged during the removal of the old flooring. Additionally, if you notice any unevenness, use a leveling compound to fill in low spots and create a flat surface.
Choosing the right type of vinyl plank flooring for stairs
When it comes to selecting the right type of vinyl plank flooring for your stairs, it’s essential to choose a product that is specifically designed for this purpose. Look for vinyl planks that are labeled as suitable for stairs and have a high slip resistance rating. Additionally, consider the durability and thickness of the planks to ensure they can withstand the heavy traffic that stairs typically experience. By choosing the right type of vinyl plank flooring, you can guarantee a safe and visually appealing installation on your stairs.
Installing Vinyl Plank Flooring On The Stairs
When it comes to giving your staircase a fresh and stylish look, installing vinyl plank flooring is a fantastic option. Vinyl plank flooring is not only durable and easy to maintain, but it also adds a touch of elegance to your stairs. In this guide, we will walk you through the step-by-step process of installing vinyl plank flooring on your stairs, ensuring a seamless and professional finish.
Starting the installation process from the top or bottom of the staircase
Before you begin, decide whether you want to start installing the vinyl plank flooring from the top or bottom of the staircase. Starting from the top allows you to work your way down, ensuring that each step is securely covered. Conversely, starting from the bottom can be more convenient, as it allows you to place full planks on the visible steps and cut the ones that will be hidden by the risers. Whichever option you choose, make sure you measure and mark the centerline of each step to ensure proper alignment.
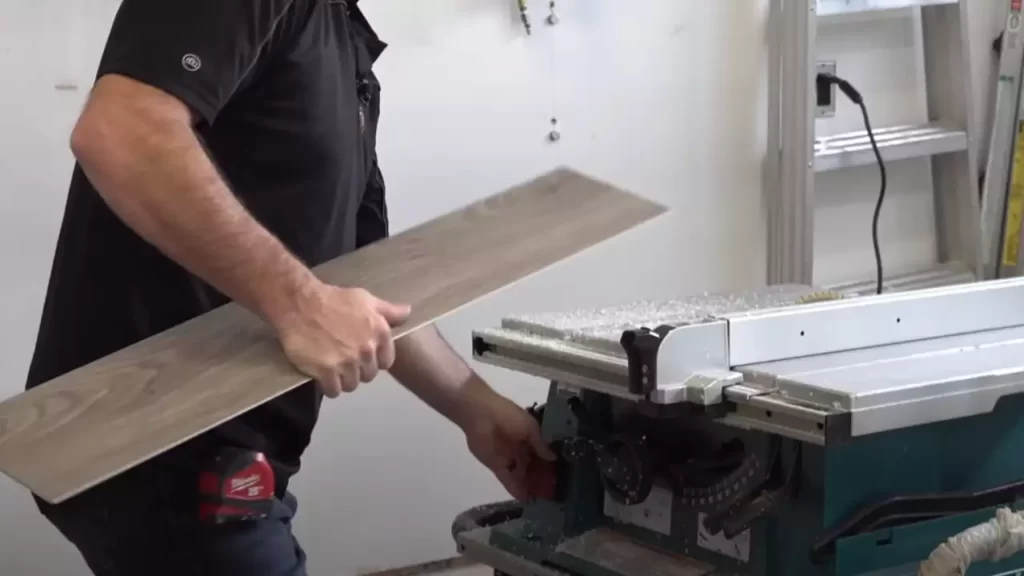
Cutting and fitting the vinyl planks to the shape and size of each step
Once you have decided where to start, it’s time to cut and fit the vinyl planks to the shape and size of each step. Measure each step individually and use these measurements to cut the vinyl planks accordingly. Remember to leave a small gap of around 1/8 inch between the vinyl plank and the riser to allow for expansion. Use a utility knife or a jigsaw to make accurate cuts, ensuring that each plank fits snugly on the step.
Applying adhesive or using a click-lock system for installation
When it comes to installing vinyl plank flooring on stairs, there are two main options for securing the planks: using adhesive or a click-lock system. Apply a thin layer of adhesive evenly on the step, making sure to follow the manufacturer’s instructions. Alternatively, if you opt for the click-lock system, insert the tongue of one plank into the groove of the previous one, snapping them together securely. This method is particularly popular as it eliminates the need for adhesive and allows for easy removal if needed in the future.
Securing the vinyl planks with nails or adhesive tape
In addition to the adhesive or click-lock system, you may also want to secure the vinyl planks further with nails or adhesive tape. Nailing the planks can provide extra stability, especially if you have heavy foot traffic on your stairs. For this, use a nail gun and ensure that the nails are driven at an angle to prevent them from protruding. Alternatively, adhesive tape can be used to hold the planks in place temporarily, allowing the adhesive to bond properly before removing the tape.
Ensuring proper alignment and a seamless look for each step
Finally, to achieve a professional and seamless appearance, it is crucial to ensure proper alignment and a consistent look for each step. Take your time to double-check the alignment of the planks, making sure they are parallel to the risers and centered on each step. Adjust as necessary before moving on to the next step. By taking care of these small details, you can create a flawless and visually appealing staircase with vinyl plank flooring.
Installing vinyl plank flooring on stairs not only improves the aesthetic appeal of your staircase but also adds durability and ease of maintenance. By following these steps, you can transform your plain stairs into a stunning focal point, all while enjoying the numerous benefits of vinyl plank flooring.
Finishing Touches And Maintenance Tips
Installing Stair Nosing for Added Safety and Aesthetics
When it comes to installing vinyl plank flooring around stairs, adding a finishing touch such as stair nosing is crucial for both safety and aesthetics. Stair nosing refers to a specialized piece of trim designed to be installed on the edge of each step. Not only does it provide a smooth and seamless transition from the stair tread to the flooring, but it also helps prevent accidents by adding traction and visibility. Installing stair nosing is a simple process that can be done by following these steps:
- Cut the stair nosing to fit the width and length of your stairs, ensuring a close and accurate fit.
- Apply a high-quality adhesive to the back of the stair nosing, evenly spreading it to ensure complete coverage.
- Align the stair nosing with the edge of the step, pressing it firmly to secure it in place.
- Repeat the process for each step, making sure the stair nosing is securely attached and aligned.
- Allow the adhesive to dry according to the manufacturer’s instructions before using the stairs.
By installing stair nosing, you not only enhance the safety of your stairs but also achieve a seamless and professional look that complements your vinyl plank flooring.
Cleaning and Maintaining the Vinyl Plank Flooring on the Stairs
Proper cleaning and maintenance are essential to keep your vinyl plank flooring on the stairs in pristine condition. Vinyl is known for its durability and low-maintenance characteristics, making it a popular choice for high-traffic areas like stairs. To ensure the longevity and beauty of your vinyl plank flooring, follow these cleaning and maintenance tips:
- Regularly sweep or vacuum the stairs to remove any dirt, dust, or debris that may scratch the surface of the flooring.
- Use a damp mop or cloth and a gentle vinyl floor cleaner to remove any stains or spills. Avoid using abrasive cleaners or excessive water, as they can damage the flooring.
- Wipe up spills immediately to prevent them from seeping into the seams or damaging the adhesive.
- Place doormats or runners at the entrance of the stairs to trap dirt and moisture before it reaches the vinyl flooring.
- Avoid dragging heavy furniture or objects across the stairs to prevent scratches or indentations. Instead, use furniture pads or sliders.
By following these cleaning and maintenance tips, you can keep your vinyl plank flooring on the stairs looking brand new for years to come.
Adding a Non-Slip Coating or Adhesive Strips for Improved Traction
To further enhance the safety of your vinyl plank flooring on the stairs, consider adding a non-slip coating or adhesive strips. This is particularly important if you have young children, elderly individuals, or pets in your household. Non-slip coatings and adhesive strips provide additional traction and prevent slipping, especially in high-traffic areas. Here’s how you can go about it:
- Choose a non-slip coating or adhesive strips designed specifically for vinyl flooring.
- Clean the stairs thoroughly to ensure a clean and dry surface.
- Apply the non-slip coating according to the manufacturer’s instructions, making sure to cover the entire surface of each tread.
- If using adhesive strips, measure and cut them to the desired length, then apply them to the edge of each tread, ensuring a secure and even placement.
- Allow the non-slip coating or adhesive strips to dry completely before using the stairs.
By adding a non-slip coating or adhesive strips, you can provide an extra layer of safety to your vinyl plank flooring on the stairs, minimizing the risk of accidents and slips.
Protecting the Vinyl Flooring from Damage Caused by Heavy Traffic
Vinyl plank flooring is designed to withstand heavy traffic, but it’s still important to take precautions to protect it from excessive wear and tear. Here are some tips to keep your vinyl flooring on the stairs in good condition:
- Place rugs or mats in high-traffic areas to help distribute the weight and reduce the impact on the vinyl flooring.
- Avoid wearing shoes with sharp or abrasive soles on the stairs, as they can leave scratches on the surface.
- Regularly trim pets’ nails to prevent them from scratching the vinyl flooring.
- Consider using felt pads on the bottom of furniture legs to prevent them from scratching or denting the vinyl flooring.
By following these tips, you can prolong the life of your vinyl plank flooring on the stairs and maintain its visual appeal.
Tips for Repairing or Replacing Damaged Vinyl Planks on the Stairs
Even with proper care, accidents or wear and tear may occur, resulting in damaged vinyl planks on the stairs. Fortunately, repairing or replacing these damaged planks is relatively straightforward. Here are a few tips to help you tackle the task:
- Assess the extent of the damage to determine whether repair or replacement is necessary.
- If the damage is minimal, you can repair it by using a vinyl floor repair kit. Follow the manufacturer’s instructions to seamlessly fix the damaged area.
- If the damage is extensive or beyond repair, removing and replacing the entire vinyl plank is recommended.
- Start by removing the damaged plank using a putty knife or utility knife to separate it from the surrounding planks.
- Install a new plank by fitting its tongue into the groove of the adjacent planks, ensuring a secure and seamless fit.
- Use a rolling pin or flooring roller to apply pressure and ensure the new plank is firmly in place.
By following these tips, you can easily repair or replace damaged vinyl planks on the stairs, maintaining the overall integrity and appearance of your flooring.
Frequently Asked Questions
What To Do With Stairs When Using Vinyl Plank Flooring?
Install vinyl plank flooring on stairs by cutting the planks to fit each step, starting from the top down. Secure the planks with adhesive or nails, ensuring a snug fit. Use a stair nose molding to cover the exposed edge and provide a finished look.
Test the stairs for stability and safety before use.
How Do You Transition Vinyl Flooring To Stairs?
To transition vinyl flooring to stairs, follow these steps: 1. Measure and cut the vinyl planks or tiles to fit the stair dimensions. 2. Use an adhesive specifically designed for vinyl flooring to attach the pieces securely. 3. Smooth out any wrinkles or bubbles for a seamless look.
4. Finish the edges with trim or molding for added protection and aesthetics.
Should I Glue Vinyl Plank Flooring To Stairs?
No, it is not necessary to glue vinyl plank flooring to stairs.
Can Vinyl Plank Flooring Be Installed On Stairs?
Yes, vinyl plank flooring can be installed on stairs. It’s a great option due to its durability and easy maintenance. It provides a stylish and cost-effective solution for stairs while also offering slip resistance and noise reduction.
Conclusion
To conclude, installing vinyl plank flooring around stairs is a straightforward process that can add beauty and durability to your home. By following these steps, you can achieve professional-looking results on your own. Remember to prepare the area properly, use the right tools and techniques, and take your time to ensure a seamless and secure installation.
With vinyl plank flooring, you can transform your stairs into a stylish focal point that will impress for years to come.