To install vinyl floor tiles with adhesive, remove any existing flooring, clean the subfloor thoroughly, and apply adhesive to the back of each tile before pressing it firmly into place.
Preparing For Installation
Before installing vinyl floor tiles with adhesive, there are a few crucial steps you need to take to ensure a smooth and successful installation. This section will guide you through the process, starting with selecting the right vinyl floor tiles for your project.
Selecting the Right Vinyl Floor Tiles
The first step in preparing for vinyl floor tile installation is selecting the right tiles for your space. Vinyl floor tiles come in various styles, colors, and patterns, so choose one that suits your aesthetic preferences and complements the overall design of your room.
When selecting vinyl floor tiles, keep in mind the following considerations:
- Durability: Opt for high-quality vinyl tiles that are designed to withstand heavy foot traffic and resist wear and tear over time.
- Water resistance: If you’re installing vinyl floor tiles in a bathroom, kitchen, or any area prone to moisture, choose tiles that are waterproof or highly water-resistant.
- Thickness: Consider the thickness of the tiles based on the condition of your subfloor. Thicker tiles provide better insulation and can help conceal minor imperfections on the subfloor.
- Interlocking or peel-and-stick: Decide whether you prefer interlocking vinyl floor tiles that snap together or peel-and-stick tiles that adhere directly to the subfloor.
Gathering Tools and Materials
Once you’ve selected the perfect vinyl floor tiles, it’s time to gather the necessary tools and materials for the installation process. Here’s a list of items you’ll need:
- Vinyl floor tiles: Make sure you have enough tiles to cover the entire area you plan to install.
- Adhesive: Invest in a high-quality vinyl floor tile adhesive that is suitable for your specific tiles and subfloor.
- Tape measure: Measure the dimensions of your room to determine the amount of tiles needed.
- Straightedge or ruler: Use a straightedge or ruler to ensure precise cuts for a professional-looking installation.
- Utility knife: A sharp utility knife will come in handy for cutting vinyl tiles to fit around edges and corners.
- Roller or trowel: Depending on the adhesive you’re using, you’ll need either a roller or a trowel to apply the adhesive evenly.
- Tile spacers: These small wedges help create uniform gaps between tiles and ensure a neat installation.
- Safety equipment: Don’t forget to wear safety goggles and gloves to protect yourself during the installation process.
Preparing the Subfloor
Before installing vinyl floor tiles, it’s crucial to prepare the subfloor to ensure a stable and long-lasting result. Follow these steps to prepare your subfloor:
- Clean the subfloor thoroughly: Remove any debris, dust, or existing flooring, and ensure the surface is clean and dry.
- Repair any damages: Inspect the subfloor and fix any cracks, holes, or uneven areas using an appropriate patching compound or leveling compound.
- Sand down high spots: If you notice any raised areas on the subfloor, use sandpaper or a sander to smooth them down and create a level surface.
- Check for moisture: Use a moisture meter to check the moisture levels of the subfloor. Ensure it falls within the acceptable range recommended by the vinyl floor tile manufacturer.
- Apply a primer if necessary: Some subfloors may require a primer to enhance adhesion. Consult the adhesive manufacturer’s guidelines to determine if a primer is needed.
By selecting the right vinyl floor tiles, gathering the necessary tools and materials, and properly preparing the subfloor, you’ll be well on your way to a successful and visually appealing vinyl floor tile installation.
Step-By-Step Installation Guide
Installing vinyl floor tiles with adhesive is a simple and cost-effective way to transform your space. In this step-by-step guide, we will walk you through the process of installing vinyl floor tiles with adhesive. Whether you are a seasoned DIY-er or a beginner, you’ll find this guide helpful in achieving a professional-looking result. Let’s get started!
Applying the Adhesive
Before you begin installing the vinyl floor tiles, it’s crucial to prepare the surface by cleaning and ensuring it’s smooth and free from any debris. Once the surface is ready, follow these steps to apply the adhesive:
- Carefully read the manufacturer’s instructions on the adhesive packaging to ensure you have the necessary tools and materials.
- Using a trowel, spread a thin and even layer of adhesive on the surface, working in small sections.
- Make sure to apply the adhesive within the recommended temperature range, as extreme temperatures may affect its effectiveness.
- Allow the adhesive to set for the recommended amount of time before proceeding to the next step.
Placing the First Tile
Now that the adhesive is ready, it’s time to place the first vinyl floor tile:
- Choose a corner of the room to start the installation. It’s a good idea to start in a corner that is most visible or closest to the main entrance.
- Remove the backing from the first tile, exposing the adhesive side.
- Position the tile in the corner, aligning it with the walls or any reference lines you have marked.
- Press down on the tile firmly, starting from the center and working your way towards the edges. Ensure there are no air bubbles trapped beneath the tile.
Installing Subsequent Tiles
With the first tile securely in place, you can now continue with the installation of subsequent tiles:
- Remove the backing from the next tile and align it with the installed tile. Leave a small gap, typically around 1/8 inch, between tiles for expansion.
- Press down firmly on the new tile, ensuring it is leveled with the previous tile. Use a rubber mallet or a rolling pin to ensure proper adhesion.
- Repeat the process for the remaining tiles, working your way across the room in rows.
- Periodically check the alignment and levelness of the tiles as you go to maintain a uniform appearance.
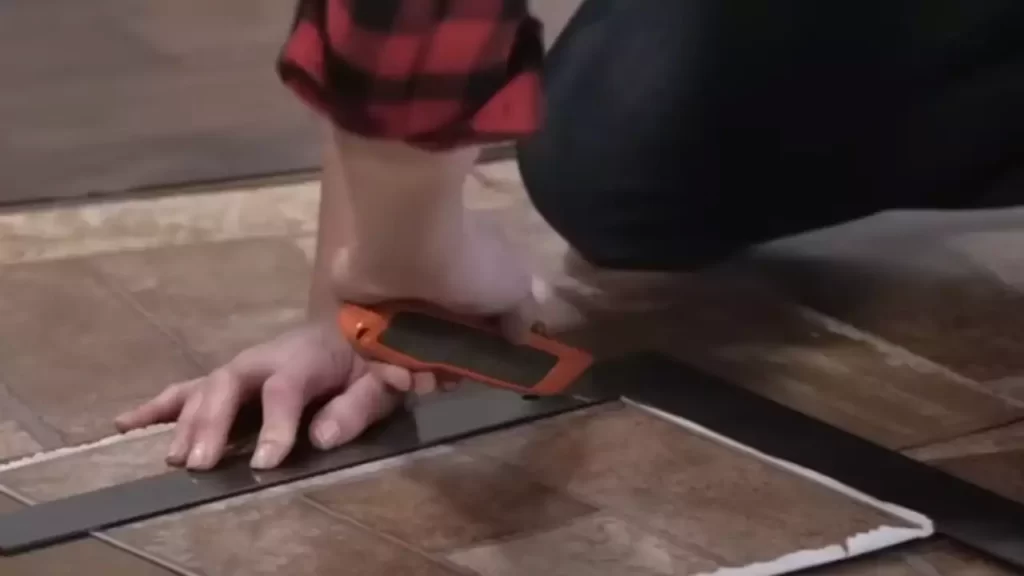
Trimming the Tiles
Inevitably, you may need to trim tiles to fit around corners, doorways, or other obstacles. Here’s how to trim the vinyl floor tiles:
- Measure the space where the tile needs to be trimmed, accounting for any required gaps.
- Transfer the measurements onto the tile using a pencil or marker.
- Use a utility knife or vinyl tile cutter to carefully cut along the marked lines.
- Fit the trimmed tile into place and ensure it fits snugly without any gaps or overlaps.
Dealing with Irregularities
It’s common for floors to have irregularities, such as uneven subfloors or small bumps. Here are a few tips to address these irregularities:
- If the subfloor is uneven, consider using a self-leveling compound to smooth it out before installing the vinyl tiles.
- For small bumps or imperfections, you can sand them down to create a smoother surface.
- Avoid installing vinyl floor tiles over large cracks or deep indentations, as they can affect the durability and appearance of the tiles.
By following this step-by-step installation guide, you’ll be able to confidently install vinyl floor tiles with adhesive and achieve a beautiful and long-lasting result. Remember to always follow the manufacturer’s instructions and take your time to ensure each step is done correctly. Happy tiling!
Finishing Touches And Maintenance
Once the vinyl floor tiles with adhesive have been properly installed, it’s time to focus on the finishing touches and ongoing maintenance. Taking the right steps to complete the installation process and ensuring regular maintenance will not only enhance the overall appearance of your vinyl floor tiles but also extend their lifespan. This blog post will guide you through the essential tasks to consider, such as grouting the tiles (optional), cleaning and maintaining the tiles, and troubleshooting common installation issues.
Grouting the Tiles (optional)
Grouting the vinyl floor tiles is an optional step that can provide a polished and finished look to your flooring. This process involves filling the gaps between the tiles with grout to create a seamless appearance. Before beginning, ensure that the adhesive beneath the tiles has completely dried.
Here’s a step-by-step guide to grouting your vinyl floor tiles:
- Carefully choose a grout color that complements the color of your vinyl tiles. You can purchase grout specifically designed for vinyl flooring.
- Using a rubber grout float, spread the grout over the tiles at a diagonal angle, making sure to push it into the gaps.
- Once the grout has been applied, use a damp sponge to wipe away any excess grout from the surface of the tiles.
- Allow the grout to dry according to the manufacturer’s instructions.
- After the grout has fully dried, use a soft cloth to buff the tiles and remove any residue left behind.
Cleaning and Maintaining Vinyl Floor Tiles
Maintaining and cleaning your vinyl floor tiles regularly is essential to keep them looking their best and prevent any potential damage. Here are some tips to help you properly clean and maintain your vinyl floor tiles:
- Sweep or vacuum the floor regularly to remove any dust, dirt, or debris that might scratch the surface.
- Use a damp mop with warm water and a mild cleaner specifically formulated for vinyl flooring to remove any stains or spills.
- Avoid using abrasive cleaners, scrub brushes, or harsh chemicals, as these can damage the vinyl tiles.
- Place mats or rugs at entryways to reduce the amount of dirt and moisture brought into the room.
- Immediately clean up any spills to prevent them from staining or seeping into the floor.
Troubleshooting Common Installation Issues
Even with careful installation, you might encounter some common issues that can be easily resolved. Here are a few troubleshooting tips:
Issue 1: Tiles not sticking properly
If you notice that some tiles are not sticking properly or have come loose, apply additional adhesive to the back of the tile and press firmly.
Issue 2: Air bubbles
If air bubbles form under the tiles during installation, use a utility knife to carefully cut an X shape through the center of the bubble. Press down firmly on the tile to remove the air and smooth it out.
Issue 3: Gaps between tiles
If small gaps appear between the tiles, you can fill them with a matching colored caulk or seam sealer for a more seamless look.
By following these maintenance tips and troubleshooting solutions, you can ensure that your vinyl floor tiles remain in excellent condition, providing you with durability and beauty for years to come.
Frequently Asked Questions
What Adhesive Is Used For Vinyl Floor Tiles?
The adhesive commonly used for vinyl floor tiles is a special vinyl tile adhesive. It provides strong and durable adhesion, ensuring the tiles stay in place over time. Applying the recommended adhesive correctly is important for a successful installation.
Do You Need Glue For Peel And Stick Vinyl Tile?
No, you don’t need glue for peel and stick vinyl tile. The adhesive on the back of the tiles is enough to stick them to the surface, making installation easy and hassle-free.
What Do You Need To Install Peel And Stick Vinyl Tile?
To install peel and stick vinyl tile, you’ll need a clean and smooth surface, a utility knife or scissors, a measuring tape or ruler, a chalk or pencil, and a roller or squeegee to press the tiles in place.
Should You Glue Vinyl Tile?
Yes, you should glue vinyl tile. Applying adhesive ensures that the tiles stay in place and prevents them from shifting or lifting. Proper adhesive will provide a strong bond and help the vinyl tile to last longer.
Conclusion
Installing vinyl floor tiles with adhesive is a simple and cost-effective way to transform your space. By following the step-by-step instructions provided in this blog post, you can effortlessly give your floors a fresh and modern look. Remember to prepare the surface properly, measure accurately, and apply the adhesive evenly for a smooth and long-lasting finish.
Enjoy the benefits of vinyl flooring, such as durability, easy maintenance, and a wide range of design options. Upgrade your floors with vinyl tiles and enjoy a stylish and practical solution for years to come.