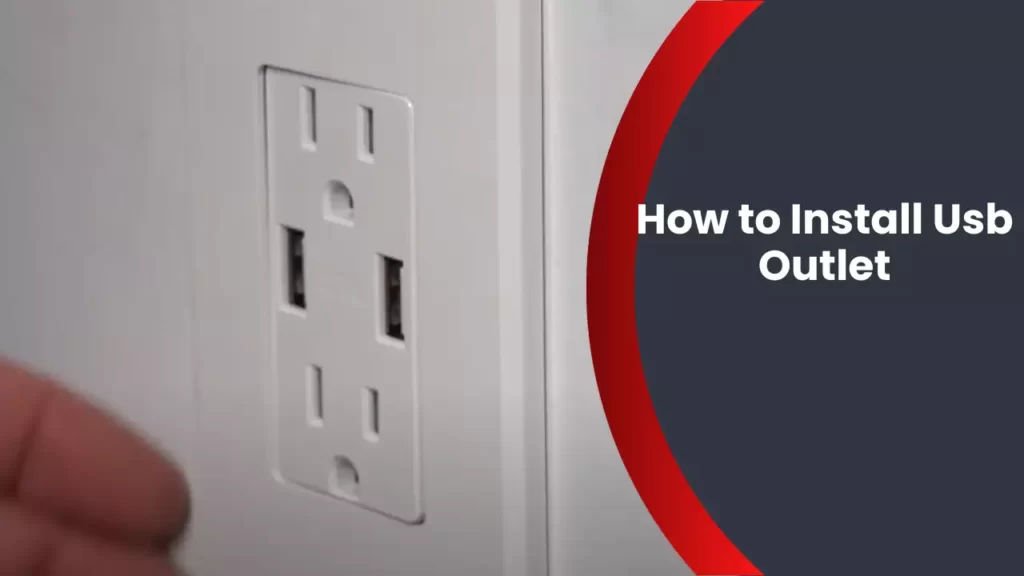
To install a USB outlet, first, turn off the power to the circuit at the breaker box. Then, remove the existing outlet cover and outlet from the electrical box, and attach the USB outlet to the box using the screws provided.
The Benefits Of Installing A Usb Outlet
Are you tired of constantly searching for bulky adapters or juggling multiple charging cables? Installing a USB outlet can be a game-changer when it comes to keeping your devices powered up and ready to go. Not only does it offer a convenient charging solution for all your gadgets, but it also eliminates the need for those unsightly adapters that clutter up your space. Let’s take a closer look at the benefits of installing a USB outlet.
Convenient charging solution for multiple devices
Gone are the days of struggling to find an available outlet or dealing with a jumble of tangled cords. With a USB outlet, you can easily charge multiple devices simultaneously, using just the one outlet. Whether you need to charge your smartphone, tablet, smartwatch, or any other USB-powered device, this convenient solution allows you to streamline your charging process. No more searching, no more fuss. Simply plug in your device and enjoy fast and efficient charging.
Reduces the need for bulky adapters
Adapters can be a real eyesore, taking up valuable space and creating unnecessary clutter. With a USB outlet, you can kiss those bulky adapters goodbye. The built-in USB ports eliminate the need for additional chargers, saving you both space and money. Imagine the freedom of having a clean and organized charging station, free from the tangles of cords and the clutter of adapters. Install a USB outlet and say hello to a sleek and streamlined charging experience.
Enhances the aesthetics of your space
Your space should be a reflection of your personal style, and that includes the way your technology is integrated. Installing a USB outlet not only offers practicality but also enhances the overall aesthetics of your living or working space. These sleek outlets seamlessly blend into any room, giving it a modern and sophisticated look. With various designs and finishes available, you can choose a USB outlet that complements your existing decor and adds a touch of elegance to your space.
In conclusion, installing a USB outlet provides numerous benefits. It offers a convenient and efficient charging solution for multiple devices, reduces the need for bulky adapters, and enhances the overall aesthetics of your space. Upgrade your charging experience today with a USB outlet and enjoy the convenience and style it brings.
Selecting The Right Usb Outlet For Your Needs
When it comes to upgrading your home or office with the convenience of USB outlets, selecting the right one for your needs is crucial. The right USB outlet not only allows you to charge your devices conveniently but also ensures their safety and longevity. In this article, we will help you navigate the process of choosing the perfect USB outlet by understanding the different types available, considering the power requirements of your devices, and selecting a reputable brand for optimal quality and safety.
Understanding the different types of USB outlets available
Before diving into the selection process, let’s explore the various types of USB outlets available. USB outlets generally fall into two categories: wall outlets and surge protectors with USB ports.
- Wall outlets: These USB outlets replace your standard electrical wall outlets. They offer a sleek and seamless appearance and are ideal for permanent installations. Wall outlets come in different configurations, such as single USB ports or multiple ports with a combination of traditional electrical sockets.
- Surge protectors: These are power strips or extension cords with built-in USB ports. Surge protectors not only provide USB charging capabilities but also protect your devices from voltage spikes and power surges. They are portable solutions and suitable for those who need flexibility or have limited wall outlet availability.
Considering the power requirements of your devices
When selecting a USB outlet, it’s essential to consider the power requirements of your devices. Different USB outlets offer varying power output per port, measured in amps (A). High-powered devices like tablets or smartphones with fast charging capabilities may require higher ampere ports for efficient and speedy charging.
Tip: Look for USB outlets that provide at least 2.4A per port, as this is generally sufficient for most devices. However, if you have devices that support fast charging or have multiple power-hungry devices, consider outlets that offer higher ampere ports, such as 3A or more, to ensure optimal charging performance.
Choosing a reputable brand for quality and safety
Safety should be a top priority when selecting any electrical device, and USB outlets are no exception. Choosing a reputable brand ensures that the USB outlet meets stringent safety standards and provides reliable performance. Here are a few factors to consider:
- Certifications: Look for USB outlets that have certifications like UL (Underwriters Laboratories), ETL (Electrical Testing Laboratories), or CSA (Canadian Standards Association). These certifications indicate that the product has undergone thorough testing to meet industry standards.
- Customer reviews: Check customer reviews and ratings to gauge the overall satisfaction and reliability of the USB outlet you are considering. Keep an eye out for any common complaints or issues that might affect your decision.
- Warranty: A reputable brand usually offers warranties on their products. Ensure that the USB outlet you choose comes with a warranty that provides reasonable coverage in case of any defects or malfunctions.
Note: Avoid opting for cheaper, generic USB outlets that may compromise safety and performance. While they might save you some money initially, they may end up causing damage to your devices or even pose a fire hazard in the long run.
By understanding the different types of USB outlets available, considering the power requirements of your devices, and choosing a reputable brand, you can confidently select the right USB outlet that suits your needs. Enjoy the convenience of charging your devices efficiently and securely, adding a modern touch to your space.
Tools And Materials Needed For Installation
Before you begin installing a USB outlet in your home, it’s essential to gather all the necessary tools and materials. Having these items on hand will not only ensure a smooth installation process but also guarantee your safety throughout the project. Below is a comprehensive list of the tools and materials you’ll need:
USB Outlet
The first item on your list is, of course, the USB outlet itself. These outlets are specifically designed to provide a convenient way to charge your devices without the need for bulky adapters. Make sure to purchase a USB outlet that suits your needs and the electrical specifications of your home.
Screwdriver
A screwdriver is a basic tool that every homeowner should have in their toolbox. When it comes to installing a USB outlet, a flat-head or Phillips screwdriver will be needed to remove the faceplate and unscrew the existing outlet from the electrical box in the wall.
Voltage Tester
Ensuring your safety is paramount when working with electricity. A voltage tester is an invaluable tool that allows you to check whether an electrical circuit is energized or de-energized. This simple device helps eliminate the risk of electrical shock during installation.
Wire Stripper
When connecting wires during the installation process, you’ll need a wire stripper to remove the insulation from the ends of the wires. This tool provides a clean and precise cut, allowing for secure connections between the USB outlet and existing electrical wiring.
Electrical Tape
Electrical tape is an essential item for insulating and protecting exposed wires. It helps prevent short circuits and ensures a tight and secure connection. Use electrical tape to wrap around the exposed wire ends and keep everything safe and secure.
Circuit Breaker Panel Key
In order to ensure your safety during installation, you’ll need access to the circuit breaker panel of your home. A circuit breaker panel key is necessary to open the panel cover and switch off the power to the specific circuit you’ll be working on. Remember, safety should always be your top priority when working with electricity.
By gathering these tools and materials before you start the installation process, you’ll have everything you need to ensure a successful and safe installation of your new USB outlet.
Preparing Your Work Area For Installation
Before you begin installing your USB outlet, it is essential to prepare your work area properly. This ensures a safe and efficient installation process. Here are three crucial steps to take before getting started.
Turning off the power to the outlet
One of the most important steps to take before installing a USB outlet is to turn off the power to the outlet. This is crucial for your safety as well as to avoid any potential electrical issues. Follow these simple steps to turn off the power:
- Locate your home’s electrical panel.
- Identify the circuit breaker that controls the power to the outlet.
- Flip the corresponding circuit breaker switch to the OFF position.
By turning off the power, you eliminate the risk of electrical shock while working on the outlet.
Checking for any existing wiring issues
Before proceeding with the installation, it is essential to check for any existing wiring issues that may affect the installation process. This step will help you identify any potential problems and address them promptly. Here’s how you can do it:
- Inspect the existing outlet for loose or damaged wiring.
- Look for any signs of frayed wires or exposed electrical components.
- If you notice any issues, consider contacting a licensed electrician to resolve them.
Addressing any existing wiring issues ensures a smooth installation process and minimizes the risk of electrical malfunctions or hazards.
Clearing the area for easy access
To make the installation process easier and more convenient, it is important to clear the area around the outlet. This allows for easy access and minimizes the risk of accidents or obstructions. Follow these steps to clear the area:
- Remove any furniture or objects obstructing the outlet.
- Gently move any cords or wires away from the area.
- Ensure there is sufficient lighting for better visibility.
By clearing the area, you create a safe and accessible workspace for the installation process, making the task at hand more efficient and hassle-free.
Installing The Usb Outlet
Installing a USB outlet not only provides convenience but also eliminates the need for bulky adapters. With a few simple steps, you can easily install a USB outlet yourself. In this article, we will guide you through the process of installing a USB outlet from identifying the hot and neutral wires to testing the new outlet.
Identifying the hot and neutral wires
The first step in installing a USB outlet is identifying the hot and neutral wires in your electrical box. Before getting started, ensure that the power to the area is turned off. This will ensure your safety throughout the installation process. Using a voltage tester, identify the wire that carries the current. This wire is the hot wire, while the wire that does not carry the current is the neutral wire. Remember that the colors of the wires may vary, so it is important to use a voltage tester.
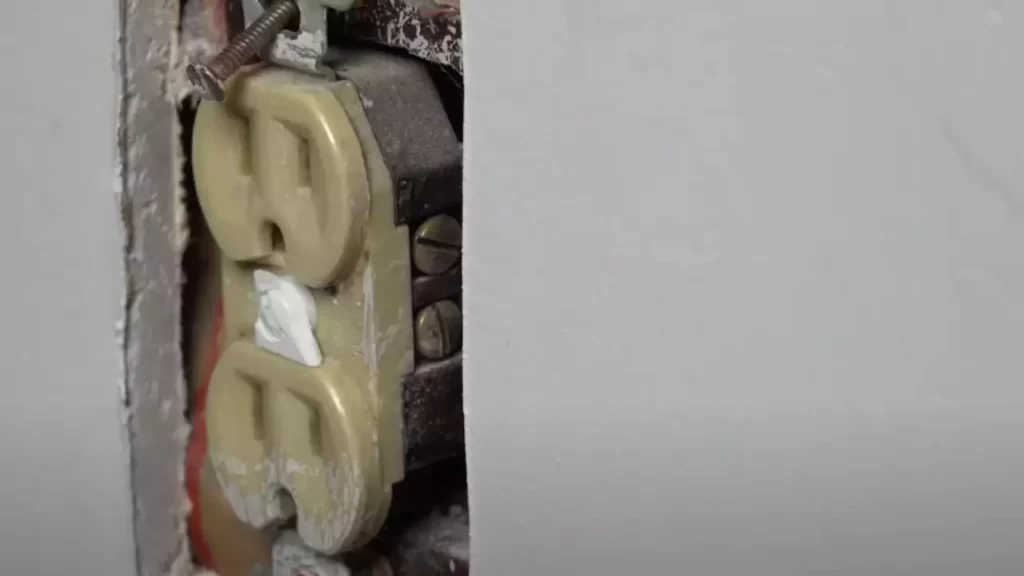
Disconnecting the existing outlet
Once you have identified the hot and neutral wires, it’s time to disconnect the existing outlet. Start by removing the cover plate and then unscrewing the outlet from the electrical box. Carefully pull the outlet out, making sure not to damage any wires. Next, disconnect the wires attached to the outlet by removing the wire nuts. Remember to keep track of which wire is hot and which is neutral.
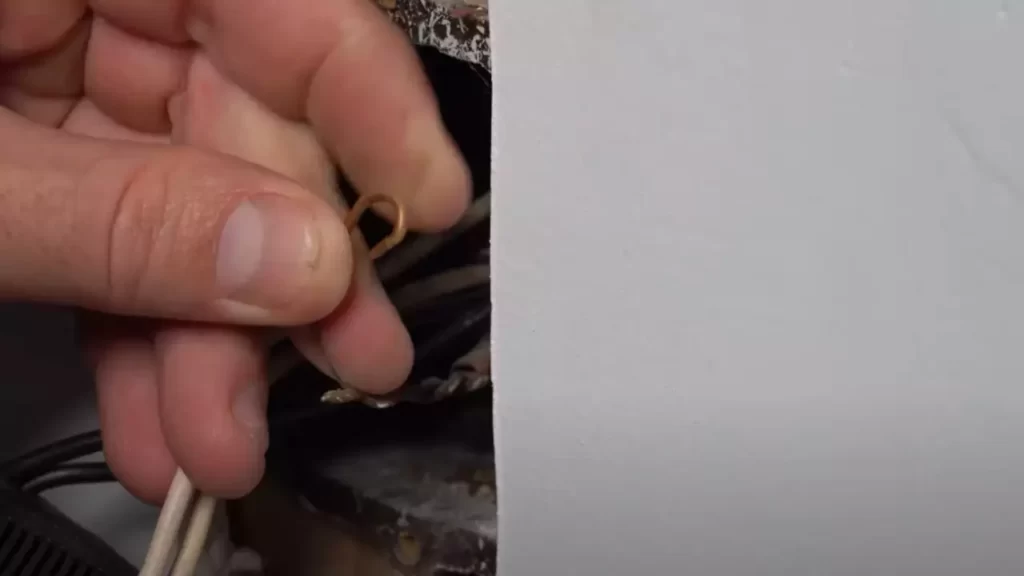
Wiring the USB outlet
After disconnecting the existing outlet, it’s time to wire the USB outlet. Start by removing the wires from the wire nuts and stripping about half an inch of insulation from the ends. Connect the hot wire to the brass screw terminal on the USB outlet and the neutral wire to the silver screw terminal. Make sure to tighten the screws securely to ensure a proper connection. If your USB outlet has a ground wire, connect it to the green screw terminal. Again, tighten the screw securely.
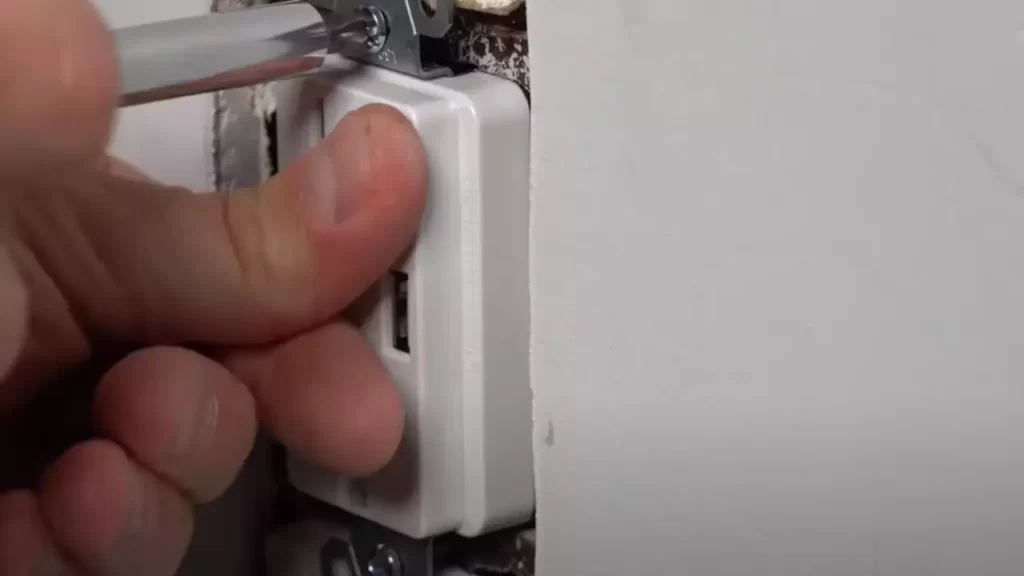
Attaching the USB outlet to the electrical box
With the wires properly connected, it’s time to attach the USB outlet to the electrical box. Carefully insert the USB outlet into the box, aligning the screw holes with those in the electrical box. Secure the outlet in place by using the provided screws. Make sure the outlet is flush with the wall and tighten the screws snugly.
Testing the new USB outlet
Now that you have installed the USB outlet, it’s important to test it before using it. Turn the power back on, and use a USB cable to connect your device to the outlet. Check if your device starts charging. If it does, congratulations! You have successfully installed a USB outlet. If not, double-check your wiring connections and make sure everything is properly connected.
Installing a USB outlet is a simple and straightforward process. By following these steps and taking necessary safety precautions, you can enjoy the convenience of having USB charging capabilities right at your fingertips.
Tips For Safe And Effective Installation
Following the Manufacturer’s Instructions
When it comes to installing a USB outlet, it is important to follow the manufacturer’s instructions carefully. These instructions are designed to ensure a safe and effective installation. By adhering to the manufacturer’s guidelines, you can avoid potential issues and ensure that your USB outlet functions properly.
Ensuring Proper Grounding for the USB Outlet
Proper grounding is crucial for the safe operation of any electrical device, including USB outlets. To ensure that your USB outlet is properly grounded, there are a few key steps you should take. First, identify the grounding wire in your electrical box. Then, connect this wire to the grounding terminal on the USB outlet. Finally, double-check that the outlet is securely grounded by using a digital multimeter. This will give you peace of mind that your USB outlet is safe for use.
Double-Checking the Wiring Connections
Before completing the installation process, it is essential to double-check the wiring connections. Make sure that all wires are securely connected and that there are no loose or exposed wires. Loose connections can lead to power interruptions or even electrical hazards. By thoroughly inspecting the wiring connections, you can prevent potential issues and ensure that your USB outlet works effectively.
Replacing any Damaged Electrical Components
Replacing any damaged electrical components is a key step in the safe installation of a USB outlet. Before installing your new USB outlet, check for any damaged wiring, switches, or outlets in your electrical box. If you identify any damaged components, it is crucial to replace them before proceeding. This will help prevent electrical malfunctions, reduce the risk of fires, and ensure the longevity of your USB outlet.
To summarize, installing a USB outlet requires following the manufacturer’s instructions, ensuring proper grounding, double-checking wiring connections, and replacing any damaged electrical components. By adhering to these tips, you can install your USB outlet safely and effectively. Don’t forget to refer to the manufacturer’s instructions throughout the installation process to ensure that you are doing everything correctly. With these precautions in mind, you can enjoy the convenience of USB charging while prioritizing safety in your home.
Common Troubleshooting Issues
USB Outlet Not Working
If you’ve recently installed a USB outlet and are experiencing issues with it not working, don’t panic. There are a few common troubleshooting steps you can take to determine the cause and find a solution.
1. Check the Wiring
The first thing you should do is check the wiring of the USB outlet. Ensure that the wires are securely connected and properly attached to the corresponding terminals. Check for any loose or damaged wires that may be causing the issue. If you notice any issues with the wiring, it’s important to fix them before proceeding.
2. Test the Outlet
To determine if the USB outlet itself is the problem, try plugging in different devices into the USB ports. If none of the devices are charging or being recognized, it may indicate a faulty outlet. In this case, it’s advisable to replace the USB outlet with a new one.
3. Verify the Circuit
Sometimes, the USB outlet may not be receiving power due to a tripped circuit breaker. Check the circuit breaker panel and ensure that none of the breakers have tripped. If you find a tripped breaker, reset it and see if the USB outlet starts working again. If the breaker continues to trip, it may indicate an overloaded circuit, and you should consider redistributing the load or consulting a licensed electrician.
Overheating or Burning Smell
If you notice an overheating sensation or a burning smell coming from your USB outlet, it’s crucial to address the issue immediately. Ignoring these signs can lead to potential fire hazards and damage to your electrical system.
1. Turn Off Power
First and foremost, turn off the power to the USB outlet from the circuit breaker panel. This will ensure that there is no electrical current flowing to the outlet, reducing the risk of accidents.
2. Inspect for Damage
Carefully inspect the USB outlet for any visible signs of damage, such as melted plastic, char marks, or frayed wires. If you notice any of these issues, it’s important to replace the USB outlet as soon as possible.
3. Review Load Capacity
Overloading the USB outlet can also cause overheating. Review the device’s load capacity and ensure that you are not exceeding its recommended limit. If you’ve connected multiple high-power devices, consider removing some to reduce the load on the outlet.
Tripping Circuit Breaker
If your USB outlet repeatedly trips the circuit breaker, it can be frustrating. However, this can often be resolved by taking a few simple steps.
1. Check the Load
Confirm that the total load on the USB outlet is not exceeding its capacity. High-power devices can put strain on the circuit and cause it to trip. Consider disconnecting some devices or distributing the load across multiple outlets.
2. Investigate Faulty Devices
Faulty devices can also cause the circuit breaker to trip. Disconnect all devices from the USB outlet and reconnect them one by one. If a specific device consistently results in the circuit breaker tripping, it may be faulty and require repair or replacement.
3. Seek Professional Help
If you’ve followed the above steps and are still experiencing issues with the circuit breaker tripping, it’s advisable to seek assistance from a licensed electrician. A professional can assess the electrical system and take appropriate measures to resolve the problem. Remember, working with electricity can be dangerous, so it’s best to leave complex electrical work to the experts.
Taking the time to troubleshoot and address common issues with USB outlets can help ensure the safety and functionality of your electrical system. By following the steps outlined above, you can identify and resolve problems effectively. If you encounter any difficulties or feel unsure about performing any electrical work, always consult a qualified professional to avoid any potential hazards.
Troubleshooting Steps
Checking for loose wiring connections
One of the first troubleshooting steps you should take when installing a USB outlet is to check for any loose wiring connections. Loose or improperly connected wires can prevent the outlet from functioning properly or even pose a potential safety hazard. To check for loose wiring connections, follow these steps:
- Turn off the power to the outlet by switching off the circuit breaker that controls the electrical circuit connected to the outlet.
- Remove the outlet cover plate using a screwdriver.
- Inspect the wiring connections to ensure they are secure. Tighten any loose screws or connections using a screwdriver.
- If any wires appear frayed or damaged, they may need to be replaced. Consult a professional electrician for assistance.
- Once all the wiring connections are secure, replace the outlet cover plate.
- Turn the power back on by switching on the circuit breaker.
Verifying the compatibility of the USB outlet with your devices
Another troubleshooting step to consider is verifying the compatibility of the USB outlet with your devices. Not all USB outlets are compatible with all devices, as different devices may require different charging specifications. To ensure compatibility, follow these guidelines:
- Check the USB outlet’s specifications for the voltage and amperage it offers. Compare these specifications with the charging requirements of your devices.
- Ensure that the USB outlet supports the charging standards required by your devices, such as USB 2.0, USB 3.0, or USB-C.
- If you have multiple devices with different charging requirements, consider installing a USB outlet that offers multiple ports, each designed for a specific charging standard.
- If your devices are not compatible with the installed USB outlet, you may need to use an adapter or purchase a different USB outlet that meets their charging requirements.
Inspecting the circuit breaker panel for any issues
In some cases, issues with the USB outlet may stem from problems with the circuit breaker panel. To inspect the circuit breaker panel for any issues, follow these steps:
- Ensure your hands are dry and protected before working with the circuit breaker panel.
- Open the circuit breaker panel door using the appropriate tools, following the manufacturer’s instructions.
- Inspect the circuit breaker switches for any that have tripped or are in the “off” position. If you find any, switch them back to the “on” position.
- If a circuit breaker repeatedly trips after being switched on, it may indicate an overloaded circuit. Consider redistributing the electrical load or consulting a professional electrician.
- Check for any loose or damaged wires connected to the circuit breaker switches. If you find any, tighten or replace them as needed.
- Close the circuit breaker panel door securely.
By performing these troubleshooting steps, you can identify and resolve common issues that may arise when installing a USB outlet. Remember, if you encounter any difficulties or are unsure about any aspect of the installation process, it’s always best to consult a qualified professional to ensure your safety and the proper functioning of the USB outlet.
Frequently Asked Questions
Can I Install A Usb Outlet Myself?
Yes, installing a USB outlet is a relatively simple and straightforward process that most homeowners can do themselves. Just make sure to turn off the power before installation and follow the provided instructions carefully.
What Tools Do I Need To Install A Usb Outlet?
To install a USB outlet, you will typically need a screwdriver, wire cutters, wire strippers, and a voltage tester. These basic tools should be sufficient for a standard installation, but it’s always a good idea to consult the specific instructions provided with the outlet.
Will A Usb Outlet Fit In My Existing Electrical Box?
Most USB outlets are designed to fit in the standard electrical box found in homes. However, it’s important to check the dimensions of your existing box and compare them to the specifications of the USB outlet you plan to install to ensure a proper fit.
Are Usb Outlets Compatible With All Devices?
USB outlets are compatible with the majority of devices that charge via USB, such as smartphones, tablets, and portable speakers. However, it’s always best to check the power requirements of your specific devices and make sure they are within the range supported by the USB outlet you choose.
Conclusion
Installing a USB outlet is a simple way to enhance the functionality of your home or workspace. With just a few easy steps, you can conveniently charge your devices without the need for adapters or power bricks. By following the instructions provided in this guide, you can successfully install a USB outlet and enjoy the convenience it offers.
So why wait? Upgrade your space today and streamline your charging experience.