To install a transfer switch for a home generator, you need to follow a precise set of instructions that ensure safe and efficient operation. In this guide, we will provide you with simple steps to help you complete the installation process successfully.
Introducing a transfer switch to your home generator system is an essential step in ensuring reliable power supply during outages. A transfer switch acts as a crucial intermediary between your home’s electrical panel and the generator, allowing you to easily switch from grid power to generator power without any hassle.
This not only protects the generator from damaging power surges but also ensures the safe transmission of electricity to your home’s appliances and circuits. By following the correct installation procedures, you can enjoy uninterrupted power during emergencies and have peace of mind knowing that your home is ready for any power outage.
Assessing Power Needs For Your Home
Calculate your power needs based on essential appliances
To install a transfer switch for your home generator, it is crucial to first assess your power needs accurately. By identifying the essential appliances and devices that require electricity during a power outage, you can determine the wattage required to keep them running smoothly.
Here’s a step-by-step guide to help you calculate your power needs:
- Create a list of all the appliances and devices that are vital for your household. This may include items such as refrigerators, sump pumps, heating systems, and medical equipment.
- Consult the owner’s manual or the rating plate on each appliance to find the wattage or amperage it consumes.
- Convert the amperage to wattage by multiplying it with the voltage (usually 120 volts in residential areas).
- Estimate the total power requirement by adding up the wattage of all the essential appliances.
For example, if you have a refrigerator consuming 1500 watts, a sump pump using 800 watts, and a heating system requiring 2500 watts, your total power requirement would be 4800 watts.
Consult a professional electrician for an accurate assessment
While calculating your power needs can give you a rough estimate, it is always recommended to consult a professional electrician for an accurate assessment. They have the expertise to consider various factors that may affect your power requirements, such as peak loads, power surge protection, and device compatibility.
A licensed electrician can also evaluate your electrical panel and recommend the appropriate size of the transfer switch. This ensures that your generator can supply enough power to your essential appliances without overloading the system.
Moreover, a professional assessment helps you identify any potential electrical hazards and ensures that the installation complies with local building codes. This not only guarantees the safety of your home but also prevents any future issues that may arise due to an inadequate power supply.
By seeking the assistance of a qualified electrician, you can rest assured that your transfer switch installation will be tailored to your specific power needs, providing you with peace of mind during unexpected power outages.
Understanding The Basics Of A Transfer Switch
When it comes to powering your home during an unexpected power outage, having a generator is a smart investment. However, in order to ensure a safe and efficient backup power system, it is crucial to understand the basics of a transfer switch. A transfer switch is an essential component that allows you to connect your generator directly to your home’s electrical system, providing a seamless transition from utility power to generator power and back again.
Definition and Purpose of a Transfer Switch
A transfer switch is an electrical device that acts as a mediator between your generator and your home’s electrical system. Its primary purpose is to ensure that power is distributed safely and effectively during a power outage. When the electricity from the utility company is interrupted, the transfer switch detects the power loss and automatically transfers the electrical load to the generator. This prevents any damage to your generator and also eliminates the risk of backfeeding, where electricity from the generator is sent back into the utility lines, posing a serious safety hazard to utility workers.
Different Types of Transfer Switches Available
There are different types of transfer switches available, each with its own unique features and benefits. Here are a few common types:
| Type | Description |
|---|---|
| Manual Transfer Switch | Requires manual intervention to switch the power source between the generator and the utility |
| Automatic Transfer Switch | Automatically senses a power outage and switches the power source to the generator |
| Load Center Transfer Switch | Integrated transfer switch with a panel that combines both the electrical panel and the transfer switch into one unit |
Benefits of Using a Transfer Switch
Using a transfer switch for your home generator offers a range of benefits:
- Enhanced Safety: A transfer switch ensures that the generator power is isolated from the utility lines, reducing the risk of electrical shock or fire hazards.
- Convenience: With a transfer switch, you can seamlessly switch from utility power to generator power without the need to manually unplug and plug in the generator.
- Efficiency: A transfer switch allows you to distribute power to essential circuits or even your entire home, enabling you to use your generator’s capacity more efficiently.
- Protection for Appliances: By using a transfer switch, you can safeguard sensitive appliances and electronics by isolating them from power surges that can occur when the utility power is restored.
Installing a transfer switch is a crucial step in ensuring the safe and efficient operation of your home generator. By understanding the basics of a transfer switch, you can make an informed decision when selecting the right type for your needs and enjoy the benefits it provides during a power outage.
Step 1: Choosing The Right Location
Choosing the right location for your transfer switch is a crucial first step in the process of installing your home generator. In this step, we will consider the accessibility and safety factors as well as determine the optimal location for the transfer switch.
Considering Accessibility and Safety Factors
Before determining the location for your transfer switch, it is important to consider both accessibility and safety factors. These factors will ensure ease of use and protect both you and your home in case of an emergency.
When it comes to accessibility, you want to choose a location that is easily reachable. This means selecting a spot that is not obstructed by furniture, boxes, or any other objects that can hinder your ability to reach the switch quickly. Additionally, it’s important to choose a location that allows for easy maneuverability, especially in the event of a power outage when time is of the essence.
In terms of safety, you should select a location that minimizes the risk of electrical hazards. Keep the transfer switch away from water sources, such as sinks or pipe joints, to avoid potential water damage or electrocution. Avoid placing it near flammable materials, such as gasoline or propane tanks, to prevent any fire hazards. Furthermore, make sure the location is well-ventilated and provides sufficient space for the transfer switch to dissipate heat effectively.
Determining the Optimal Location for the Transfer Switch
Now that you have taken accessibility and safety factors into account, it’s time to determine the optimal location for your transfer switch. This location will ultimately depend on several factors peculiar to your home and electrical system.
Here are some key points to consider when deciding the optimal location:
- Proximity to the main electrical panel: The transfer switch should be installed as close to the main electrical panel as possible, minimizing the need for long cable runs and potential voltage drops.
- Available wall space: Choose a location on a clear wall that has enough space to accommodate the transfer switch and any necessary electrical connections.
- Accessible cable pathways: Ensure that the location allows for easy installation of the necessary conduits or cable pathways, avoiding any obstructions that may impede the flow of cables.
- Visibility and labeling: Position the transfer switch in a visible location that can be easily identified during an emergency, and consider labeling it for quick and accurate identification.
By carefully considering accessibility and safety factors and taking into account the unique characteristics of your home, you can determine the optimal location for your transfer switch. This step sets the foundation for a successful installation, ensuring that your home generator is ready to provide reliable power in times of need.
Step 2: Gathering The Necessary Tools And Equipment
Before you begin the installation process for your home generator transfer switch, it’s important to gather all the necessary tools and equipment. Having everything you need at hand will not only make the installation smoother but also save you time and frustration. To help you with this step, we’ve prepared a comprehensive list of tools and equipment required for the installation.
List of Tools and Equipment
Here are the essential tools and equipment you’ll need to install your transfer switch:
1. Screwdrivers
Invest in a set of screwdrivers with various sizes and types, including Phillips and flathead screwdrivers. These will come in handy when securing wires and connecting components.
2. Wire Strippers
To prepare the wires for connection, you’ll need a good pair of wire strippers. These specialized tools make it easy to remove the insulation from the wires without damaging the conductors.
3. Pliers
Having a pair of pliers is essential for this installation. They will help you grip and twist the wires, ensuring secure connections.
4. Electric Drill
An electric drill will be necessary when mounting the transfer switch on the wall. Make sure you have the appropriate drill bits for the type of surface you’ll be drilling into.
5. Level
To ensure the transfer switch is mounted correctly, a level is indispensable. Use it to make sure the switch is perfectly horizontal or vertical, depending on the manufacturer’s instructions.
6. Electrical Tape
Electrical tape is an essential item for securing wire connections and insulating exposed wires. Make sure you have enough on hand to complete the installation without interruptions.
7. Wire Nuts and Connectors
Stock up on wire nuts and connectors of various sizes. These will be instrumental in joining wires together securely and maintaining proper electrical connections.
8. Circuit Tester
Before and after the installation, it’s crucial to test the circuits to ensure they’re properly wired and functioning correctly. A circuit tester will help you identify any issues and make the necessary adjustments.
Tips for Sourcing the Required Materials
When gathering the tools and equipment for the installation, keep these tips in mind:
- Check your local hardware store: Visit your nearest hardware store to find most, if not all, the tools and materials you need. They often carry a variety of electrical supplies.
- Compare prices online: Online retailers often offer competitive prices, so it’s worth browsing different websites to find the best deals on specific tools or equipment.
- Consider borrowing or renting: If you don’t anticipate using certain tools frequently, borrowing from a friend or family member, or renting from a tool rental service, can be a cost-effective option.
- Double-check compatibility: Ensure that the tools and equipment you purchase are compatible with your specific transfer switch model. Check the manufacturer’s guidelines or consult with a professional if needed.
By following this comprehensive list of tools and equipment needed for the installation, and keeping these sourcing tips in mind, you’ll be well-prepared to tackle the next steps in installing your home generator transfer switch.
Step 3: Preparing For Installation
Before installing a transfer switch for your home generator, it is important to properly prepare for the installation process. This step involves turning off the main power supply and identifying the correct breaker for the transfer switch. Let’s dive into the details of each task.
Turning off the main power supply
The first thing you need to do is ensure the safety of everyone in your household. To do this, you must turn off the main power supply. This step is crucial as it will prevent any electrical accidents or mishaps during the installation process. It’s vital to follow this step meticulously to avoid any potential damage to electrical components or risk of injury.
To turn off the main power supply, locate your home’s main electrical panel. This panel is usually found in a basement, garage, or utility room. Look for the main circuit breaker, which is typically a large breaker switch labeled “Main” or “Main Power.” It’s important to note that this breaker should be clearly marked to avoid any confusion.
Once you have located the main circuit breaker, switch it off by flipping the switch to the “Off” position. This will cut off the power supply to the entire house and ensure that you can proceed with the installation safely.
Identifying the correct breaker for the transfer switch
After turning off the main power supply, the next step is to identify the correct breaker for the transfer switch. This breaker will be responsible for connecting your home’s electrical system to the generator during a power outage.
To find the correct breaker, carefully examine your electrical panel’s wiring diagram. This diagram is usually provided on the inside of the panel door or in the instruction manual. Refer to the diagram to identify the specific breaker that controls the circuits you want to connect to the generator.
When identifying the correct breaker, it’s essential to match the amperage rating of the transfer switch to the amperage rating of the breaker. This ensures compatibility and prevents overloading. Always consult the manufacturer’s instructions or an electrician if you are uncertain about the correct breaker.
By properly turning off the main power supply and identifying the correct breaker for the transfer switch, you are now prepared for the installation process. These steps are crucial in ensuring a safe and successful installation of your home generator’s transfer switch. In the next step, we will guide you through the actual installation process.
Step 4: Mounting The Transfer Switch
Securing the Transfer Switch to the Wall
Now that you have prepared the area for installation and have determined the proper location, it’s time to secure the transfer switch to the wall. This step is crucial to ensure the safe and efficient functioning of your home generator. Follow these steps to mount the transfer switch securely:
- Begin by positioning the transfer switch against the wall at the chosen location. Make sure it is level and align it with the mounting holes.
- Using a pencil or marker, mark the positions of the mounting holes on the wall.
- Drill the necessary holes into the wall at the marked positions. The size of the drill bit will depend on the type of wall material, so refer to the manufacturer’s instructions for the appropriate size.
- Insert wall anchors into the drilled holes. This will provide additional support and stability for the transfer switch.
- Align the transfer switch with the wall anchors and mounting holes, then fasten it securely to the wall using screws or bolts. Make sure to tighten the screws or bolts properly to prevent any movement or vibrations during operation.
- Double-check that the transfer switch is level and securely attached to the wall. If necessary, make adjustments to ensure a proper fit.
By following these steps, you can ensure that your transfer switch is securely mounted to the wall, providing a stable base for optimal performance and safety.
Ensuring Proper Grounding of the Switch
Grounding the transfer switch is a critical step to ensure the proper functioning and safety of the electrical system. Here’s how you can ensure that your transfer switch is properly grounded:
- Locate the grounding bar or terminal on the transfer switch. This is usually labeled or indicated in the manufacturer’s instructions.
- Ensure that the main electrical service panel is properly grounded. Check that the grounding wire is securely connected to the panel’s grounding bar or terminal.
- Connect one end of a grounding wire to the grounding bar or terminal on the transfer switch, and the other end to the grounding bar or terminal in the main electrical service panel.
- Use a wire nut or a suitable connector to secure the grounding wire to each terminal.
- Double-check all the connections to ensure they are tight and secure.
Proper grounding is essential to protect your electrical system from potential electrical faults and to provide a safe pathway for electric current in the event of a power outage. By following these steps, you can ensure that your transfer switch is effectively grounded and ready to function smoothly.
Step 5: Connecting The Transfer Switch
Now that you have completed wiring the transfer switch to the main electrical panel, it’s time to move on to the next crucial step – connecting the transfer switch. This step involves properly installing and connecting the transfer switch wires to ensure a seamless and efficient operation of your home generator.
Wiring the transfer switch to the main electrical panel
Before connecting the transfer switch, it is important to understand the wiring process. Ensure that you have identified the designated circuit breaker for the transfer switch in your main electrical panel. This breaker will be responsible for isolating your home’s electrical circuits from the utility power during a power outage.
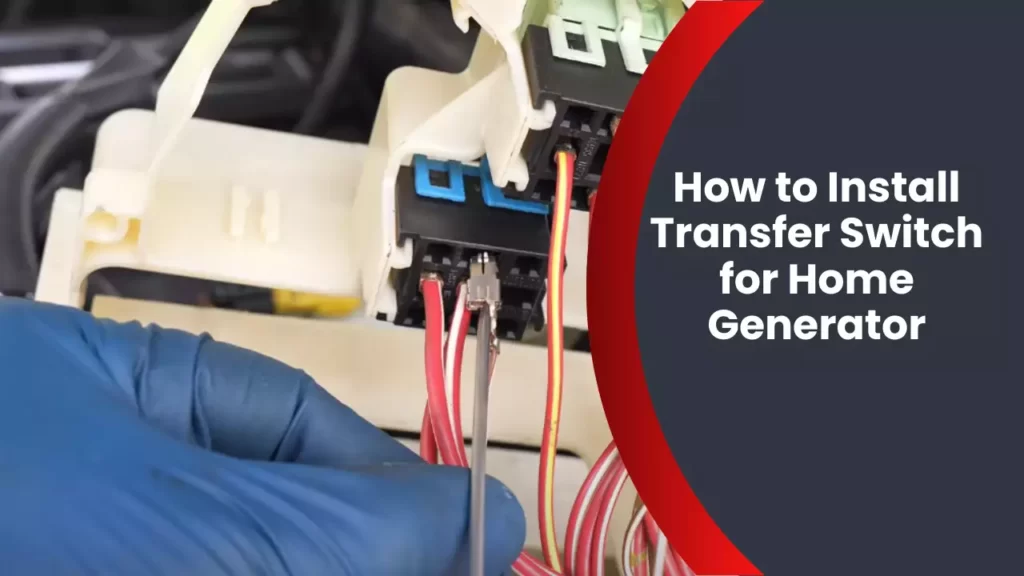
To begin, locate the wires coming from the transfer switch. These wires are typically labeled and color-coded for easier identification. Refer to the manufacturer’s instructions to determine the specific wiring configuration for your transfer switch model.
Next, carefully connect the transfer switch wires to the designated circuit breaker in the main electrical panel. Make sure to follow the correct polarity, which means connecting the black (hot) wire to the breaker’s terminal and the white (neutral) wire to the neutral bus bar. Use appropriate wire connectors or terminal blocks to secure the connections.
Once the transfer switch wires are securely connected, double-check all connections to ensure they are tight and properly insulated. Remember, any loose or faulty connections can not only compromise the functionality of your transfer switch but also pose a safety hazard.
Properly installing and connecting the transfer switch wires
After correctly wiring the transfer switch to the main electrical panel, it’s time to properly install and connect the transfer switch wires. This step ensures that the power from the generator reaches your home’s circuits effectively and safely.
Before proceeding, it is essential to refer to the manufacturer’s instructions specific to your transfer switch model. These instructions will guide you through the proper installation and connection process, ensuring you adhere to the necessary electrical codes and safety regulations.
Follow these general steps to install and connect the transfer switch wires:
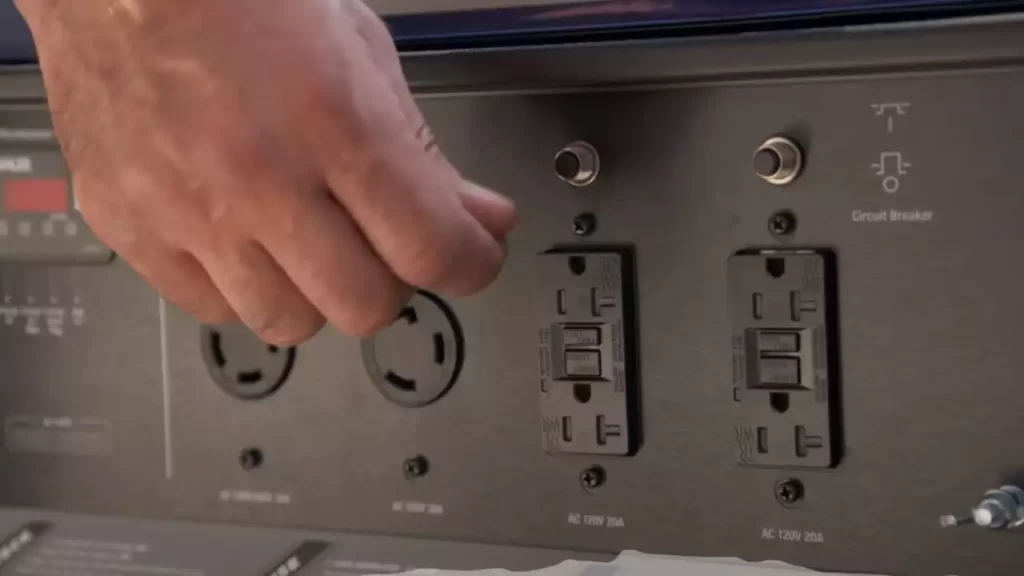
- Locate the wires coming from your generator and the transfer switch. These wires are usually labeled and color-coded for easier identification.
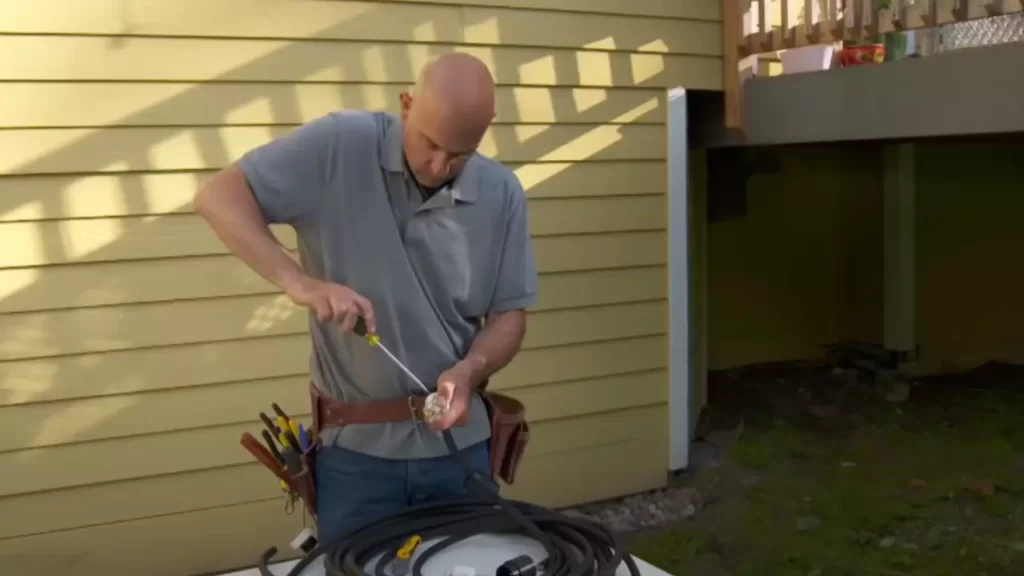
- Carefully strip a small portion of the insulation from the end of each wire.
- Position the transfer switch wires and the generator wires side by side, making sure they do not touch each other or any other metallic objects.
- Using appropriately sized wire connectors or crimp sleeves, connect the corresponding wires together. For example, connect the black (hot) wire from the generator to the black (hot) wire from the transfer switch.
- After connecting each wire, gently tug on them to ensure they are securely attached and will not come loose.
Once all the transfer switch wires are connected, visually inspect the connections to ensure they are properly insulated and free from any bare wires. This step is crucial to prevent any potential electrical hazards.
With the transfer switch wires properly installed and connected, you are one step closer to having a reliable and efficient standby power solution for your home. However, it is essential to conduct a thorough test of the transfer switch and generator system before relying on it during a power outage.
Step 6: Testing And Commissioning
After completing the installation of a transfer switch for your home generator, it is crucial to conduct a thorough inspection before moving on to testing and commissioning. This step ensures that all the connections are secure and the switch is installed correctly. Once you have confirmed that the installation is done properly and all the safety measures have been followed, you can proceed with testing the transfer switch and the generator.
Conducting a thorough inspection of the installation
Before proceeding with testing and commissioning, it is important to conduct a thorough inspection of the entire installation to ensure everything is in order. Here’s what you need to check:
- Connections: Inspect all the wiring connections and make sure they are properly secured. Tighten any loose connections and ensure that there is no visible damage to the wires.
- Grounding: Check the grounding system to ensure it is in proper working condition. Grounding is essential for protecting your home’s electrical system from damage.
- Labels and markings: Verify that all the wires, switches, and components are properly labeled and marked for easy identification. This will help troubleshoot any issues that may arise in the future.
- Safety measures: Double-check all the safety measures, such as proper installation of circuit breakers, surge protectors, and disconnect switches. Confirm that these safety features are installed and functioning correctly.
Testing the transfer switch and generator
Once you have completed the inspection and confirmed that everything is in order, it’s time to test the transfer switch and the generator. Testing both these components is crucial to ensure that they are functioning as intended. Here’s how you can perform these tests:
- Testing the transfer switch: Start by simulating a power outage or disconnecting the utility power supply. Turn on your generator and then switch on the transfer switch. Ensure that the switch successfully transfers power from the generator to the designated circuits. Test each circuit individually to ensure that power is being supplied correctly. Additionally, check if the switch is automatically transferring power back to the utility supply once it’s restored.
- Testing the generator: While the generator is running and supplying power, check if it is operating smoothly without any unusual noises or vibrations. Measure the voltage output of the generator using a multimeter to ensure it is within the acceptable range. Also, make sure that the generator is supplying power to all the designated circuits without any issues.
When conducting these tests, it is essential to prioritize safety. Make sure to follow all recommended safety practices and guidelines provided by the manufacturer. If you encounter any issues during the testing process, it’s best to consult a professional electrician to identify and resolve the problem. Proper testing and commissioning of the transfer switch and generator will give you the peace of mind knowing that your backup power system is ready to support your home during unexpected power outages.
Regular Maintenance For Optimal Performance
Cleaning and inspecting the transfer switch
Regular maintenance is crucial for ensuring optimal performance of your home generator’s transfer switch. Over time, dust, dirt, and debris can accumulate on the transfer switch, hindering its functionality. To keep it in top shape, implement a cleaning and inspection routine.
Start by switching off the power supply to the generator and wearing protective gloves. Carefully remove the cover of the transfer switch, exposing the internal components. Use a soft, dry cloth or a brush to gently wipe away any dirt or dust that may have gathered on the switch. Pay close attention to the circuit breakers, terminals, and contact points.
While cleaning, it’s essential to inspect the transfer switch for any signs of damage or wear. Look out for loose connections, broken wires, or evidence of overheating. If you notice any issues, it’s important to address them promptly to prevent malfunctions and potential hazards.
Once you’ve cleaned and inspected the transfer switch, replace the cover securely, ensuring it is properly aligned. Remember to restore power to the generator before testing its functionality.
Checking wires and connections for any signs of damage
In addition to cleaning and inspecting the transfer switch, it’s vital to examine the wires and connections for any signs of wear or damage. Over time, wires can become loose or develop corrosion, jeopardizing the performance of your home generator.
Start by visually inspecting the wires and connections, looking for any frayed or damaged insulation. If you notice exposed wires or signs of deterioration, it’s crucial to address the issue promptly. Depending on the severity of the damage, you may need to replace the affected wires or connectors.
In some cases, you may need to tighten loose connections to ensure optimal performance. Use a screwdriver or appropriate tool to tighten any loose screws or terminals. Taking this precautionary step can help prevent electrical arcing, which can lead to hazardous situations.
Remember to conduct these checks regularly, especially before and after extended periods of generator use. By paying attention to the condition of the wires and connections, you can ensure that your home generator operates smoothly and reliably.
Troubleshooting Common Issues
Installing a transfer switch for your home generator is a smart and practical solution to ensure uninterrupted power supply during an outage. However, just like any other electrical system, transfer switches can encounter problems that may require troubleshooting. In this section, we will cover the common issues you may encounter with a transfer switch and how to resolve them.
Identifying and resolving common problems with the transfer switch
1. Switch not transferring power: If you find that your transfer switch is not transferring power from the utility to the generator, there could be a few causes. First, check if the generator is running and producing power. Also, ensure that the transfer switch is set to the correct position (usually labeled “Generator” or “Utility”). If everything appears to be in order, it’s possible that the transfer switch itself is faulty and may require repair or replacement.
2. Generator not starting or running: If you’re experiencing difficulties with your generator not starting or running, there are a few things to check. Ensure that there is enough fuel in the generator and that it’s connected properly to the transfer switch. Additionally, check the generator’s fuel filter, spark plugs, and oil levels. If necessary, refer to the generator’s manual for troubleshooting steps specific to your model.
3. Circuit overload: A common problem that can occur with a transfer switch is a circuit overload. This can happen if you attempt to power too many appliances or devices simultaneously. To resolve this issue, identify which circuits are causing the overload and reduce the load by disconnecting non-essential devices. If the problem persists, you may need to consult a qualified electrician to assess your electrical system’s capacity.
When to seek professional help for troubleshooting
1. Electrical expertise required: If you’re unsure about working with electrical systems or lack the necessary knowledge and experience, it’s best to leave troubleshooting to a professional electrician. They have the expertise to safely diagnose and resolve complex electrical issues related to transfer switches.
2. Complex or recurring problems: Some transfer switch problems may require advanced troubleshooting techniques or specialized tools. If you encounter complex issues or problems that keep recurring even after attempting basic troubleshooting steps, it’s recommended to seek professional help. A licensed electrician will have the skills and equipment necessary to diagnose and fix the problem effectively.
3. Safety concerns: If you have concerns about safety or suspect that there may be a dangerous electrical situation, do not attempt to troubleshoot it yourself. Call a professional electrician immediately to assess the situation and ensure the safety of your home and family.
Remember, while troubleshooting common issues with a transfer switch can be done by confident homeowners, it’s essential to prioritize safety and seek professional assistance when needed. By doing so, you can ensure that your transfer switch operates flawlessly, keeping your home powered during any utility outages.
Frequently Asked Questions
Do You Need An Electrician To Install A Generator Transfer Switch?
Yes, an electrician is needed to install a generator transfer switch. It ensures a safe and proper connection between the generator and the electrical system in your home. Hiring an electrician ensures compliance with local codes and ensures the switch is installed correctly.
How Much Does It Cost To Install A Transfer Switch For A Generator?
The cost of installing a transfer switch for a generator can vary, but it typically ranges from $500 to $1,000. It is best to consult with a licensed electrician for an accurate estimate based on your specific needs and requirements.
Where Does The Transfer Switch Go For Whole House Generator?
The transfer switch for a whole house generator should be installed near the main electrical panel of your home. This allows for seamless switching between utility power and generator power during a power outage.
Where Is The Best Place To Put A Generator Transfer Switch?
The best place to put a generator transfer switch is near the main electrical panel. This allows for easy access and efficient switching between utility power and generator power during power outages.
Conclusion
Installing a transfer switch for your home generator is a crucial step in ensuring a smooth power supply during outages. By following the right steps and considering safety precautions, you can confidently secure your generator’s connection to your electrical system.
Remember, always consult a professional electrician if you’re unsure about any aspect of the installation. With a properly installed transfer switch, you can be prepared for unexpected power disruptions and keep your home functioning smoothly. Don’t let power outages catch you off guard – take the initiative to safeguard your home with a transfer switch today.