To install trailer skirting, measure the perimeter of the trailer, cut the skirting panels to fit, attach the panels to the framing using screws or adhesive, and secure the bottom edge with nails or stakes.
Choosing The Right Trailer Skirting Material
Installing trailer skirting is a great way to enhance the appearance and functionality of your mobile home. However, with so many options available in the market, choosing the right trailer skirting material can be a bit overwhelming. The material you select should not only meet your aesthetic preferences but also provide durability and insulation. In this section, we will discuss the important factors to consider when selecting trailer skirting material, popular types of trailer skirting materials, and the pros and cons associated with each option.
Factors to consider when selecting trailer skirting material
Choosing the perfect material for your trailer skirting requires careful consideration of several factors. Let’s take a look at what you need to keep in mind:
- Climate: The climate of your location plays a significant role in determining the ideal skirting material. For colder regions, skirting materials with good insulation properties are crucial to prevent heat loss and reduce energy bills. In contrast, areas with hot climates require materials that can withstand high temperatures and provide proper ventilation.
- Installation ease: Consider the level of difficulty associated with installing different skirting materials. Some options may require professional assistance, while others can be easily installed as a DIY project.
- Durability: Ensure that the skirting material you choose is capable of withstanding the elements and remains intact for an extended period. The material should be resistant to impact, moisture, and pests.
- Aesthetics: Your skirting material should complement the overall appearance of your mobile home. Select a material that aligns with your personal style and enhances the curb appeal of your property.
Popular types of trailer skirting materials
When it comes to trailer skirting, there are several popular materials available in the market. Let’s take a look at some of the commonly used options:
| Material | Pros | Cons |
|---|---|---|
| 1. Vinyl Skirting | – Easy to clean and maintain – Wide variety of colors and styles available – Provides good insulation |
– More expensive compared to other options – May fade over time with exposure to sunlight |
| 2. Metal Skirting | – Durable and long-lasting – Resistant to pests and fire – Provides a modern and sleek look |
– May not have good insulation properties – Can be noisy during heavy rainfall or winds |
| 3. Concrete Skirting | – Extremely durable – Provides excellent insulation and protects against pests – Can be painted or textured to match your home |
– Requires professional installation – Can be expensive and time-consuming to install |
| 4. Faux Stone Skirting | – Offers a realistic stone-like appearance – Lightweight and easy to install – Resistant to rot and pests |
– Limited color options – May not provide the same level of insulation as other materials |
Pros and cons of different trailer skirting materials
Each trailer skirting material has its own set of advantages and disadvantages. Let’s explore them in detail:
- Vinyl Skirting: Vinyl skirting is easy to clean and maintain, making it an ideal choice for homeowners who want convenience. However, it can be relatively more expensive and may fade over time with exposure to sunlight.
- Metal Skirting: Metal skirting provides a sleek and modern look to your mobile home, along with excellent durability and resistance to pests and fire. However, it may lack proper insulation properties and can be noisy during heavy rainfall or winds.
- Concrete Skirting: Concrete skirting is known for its exceptional durability and insulation capabilities. It can protect against pests and be customized to match your home’s aesthetic. However, it requires professional installation, which can be costly and time-consuming.
- Faux Stone Skirting: Faux stone skirting offers a realistic stone-like appearance and is lightweight, making it easy to install. It is resistant to rot and pests. However, it may have limited color options and may not provide the same level of insulation as other materials.
By carefully considering these factors and understanding the pros and cons of each trailer skirting material, you can make an informed decision that best suits your needs and preferences.
Measuring And Preparing For Installation
Accurate Measurement Techniques for Trailer Skirting
Before installing trailer skirting, it’s crucial to take accurate measurements to ensure a proper fit. By measuring the perimeter of your trailer, you will have the correct dimensions for ordering your skirting panels. Here are some measurement techniques to follow:
- Start by measuring the length of each side of your trailer. Use a measuring tape and record the dimensions in feet or inches, whichever you prefer.
- Moving on to the height, measure from the ground to the bottom edge of your trailer to determine the necessary panel length. Make sure to take measurements at multiple points along the trailer’s perimeter to account for any uneven ground or variations in height.
- Next, measure the width of any access points, such as doors or vents, that you want to leave exposed. This will help you determine how much skirting material you’ll need to cut or modify to fit around these areas.
By following these accurate measurement techniques, you can ensure that you order the correct amount of skirting material and achieve a seamless installation.
Tools and Supplies Needed for Installation
To install trailer skirting, you will need the following tools and supplies:
- Skirting panels: Make sure you have enough panels to cover the entire perimeter of your trailer.
- Tape measure: Use a tape measure to take accurate measurements of your trailer.
- Utility knife: A utility knife will be useful for cutting skirting panels to fit around access points or to make any necessary adjustments.
- Drill with screws: You’ll need a drill and screws to secure the skirting panels to the trailer.
- Level: Use a level to ensure that the skirting panels are installed straight and level for a professional finish.
- Caulk: Caulk will help seal any gaps between the skirting panels and the trailer, providing added protection against drafts and pests.
- Protective gloves and safety glasses: It’s always important to prioritize safety when handling tools and materials.
Preparing the Trailer for Skirting Installation
Before installing the skirting panels, it’s essential to prepare your trailer:
- Clean the area: Remove any dirt, debris, or vegetation from the perimeter of your trailer. This will provide a clean surface for the skirting panels to adhere to.
- Inspect for damages: Take a thorough look at your trailer to identify any damages that need to be addressed before installation. Repair any dents, cracks, or holes to ensure a smooth installation process.
- Apply a waterproofing barrier: Consider applying a waterproofing barrier, such as a weather-resistant sealant, along the bottom edge of your trailer. This will provide an extra layer of protection against moisture and help prolong the lifespan of your skirting.
By adequately preparing your trailer, you’ll create a solid foundation for the skirting installation and ensure a durable and long-lasting result.
Step-By-Step Guide To Installing Trailer Skirting
Trailer skirting not only enhances the appearance of your trailer but also provides insulation and protection against pests. If you’re looking to install trailer skirting, we’ve got you covered. In this step-by-step guide, we’ll walk you through the process of installing trailer skirting, ensuring a secure and professional finish.
Clearing the area and marking the installation site
Before you start installing the trailer skirting, it’s important to clear the area around the trailer and ensure a smooth surface for installation. Remove any debris or obstacles that might impact the installation process. Once cleared, mark the installation site using stakes and string to create a guide for the skirting.
Installing support brackets or frames for the skirting
To ensure stability and durability, installing support brackets or frames for the skirting is crucial. Begin by measuring the length of the trailer sides and cut 2×4 wooden boards accordingly. Attach these boards horizontally along the bottom edges of the trailer using metal brackets or screws. Make sure they are evenly spaced and securely fastened to provide a firm foundation for the skirting.
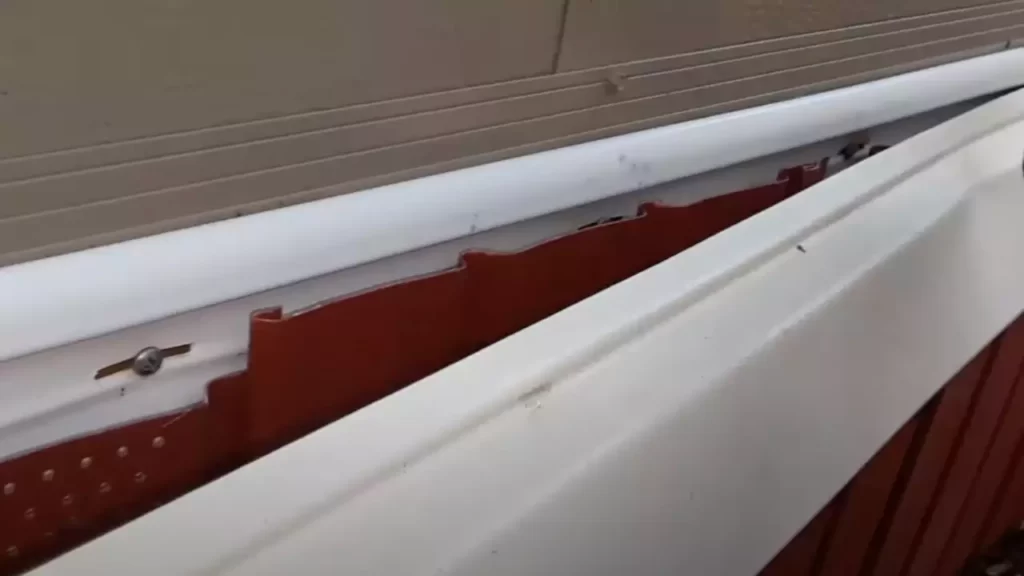
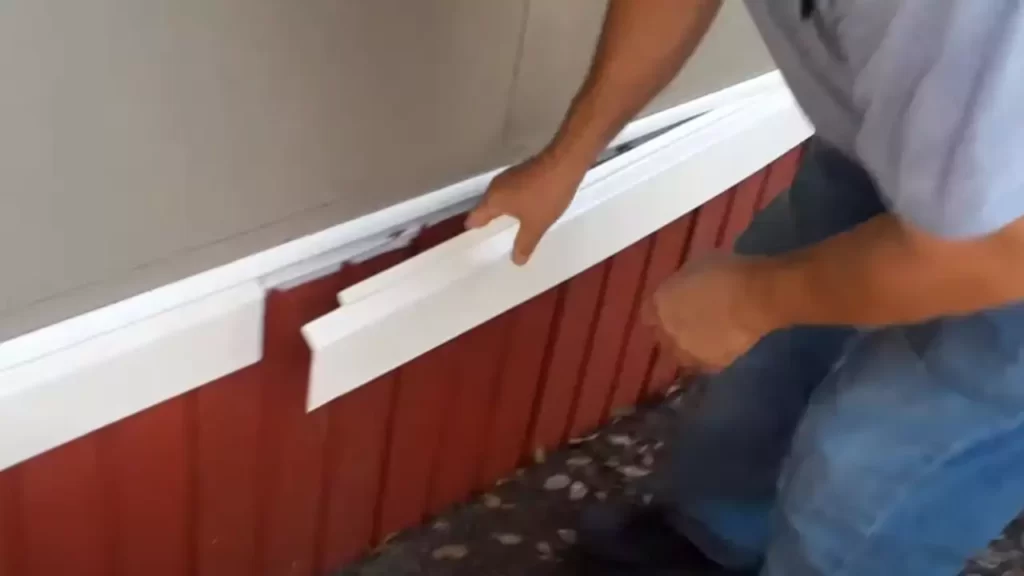
Cutting and fitting the skirting panels
Once the support brackets or frames are in place, it’s time to cut and fit the skirting panels. Measure the distance between the support brackets or frames. Using these measurements, cut the skirting panels to the appropriate size. Ensure the panels are cut with precision and accuracy for a seamless look. Fit the panels between the support brackets or frames, making sure they align perfectly and provide complete coverage.
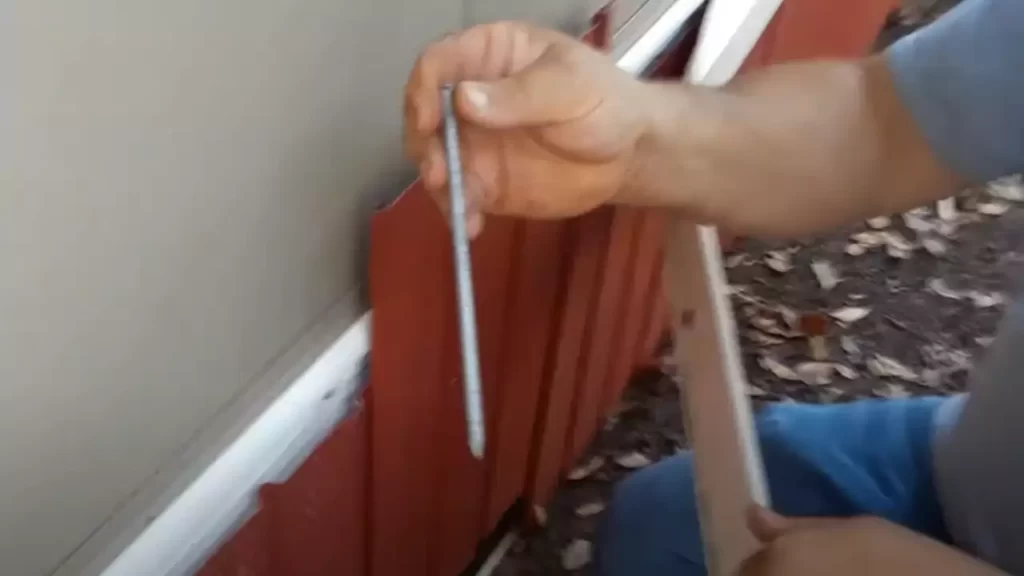
Securing the panels and ensuring a tight fit
After fitting the skirting panels, it’s important to secure them and ensure a tight fit. Start by attaching the panels to the support brackets or frames using screws or nails. Place the fasteners at regular intervals to maintain stability and prevent the panels from sagging. Check each panel for any gaps or loose areas. If needed, adjust the panels and tighten the fasteners to achieve a secure and snug fit.
Sealing and finishing the skirting installation
To complete the installation process, it’s essential to seal and finish the skirting. Apply a weather-resistant sealant to the edges and corners of the skirting panels to prevent moisture and pest infiltration. Additionally, consider adding a finishing touch by installing trim or molding along the top edges of the skirting. This will not only enhance the appearance but also provide additional protection against the elements.
Following these step-by-step instructions will ensure a successful trailer skirting installation. Not only will your trailer look more appealing, but you’ll also enjoy the benefits of insulation and protection. Get started on installing your trailer skirting today!
Maintaining And Repairing Trailer Skirting
Maintaining and repairing trailer skirting is an essential part of ensuring the longevity and efficiency of your trailer. Proper maintenance not only protects your investment but also keeps your trailer looking great. In this section, we will discuss some tips for the proper maintenance of trailer skirting, signs of damage or wear to look out for, and how to repair or replace damaged skirting panels. Let’s dive in!
Tips for proper maintenance of trailer skirting
To ensure your trailer skirting remains in top condition, follow these tips:
- Regularly clean the skirting: Use a mild soap and water solution to clean your skirting panels. Gently scrub away any dirt, debris, or mold that may have accumulated on the surface.
- Inspect for damage: Regularly inspect your skirting for any signs of damage, such as cracks, holes, or loose panels. Addressing these issues promptly can prevent further damage.
- Secure loose panels: If you notice any loose skirting panels, make sure to secure them properly. Loose panels not only compromise the appearance but also reduce the skirting’s effectiveness in insulating your trailer.
- Apply protective coating: Consider applying a protective coating, such as a sealant, to your trailer skirting. This helps to increase its durability and protect it from harsh weather elements.
- Trim vegetation around the skirting: Ensure that there is enough space between the skirting and any nearby vegetation. This prevents vegetation from causing damage or obstructing the skirting in any way.
Signs of damage or wear to look out for
Regularly inspecting your trailer skirting allows you to catch signs of damage or wear early on. Some signs to watch out for:
- Cracks or holes: These can compromise the integrity of your skirting and allow pests or moisture to enter your trailer.
- Warped or misshapen panels: This may indicate water damage or structural issues that need to be addressed.
- Faded or discolored panels: Sun exposure can cause fading or discoloration, which not only affects the appearance but also indicates potential deterioration.
- Loose or missing fasteners: Check if any fasteners holding the skirting panels in place are loose or missing. Replace or tighten them as needed.
How to repair or replace damaged skirting panels
When damage or wear is detected, it is crucial to repair or replace the affected skirting panels promptly. Here are the steps to follow:
- Remove the damaged panel: Unscrew or unclip the damaged panel from the frame of the trailer.
- Clean the area: Inspect the area where the damaged panel was attached and clean it thoroughly.
- Measure and cut new panel: Take precise measurements of the open space and cut a replacement panel to fit.
- Attach the new panel: Use screws or clips to secure the new panel to the frame. Ensure it is properly aligned and tightly secured.
- Inspect and test: After completing the replacement, inspect the repaired skirting and ensure it fits snugly and looks seamless.
Taking the time to maintain and repair your trailer skirting pays off in the long run. By following these simple tips and being proactive in detecting and addressing damage, you can extend the life of your skirting and keep your trailer looking its best.
Additional Considerations For Trailer Skirting Installation
Insulating benefits of trailer skirting
One of the key advantages of installing trailer skirting is the insulation it provides. The space underneath a mobile or seasonal trailer is often exposed to cold air or hot temperatures, which can make the interior uncomfortable and increase energy consumption. Trailer skirting acts as a barrier, reducing airflow and creating an insulating layer that helps maintain a constant temperature inside the trailer. This not only improves the overall comfort but also lowers heating and cooling costs.
Consideration for mobile or seasonal trailers
Mobile or seasonal trailers have specific needs when it comes to skirting installation. Unlike permanent residences, these trailers are designed to be moved and may spend a significant portion of the year in different locations. When installing skirting for such trailers, it’s important to ensure that the skirting material is lightweight, easy to install, and durable enough to withstand transportation and potential weather conditions. Additionally, it’s important to choose a skirting option that allows for easy access to utilities and storage spaces that may be located underneath the trailer.
Compliance with local regulations and guidelines
Before installing trailer skirting, it’s crucial to consider local regulations and guidelines. Different areas may have specific requirements regarding the use of skirting materials, heights, and overall aesthetics. It’s essential to research and understand these regulations to ensure compliance. Failure to adhere to local guidelines may result in fines, the need to remove or replace skirting, or other potential legal consequences. By taking the time to research and comply with local regulations, you can avoid unnecessary expenses and ensure that your skirting installation is in line with the requirements of your area.
Frequently Asked Questions
What Is The Cheapest Way To Put Skirting On A Mobile Home?
The most cost-effective way to install skirting on a mobile home is by using vinyl panels. Vinyl skirting is affordable, durable, and easy to install. It provides a clean and polished finish while protecting the underside of the mobile home.
How Do You Secure Skirting On A Mobile Home?
Secure skirting on a mobile home by using durable fasteners like screws or nails. Make sure to attach the skirting firmly to the home’s foundation or frame to prevent it from coming loose. Regularly inspect and tighten any loose fasteners to maintain the skirting’s security.
How Much Skirting Is Needed For A 14X70 Mobile Home?
Approximately 280 linear feet of skirting is needed for a 14×70 mobile home for optimal coverage and protection.
How Much Does It Cost To Put Skirting Around A Trailer?
Skirting for a trailer typically costs between $500 to $2,000. Prices will vary based on the materials used, the size of the trailer, and the complexity of the installation.
Conclusion
Installing trailer skirting is an important step in maintaining the durability and insulation of your mobile home. By following the step-by-step guide provided in this blog post, you can successfully install trailer skirting without any hassle. Remember to choose the right materials, measure accurately, and secure the skirting properly.
By doing so, you will create a more enjoyable and energy-efficient living space. Happy skirting!