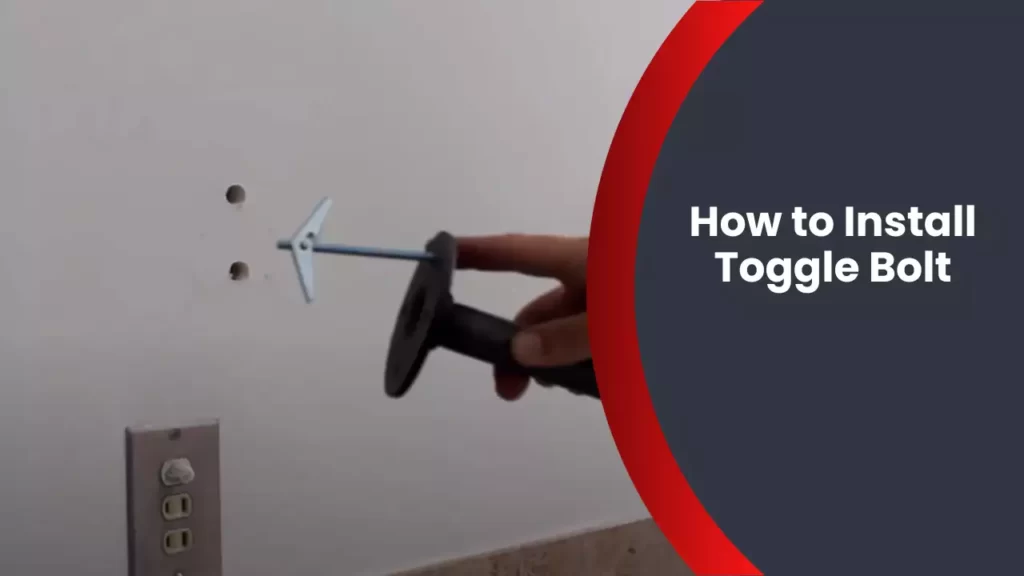
To install a toggle bolt, start by drilling a hole in the wall and inserting the bolt, then tighten it using a screwdriver. A toggle bolt is a type of anchor that provides secure support for heavy objects when installing them on hollow walls.
Whether you are hanging a shelf to display your favorite books or mounting a TV to optimize your viewing experience, implementing toggle bolts is essential. This versatile anchoring mechanism is designed to distribute weight evenly, minimizing the risk of damage to your walls.
By following a few simple steps, you can ensure a strong and reliable installation that will endure over time. We will guide you through the process of installing toggle bolts, providing you with the necessary knowledge to confidently tackle your next home improvement project.
What Is A Toggle Bolt And When To Use It
Definition and Purpose of a Toggle Bolt
A toggle bolt, also known as a butterfly anchor or a toggle anchor, is a type of fastener used to secure heavy objects to drywall or other materials where standard screws or nails may not be sufficient. It consists of a threaded bolt with wings that open up behind the wall when inserted. The purpose of a toggle bolt is to distribute weight across a larger area, providing a secure anchor point.
Situations Where Toggle Bolts are the Best Option
Toggle bolts are the best option in various situations where you need to hang or mount heavy items on drywall or other materials. Here are a few examples:
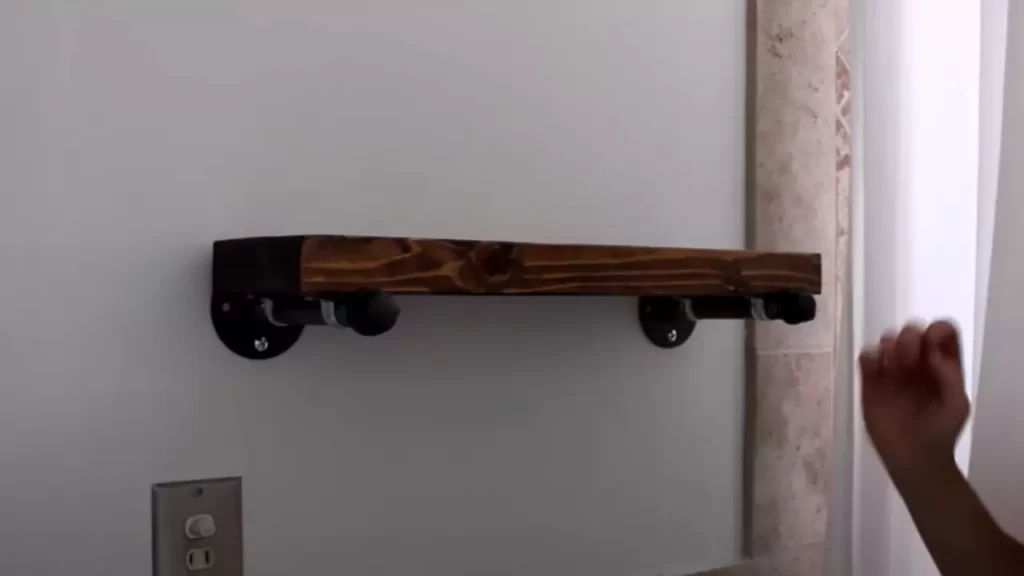
- Installing shelves: When mounting shelves on drywall, using toggle bolts ensures they are securely anchored, preventing them from sagging or falling.
- Hanging mirrors or artwork: Large mirrors or heavy frames can be safely hung on the wall using toggle bolts, providing stability and peace of mind.
- Mounting TV brackets: To securely mount a TV bracket on drywall, toggle bolts are an ideal choice as they can handle the weight and ensure your TV stays securely in place.
- Installing ceiling fixtures: Whether it’s a ceiling fan, a light fixture, or any other heavy object that needs to be installed on the ceiling, toggle bolts are the go-to option for providing a reliable anchor point.
Overall, toggle bolts are an essential component in your toolkit when it comes to hanging heavy objects on different surfaces. Their ability to distribute weight and provide a secure anchor make them a reliable choice for a wide range of applications.
Preparing For Installation
Before diving into the installation process of toggle bolts, it is crucial to adequately prepare. Assessing the wall for suitability, gathering the necessary tools and materials, and measuring and marking the location for the toggle bolt are important steps to ensure a successful installation. Let’s delve into each of these steps and get ready to secure those heavy items with confidence.
Assessing the wall for suitability
Not every wall is suitable for toggle bolt installation. It is essential to assess the wall’s composition and thickness to determine its suitability. Here’s how:
- Start by inspecting the material of the wall, as toggle bolts work best with solid materials such as concrete, brick, or solid wood.
- Measure the thickness of the wall using a tape measure. Toggle bolts typically require a minimum wall thickness of 1/8 inch for proper anchoring.
- Check for any obstructions behind the wall, such as electrical wires or plumbing pipes, that may hinder the installation or cause damage if punctured.
Gathering the necessary tools and materials
Once you’ve determined the wall’s suitability, it’s time to gather the tools and materials required for the installation. Make sure you have the following items on hand:
| Tools | Materials |
|---|---|
|
|
Measuring and marking the location for the toggle bolt
Accurate measurement and marking are crucial for a secure installation. Follow these steps to ensure you hit the mark:
- Using a tape measure, determine the desired height or position of the object you plan to attach to the wall.
- Mark this point on the wall using a pencil or marker.
- Measure and mark the distance between each toggle bolt hole. For heavy items, it is typically recommended to use multiple toggle bolts for better weight distribution.
- Double-check the measurements to ensure accuracy before proceeding to drill.
By properly assessing the wall for suitability, gathering the necessary tools and materials, and measuring and marking the location for toggle bolts, you are well on your way to a successful installation. Making sure these preparatory steps are completed will lay a solid foundation for securely hanging your objects. In the next section, we’ll dive into the installation process itself.
Installing Toggle Bolts Step By Step
When it comes to installing heavy items on walls, toggle bolts are a reliable choice. These are robust anchors that provide great support and stability for your shelves, cabinets, and other fixtures. In this guide, we will walk you through the process of installing toggle bolts step by step. By following these instructions, you will be able to securely mount your items on the wall without any hassle. Let’s get started!
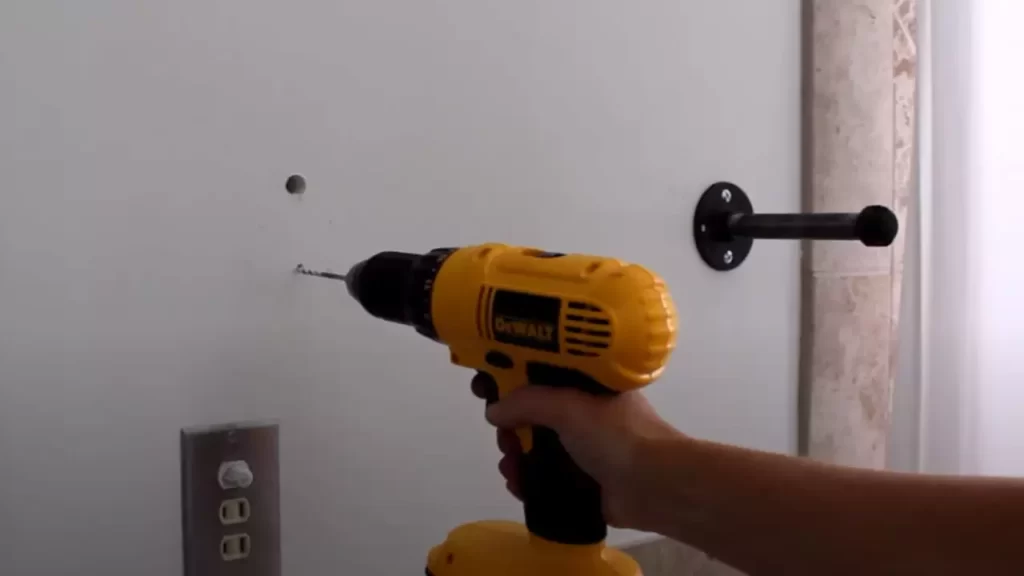
Drilling the pilot hole
Before inserting the toggle bolt, you need to drill a pilot hole in the wall. This hole should be slightly smaller than the diameter of the bolt. To do this:
- Mark the exact spot where you want to install your item.
- Using an appropriate drill bit, carefully make a hole at the marked spot.
- Make sure the hole is deep enough to accommodate the length of the toggle bolt.
Inserting the toggle bolt into the hole
Now that you have the pilot hole ready, it’s time to insert the toggle bolt. Here’s how:
- Hold the toggle bolt and fold the wings together to align them with the hole.
- Insert the folded wings into the pilot hole.
- Once inside, let go of the wings to allow them to expand behind the wall.
- Make sure the toggle bolt is properly seated in the hole.
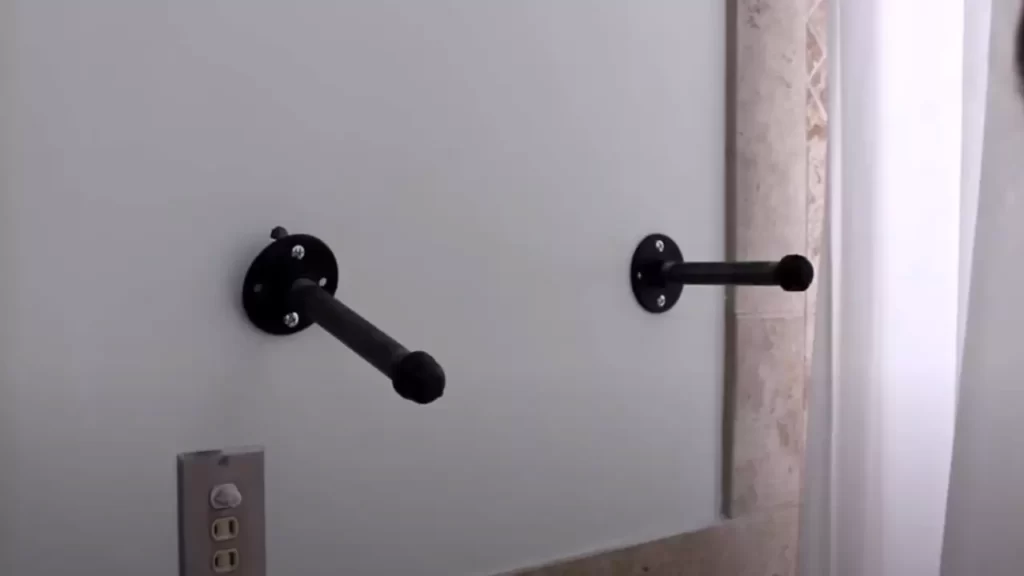
Securing the toggle bolt in place
Now that the toggle bolt is inserted, you need to secure it in place. Follow these steps:
- Tighten the bolt by turning it clockwise. This will pull the wings against the back of the wall, providing a secure hold.
- Continue tightening until the toggle bolt is firmly in place.
- Avoid over-tightening as it may damage the wall or the toggle bolt itself.
Testing the strength and stability of the installation
Before considering the installation complete, it is essential to test the strength and stability of the toggle bolt. Follow these steps:
- Apply firm pressure to the item that you have mounted on the toggle bolt.
- Check to ensure that the item remains stable and does not wobble or shift.
- If any instability is observed, remove the bolt and reposition it or consider using a larger toggle bolt for added support.
By following these step-by-step instructions for installing toggle bolts, you can confidently mount heavy items on your walls. With their robust design and reliable hold, toggle bolts provide secure support for your fixtures. Always remember to test the strength and stability of your installation before putting any weight on the item. Happy mounting!
Tips And Tricks For Successful Installation
choosing the right size and type of toggle bolt for your project
One of the most important factors for a successful toggle bolt installation is selecting the correct size and type of toggle bolt for your specific project. Choosing the wrong size or type can result in an ineffective or weak anchoring system. To ensure optimal support, follow these tips:
- Assess the weight and load-bearing requirements of your project. It’s crucial to select a toggle bolt that can comfortably carry the weight it will be subjected to.
- Consider the material you’re anchoring into. Different materials require different types of toggle bolts for optimal results. For example, if you’re installing into drywall, choose a toggle bolt specifically designed for this material.
- Refer to the manufacturer’s guidelines and recommendations for selecting the appropriate size and type of toggle bolt for your specific project. These guidelines will provide valuable information on weight ratings, anchoring methods, and installation instructions.
properly positioning the toggle bolt for optimal support
Once you have chosen the right toggle bolt for your project, accurately positioning it is crucial for optimal support. Follow these tips to ensure proper positioning:
- Locate the desired position for your anchor point. Ensure there are no obstacles or other objects behind the wall that may interfere with the toggle bolt’s expansion.
- Mark the spot where you will be inserting the toggle bolt. Use a pencil or marker to make a clear and visible mark on the surface.
- Double-check the position and alignment of your marked spot to ensure it is accurate before proceeding with the installation.
ensuring a secure and tight fit of the toggle bolt
The final step in achieving a successful toggle bolt installation is ensuring a secure and tight fit. Follow these tips to guarantee a strong anchoring:
- Make a pilot hole at the marked spot using a drill bit slightly smaller than the diameter of the toggle bolt.
- Insert the toggle bolt into the pilot hole and ensure it is aligned properly.
- Tighten the toggle bolt by hand or using a screwdriver until it is securely flush against the wall or surface.
- Lastly, give the toggle bolt a final tightening using a wrench or pliers until it is firmly in place. Be careful not to overtighten, as this can damage the anchor or the wall.
- Recheck the tightness of the toggle bolt periodically, especially if it is subjected to vibrations or heavy loads.
By following these tips and tricks for successful toggle bolt installation, you can ensure a secure and reliable anchoring system for your project. Remember to choose the right size and type of toggle bolt, properly position it, and ensure a secure and tight fit for optimal support.
Troubleshooting Common Issues
Even with the proper installation technique, sometimes there can be issues when using toggle bolts. In this section, we will address some common problems that may arise and provide solutions to troubleshoot these issues effectively.
Toggle Bolt Not Holding Properly
If you find that your toggle bolt is not holding securely in place, it can be frustrating. This issue is commonly caused by one of two reasons: either the toggle bolt is not properly sized for the weight it needs to support, or it is not being installed correctly.
To overcome this problem, you need to ensure that you are using the appropriate size and type of toggle bolt for your application. Consider the weight of the object you are hanging and choose a toggle bolt with a weight rating that exceeds this value. Additionally, make sure to follow the installation instructions carefully, ensuring that the wings are fully opened behind the wall and the bolt is tightened securely.
Overcoming Challenges with Different Wall Materials
Depending on the type of wall material you are working with, you may encounter challenges when installing toggle bolts. Different materials require different techniques to ensure a secure installation.
For drywall, it is crucial to locate a stud or use a wall anchor to provide additional support for the toggle bolt. This will prevent the bolt from pulling out under pressure. When working with plaster or masonry walls, it may be necessary to drill a small pilot hole before inserting the toggle bolt to prevent the wall from cracking or breaking.
In the case of hollow doors or thin paneling, it may be necessary to reinforce the area with a piece of plywood or a stronger material before installing the toggle bolt.
Repairing or Replacing a Damaged Toggle Bolt Installation
If a toggle bolt installation becomes damaged or fails over time, it is essential to address the issue promptly to maintain the integrity of the wall and prevent any accidents. In some cases, it may be possible to repair the existing installation, while in others, it may be necessary to replace the toggle bolt completely.
To repair a toggle bolt installation, start by removing any damaged components. Next, assess the damage and determine if any additional measures need to be taken, such as adding a wall anchor or reinforcing the area. Finally, reinstall the toggle bolt using the proper techniques and ensure it is securely fastened.
If the damage is severe or the toggle bolt cannot be repaired, it is crucial to remove it completely and replace it with a new toggle bolt. Follow the installation instructions carefully and take the necessary precautions to ensure a secure and reliable installation.
By troubleshooting common issues and addressing them effectively, you can ensure that your toggle bolt installations are secure and reliable, providing peace of mind and stability for your hanging objects.
Frequently Asked Questions
Do You Need A Drill For A Toggle Bolt?
Yes, you need a drill for a toggle bolt. A drill is used to create a hole in the wall or ceiling. The toggle bolt is then inserted into the hole and the wings on the bolt spread out to grip the backside of the wall, providing a secure anchor for hanging heavy objects.
How Do You Install A Zip Toggle Bolt?
To install a zip toggle bolt, follow these steps: 1. Drill a hole in the wall or ceiling. 2. Insert the bolt into the hole and tighten it. 3. Slide the toggle onto the bolt and push it through the hole.
4. Once the toggle is inside, pull the bolt back to secure it. 5. Tighten the bolt until it is firmly in place.
Do Toggle Bolts Go Into Studs?
No, toggle bolts do not go into studs. Toggle bolts are designed to provide support for objects on hollow walls, such as drywall or plaster. They work by expanding behind the wall surface for stability. For stud installation, it is recommended to use screws or nails directly into the studs for better support.
Do Toggle Bolts Go Vertical Or Horizontal?
Toggle bolts can be used both vertically and horizontally, depending on the application and the weight being supported. They are versatile fasteners commonly used for anchoring heavy objects to walls or ceilings.
Conclusion
Installing toggle bolts may seem daunting at first, but by following the steps outlined in this blog post, you can confidently tackle this task. Remember to choose the right size bolt for your project and use the proper tools for installation.
Whether you’re hanging a heavy mirror or securing an item to drywall, toggle bolts provide a strong and secure solution. With a little patience and know-how, you’ll be able to complete your installation successfully. Happy DIYing!