To install threaded inserts for wood, start by drilling a hole slightly smaller than the insert into the wood. Then, thread the insert into the hole using a screwdriver or a specialized insertion tool.
Introducing threaded inserts for wood can enhance the strength and durability of your woodworking projects. Whether you’re building furniture, cabinetry, or other wooden structures, threaded inserts provide a secure and reliable way to attach bolts, screws, and other fasteners. By properly installing these inserts, you can ensure that your wood joints remain strong and sturdy over time.
We will guide you on how to install threaded inserts for wood, allowing you to elevate your woodworking skills and produce high-quality, long-lasting creations.
Selecting The Right Threaded Inserts
Factors to consider when choosing threaded inserts
When it comes to selecting the right threaded inserts for your wood projects, there are several important factors to consider. By carefully evaluating these factors, you can ensure that your threaded inserts not only serve their purpose effectively but also withstand the test of time.
First and foremost, you need to consider the load-bearing requirements of your project. Determine the amount of weight or force that will be applied to the threaded inserts. This will help you choose the appropriate size and strength of inserts to ensure they can handle the stress without compromising the integrity of the wood.
Another factor to consider is the type of mating material you will be using. Whether it’s a metal, plastic, or another piece of wood, the threading of the insert should match that of the mating material to ensure a secure connection. Mismatched threading can lead to instability and weakening of the joint.
Additionally, consider the environment in which your wood project will be located. If it’s exposed to moisture, chemicals, or high temperatures, you’ll want to choose threaded inserts made from materials that can withstand these conditions. For instance, stainless steel inserts are corrosion-resistant and ideal for outdoor applications.
Aesthetic considerations are also important. Choose threaded inserts that blend seamlessly with the overall design and finish of your wood project. There are various options available, such as brass or zinc-plated inserts, that can add a touch of elegance to your final product.
Understanding the different types of threaded inserts
There are several types of threaded inserts available, each with its own unique installation method and application. Understanding these different types will help you determine which one is best suited for your specific wood project.
One common type is the screw-in insert, which features external threading and is self-tapping. These inserts can be easily installed with the help of a screwdriver or a power drill. They provide a strong hold and are suitable for both hardwood and softwood applications.
Another type is the press-fit insert, which does not have external threading. These inserts are typically press-fit into pre-drilled holes in the wood using a dedicated installation tool. They provide a seamless and flush appearance, making them ideal for furniture or cabinetry projects.
Threaded inserts that require heat installation are also available. These inserts have flanges around the external threading and are melted into the wood using a soldering iron or a heat gun. They offer excellent pull-out resistance and are commonly used in high-stress applications.
Evaluating the suitability of threaded inserts for your specific wood material
Before proceeding with the installation of threaded inserts, it’s important to evaluate the suitability of the inserts for your specific wood material. Different wood types have varying densities and strengths, which can affect the overall stability and strength of the inserts.
Hardwoods such as oak, maple, or walnut offer better resistance to wear and tear and can accommodate heavier loads. For such woods, threaded inserts with greater strength and durability are recommended.
On the other hand, softwoods like pine or cedar are less dense and may require inserts with a smaller profile. These inserts should be chosen carefully to avoid splitting or weakening the wood fibers.
Always consult the manufacturer’s recommendations and guidelines when selecting threaded inserts for your wood material. They will provide valuable information on load capacities, insertion depths, and specific installation techniques that optimize the performance of the inserts in your wood projects.
By considering these factors and understanding the different types of threaded inserts available, you can confidently select the right inserts that will ensure secure and long-lasting connections in your woodworking endeavors. Remember, choosing the right threaded inserts is crucial for the overall strength, stability, and durability of your wood projects.
Preparing The Wood Surface
Before installing threaded inserts for wood, it’s crucial to properly prepare the wood surface. This ensures that the inserts will be securely held in place and prevent any potential damage to the wood. This section will guide you through the essential steps of measuring and marking the insertion points, drilling pilot holes for the inserts, and determining the depth of the pilot holes.
Measuring and marking the insertion points
The first step in preparing the wood surface is to measure and mark the insertion points for the threaded inserts. To do this, you’ll need a measuring tape or ruler and a pencil. Start by determining the desired location of the inserts on the wood. Consider factors such as the weight or stress that will be applied to the area and ensure sufficient space between the inserts for stability.
Once you’ve determined the placement, use the measuring tape or ruler to mark the positions of the insertion points on the wood. Make sure the marks are clear and easily visible, as they will guide your drilling later on. It’s important to be precise and accurate in this step to ensure the seamless installation of the threaded inserts.
Drilling pilot holes for the inserts
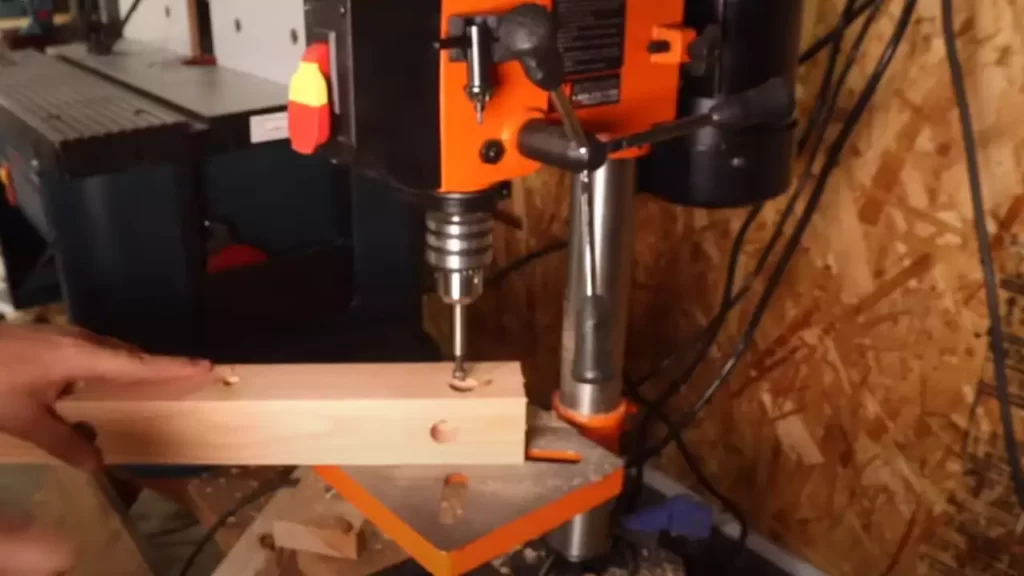
After marking the insertion points, the next step is to drill pilot holes in the wood. These pilot holes serve as guides for inserting the threaded inserts and provide a path for the screw to follow. To drill the pilot holes, you’ll need a drill and a drill bit that matches the size of the threaded insert.
Start by securely clamping the wood piece in place to prevent any movement during the drilling process. Then, using the marked insertion points as references, carefully drill one pilot hole at each point. Ensure that the drill bit is straight and perpendicular to the wood surface to have a precise hole.
Determining the depth of the pilot holes
After drilling the pilot holes, it’s essential to determine the depth of each hole to ensure a proper fit for the threaded inserts. The depth should be based on the length of the inserts and the thickness of the wood. One way to determine the depth is by measuring the length of the insert and marking it on the drill bit as a guide.
Insert the marked drill bit into each pilot hole, making sure the depth aligns with the marked length. Take caution not to drill too deep, as it can weaken the wood and compromise the hold of the threaded inserts. Repeat this process for all the pilot holes you have drilled.
With the wood surface properly prepared, you are now ready to move on to the next step of installing threaded inserts. Stay tuned for our next blog post on how to install threaded inserts for wood to complete your project seamlessly.

Installing Threaded Inserts
Threaded inserts are an excellent way to add strength and stability to your wood projects, allowing you to produce threaded holes that can withstand heavy loads. Whether you’re assembling furniture, constructing cabinetry, or creating intricate woodwork, knowing how to properly install threaded inserts is essential. In this guide, we will explore the techniques and tools you need to ensure a successful installation.
Applying Appropriate Tools for the Installation
Before diving into the installation process, it’s important to have the right tools at your disposal. The following tools will help make your threaded insert installation a breeze:
- A power drill or drill press
- A tap handle or wrench
- A threaded insert installation tool or mandrel
- A depth stop collar
- Sandpaper or a deburring tool
These tools will ensure that you have all the necessary equipment to achieve a precise and secure installation.
Techniques for Inserting Threaded Inserts into Wood
Inserting threaded inserts into wood requires a careful and strategic approach. Follow these techniques to achieve a successful installation:
- Prepare the wood surface: Begin by drilling a hole slightly smaller than the outer diameter of the insert, ensuring a snug fit.
- Mark the insertion depth: Use a depth stop collar on your drill bit to mark the desired insertion depth, preventing the insert from going too deep or not deep enough.
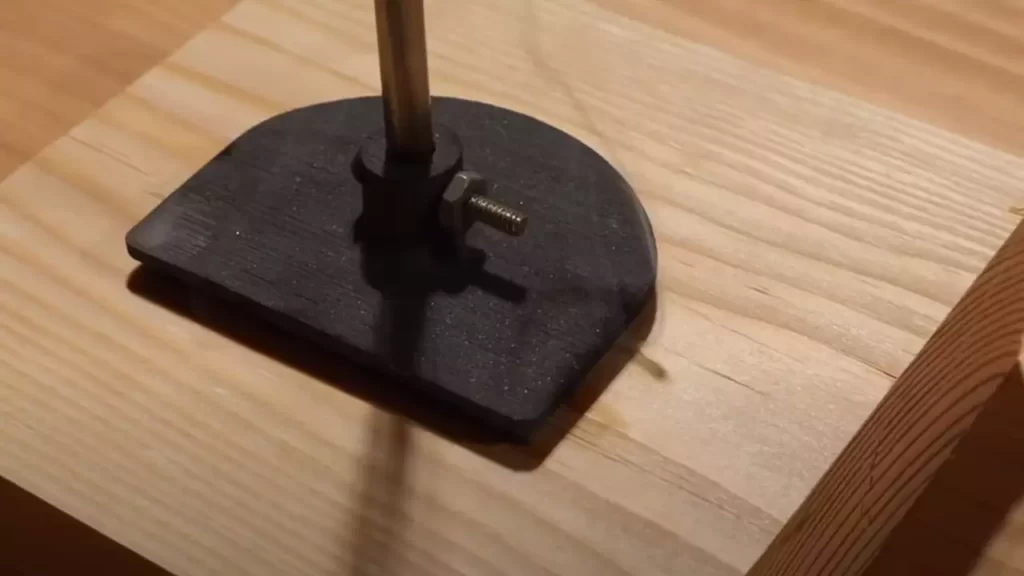
- Insertion process: Apply a small amount of wood glue or epoxy to the external threads of the insert. Then, using your installation tool or mandrel, twist the insert into the drilled hole, applying steady pressure until the insert is flush with the wood surface.
- Deburring: After the insert is fully inserted, use sandpaper or a deburring tool to remove any excess material or rough edges.
Following these techniques will ensure that the threaded inserts are installed securely and correctly, maximizing their effectiveness within your wood project.
Ensuring Proper Alignment and Depth during Installation
Proper alignment and insertion depth are crucial factors in achieving a successful threaded insert installation. Here are a few tips to help you maintain accuracy:
- Use a center punch to create an indentation where you want the hole to be drilled, enhancing accuracy during drilling.
- Make sure your drill or drill press is perpendicular to the wood surface, ensuring straight and aligned holes.
- Use the depth stop collar on your drill bit to control the depth, preventing the inserts from being either too shallow or too deep.
- Regularly check alignment and depth as you install each insert, making adjustments as needed.
By following these alignment and depth guidelines, you can ensure a clean and professional finish for your threaded insert installations.
Now that you have a solid understanding of how to install threaded inserts in wood, you’ll be able to confidently tackle projects that require added strength and stability. Remember to choose the appropriate tools, follow the correct techniques, and ensure proper alignment and depth for each installation. With these steps in mind, you’ll be well on your way to mastering the art of installing threaded inserts!
Troubleshooting Common Issues
When it comes to installing threaded inserts for wood, you may sometimes encounter a few common issues that can affect the overall success and stability of your project. However, with the right knowledge and troubleshooting techniques, you can easily overcome these challenges and ensure a seamless installation process. In this section, we will explore three common issues that often arise during the installation of threaded inserts: dealing with stripped or damaged inserts, fixing misaligned or loose inserts, and repairing threads that are difficult to grip.
Dealing with Stripped or Damaged Inserts
If you come across stripped or damaged inserts, there is no need to worry. You can still salvage the situation and make the inserts work effectively. Here’s how:
- Remove the damaged insert: Begin by carefully removing the stripped or damaged insert from the wood. Ensure that you have a firm grip on the insert to prevent any further damage.
- Clean the hole: Thoroughly clean the hole using a brush or compressed air to remove any debris or residue that may hinder the installation of a new insert.
- Choose a larger size insert: If the existing hole has been stripped, you can opt for a larger size insert. This will provide a stronger grip and prevent any future stripping issues.
- Apply epoxy resin: To ensure a secure fit, you can apply a small amount of epoxy resin to the walls of the hole before installing the new insert. This will create an extra layer of adhesive strength.
- Install the new insert: Carefully thread the new insert into the cleaned and prepared hole. Ensure it is securely seated and aligned with the surface of the wood.
By following these steps, you can effectively deal with stripped or damaged inserts, restoring the stability and functionality of your woodworking project.
Fixing Misaligned or Loose Inserts
If you encounter misaligned or loose inserts, it is important to address the issue promptly to prevent any further complications. Here are some steps you can take to fix this problem:
- Remove the loose insert: Begin by removing the misaligned or loose insert from the hole. Take caution to avoid causing any additional damage to the wood.
- Inspect the hole and insert: Examine the hole and the insert for any irregularities or signs of damage. If necessary, clean the hole and the insert thoroughly.
- Apply a suitable adhesive: To remedy the misalignment or looseness, apply a suitable adhesive such as epoxy resin or wood glue to the walls of the hole.
- Reinstall the insert: Carefully position the insert back into the hole, ensuring it is aligned properly. Apply pressure to secure the insert in place.
By following these steps, you can correct misaligned or loose inserts, providing a stable foundation for your woodworking project.
Repairing Threads that are Difficult to Grip
Threads that are difficult to grip can make the installation process challenging and compromise the overall strength of the inserts. However, with the following steps, you can easily repair and improve the gripping ability:
- Inspect the threads: Examine the threads of the insert to identify any signs of wear or damage. If necessary, clean the threads using a wire brush or compressed air.
- Add lubrication: Apply a small amount of lubricating oil or wax to the threads of the insert to facilitate smooth installation and enhance gripping capabilities.
- Use a thread tap: If the threads are severely damaged or worn, consider using a thread tap to create fresh and clean threads in the wood. This will ensure a strong, reliable connection.
- Install the insert: Once you have taken the necessary steps to repair the threads, proceed to install the insert in the hole, ensuring it is properly aligned and threaded into place.
By following these steps, you can effectively repair threads that are difficult to grip, ensuring a secure and durable installation of threaded inserts for wood.
Now that you are equipped with troubleshooting techniques for dealing with stripped or damaged inserts, fixing misaligned or loose inserts, and repairing threads that are difficult to grip, you can confidently approach the installation process. Remember to take your time, exercise patience, and make any necessary adjustments to achieve a professional and successful outcome for your woodworking project.
Securing Threaded Inserts In Wood
When it comes to installing threaded inserts in wood, it’s not only important to ensure their proper placement, but also to secure them effectively. This helps to prevent inserts from rotating or coming loose, especially in heavy-duty applications. In this section, we will explore techniques to prevent inserts from rotating or coming loose, the use of adhesive or epoxy to secure inserts, and how to reinforce inserts for heavy-duty applications.
Techniques to Prevent Inserts from Rotating or Coming Loose
Preventing inserts from rotating or coming loose is crucial for maintaining the stability and durability of your project. There are a few key techniques you can employ to achieve this:
- Tightening with a Threaded Insert Tool: Using a specialized threaded insert tool, such as a T-handle or a threaded insert driver, allows you to apply consistent and controlled pressure while tightening the insert into the wood. This helps to minimize any rotational movement and ensures a secure fit.
- Using a Thread-locking Compound: Applying a thread-locking compound, such as Loctite, can add an extra layer of security. This compound is designed to prevent threaded fasteners from loosening due to vibration and other external forces. Before applying the compound, ensure that the insert is clean, and follow the manufacturer’s instructions for the specific product.
Using Adhesive or Epoxy to Secure Inserts
Another effective way to secure threaded inserts in wood is by using adhesive or epoxy. This method provides additional bonding strength and helps to distribute the stress more evenly throughout the wood. Here’s how you can do it:
- Clean the Insert Hole: Before applying the adhesive or epoxy, make sure to clean the insert hole thoroughly to remove any dust or debris. This will ensure a proper adhesion.
- Apply the Adhesive or Epoxy: Using a suitable adhesive or epoxy, carefully apply a small amount around the threaded insert. Avoid over-applying, as it can result in messy adhesion and interfere with thread engagement. Follow the manufacturer’s instructions on drying and curing time.
- Secure the Insert: Insert the threaded insert into the hole while the adhesive or epoxy is still wet. Twist the insert gently to evenly distribute the adhesive. Allow the adhesive to dry or cure completely according to the manufacturer’s instructions before applying any loads or stresses.
Reinforcing Inserts for Heavy-Duty Applications
In heavy-duty applications where inserts are subjected to substantial force, it’s important to reinforce them for added strength and durability. Here are some techniques to reinforce threaded inserts in wood:
- Using Reinforcing Plates: Reinforcing plates, typically made of metal or hard plastic, can be placed underneath or on top of the wood surface where the insert is installed. These plates help distribute the load and prevent the wood from splitting or warping.
- Using Larger Inserts: Opting for larger-sized threaded inserts can provide increased holding power in heavy-duty applications. Ensure that the hole is drilled to the appropriate size to accommodate the larger insert.
- Addition of Wood Dowels: For maximum reinforcement, you can complement threaded inserts with wood dowels. By drilling matching holes in the wood and inserting dowels coated with adhesive or epoxy, you effectively create a stronger connection.
By implementing these techniques, you can ensure that your threaded inserts remain securely in place, even under heavy loads or high levels of vibration. Remember to choose the appropriate technique for your specific project and seek professional advice if needed.
Finishing Touches
Finishing Touches
Once you have successfully installed threaded inserts for wood, it’s time to focus on the finishing touches. These final steps are crucial in ensuring the inserts seamlessly blend with the surrounding wood surface, both aesthetically and functionally. By following these steps, you’ll be able to achieve a professional and polished look while providing long-lasting durability.
Sanding and Polishing the Wood Surface around the Inserts
After the threaded inserts are securely in place, it’s important to sand and polish the wood surface around them. This step helps create a smooth and even finish, making the inserts blend seamlessly with the wood. It also ensures that any rough edges or imperfections are eliminated, reducing the risk of splinters or injuries.
You can start by using a medium-grit sandpaper to gently sand the wood surface around the inserts. Sand in a circular motion, paying special attention to the immediate area surrounding each insert. Once you have achieved a smooth surface, switch to a fine-grit sandpaper to further refine the finish and remove any remaining scratches or roughness. Be sure to wipe away any dust or debris with a clean cloth before moving on to the next step.
Painting or Staining the Wood to Match the Surrounding Area
Now that the wood surface is smooth and polished, you have the option to paint or stain it to match the surrounding area. This step helps create a cohesive and visually appealing result, where the threaded inserts become virtually indistinguishable from the rest of the wood.
If you prefer a painted finish, choose a suitable wood primer and paint that matches the color of the surrounding wood. Apply thin and even coats of primer, allowing each layer to dry completely before applying the next. Once the primer is dry, paint the wood surface, again using thin and even coats. This will help achieve a uniform finish without any drips or brush marks.
On the other hand, if you prefer to enhance the natural beauty of the wood, staining is the way to go. Choose a wood stain that closely matches the color of the surrounding wood. Apply the stain with a brush or cloth, following the manufacturer’s instructions. Be sure to wipe off any excess stain to achieve an even and consistent color.
Applying a Protective Finish to the Wood
After painting or staining, it’s crucial to apply a protective finish to the wood to ensure its longevity. This step not only enhances the appearance but also offers protection against moisture, stains, and general wear and tear.
There are various types of protective finishes available, such as polyurethane, lacquer, or shellac. Choose a finish that suits your preference and the requirements of the wood. Apply thin and even coats, following the manufacturer’s instructions. Allow each coat to dry completely before applying the next.
With these finishing touches, your newly installed threaded inserts will seamlessly blend with the wood surface and provide a strong and durable connection. By sanding, painting or staining, and applying a protective finish, you’ll be able to achieve a professional and aesthetically pleasing result that will stand the test of time.
Advantages And Applications Of Threaded Inserts In Woodworking
Exploring the Benefits of Using Threaded Inserts
Threaded inserts have revolutionized the way woodworkers approach their projects. With their versatility and numerous advantages, these small but mighty components have become essential in woodworking. By understanding the benefits threaded inserts offer, you can elevate your woodworking game and unlock new possibilities for creating sturdy and long-lasting wooden structures.
Understanding the Wide Range of Applications for Threaded Inserts in Woodworking Projects
One of the remarkable aspects of threaded inserts is their versatility, enabling their use in a wide range of woodworking applications. Whether you are working on furniture, cabinetry, or decorative pieces, threaded inserts can enhance the durability, strength, and functionality of your creations. Let’s dive into the different applications where threaded inserts excel:
Furniture Assembly and Repair:
Threaded inserts are invaluable when it comes to assembling or repairing furniture. From constructing solid table legs to connecting chair frames securely, these inserts provide a reliable and long-lasting solution. Installing threaded inserts in wood allows for easy disassembly and reassembly, making furniture repair a breeze.
Jig and Fixture Creation:
Woodworkers often rely on jigs and fixtures to ensure precision and accuracy during their projects. Threaded inserts can be seamlessly incorporated into various jigs and fixtures, providing a secure and adjustable connection point. Whether it’s securing guides or attaching clamps, threaded inserts offer a reliable solution for fixture creation.
Hanging and Mounting Applications:
When it comes to hanging or mounting heavy objects on wood, threaded inserts are a game-changer. Whether you’re installing hooks, brackets, or hangers, these inserts provide a strong and stable connection, eliminating the risk of objects falling or becoming loose over time. The added strength and stability are invaluable, particularly in applications such as shelving units and wall-mounted displays.
Thread Reinforcement:
Wood may not always be the best material for threading, especially when it comes to frequent disassembly. By incorporating threaded inserts, you can reinforce the threads and prevent wear and tear over time. This is especially beneficial in applications that require frequent assembly and disassembly, such as musical instruments or adjustable mechanisms.
Showcasing Examples of Successful Projects Using Threaded Inserts
Now that we’ve explored the benefits and applications of threaded inserts, let’s take a look at some successful woodworking projects that have utilized these inserts to their advantage:
-
Bespoke Dining Table: A custom dining table that features detachable legs for ease of transportation and storage. The threaded inserts used in this project allow for quick assembly and disassembly without compromising strength or stability.
-
Wall-Mounted Shelving: A stylish and functional wall-mounted shelving unit that showcases decorative items and provides storage space. The threaded inserts used in this project ensure a secure connection, preventing the shelves from sagging under the weight of objects.
-
Wooden Guitar Stand: A handmade wooden guitar stand that offers a secure and visually pleasing display for guitars. The threaded inserts utilized in this project allow for easy adjustment and customization, ensuring a snug fit for each instrument.
These examples represent just a few of the countless possibilities when it comes to incorporating threaded inserts into your woodworking projects. By harnessing their advantages and exploring creative applications, you can elevate your woodworking skills and create impressive, durable pieces that stand the test of time.
Frequently Asked Questions
Should I Glue Threaded Inserts In Wood?
Yes, you can glue threaded inserts in wood. It provides strength and stability to the connection. Make sure to use a strong adhesive suitable for wood. Apply the glue to both the insert and the wood surface, then insert the threaded insert and let it dry before using it.
How Do You Install Threaded Inserts Accurately?
To install threaded inserts accurately, follow these guidelines: 1. Drill a hole with the appropriate size for the insert. 2. Insert the tool into the hole and align it properly. 3. Apply even pressure while turning the tool clockwise. 4.
Keep turning until the insert is flush with the surface. 5. Use a wrench to make sure the insert is securely in place.
Are Threaded Inserts Stronger Than Screws?
Threaded inserts are generally stronger than screws. This is because their design allows them to distribute the load more evenly. They also provide a more secure and durable connection. So, if strength is a priority, threaded inserts are a better choice.
How Do You Install Threaded Inserts In Plywood?
To install threaded inserts in plywood, follow these steps: 1. Mark the desired location on the plywood. 2. Drill a hole slightly smaller than the insert’s outer diameter. 3. Apply a small amount of wood glue to the insert’s threads. 4.
Insert the threaded insert into the drilled hole, using a wrench if necessary. 5. Allow the glue to dry before using the insert for any application.
Conclusion
To wrap up, threaded inserts are an essential component when it comes to ensuring the durability and strength of wood joints. By following the step-by-step guide on how to install threaded inserts for wood, you can easily enhance the stability and longevity of your woodworking projects.
Remember to choose the right type of insert, drill accurate holes, and use the proper installation technique. With these tips in mind, you’ll be able to confidently tackle any wood project that requires the use of threaded inserts.