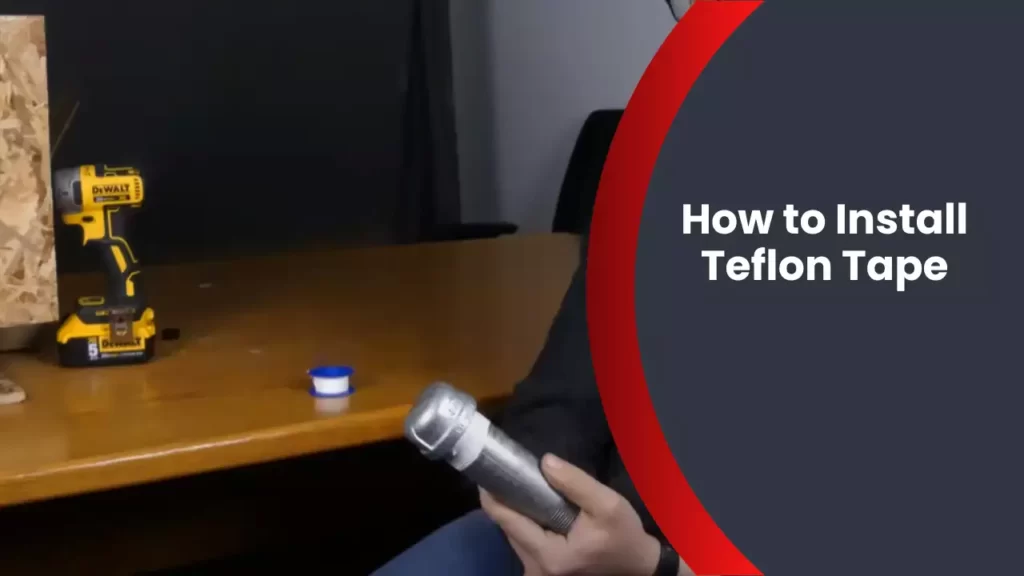
To install Teflon tape, wrap it tightly around the threaded end of a pipe or fitting in a clockwise direction. Teflon tape is commonly used in plumbing applications to create a watertight seal on threaded connections.
It is a thin, white tape made of PTFE (polytetrafluoroethylene) that is highly resistant to chemicals and temperature extremes. When installed correctly, Teflon tape can help prevent leaks and ensure a secure connection. To install Teflon tape, start by cleaning the threaded end of the pipe or fitting to remove any dirt or debris.
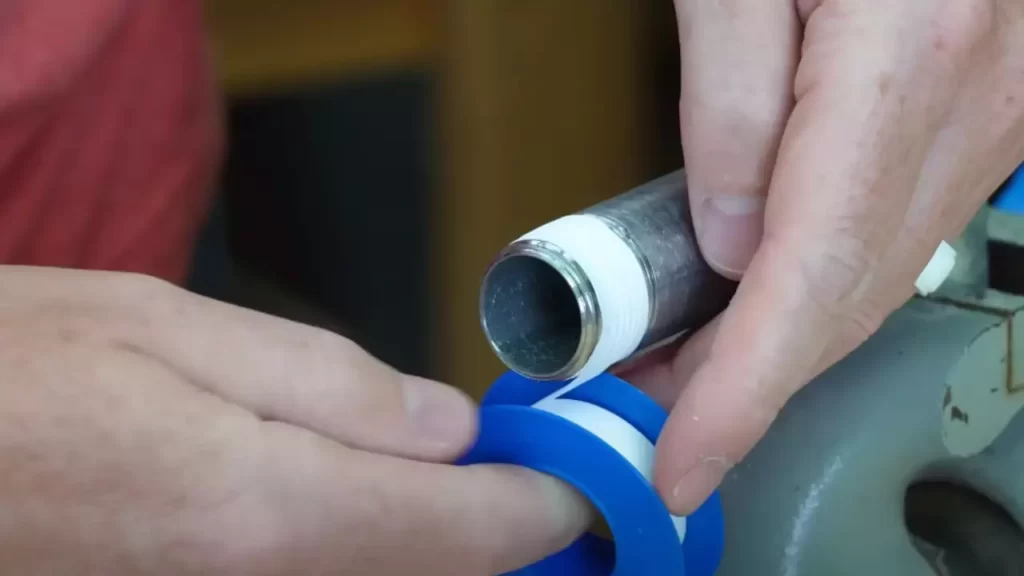
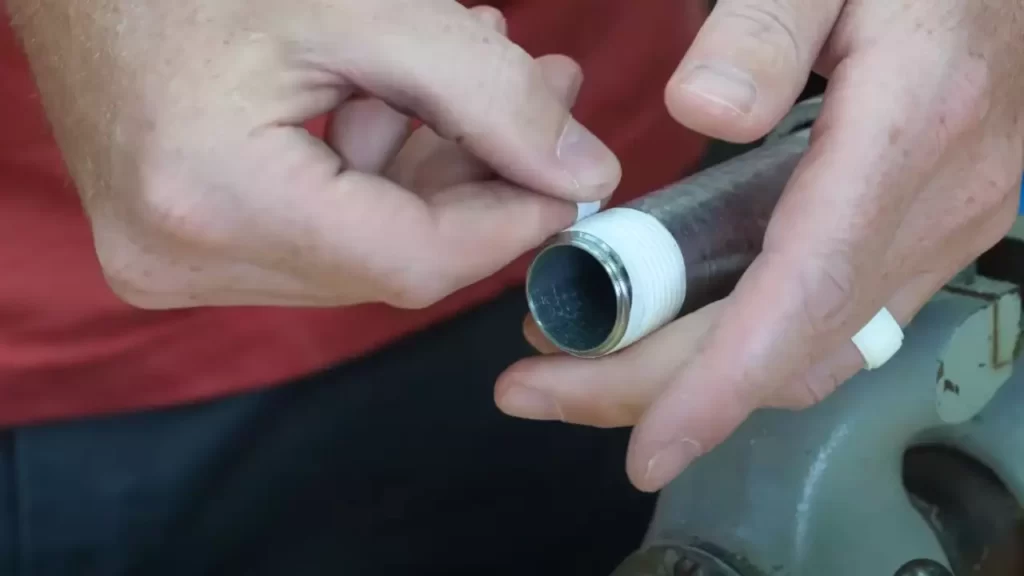
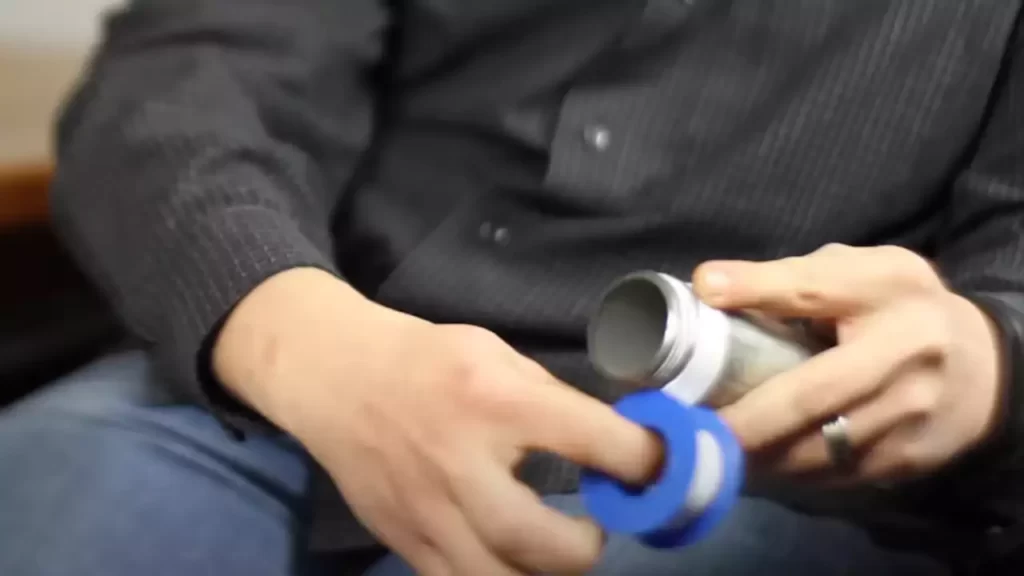
Then, begin wrapping the tape around the threaded end in a clockwise direction. Make sure to overlap the tape slightly with each wrap and pull it tight as you go. Continue wrapping until the threads are completely covered, but be careful not to wrap it too thickly as that can impede proper threading. Once the tape is in place, you can now screw the pipe or fitting into place. Ensure you tighten it securely by using appropriate tools, such as a wrench.
Preparing For Installation
Preparing for installation is an important step to ensure a successful and leak-free application of Teflon tape. By gathering the necessary materials and understanding the proper techniques, you can make the installation process quick and efficient. In this guide, we will take you through the key steps under the subheading: Preparing for Installation.
Gather the necessary materials
Before you begin the installation process, it is essential to gather all the required materials. Having everything readily available will save you time and make the project go smoothly. Here are the materials you will need:
| Teflon tape | Pipe or fitting to be sealed |
|---|
- Teflon tape: This is the star of the show. Make sure you have a high-quality Teflon tape that is compatible with your piping system. Opt for a tape with a high density and thickness for the best results.
- Pipe or fitting to be sealed: Identify the specific pipe or fitting that needs to be sealed. It should be clean and free from any dirt or debris for the tape to adhere properly.
Once you have gathered these materials, you are ready to move on to the next step: applying the Teflon tape. Continue reading our guide to learn the proper techniques for a secure and effective installation.
Understanding Teflon Tape
When it comes to plumbing projects, understanding how to use Teflon tape is essential. This versatile material is commonly used to create a tight seal on threaded pipe fittings, preventing leaks and ensuring a secure connection. In this blog post, we will delve into the world of Teflon tape, explaining what it is, how it works, and the different types available.
What is Teflon Tape and How Does it Work?
Teflon tape, also known as plumber’s tape or thread seal tape, is a thin, flexible strip made from polytetrafluoroethylene (PTFE). It is color-coded for easy identification, with white tape being the most commonly used variety.
But how does Teflon tape work its magic? Well, when wrapped around the threads of a pipe fitting, Teflon tape acts as a lubricant and a sealant. As the fitting is tightened, the tape compresses and fills the gaps between the threads, helping to create a watertight seal.
The Different Types of Teflon Tape Available
There are different types of Teflon tape available, each designed for specific applications. It’s important to choose the right type of tape for your project to ensure proper sealing and prevent leaks. Here are the different types of Teflon tape:
| Type | Color | Recommended Usage |
|---|---|---|
| Standard Teflon Tape | White | Used for general-purpose applications on water and air lines. |
| High-Density Teflon Tape | Pink or Red | Ideal for high-pressure applications such as gas lines. |
| Yellow Gas Line Teflon Tape | Yellow | Specifically designed for natural gas and propane lines. |
| Nickel-Plated Teflon Tape | Purple | Used in applications involving stainless steel fittings to prevent galling. |
Before starting your project, make sure to read the manufacturer’s instructions and guidelines to determine the most suitable type of Teflon tape for your specific needs.
Now that you understand what Teflon tape is and how it works, you’re ready to tackle your plumbing projects with confidence. Remember to choose the right type of tape for your application and follow proper installation techniques to ensure a secure and leak-free connection. Happy plumbing!
Steps For Proper Installation
Properly installing Teflon tape is crucial to ensure leak-free connections. Whether you’re working on plumbing fixtures, threaded pipes, or fittings, following these steps will help you achieve a tight and secure seal. Let’s dive into the step-by-step process of installing Teflon tape:
Step 1: Clean the area
Before applying Teflon tape, it is essential to clean the area thoroughly. Removing any dirt, oil, or debris will ensure a clean surface for the tape to adhere to. Use a clean cloth or rag to wipe the area, removing any particles that could compromise the effectiveness of the tape.
Step 2: Wrap the tape in the correct direction
One crucial aspect of using Teflon tape is wrapping it in the correct direction. Begin by identifying the male end of the connection; this is usually the pipe or fitting that goes inside the other. To determine the correct direction, remember this simple rule: wrap the tape clockwise around the male threads.
Step 3: Apply the tape evenly
When applying Teflon tape, it’s important to wrap it evenly and tightly around the threads. Start at the base of the male threads, holding the loose end of the tape against them. Move your hand clockwise, gradually wrapping the tape around the threads. Ensure that the tape overlaps itself as you go, creating a uniform layer without any gaps.
Here are some tips for a neat and effective application:
- Use moderate pressure while wrapping the tape to avoid stretching or tearing it.
- Wrap the tape at least three times around the male threads for a secure seal.
- Avoid covering the very end of the threads to prevent any loose tape from getting into the connection.
Step 4: Tighten the connection
After applying the Teflon tape, it’s time to tighten the connection. Use a wrench or pliers to securely tighten the pipe or fitting, ensuring a proper seal. Be careful not to overtighten, as this can damage the threads or cause leaks.
Step 5: Test for leaks
Once the connection is tightened, it’s crucial to test for leaks. Turn on the water or pressure source and observe the connection for any signs of dripping or leakage. If you notice any leaks, carefully tighten the connection a bit more until the leaks stop.
Now that you’re aware of these step-by-step instructions, you can confidently install Teflon tape and achieve leak-free connections in your plumbing or pipe fittings.
Troubleshooting Common Issues
Even with careful installation, sometimes issues can arise when using Teflon tape. Understanding and troubleshooting these common problems can help you achieve a leak-free and successful installation. Below are some common issues you may encounter and steps to resolve them.
Tape unraveling or coming loose
If you find that the Teflon tape is unraveling or coming loose during installation, this can result in leaks and compromise the effectiveness of the tape. There are a few reasons why this may occur:
- The tape may not have been applied correctly or tightly enough.
- The threads may be warped or damaged.
- There may be too much pressure or force being applied during installation.
To resolve this issue, follow these steps:
- Ensure that you are using enough Teflon tape for a secure seal. Start at the end of the threads and wrap the tape tightly around in a clockwise direction.
- Inspect the threads for any signs of damage. If they are warped or damaged, consider replacing the fitting or using a different sealing method.
- Apply the tape evenly and avoid excessive force during installation. Tighten the fitting until it is snug, but be cautious not to overtighten as this can cause leaks.
Leaks despite using Teflon tape
It can be frustrating to discover leaks even after using Teflon tape, but there are a few possible reasons for this:
- The tape may not have been applied correctly or tightly enough.
- The threads may be damaged or worn out.
- There may be debris or foreign objects interfering with the seal.
To address this issue, consider the following steps:
- Ensure that you wrap the Teflon tape firmly and evenly around the threads in a clockwise direction. Make sure to cover the threads completely.
- Inspect the threads for any signs of damage or wear. If necessary, replace the fitting or use an alternative sealing method.
- Clean the threads thoroughly before applying the Teflon tape. Remove any debris or foreign objects that could compromise the seal.
By troubleshooting these common issues, you can enhance your Teflon tape installation and achieve a reliable and leak-free connection. Remember to follow the proper installation techniques and take the necessary precautions to ensure a successful outcome.
Additional Tips And Best Practices
When it comes to installing Teflon tape, there are a few additional tips and best practices that can help ensure a successful application and prevent any leaks. In this section, we will discuss how much tape to use and when to replace Teflon tape.
How much tape to use
When applying Teflon tape, it is important to use just the right amount. Using too little tape can result in leaks, while using too much tape can cause difficulties when tightening fittings and may even lead to the tape being pushed into the pipe.
In general, it is recommended to wrap the male threads with Teflon tape in a clockwise direction, overlapping the tape at least two-thirds of the width with each pass. It is usually sufficient to wrap the tape around the threads three to five times, although the specific number of wraps may vary depending on the size of the fitting and the thread type.
The key is to ensure that the tape wraps snugly around the threads without any gaps or overlaps. By doing so, you create a proper seal that prevents leaks without compromising the integrity of the fitting.
When to replace Teflon tape
Although Teflon tape is durable, it is not meant to last forever. Over time, the tape can begin to deteriorate or become compressed, which can compromise its ability to create an effective seal. As such, it is important to know when to replace Teflon tape.
If you notice any signs of wear or damage, such as frayed edges or tears, it is time to replace the tape. Additionally, if you experience any leaks or loosening of fittings, it is a good idea to check the condition of the tape and replace it if necessary.
Remember, prevention is better than cure, so it’s a good practice to inspect Teflon tape regularly, especially in areas with high vibration or frequent temperature fluctuations. By staying proactive and replacing the tape as needed, you can ensure a reliable and leak-free connection that lasts.
In conclusion, when installing Teflon tape, make sure to use the appropriate amount of tape, wrapping it tightly around the threads, and replace it when signs of wear or leaks are detected. Adhering to these additional tips and best practices will help you achieve a secure and watertight seal for your plumbing needs.
Frequently Asked Questions Of How To Install Teflon Tape
Which Way Do You Put Teflon Tape On?
To put teflon tape on, wrap it clockwise around the male threaded end of the pipe. Make sure to apply the tape tightly and evenly to create a watertight seal. Avoid using excessive tape, as it can cause leaks. Double-check for any exposed threads before installing.
How Many Times Do You Wrap Teflon Tape?
Wrap teflon tape around the threaded area 2-3 times for a secure fit.
Do You Put Teflon Tape On With Our Against Threads?
Apply Teflon tape by wrapping it clockwise around the threads.
Is One Wrap Of Teflon Tape Enough?
One wrap of Teflon tape is usually sufficient.
Conclusion
Learning how to install Teflon tape is a valuable skill for any DIY enthusiast or homeowner. By following the step-by-step guide provided in this blog post, you can ensure a tight and leak-free seal for your plumbing connections. Remember to apply the tape in a clockwise direction and wrap it around the pipe threads tightly but without overlapping.
Investing a little time in mastering this technique will save you from future headaches and costly repairs. So, get started and enjoy the benefits of a well-installed Teflon tape!