To install T molding, measure and cut the molding to fit the gap, then attach it using adhesive or a hammer and nails. T molding is a versatile and attractive option for joining two floors of different heights or materials.
Whether you’re replacing old molding or installing it for the first time, the process is relatively straightforward. It is important to measure and cut the molding accurately to ensure a seamless fit. Additionally, you can choose between adhesive or nails to secure the molding in place.
By following these simple steps, you can easily install T molding and achieve a polished and professional look in your space.
Understanding T Molding And Its Benefits
What is T molding and why is it used?
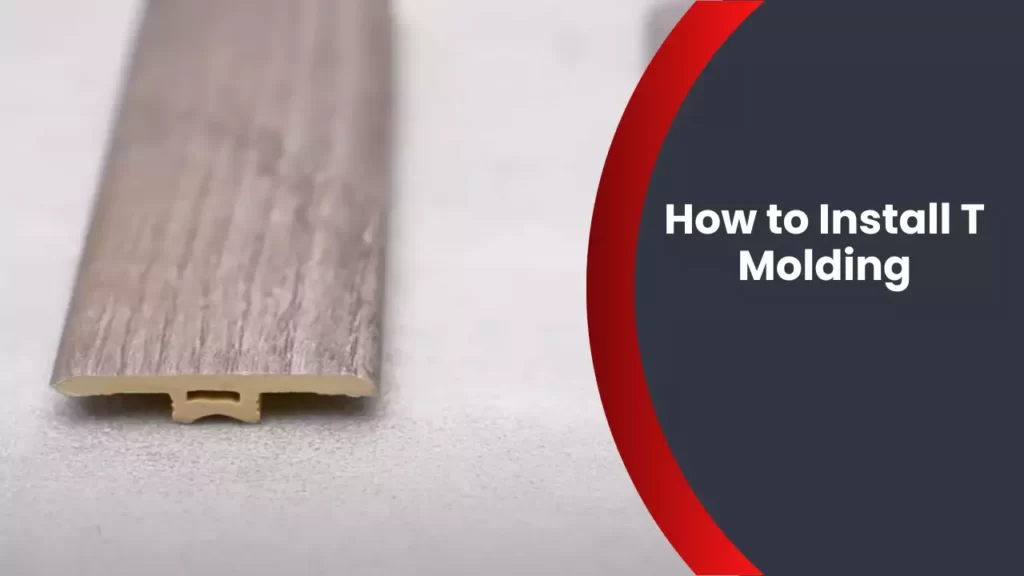
T molding is a versatile and functional type of molding that is commonly used in home improvement projects, particularly in flooring installations. It is called “T molding” because of its T-shaped profile, which allows it to join two different types of flooring materials seamlessly. This type of molding is used to bridge the gap between two surfaces of different heights or materials, providing a smooth transition and a finished look.
Using T molding is especially beneficial when you have rooms with different flooring materials such as hardwood, laminate, or tile coming together. It not only enhances the visual appeal of the space but also ensures a secure and durable connection between the two surfaces. Whether you are installing new flooring or renovating an existing space, T molding can be an essential component in achieving a professional and polished appearance.
The benefits of using T molding in home improvement projects
The benefits of using T molding in home improvement projects
T molding offers a range of benefits that make it an ideal choice for various home improvement projects. Here are a few reasons why you should consider using T molding:
1. Seamless transition: T molding provides a seamless transition between two different flooring surfaces or materials, ensuring a visually pleasing and cohesive look. It effectively hides any gaps or unevenness, creating a smooth flow throughout the space.
2. Protection against damage: By bridging the gap between two surfaces, T molding helps protect the edges of the flooring materials from damage caused by foot traffic, furniture, or other impacts. It acts as a protective barrier, extending the lifespan of the flooring and minimizing the need for repairs or replacements.
3. Noise reduction: T molding helps reduce noise transfer between rooms by providing a barrier that absorbs and minimizes sound vibrations. This can be particularly beneficial in multi-story homes or areas where sound insulation is needed.
4. Moisture resistance: In areas prone to moisture or water spills, such as bathrooms or kitchens, T molding can provide protection against water damage. It helps to prevent water from seeping into the gaps between flooring materials, reducing the risk of warping, mold growth, and structural issues.
5. Easy installation: T molding is relatively easy to install, making it a popular choice for DIY enthusiasts. It typically comes with pre-drilled holes, allowing for quick and secure installation using screws or adhesive. With basic tools and some guidance, you can achieve professional-looking results without the need for extensive skills or experience.
Considering these benefits, T molding is a practical and aesthetically-pleasing solution for creating seamless transitions between different flooring surfaces. Whether you are looking to upgrade your home’s appearance or enhance its functionality, T molding can be a valuable addition to your home improvement projects.
Remember, when using T molding, ensure that you choose the right dimensions and materials that match your existing flooring. This will ensure a proper fit and a result that meets your expectations.
Tools And Materials Needed
Tools and Materials Needed
Installing T molding is a simple and effective way to create a smooth transition between different types of flooring. Whether you are tackling a DIY project or hiring a professional, having the right tools and materials is essential for a successful installation. In this section, we will discuss the essential tools required and the recommended materials and supplies for installing T molding.
Essential tools required for installing T molding
Before starting the installation process, ensure that you have the following tools:
- Tape Measure – to accurately measure the length of T molding required for the transition.
- Miter Saw or Hand Saw – for cutting the T molding at the appropriate angles.
- Utility Knife – to trim any excess T molding or make precise cuts.
- Drill – for pre-drilling holes, if necessary, to secure the T molding in place.
- Screwdriver or Screw Gun – for attaching screws, if needed, to secure the T molding.
- Hammer and Nail Set – for nail-in installations, if applicable.
- Pry Bar – to remove any existing molding, if required.
Recommended materials and supplies
Along with the essential tools, it is recommended to gather the following materials and supplies:
- T Molding – choose the appropriate type and color based on your flooring materials.
- Adhesive – depending on the type of T molding and the subfloor, you may need a suitable adhesive.
- Screws or Nails – for attaching the T molding to the subfloor or existing flooring, if necessary.
- Finishing Nails – for a professional finish when nail-in installation is required.
- Caulk or Putty – to fill any gaps or nail holes for a seamless look.
- Safety Glasses and Gloves – to protect yourself during the installation process.
By having all the essential tools and recommended materials ready, you can ensure a smoother and hassle-free installation of T molding. Let’s move on to the next section to learn how to prepare the floor for T molding installation.

Preparing The Surface
Preparing the Surface
Before installing T molding, it is essential to prepare the floor or surface where the molding will be installed. This important step ensures a proper and long-lasting installation. In this section, we will discuss the key aspects of preparing the surface, including cleanliness, dryness, and levelness.
Preparing the floor or surface where the T molding will be installed
Proper preparation of the floor or surface is crucial for a successful T molding installation. Here are the steps you need to follow:
- Clear the area: Begin by removing any objects, furniture, or debris from the area where you will install the T molding. This will provide a clear workspace and make the installation process more convenient.
- Clean the surface: Thoroughly clean the floor or surface using a vacuum cleaner or broom to remove any dust, dirt, or loose particles. If there are stubborn stains or sticky residue, consider using a mild detergent solution and a clean cloth to wipe the area clean. Allow sufficient time for the surface to dry before proceeding.
- Inspect for damage: Carefully examine the floor or surface for any signs of damage, such as cracks or unevenness. If you notice any issues, it is essential to address them before proceeding with the T molding installation. Fill in cracks with an appropriate filler and use a leveling compound to rectify any unevenness.
Ensuring the surface is clean, dry, and level
Once the floor or surface has been prepared, it is essential to ensure it meets certain criteria to guarantee a successful T molding installation. Here are key factors to consider:
| Cleanliness | Dryness | Levelness |
|---|---|---|
| Make sure the surface is free from dirt, dust, and debris, which can affect the adhesion of the T molding. | Ensure the surface is completely dry before installing the T molding. Moisture can compromise the adhesive and cause the molding to loosen over time. | Check that the surface is level by using a leveling tool. If you find any irregularities, take the necessary steps to level the surface before proceeding with the T molding installation. |
By following these simple yet essential steps to prepare the surface, you are setting the foundation for a successful T molding installation. Taking the time to ensure cleanliness, dryness, and levelness will help to avoid potential issues and ensure a visually pleasing and durable finish.
Measuring And Cutting T Molding
Installing T molding can be a great way to enhance the look and durability of your flooring. One crucial step in this process is measuring and cutting the T molding to fit your space perfectly. By following proper techniques and using the appropriate tools, you can achieve accurate measurements and create seamless transitions between different flooring surfaces. In this section, we will guide you through the steps of measuring the length needed for the T molding, ensuring accurate measurements, and cutting the T molding to the correct size using the appropriate tools.
Measuring the length needed for the T molding
Before you begin cutting the T molding, it’s essential to measure the length needed accurately. This measurement will depend on the specific area where you plan to install the T molding. To measure the length, follow these steps:
- Start by determining the total distance between the two surfaces you want to transition with the T molding.
- Using a tape measure, measure this distance from one end to the other, ensuring you account for any corners or obstacles along the way.
- Remember to add a small allowance for expansion and contraction, typically around 1/4 inch, to ensure a proper fit.
By following these steps, you can measure the length needed for the T molding accurately. This measurement will serve as a guide when cutting the T molding to the correct size.
Cutting the T molding to the correct size using the appropriate tools
Once you have determined the length needed for the T molding, it’s time to cut it to the correct size. To ensure precise cuts, follow these guidelines:
- Use a miter saw or a coping saw to cut the T molding. These tools provide clean and accurate cuts.
- Before cutting, make sure to double-check your measurements for accuracy.
- Secure the T molding in place using clamps or a vise to prevent movement while cutting.
- When cutting, follow the manufacturer’s instructions, as different types of T molding may require specific techniques.
- Take your time and cut with a steady hand to maintain accuracy.
By using the appropriate tools and following these steps, you can cut the T molding to the correct size. Remember to always prioritize safety by wearing protective gear, such as safety goggles and gloves, when working with power tools.
Now that you have learned how to measure and cut T molding accurately, you are ready to proceed with the installation process. Properly fitted T molding will not only provide a professional finish but also ensure a seamless transition between different flooring surfaces.
Installing T Molding On Hard Surfaces
Step-by-step instructions for installing T molding on hard surfaces
Installing T molding on hard surfaces such as tile, hardwood, or laminate flooring requires proper techniques to ensure a secure and long-lasting installation. The following step-by-step instructions will guide you through the process, making it easy to achieve a professional finish.
- Measure and cut: Begin by measuring the width of the doorway or transition area where the T molding will be installed. Use a measuring tape and mark the length on the T molding. To ensure a clean cut, use a miter saw or a hacksaw specifically designed for cutting T molding.
- Prepare the surface: Before installing the T molding, clean the surface to remove any dust, debris, or adhesive residue. Ensure that the surface is dry and smooth, as any imperfections may affect the installation.
- Apply adhesive: Apply a high-quality construction adhesive along the underside of the T molding. Be sure to follow the manufacturer’s instructions for adhesive application and allow for adequate drying time.
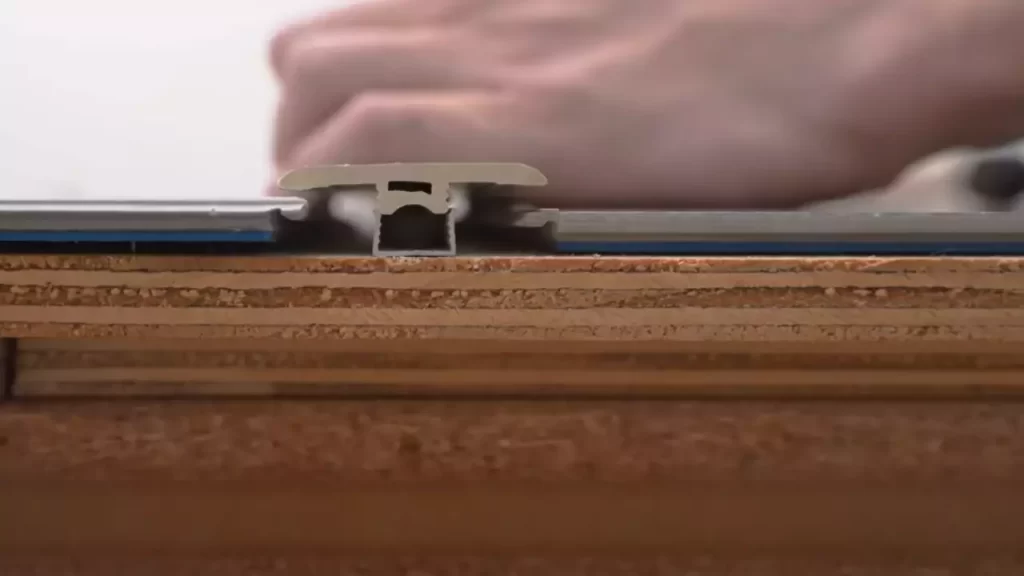
- Position the T molding: Carefully place the T molding in the desired position, ensuring that it aligns with the transition area or doorway. Press firmly to secure the T molding to the surface. Take caution not to trap any air bubbles beneath the molding.
- Secure in place: Once the T molding is in position, use finishing nails or screws to secure it further. Place the nails or screws at regular intervals along the length of the T molding, ensuring that they penetrate both the T molding and the underlying surface. Be careful not to over-tighten, as it may cause the molding or the surface to crack.
- Finish and conceal: To achieve a polished look, you can use wood putty or color-matched caulk to fill any visible nail or screw holes. Smooth the filler material using a putty knife or your finger and allow it to dry completely before proceeding.
Proper techniques for securing the T molding in place
Securing the T molding in place is crucial to its functionality and durability. Follow these proper techniques to ensure a secure installation:
- Choose the right type of fasteners: Selecting the appropriate fasteners is essential for securing the T molding. Finishing nails or screws are commonly used, but make sure they are suitable for the material of both the T molding and the underlying surface.
- Space the fasteners evenly: To ensure a secure and consistent installation, space the fasteners evenly along the length of the T molding. This will help distribute the pressure and prevent any potential warping or damage.
- Use pilot holes when necessary: If you are installing T molding on hardwood or another fragile surface, it is advisable to pre-drill pilot holes to prevent splitting or damage. The size of the pilot holes should match the diameter of the fasteners you are using.
- Avoid over-tightening: When fastening the T molding, take care not to over-tighten the screws or nails. Over-tightening can lead to cracks or damage on the molding or the underlying surface. Use a moderate amount of force to secure the molding without causing any harm.
- Consider adhesive reinforcement: In addition to fasteners, you can reinforce the installation by applying adhesive along the underside of the T molding. This will provide extra stability and ensure a strong bond between the molding and the surface.
By following these step-by-step instructions and employing proper techniques for securing the T molding, you can achieve a flawless installation on hard surfaces such as tile, hardwood, or laminate flooring. Now, you can enjoy a smooth and seamless transition between different floor types while adding an attractive finishing touch to your space.
Installing T Molding On Carpeted Surfaces
When it comes to installing T molding on carpeted surfaces, following the correct technique is crucial to achieve a secure and professional-looking installation. T molding is a decorative and functional strip of material that is used to transition between different flooring types or to join two sections of the same floor seamlessly. By properly installing T molding on carpeted surfaces, you can ensure a beautiful and durable finish that enhances the overall appearance of your space. In this article, we will provide step-by-step instructions and techniques to help you achieve a successful installation.
Step-by-step instructions for installing T molding on carpeted surfaces
Follow these steps to install T molding on carpeted surfaces:
- Begin by measuring the width of the doorway or the area where the T molding will be installed. This will help you determine the length of the T molding strip you will need.
- Cut the T molding strip to the required length using a saw or a utility knife. Ensure that the cut is clean and straight for a neat finish.
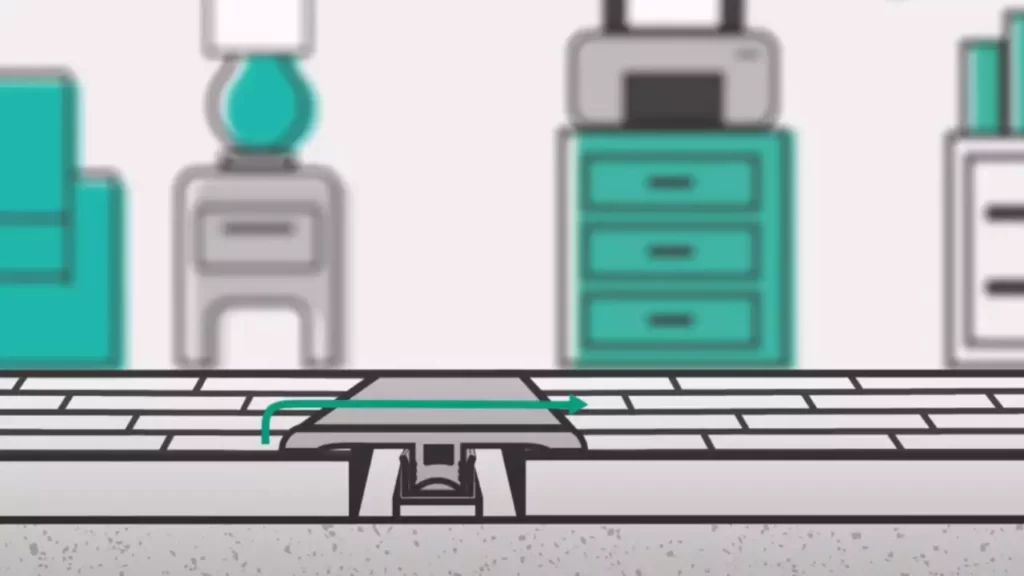
- Place the T molding strip in the desired position on the carpeted surface, ensuring that the lip of the T molding is facing towards the desired direction, such as towards the higher flooring surface.
- Using a marker or pencil, mark the areas where the T molding strip will be attached to the floor. These marks will act as a guide during the installation process.
- Apply a thin layer of adhesive or double-sided tape to the back of the T molding strip. Make sure to spread the adhesive evenly to ensure a secure and long-lasting installation.
- Press the T molding strip firmly onto the marked areas on the carpeted surface. Apply even pressure to ensure proper adhesion.
- Wipe off any excess adhesive that may squeeze out from the edges of the T molding strip. A damp cloth or sponge can be used for this purpose.
- Allow the adhesive to dry completely according to the manufacturer’s instructions before subjecting the T molding to regular foot traffic or excessive pressure.
Techniques to ensure a secure and professional-looking installation
To achieve a secure and professional-looking installation, consider the following techniques:
- Make sure the carpeted surface is clean and free from any dust, debris, or loose fibers before installing the T molding. This will ensure better adhesion and prevent any unevenness.
- If the carpet has a thick pile, you may need to trim the carpet along the edge where the T molding will be installed. This will create a smooth transition and ensure a flush fit.
- Use a rubber mallet or a block of wood and a hammer to tap the T molding into place. This will help secure it firmly and ensure a tight fit.
- Consider using screws or nails in addition to adhesive or tape for added stability and strength, especially for high-traffic areas.
- Regularly inspect the T molding for any signs of wear or damage, and replace it if necessary to maintain the overall appearance and functionality of the installation.
By following these step-by-step instructions and techniques, you can install T molding on carpeted surfaces with confidence. Remember to take your time, be precise in your measurements and cuts, and use high-quality materials for a professional result. With a little effort and attention to detail, you can achieve a secure and visually appealing installation that enhances the beauty and functionality of your space.
Tips And Tricks For A Professional Result
When it comes to installing T molding, following the right techniques and using the right tools is crucial. By paying attention to the details and incorporating some tips and tricks, you can achieve a professional result that not only enhances the look of your flooring but also ensures a long-lasting installation. In this section, we will discuss additional tips and tricks to enhance the installation process and achieve a polished look, as well as common mistakes to avoid when installing T molding.
Additional tips and tricks to enhance the installation process and achieve a polished look
1. Take accurate measurements
To ensure a seamless installation, start by measuring the length and width of the area where the T molding will be installed. Be precise and allow for any irregularities in the flooring. Taking accurate measurements will help you cut the molding to the correct size, eliminating any gaps or uneven edges.
2. Choose the right adhesive
Choosing the right adhesive is essential for a sturdy and long-lasting installation. Select an adhesive that is specifically designed for T molding and compatible with the type of flooring material you are working with. Follow the manufacturer’s instructions for application and drying time to achieve optimal results.
3. Pre-drill the holes
To avoid splitting or cracking the molding, pre-drill holes where the nails or screws will be inserted. Use a drill bit that is slightly smaller than the diameter of the nails or screws to ensure a snug fit. Pre-drilling will make the installation process easier and prevent any damage to the molding.
4. Use a miter saw for precise cuts
A miter saw is a valuable tool for achieving clean and precise cuts on the T molding. Adjust the miter saw to the appropriate angle for your installation (usually 45 degrees) and carefully cut the molding to the desired length. Ensure that the angles match perfectly to achieve a professional finish.
Common mistakes to avoid when installing T molding
1. Rushing the installation
One common mistake is rushing the installation process. Take your time to measure accurately, cut precisely, and ensure the adhesive is applied correctly. Rushing can lead to mistakes, uneven cuts, and a sloppy overall appearance.
2. Neglecting to acclimate the molding
Before installation, allow the T molding to acclimate to the room’s temperature and humidity for at least 48 hours. This will prevent the molding from expanding or contracting after installation, reducing the chances of gaps or buckling.
3. Not cleaning the subfloor properly
A clean and smooth subfloor is crucial for a secure and long-lasting T molding installation. Make sure to remove any dirt, debris, or adhesive residue from the subfloor before applying the adhesive. This will create a proper bond and prevent any unevenness or movement.
4. Failure to trim excess adhesive
After the adhesive has dried, don’t forget to trim any excess adhesive that may have squeezed out from under the T molding. Use a putty knife or a utility knife to carefully remove the excess, ensuring a clean and professional appearance.
Maintenance And Care For T Molding
T Molding is a popular choice for finishing edges and joining different types of flooring seamlessly. Its durability and aesthetic appeal make it a great addition to any space. To ensure that your T molding remains in excellent condition for years to come, proper maintenance and care are essential. In this section, we will discuss how to properly clean and maintain T molding, as well as the recommended products and methods for cleaning.
How to properly clean and maintain T molding to prolong its lifespan
Regular cleaning and maintenance play a vital role in keeping your T molding looking its best. Here are some essential tips:
- Remove loose dirt and debris: Using a soft-bristle broom or vacuum cleaner with a brush attachment, gently sweep away any loose dirt and debris from the T molding. This step will prevent scratching during the cleaning process.
- Prepare a gentle cleaning solution: In a bucket, mix warm water with a mild detergent or floor cleaner. Avoid using harsh chemicals or abrasive cleaners as they can damage the T molding’s finish.
- Clean the T molding: Dip a soft cloth or sponge into the cleaning solution. Wring out any excess liquid, ensuring the cloth or sponge is damp but not soaking wet. Gently wipe down the T molding, following the direction of the grain. This process will remove any stubborn dirt or stains.
- Rinse with clean water: After cleaning, use a clean, damp cloth or sponge to rinse the T molding with clean water. This step will remove any residue from the cleaning solution.
- Dry thoroughly: Using a dry cloth or towel, carefully dry the T molding to prevent water spots or moisture damage. Make sure to remove any remaining moisture from the surface.
By following these steps regularly, you can maintain the cleanliness and appearance of your T molding, ensuring its longevity.
Recommended products and methods for cleaning
When it comes to cleaning T molding, it’s important to use the right products and methods to avoid causing any damage. Here are some recommended options:
| Product | Method |
|---|---|
| Mild Detergent | Mix a small amount of mild detergent with warm water. Follow the cleaning steps mentioned above. |
| Vinegar Solution | Mix equal parts of vinegar and warm water in a spray bottle. Spray the solution onto a cloth or sponge and clean the T molding. |
| Mild Floor Cleaner | Follow the manufacturer’s instructions and dilute the floor cleaner with water as directed. Clean the T molding using a damp cloth or sponge. |
Please note that it’s always recommended to test any cleaning product or solution on a small, inconspicuous area of the T molding before applying it to the entire surface. This step will ensure that the product does not cause any discoloration or damage.
By using the right cleaning products and following the proper cleaning methods, you can keep your T molding looking pristine and extend its lifespan.
Alternative Uses For T Molding
When it comes to home improvement projects, T molding is commonly used to join two sections of flooring together, providing a smooth transition and a polished finish. However, did you know that T molding can be used in a variety of creative ways beyond its traditional purpose? In this article, we will explore some alternative uses for T molding that can elevate your interior design and enhance the functionality of your home.
Creative ways to use T molding in various home improvement projects
1. Accent Wall Trim: T molding can be used as a decorative trim to create an eye-catching accent on your walls. Install a horizontal strip of T molding at chair rail height to divide the room visually and add architectural interest.
2. Customized Shelves: Give your shelving units a professional touch by incorporating T molding along the front edge. This simple addition will not only prevent wear and tear but also create a sleek and finished look.
3. Cabinet Door Frame: T molding can be used to frame cabinet doors, adding a touch of sophistication to your kitchen or bathroom. Choose a contrasting color that complements your cabinetry to make a bold statement.
4. Room Divider: Create separation in an open floor plan by using T molding as a room divider. Whether it’s between your living and dining area or your home office and bedroom, this unique solution adds structure without sacrificing that open and airy feeling.
Ideas for incorporating T molding in interior design
1. Transition Between Flooring Types: T molding is perfect for seamlessly transitioning between different types of flooring materials. Use it to join hardwood and tile, carpet and laminate, or any other flooring combination you desire.
2. Border for Carpet: Install T molding as a border for your carpet, creating a defined transition between the carpeted area and other flooring surfaces. This not only adds visual appeal but also protects the edges of your carpet from fraying.
3. Staircase Edging: Add durability and safety to your staircase by installing T molding along the edges of each step. This not only protects the stair tread but also gives your staircase a finished and polished look.
4. Baseboard Alternative: Instead of traditional baseboards, consider using T molding as a sleek and modern alternative. This option allows for easier cleaning and can create a stylish, contemporary look in any room.
With its versatility and functionality, T molding can be a valuable addition to your home improvement projects. Whether you’re looking to add a decorative element or improve the overall functionality and design of your space, incorporating T molding in these alternative ways can make a significant impact. Embrace your creativity and explore the endless possibilities!
Frequently Asked Questions
How Do You Install T Transition Strips?
To install T transition strips, follow these steps: 1. Measure the gap between the two flooring surfaces. 2. Cut the transition strip to the measured length. 3. Apply adhesive to the strip and press it firmly onto the floor. 4.
Allow the adhesive to dry. 5. Trim any excess strip if needed.
What Kind Of Glue To Use For T-Molding?
To adhere T-molding, use a strong adhesive such as epoxy, super glue, or construction adhesive.
What Size Gap For T-Molding?
The recommended gap size for T-molding is typically around 1/4 inch.
How Do You Trim T-Molding?
To trim T-molding, follow these steps: Measure and mark the desired length on the molding. Use a miter saw or a hand saw to carefully cut along the marked line. Smooth the cut edge with sandpaper if needed. Fit the trimmed molding into place and secure it with adhesive or nails.
Conclusion
Installing T-molding is a simple and effective way to add a polished finish to your flooring project. By following the step-by-step instructions outlined in this blog post, you can achieve professional-looking results. Remember to measure accurately, prepare the flooring surface, and secure the T-molding firmly in place.
With attention to detail and a little bit of patience, you’ll have a seamless transition between floorings that enhances the overall look and durability of your space. Happy installing!