Installing a sun shade sail involves measuring and preparing the space, attaching the sail to sturdy structures, and tightening the tension to ensure a secure and aesthetically pleasing installation. A sun shade sail can be a great addition to your outdoor space, providing shade and protection from the sun’s harmful rays.
Installing a sun shade sail may seem like a daunting task, but with proper planning and attention to detail, it can be a relatively straightforward process. By following a few simple steps, you can easily install a sun shade sail in your own backyard.
The first step in installing a sun shade sail is to measure the area where you plan to install it. Take accurate measurements of the space to determine the size of the sail you will need. Next, you will want to identify and prepare the attachment points, such as the corners of your house or sturdy poles.
Make sure these structures are securely in place and able to withstand the tension of the sail. Once you have your measurements and attachment points in place, it’s time to install the sail. Start by carefully attaching each corner of the sail to the designated attachment points. Depending on the type of attachment hardware you are using, this step may involve using anchor bolts, turnbuckles, or carabiners. Ensure that each connection point is secure and properly tightened.
With the sail attached, it’s time to tension the fabric. This step is crucial for not only ensuring the shade sail is secure but also for achieving a taut and visually appealing result. Using a tensioning device, such as a turnbuckle or pulley system, gradually apply tension to each corner of the sail. Be careful not to over-tighten, as this can put unnecessary strain on the fabric and attachment points.
Finally, step back and assess the positioning and tension of the sun shade sail. Make any necessary adjustments to ensure the sail is level and properly tensioned. If needed, recheck your installation to confirm stability and security. By following these steps and carefully considering the measurements, attachment points, and tension of the sail, you can successfully install a sun shade sail in your outdoor space. Enjoy the added shade and comfort that it brings to your backyard or patio.
Why Install A Sun Shade Sail?
When it comes to creating a comfortable and protected outdoor space, installing a sun shade sail is a brilliant solution. Not only does it provide much-needed shade, but it also adds a touch of aesthetic appeal to your outdoor area. In this article, we will explore the reasons why you should consider installing a sun shade sail and the benefits it offers. Let’s dive in!
Benefits and Advantages of Installing a Sun Shade Sail
Installing a sun shade sail comes with numerous benefits and advantages, making it a popular choice for many homeowners. Some of the key benefits include:
- Protection from Harmful UV Rays: A sun shade sail provides excellent protection against harmful UV rays emitted by the sun. This is crucial, as prolonged exposure to UV rays can lead to skin damage, premature aging, and even skin cancer. By installing a sun shade sail, you can create a safe space for you and your loved ones to relax outdoors, without worrying about sunburn or other sun-related issues.
- Temperature Regulation: One of the major advantages of a sun shade sail is its ability to regulate the temperature of your outdoor space. By blocking the direct sunlight, it significantly reduces the heat buildup underneath, keeping the area cool and comfortable even on the hottest days. This makes it the perfect addition to your patio, deck, or any other outdoor gathering area.
- Enhanced Privacy: If you value your privacy, a sun shade sail can offer just that. It acts as a visual barrier, shielding your outdoor space from prying eyes and creating a secluded and intimate atmosphere. This is especially beneficial if you live in a densely populated area or have neighbors in close proximity.
- Versatility and Customization: Sun shade sails come in various shapes, sizes, and colors, allowing you to customize your outdoor space according to your preferences. Whether you want a contemporary look or a more rustic vibe, there is a sun shade sail design that will perfectly complement your outdoor aesthetics.
Aesthetic Appeal and Functionality of a Sun Shade Sail in Outdoor Spaces
Apart from its practical benefits, a sun shade sail also offers a great deal of aesthetic appeal in outdoor spaces. Here’s how:
- Modern and Stylish: With its sleek and minimalist design, a sun shade sail adds a touch of modernity and elegance to any outdoor setting. Whether you have a traditional or contemporary space, a sun shade sail can seamlessly blend in and elevate the overall look and feel of your area.
- Enhanced Outdoor Living: By installing a sun shade sail, you instantly expand your living space beyond the four walls of your home. It creates an inviting and comfortable nook where you can entertain friends, enjoy family meals, or simply relax with a book. The versatility and functionality of a sun shade sail make it an essential addition to any outdoor area.
- Complements Existing Features: The beauty of a sun shade sail is that it effortlessly complements existing outdoor features, such as patios, decks, and gardens. Whether you have a cozy corner seating arrangement or a sprawling outdoor dining area, a sun shade sail will enhance the overall aesthetics of your space and tie everything together.
Creating a Comfortable and Protected Area with a Sun Shade Sail
One of the primary reasons to install a sun shade sail is to create a comfortable and protected area in your outdoor space. Here’s how it achieves that:
- Ample Shade: The primary function of a sun shade sail is to provide shade, and it does so remarkably well. By blocking out direct sunlight, it creates a cool and shady area where you can escape the heat and enjoy the outdoors. This is particularly beneficial during hot summer days when the sun is at its peak.
- Breathability and Air Circulation: Unlike solid structures, a sun shade sail allows for natural airflow and ventilation. This helps in keeping the area well-ventilated and prevents the buildup of stagnant hot air. As a result, you can enjoy a refreshing breeze while still being protected from the sun.
- Protection from Light Rain and Elements: Aside from offering shade, a sun shade sail can also provide some protection against light rain showers and other elements. Its water-resistant properties ensure that you can still enjoy your outdoor space even if the weather is not ideal. However, it’s important to note that sun shade sails are not designed to withstand heavy rain or harsh weather conditions.
In conclusion, installing a sun shade sail brings a multitude of benefits and advantages to your outdoor space. From protecting against harmful UV rays to enhancing the aesthetics and functionality, it is an investment that pays dividends in terms of comfort and enjoyment. So, why wait? Install a sun shade sail today and transform your outdoor area into a relaxing haven.
Choosing The Right Sun Shade Sail
When it comes to installing a sun shade sail, one of the most important decisions you’ll need to make is choosing the right one for your space. The sun shade sail you select should not only provide effective sun protection, but also enhance the aesthetic appeal of your outdoor area. In this article, we’ll explore the factors you should consider when selecting a sun shade sail, including measuring the space, determining the size needed, and the various material options available.
Factors to Consider When Selecting a Sun Shade Sail
Before making a purchase, there are several factors to consider to ensure that you choose a sun shade sail that meets your specific needs. Understanding these factors will help you make an informed decision and maximize the benefits of your shade sail installation.
Here are some key factors to keep in mind:
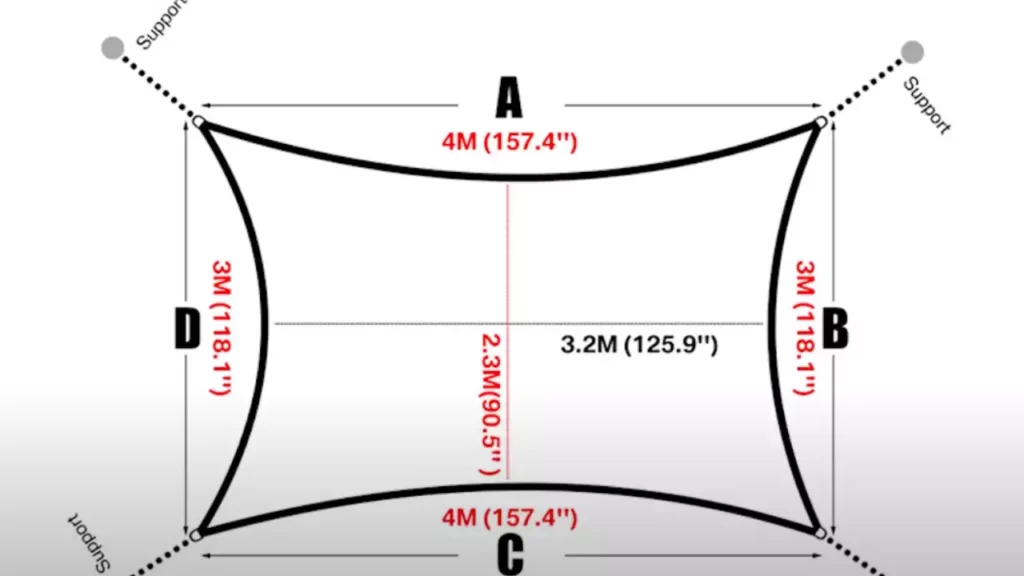
Measuring the Space and Determining the Size Needed
To select the appropriate size for your sun shade sail, you first need to measure the space where you intend to install it. A precise measurement ensures a proper fit and avoids any complications during installation. Using a tape measure, carefully measure the length and width of the area. Consider any additional space required for attachment points and tensioning. After measuring, you can determine the size of the shade sail that will provide optimal coverage and protection.
Material Options and Suitability for Different Environments
When it comes to sun shade sails, the material used is a crucial factor to consider. There are different options available, each with its own advantages and suitability for various environments. The most common materials used for sun shade sails include:
| Material | Suitability |
|---|---|
| High-density polyethylene (HDPE) | A popular choice due to its durability, UV resistance, and breathability. It is suitable for both residential and commercial applications. |
| Polyester | Known for its high tensile strength and resistance to stretching and tearing. It is ideal for areas with heavy winds. |
| Acylic | A versatile material that offers excellent fade resistance and color options. It is commonly used in residential settings. |
| PVC-coated polyester | This material provides enhanced waterproofing and is often used in areas with frequent rainfall. |
Consider the climate and weather conditions in your area to determine the most suitable material for your needs. If you’re unsure, consult with a shade sail professional who can guide you in making the right material choice.
By carefully considering these factors, you can confidently choose a sun shade sail that not only provides protection from the sun’s harmful rays but also complements your outdoor space. Take the time to measure accurately and select the most suitable material, and you’ll enjoy the benefits of a comfortable and stylish shade sail installation for years to come.
Step-By-Step Guide To Installing A Sun Shade Sail
Installing a sun shade sail can transform your outdoor space into a comfortable and stylish oasis, providing much-needed shade from the scorching sun. This step-by-step guide will walk you through the installation process, ensuring a sturdy and long-lasting shade sail.
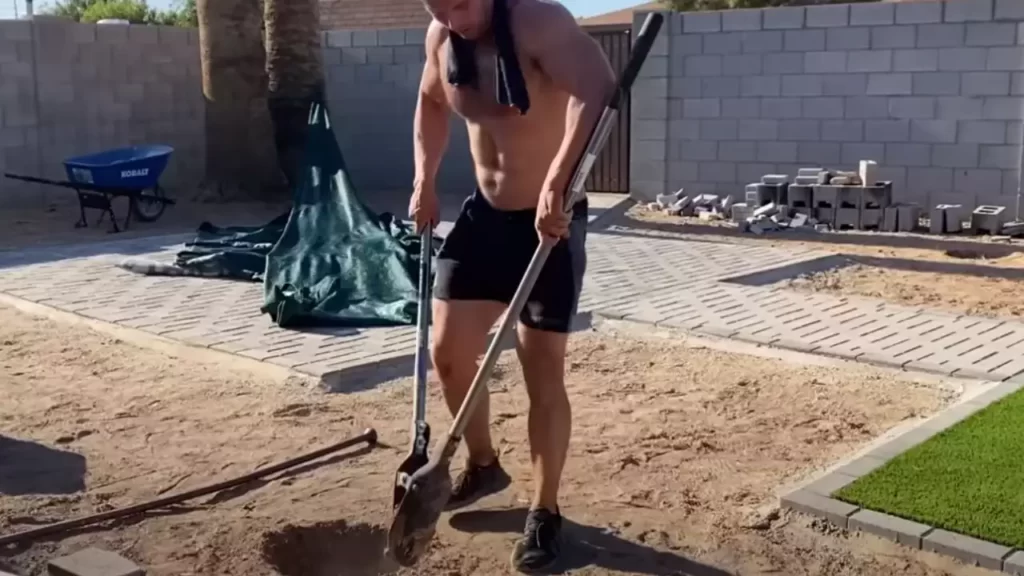
Preparing the installation area
Before you begin installing your sun shade sail, it’s essential to prepare the installation area properly. Start by clearing the area of any debris, rocks, or branches that could interfere with the installation process. Additionally, make sure to level the area to ensure a proper installation and prevent any sagging or unevenness in the shade sail.
Assessing structural support for anchoring points
The next step is to assess the structural support for the anchoring points. It’s crucial to determine if the existing structures, such as trees, posts, or walls, can support the weight and tension of the shade sail. If not, you may need to install additional posts or use anchor points specifically designed for sun shade sails.
Measuring and marking the anchor points
Accurate measurements are vital for a successful sun shade sail installation. Measure the size of your sail and mark the anchor points accordingly. Ensure that the distances between the anchor points will provide enough tension to prevent sagging but not too much tension that could strain the fabric.
Ensuring proper tension and stability
Proper tension and stability are crucial to prevent sagging or tearing of the sun shade sail. Ensure that the distance between each anchor point is correct, and make any necessary adjustments before proceeding with the installation.
Determining anchor point locations
Based on your measurements and marking, determine the exact location for each anchor point. These anchor points will serve as the foundation for your sun shade sail, so it’s essential to secure them properly.
Installing the anchor points
Once you have determined the anchor point locations, it’s time to install them. Depending on your specific situation, you have different options for securing the anchor points. It may involve drilling holes, using hardware, or attaching them to existing structures. Choose the method that best suits your situation and ensures a secure connection.
Options for securing anchor points
When it comes to securing the anchor points, you have several options to choose from. Here are some commonly used techniques:
- Concrete footings: Digging holes and pouring concrete to create a stable foundation.
- Wall brackets: Mounting brackets onto walls or existing structures to support the tension of the shade sail.
- Poles and posts: Installing wooden or metal posts to serve as support for the shade sail.
- Ground anchors: Using specialized ground anchors to secure the sail directly into the ground.
Proper techniques for attaching to different surfaces
Depending on the surface you are attaching your sun shade sail to, you may need to use different techniques. Here are some guidelines for attaching to common surfaces:
| Surface | Attachment Technique |
|---|---|
| Wooden posts or structures | Use sturdy stainless-steel screws and eye bolts to secure the shade sail. |
| Brick or concrete walls | Use wall anchors and masonry screws to attach the sail to the wall securely. |
| Exterior walls with siding | Use a ledger board attached to the framing to provide stability and support for the shade sail. |
Attaching the sun shade sail
With the anchor points securely installed, it’s time to attach the sun shade sail. Start by connecting the corners of the sail to the anchor points using carabiners, D-rings, or other suitable hardware. Ensure that the connections are tight and secure to prevent any movement or slipping.
Positioning and securing the sail to anchor points
Once the shade sail is attached, carefully position it to achieve the desired coverage and shade. Adjust the tension on each corner by tightening or loosening the connections to ensure a taught and appealing appearance. Proper tensioning will also help prevent sagging or tearing in the fabric.
Proper tensioning to avoid sagging or tearing
It’s crucial to achieve the right amount of tension when installing your sun shade sail. Too much tension can strain the fabric and potentially cause tearing, while too little tension can result in sagging and pooling of water during rainfall. Regularly inspect the sail and adjust the tension as needed to maintain its optimal performance.
Adjusting and maintaining the sun shade sail
Regular inspections and adjustments are necessary to ensure that your sun shade sail remains in optimal condition. Over time, factors such as wind, rain, and UV exposure may affect the tension and stability of the sail. Periodically check the tension and make any necessary adjustments to maintain its proper functionality.
Cleaning and maintaining the sail is also essential for its longevity. Regularly remove dirt, leaves, and debris from the fabric to prevent mold and mildew growth. Follow the manufacturer’s instructions for cleaning and maintenance to preserve the performance and appearance of your sun shade sail for years to come.
Additional Tips And Considerations
When it comes to installing a sun shade sail, there are a few additional tips and considerations that can make the process smoother and ensure the best results. Paying attention to these factors will not only enhance the functionality of your sun shade sail but also maximize its aesthetic appeal and durability. Let’s take a closer look at some useful tips and considerations to keep in mind.
Sun shade sail accessories and customization options
One of the great advantages of sun shade sails is their versatility. You can enhance the functionality and visual appeal of your shade sail by incorporating various accessories and customization options. These can help you tailor the shade sail to your specific needs and preferences.
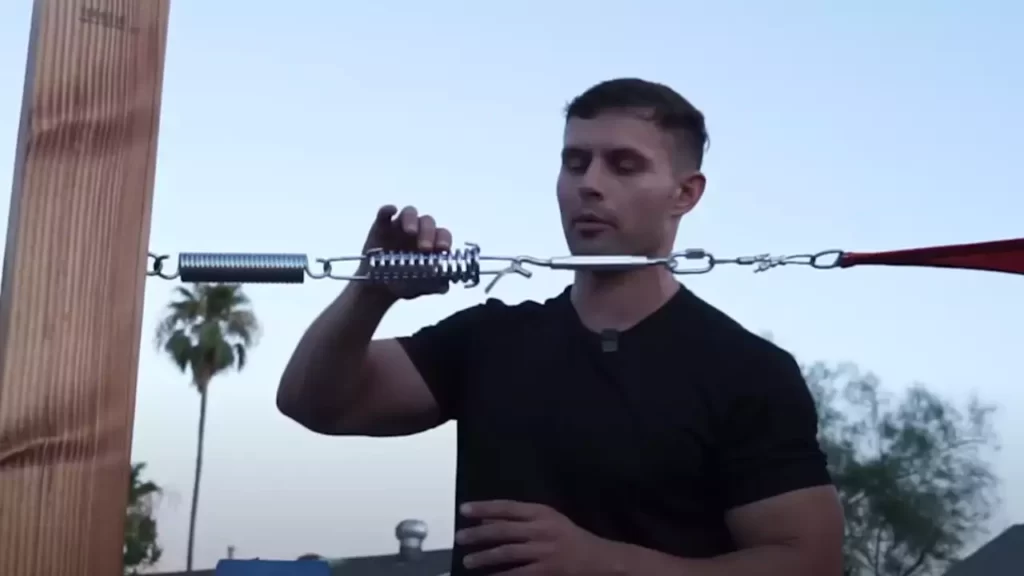
To improve stability and prevent sagging, consider adding turnbuckles, D-rings, or carabiners. These accessories allow you to easily adjust and tension the sail, ensuring it stays taut and secure. For added convenience, you can install swivel hooks or pulley systems to make it easier to detach or lower the shade sail when needed.
When it comes to customization, the options are virtually limitless. You can choose from a variety of colors, sizes, and shapes to match your outdoor living space. Opting for a waterproof or UV-protected fabric can provide extra protection against the elements, extending the lifespan of your shade sail. Additionally, consider incorporating unique design elements, such as decorative edge trims or monogramming, to personalize your shade sail and make a statement.
Dealing with inclement weather and extreme conditions
While sun shade sails are designed to withstand various weather conditions, it’s important to take certain precautions, particularly in areas prone to inclement weather or extreme conditions. By following these tips, you can ensure the longevity and durability of your shade sail.
Before installing your shade sail, assess the area for potential hazards such as overhanging trees or nearby structures. Trimming branches and ensuring proper clearance will help minimize the risk of damage during storms or strong winds.
Consider installing your shade sail at a slight angle to facilitate water runoff. This will prevent water pooling, which can cause fabric stretching or structural damage over time. Regularly inspecting and cleaning your shade sail, especially after heavy rain or snow, will help maintain its integrity and prevent any potential damage from debris or moisture buildup.
Enhancing the aesthetics of the sun shade sail with lighting or decorations
A sun shade sail not only provides relief from the sun but also offers an opportunity to enhance the beauty of your outdoor space. By incorporating lighting or decorations, you can create a captivating ambiance and transform your shade sail into a focal point.
Consider installing string lights or LED strips along the perimeter of your shade sail. This not only adds an enchanting glow during evenings and nighttime but also extends the usability of your outdoor area. Additionally, you can hang decorative lanterns or wind chimes to add a touch of charm and personal style.
Remember to choose lighting and decorations that are weather-resistant and suitable for outdoor use. Properly securing any electrical components and regularly inspecting them for damage will ensure safe and enjoyable use.
Frequently Asked Questions
What Do You Attach Sun Shade Sails To?
Sun shade sails are attached to sturdy structures such as buildings, poles, or posts. These structures provide the necessary support for the sails, ensuring they remain stable and properly tensioned.
Which Way Up Does A Shade Sail Go?
A shade sail should be installed with the curved edges facing downwards and the straight edges facing upwards. This allows rainwater to run off and prevents water from pooling on the sail.
How Do You Attach A Sun Sail To A Fence?
To attach a sun sail to a fence, first, attach mounting brackets to the fence posts. Then, hook the corners of the sun sail onto the brackets. Make sure the sail is tight and secure before enjoying the shade it provides.
How Do I Keep My Shade Sail From Sagging?
To prevent sagging of your shade sail, follow these tips: 1. Properly tension the sail to ensure it is taut and secure. 2. Use durable and high-quality materials for the sail and its installation. 3. Regularly check and adjust the tension of the sail as needed.
4. Install additional support structures, like poles or cables, for added stability. 5. Keep the sail clean and remove any debris that may weigh it down.
Conclusion
Installing a sun shade sail can be a great way to add shade and style to your outdoor space. By following these simple steps and tips, you can easily install a sun shade sail on your own. Remember to choose a suitable location, properly measure and prepare your space, and secure the sail with strong and sturdy hardware.
With a little effort and patience, you can enjoy a cool and comfortable outdoor area all year round. Start your sun shade sail installation today and transform your outdoor space into a relaxing oasis.