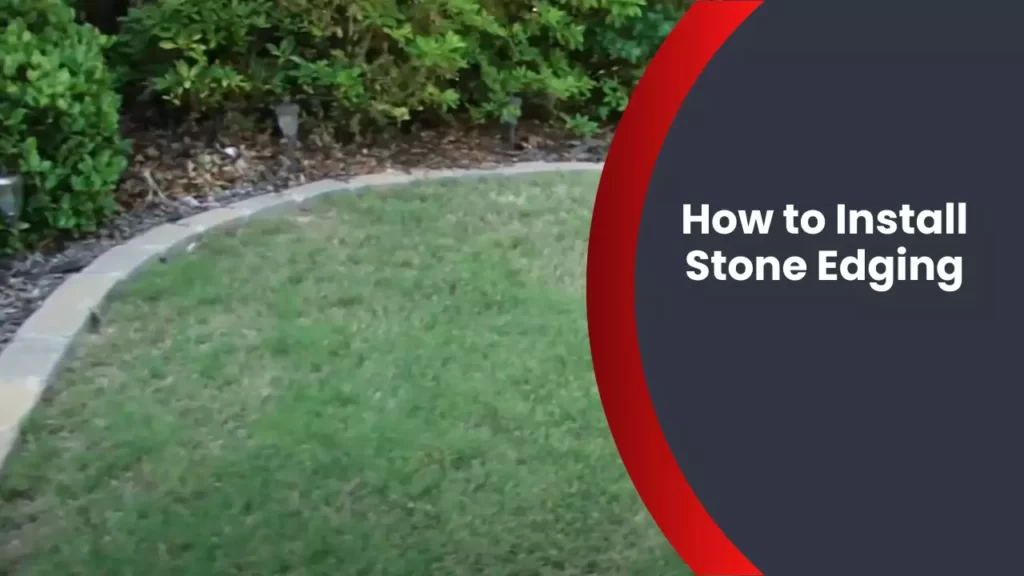
To install stone edging, first mark the desired border location and layout the stones in a trench approximately 4-6 inches deep. Then, level the stones and backfill the trench with soil, compacting it as you go.
Choosing The Right Stone Edging Material
When it comes to installing stone edging, one of the most crucial decisions you’ll make is choosing the right stone edging material. The material you choose will not only determine the overall aesthetic appeal of your edging but also its durability and functionality. To help you make an informed decision, consider the following factors before settling on a specific stone edging option:
Factors to consider when choosing stone edging
1. Style and Design: Take into account the overall style and design of your landscape. Choose a stone edging material that complements and enhances the existing elements in your garden or yard. For a more rustic look, opt for natural stones with irregular shapes. If you prefer a more contemporary and sleek appeal, consider uniform and cut stones.
2. Durability: Ensure that the stone edging material you choose can withstand changing weather conditions, especially if you live in an area with harsh climate patterns. Look for stones that are known for their resilience and longevity, as they will require minimal maintenance and hold up well over time.
3. Functionality: Consider the purpose of your stone edging. If it is solely for decorative purposes, then you have more flexibility in choosing a delicate stone option. However, if you plan to use the edging as a barrier to retain soil or prevent grass from encroaching on your flower beds, you’ll need a sturdier stone that can handle the pressure.
4. Budget: Stone edging materials vary in price, so it’s important to determine your budget before making a decision. While natural stones such as granite and limestone may be more expensive, they often offer superior quality and a timeless appeal. If you’re working with a limited budget, consider alternatives like concrete or composite stones, which can mimic the appearance of natural stones at a fraction of the cost.
Popular stone options for edging
Now that you have an idea of what factors to consider, let’s explore some popular stone options for edging:
| Stone Material | Advantages | Disadvantages |
|---|---|---|
| Bluestone | – Elegant and sophisticated look – Durable and long-lasting |
– Can be more expensive than other options – Can be heavy and challenging to install |
| Flagstone | – Wide variety of shapes and colors – Versatile and can be easily customized |
– Can be prone to cracking – Requires regular maintenance |
| Brick | – Classic and timeless appeal – Affordable and readily available |
– Not as durable as some other stones – May fade over time |
Remember, these are just a few examples, and there are numerous other stone options available in the market. Take the time to research and explore different materials, considering the specific needs and aesthetics of your landscape. By selecting the right stone edging material, you’ll not only enhance the beauty of your outdoor space but also add value and functionality that will stand the test of time.
Planning And Preparing For Installation
Planning and Preparing for Installation
When it comes to installing stone edging in your garden, proper planning and preparation are essential. This step ensures a smooth and successful installation process, allowing you to achieve a beautifully landscaped outdoor space. In this guide, we will walk you through the steps involved in planning and preparing for the installation of stone edging. With careful measurement, gathering the necessary tools and materials, and preparing the ground adequately, you’ll be well on your way to creating a stunning and long-lasting stone edging feature.
Measuring and Marking the Area for Stone Edging
The first step in planning your stone edging installation is to measure and mark the area where you want to install it. This will help you determine the quantity of stones and materials you’ll need, ensuring an accurate estimate and minimizing the chances of any shortages. To measure the area, you can use a measuring tape or a measuring wheel, depending on the size of your garden.
Once you’ve measured the area, use landscaping spray paint or wooden stakes and string to mark the outer boundaries of the stone edging. This will provide a clear visual guide during the installation process and help you stay on track. Remember to account for any curves or bends in your design by using additional markers, ensuring the stones will fit perfectly in your desired layout.
Gathering the Necessary Tools and Materials
Before diving into the installation process, it’s crucial to ensure you have all the necessary tools and materials at hand. This will not only save you time but also make the installation process more efficient. Here are some tools and materials you’ll need for installing stone edging:
- A spade or shovel for digging
- A level tool to ensure the stones are even and straight
- A rubber mallet to secure the stones in place
- A wheelbarrow for transporting materials
- Landscape fabric to prevent weed growth
- Crushed stone or sand for a stable base
- Stone edging pieces of your choice
- Optional: a power saw or chisel for cutting stones to fit
Having all these tools and materials readily available will streamline the installation process and allow you to focus on creating a visually appealing stone edging feature for your garden.
Preparing the Ground for Installation
Now that you have the area measured and the tools and materials gathered, it’s time to prepare the ground for stone edging installation. Proper preparation will ensure a stable base for the stones, preventing shifting or sinking over time.
Start by clearing any existing vegetation or debris from the marked area. This includes pulling out weeds, removing rocks, and smoothing out the soil. Next, consider adding a layer of landscape fabric over the cleared ground. This barrier will help control weed growth and maintain the integrity of your stone edging.
To create a stable base, add a layer of crushed stone or sand on top of the landscape fabric. This layer will provide drainage and prevent the stones from sinking into the soil. Use a rake to evenly distribute the material and ensure a level surface.
With the ground prepared, you’re now ready to begin the installation process and bring your stone edging vision to life. Stay tuned for our next section, where we’ll guide you through the steps of laying and securing the stones in place.
Excavating The Edging Trench
When it comes to installing stone edging in your yard, one of the most critical steps is excavating the edging trench. This step ensures that the edging will be properly anchored and provide a clean, defined border for your landscape. By following these guidelines for digging the trench and removing any existing vegetation or debris, you will be on your way to a successful stone edging installation.
Digging the trench to the appropriate depth and width
To begin, start by determining the desired depth and width of your stone edging. The depth will typically depend on the size of the stones you are using and the overall height you want for the edging. The width should be sufficient to hold the stones securely in place.
Once you have determined the dimensions for your edging, it’s time to get your hands dirty and start digging. Use a shovel or a trenching tool to carefully excavate the trench along the desired pathway of the edging. Make sure to follow the layout you have planned and keep the edges of the trench as straight as possible.
Note: Depending on the type of soil in your yard, you may encounter some resistance while digging. If the soil is compacted, you can water it beforehand to soften it, making it easier to dig.
Removing any existing vegetation or debris
Before proceeding, it’s essential to remove any existing vegetation or debris that may interfere with the installation of your stone edging. Clearing the area ensures a clean and stable base for the edging while preventing future weed growth through the gaps.
Start by manually removing any larger plants or roots that may be growing in the path of the edging. Using a garden hand tool or a small shovel, carefully dig around the plants’ roots and lift them out of the ground.
Next, if the area is covered with grass or weeds, you’ll want to eliminate them to create a clear space for the edging. You have several options to accomplish this:
- Manual Removal: Use a digging tool, such as a garden trowel or a dandelion weeder, to extract the grass or weeds from the soil. Be sure to remove the entire root system to prevent regrowth.
- Chemical Herbicides: If you’re comfortable using herbicides, you can apply a herbicide that targets grass and weeds. Follow the instructions carefully and ensure the product is safe for use in your specific landscape.
- Plastic Sheeting or Newspaper: Alternatively, you can cover the area with plastic sheeting or several layers of newspaper. This method blocks sunlight and suffocates the grass and weeds beneath it.
Once you have cleared the area, inspect it for any remaining debris or rocks that could affect the edging’s stability. Remove any loose materials from the trench, ensuring that it is clean and ready for the next stages of the installation process.
Laying The Stone Edging
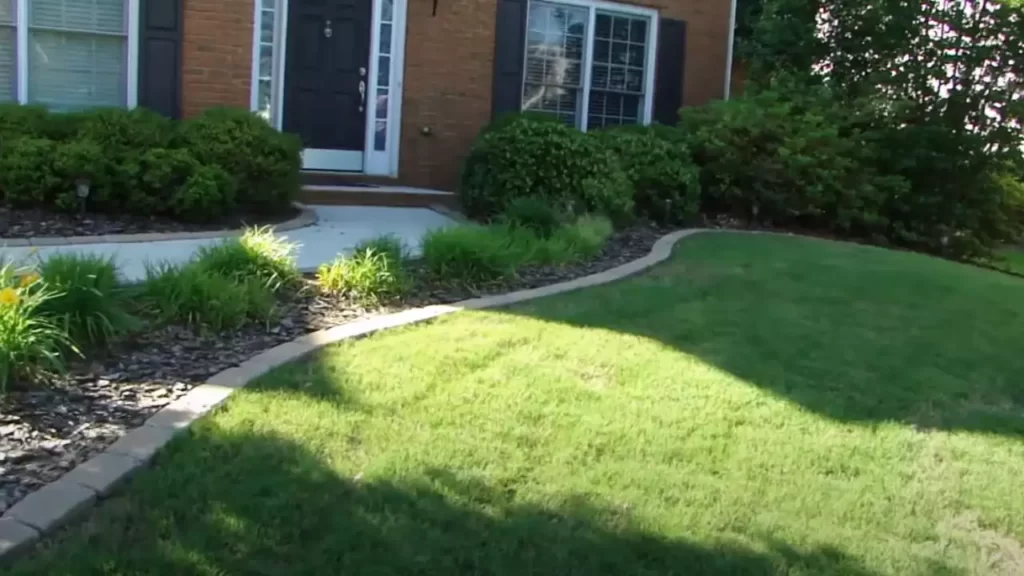
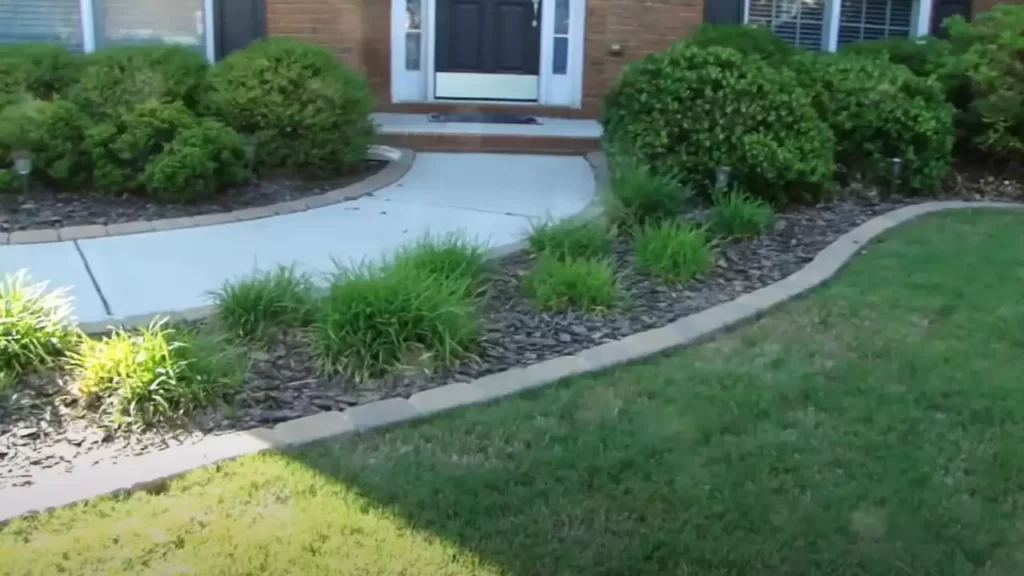
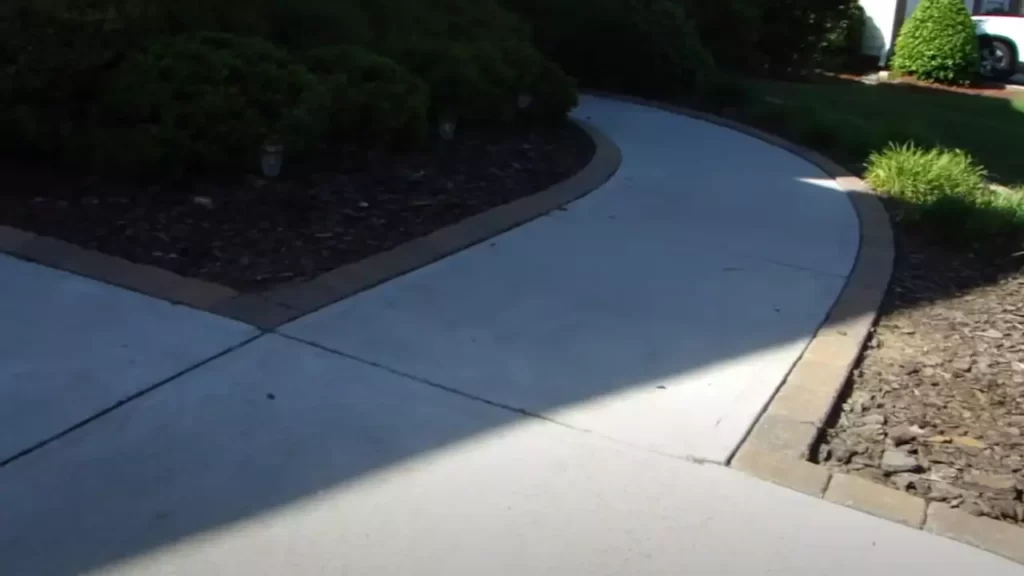
When it comes to enhancing the beauty and functionality of your garden, stone edging is a perfect addition. Not only does it add structure and definition to your landscape, but it also helps to keep soil and mulch in place, preventing erosion. In this section, we will guide you through the process of laying the stone edging, ensuring a seamless and secure installation.
Setting the first stone in place
Before you begin laying the stone edging, it’s essential to set the first stone in place as it will act as a foundation for the rest of the edging. Choose a stone that is flat and stable, ensuring it is positioned at the desired starting point of your edging. Dig a small trench along the edge where the stone will be placed and make sure the depth is sufficient for the stone to sit securely.
Aligning the rest of the stones to create a seamless look
Once the first stone is in place, aligning the rest of the stones is crucial to achieve a seamless appearance. Select stones that are similar in size and shape to maintain consistency. Lay each subsequent stone next to the previous one, checking that it is level and positioned correctly. This careful alignment will ensure a stunning and polished result that seamlessly transitions along the garden’s edge.
Ensuring the stones are level and secure
As you lay each stone, it is vital to ensure that they are level and securely in place. Use a level tool to check the horizontal alignment regularly and adjust as necessary. If a stone appears uneven, remove it and adjust the soil or sand beneath it until it is in the correct position. Additionally, for added stability, fill in any gaps around the stones with fine gravel or soil to secure them in place.
In conclusion, laying stone edging can provide an elegant and functional touch to your garden. Following the steps outlined here, you can ensure that each stone is set securely and aligned correctly, resulting in a seamless and visually pleasing edging that enhances the overall look of your landscape.
Filling And Finishing The Edging
Adding gravel or sand to stabilize the stones
Once you have positioned your stone edging in the trench, it’s time to ensure that the stones are securely set in place. One effective way to stabilize the stones is by adding gravel or sand. This will create a solid base and prevent the stones from shifting or moving over time. When choosing between gravel or sand, consider the type of stone you are using and the overall look you want to achieve.
For gravel, select a size that is appropriate for the size of the gaps between your stones. This will help fill any voids and create stability. Fill the gaps between the stones with the gravel, using a small shovel or your hands. Gently brush off any excess gravel on the stones, making sure they have a clean and polished appearance.
If you prefer a smoother and more refined look, sand can be a great option. Fill the gaps between the stones with sand and use a broom or brush to sweep off any excess. This will give your stone edging a clean and cohesive finish.
Using a rubber mallet to secure the stones in place
Securing the stones firmly is crucial to maintain the integrity of your stone edging. A rubber mallet is the ideal tool for this task, as it provides the necessary force without damaging or chipping the stones. Start by gently tapping each stone with the rubber mallet to ensure it is tightly packed and level with the adjacent stones.
Pay close attention to any gaps or unevenness between the stones. If you notice any, adjust the position of the stone and tap it with the rubber mallet until it fits snugly. This will create a seamless and visually appealing finish.
Continue the process of tapping each stone until the entire length of the edging is secure. Take your time and be careful not to rush this step, as it significantly contributes to the overall durability and longevity of your stone edging.
Backfilling the trench with soil and compacting it
After securing the stones in place, it’s essential to backfill the trench with soil to provide stability and support. Use a shovel or garden trowel to carefully fill the space behind the stones, ensuring that the soil is packed tightly.
Start by adding a small amount of soil at a time, gradually building up to the desired level. Take care not to disturb the stones while backfilling, as it may cause them to shift or become uneven. Use your hands or a compactor tool to press down the soil firmly, ensuring it is compacted and level.
Continue this process until the trench is completely filled and the soil is compacted. Once finished, check the level of the stones and make any necessary adjustments to ensure a uniform appearance. Lastly, water the soil lightly to settle it, allowing the stones to settle into place.
Regular Cleaning And Inspection
Regular cleaning and inspection of your stone edging is essential to maintain its appearance and functionality. By following these simple steps, you can ensure that your stone edging remains in top condition for years to come.
Removing debris and dirt from the edging:
Over time, debris such as fallen leaves, dirt, and moss can accumulate on the surface of your stone edging. This not only diminishes its aesthetic appeal but can also cause damage if left unattended. To keep your edging looking its best, it’s important to regularly remove any debris and dirt.
Here are some easy steps on how to remove debris and dirt from your stone edging:
- Start by using a garden hose to give the edging a thorough rinse. This will help to loosen any stubborn dirt and make it easier to remove.
- Next, use a stiff brush or broom to scrub away any remaining dirt. Work in small, circular motions to ensure that you reach all the nooks and crannies of the edging.
- If there are stubborn stains or moss growth, you can use a solution of warm water and mild soap to clean the edging. Avoid using harsh chemicals or abrasive cleaners, as these can damage the stone.
- Once you have finished scrubbing, rinse the edging again with clean water to remove any soap residue.
- Finally, allow the stone edging to air dry completely before stepping on or placing any objects on it.
Checking for any damage or loose stones:
In addition to regular cleaning, it is important to inspect your stone edging for any signs of damage or loose stones. This will ensure the longevity and stability of your edging.
To check for damage or loose stones, follow these simple steps:
- Start by visually inspecting the entire length of the edging. Look for any cracks, chips, or dislodged stones.
- If you notice any loose stones, carefully remove them and clean the area beneath.
- Inspect the removed stones for any signs of damage. If they are still in good condition, you can reposition them securely in the edging. Otherwise, consider replacing them with new stones.
- For any cracked or damaged stones, it’s best to replace them as soon as possible to prevent further deterioration of the edging.
- If you find any significant damage or are unsure about how to repair the edging, it may be best to consult a professional for assistance.
By regularly cleaning and inspecting your stone edging, you can ensure its longevity and keep it looking beautiful. Taking these simple steps will help you avoid costly repairs and maintain the overall appearance and functionality of your landscaping. Make regular cleaning and inspection a part of your routine, and enjoy the benefits of a well-maintained stone edging for years to come.
Repairing And Replacing Stone Edging
Replacing damaged or misplaced stones
If you notice any damaged or misplaced stones in your stone edging, it’s essential to replace them as soon as possible to maintain the integrity and appearance of your landscaping project. Follow these steps to replace a damaged or misplaced stone in your stone edging:
- Carefully remove the damaged or misplaced stone from the edging, using a pry bar or a flat head screwdriver. Take caution not to damage the nearby stones during this process.
- Clean the area where the stone was removed by removing any debris or dirt to ensure a clean and level surface for the replacement stone.
- Measure the size of the hole left by the removed stone. You may need to chisel or cut the replacement stone to fit correctly. It’s crucial to ensure that the replacement stone matches the rest of the edging in terms of size, shape, and color for a seamless look.
- Apply a layer of landscaping adhesive to the back of the replacement stone and carefully press it into place. Make sure the stone is level with the surrounding stones and aligns properly with the edging.
- Allow the adhesive to dry completely before walking or placing any pressure on the repaired area.
Repairing any gaps or unevenness in the edging
To maintain the sturdiness and aesthetic appeal of your stone edging, it’s essential to repair any gaps or unevenness that may develop over time. Follow these steps to repair gaps or unevenness in your stone edging:
- Remove any debris or dirt from the gaps between the stones using a small brush or a jet of water. Ensure that the gaps are clean and free of any loose materials.
- Fill the gaps with a suitable filler material such as fine gravel, sand, or stone dust. Use a small trowel or your fingers to carefully press the filler material into the gaps, ensuring it is packed tightly to prevent future shifting.
- After filling the gaps, use a broom or brush to sweep away any excess filler material from the surface of the stones.
- Check for any unevenness in the edging and make necessary adjustments. If you notice any stones that are higher or lower than the rest, use a rubber mallet or a wooden block and a hammer to tap them into place until they are level with the surrounding stones.
- Once all repairs have been made, water the edging to help settle the filler material and ensure a solid foundation.
By following these steps, you can easily replace damaged or misplaced stones and repair any gaps or unevenness in your stone edging. Regular maintenance and timely repairs will help keep your stone edging looking beautiful and functional for years to come.
Enhancing And Updating Stone Edging
Adding decorative elements to the edging
If you’re looking to enhance the look of your stone edging and add a touch of personality to your outdoor space, there are a variety of decorative elements you can incorporate. These additions can help create a unique and eye-catching design that will make your stone edging stand out. Here are a few ideas:
- 1. Planting flowers and plants: Adding some colorful flowers or greenery along your stone edging can instantly brighten up the area. Consider choosing plants that complement the color of the stones and create a harmonious look.
- 2. Installing solar lights: For a charming and practical addition to your stone edging, consider placing solar lights along the border. These lights will not only illuminate the pathway but also provide a warm and inviting ambiance to your outdoor space.
- 3. Integrating decorative gravel: Another way to enhance the appearance of your stone edging is by incorporating decorative gravel. This can add texture and visual interest to the edges, creating a stylish and modern look.
- 4. Using stepping stones: Stepping stones can be a creative and fun addition to your stone edging. They can serve as both a functional pathway and a decorative element, leading the eye and adding visual intrigue to your outdoor space.
Changing the layout or design of the edging over time
As your outdoor space evolves and your tastes may change, you might find yourself wanting to update the layout or design of your stone edging. Thankfully, stone edging offers great flexibility and can easily be modified to suit your preferences. Here are a few tips on how to go about making changes:
- Reconfiguring the stones: If you’re looking to change the shape or direction of your stone edging, start by removing the existing stones and lay them out in the new desired pattern. This process allows you to experiment with different arrangements and find the perfect layout.
- Adding or removing stones: Another way to update your stone edging is by adding or removing individual stones. You can create a more intricate design by adding extra stones or simplify the look by removing a few. Flexibility is one of the greatest advantages of stone edging, so don’t be afraid to experiment.
- Painting or staining the stones: If you’re looking for a drastic change, consider painting or staining your stone edging. This allows you to completely transform the appearance and match the stones to your new color scheme or theme. However, be sure to use a paint or stain that is suitable for outdoor use and won’t easily chip or fade.
Overall, updating your stone edging is a great way to keep your outdoor space looking fresh and exciting. Whether you choose to add decorative elements or change the layout, the possibilities are endless. Just remember to take your time, plan carefully, and have fun with the process!
Frequently Asked Questions
What Do You Put Under Stone Edging?
Under stone edging, you can put a variety of materials, such as gravel, mulch, or ground cover plants. These options help to enhance the appearance of the edging and provide a clean, finished look to your outdoor space.
What Is The Best Way To Lay Edging Stones?
To lay edging stones effectively, prepare the area by removing any turf or plants. Level the ground and mark the edging line. Lay a solid base of sand or gravel and compact it. Place the stones tightly together, ensuring they are level.
Secure the edging with stakes or adhesive.
How Do You Use Landscape Edging Stones?
Landscape edging stones are used to create boundaries in outdoor spaces. Place them along the edges of garden beds, walkways, or driveways to create a clean and polished look. Simply position the stones in the desired location and secure them in place with soil or adhesive.
How Do You Keep Stone Edging From Sinking?
To prevent stone edging from sinking, follow these steps: 1. Prepare the ground by clearing debris and leveling the area. 2. Install a solid base layer like crushed rock or sand to provide stability. 3. Make sure the stones are properly spaced and tightly packed together.
4. Secure the edging with landscape spikes or adhesive to keep it in place. 5. Regularly inspect and maintain the edging to prevent any potential sinking issues.
Conclusion
Installing stone edging can transform your landscape, adding a touch of elegance and sophistication. By following the step-by-step guide outlined in this blog post, you can achieve professional-looking results. Keep in mind that proper preparation, a steady hand, and attention to detail are key to a successful installation.
With stone edging, you not only enhance the beauty of your outdoor space but also create a durable and functional barrier. So, why wait? Start your stone edging project today and enjoy the long-lasting benefits it brings.