To install a stair runner without nails, use adhesive tape or double-sided carpet tape for a secure and non-permanent solution. Simply apply the tape directly to the underside of the runner and press it firmly onto the stairs for a hassle-free installation.
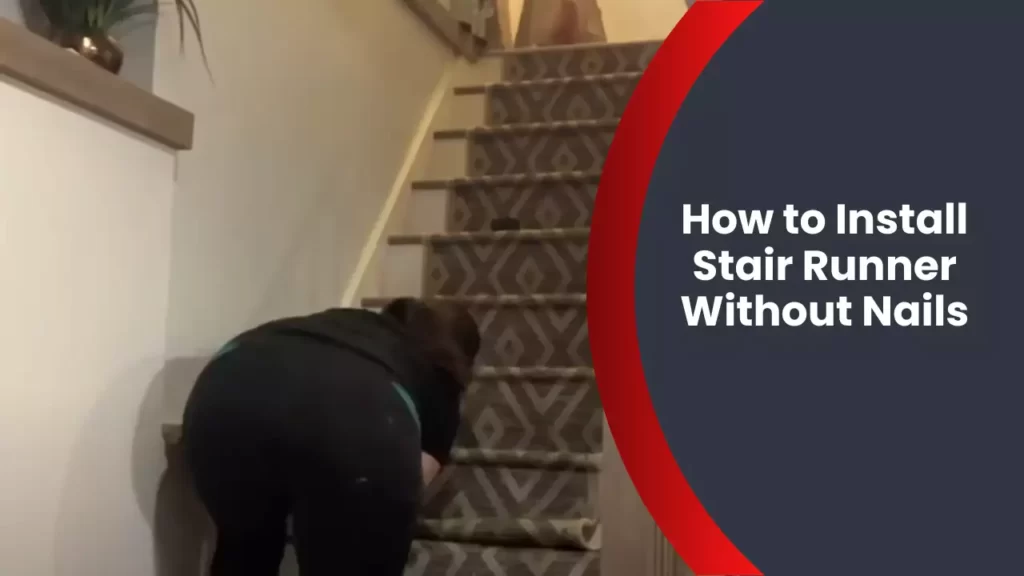
[INTRODUCTION] Installing a stair runner can add style, safety, and warmth to your staircase. But what if you don’t want to use nails or make permanent changes to your stairs? In this guide, we will show you how to install a stair runner without nails, using easy-to-find materials like adhesive tape or double-sided carpet tape.
This method allows for a secure and non-permanent installation, making it ideal for renters or those who wish to change their runner in the future. Whether you’re looking to spruce up your staircase or protect your steps from wear and tear, this step-by-step guide will help you achieve a professional-looking result without the need for nails.
Understanding The Benefits Of A Nail-Free Installation
When it comes to installing a stair runner, most people opt for the traditional method of using nails or staples to secure it in place. However, there is a nail-free alternative that offers a range of benefits. Understanding these advantages can help you make an informed decision when it comes to choosing the right installation method for your staircase. In this article, we will explore the benefits of a nail-free installation for your stair runner.
Avoiding Damage to the Staircase
Installing a stair runner without nails eliminates the need to penetrate the surface of your staircase. This means that you can enjoy the beauty of a carpeted staircase without causing any damage to the underlying wood or other materials. Nails can leave unsightly holes and potentially weaken the structure of your staircase over time. By choosing a nail-free installation method, you can preserve the integrity of your staircase while still achieving the desired aesthetic.
Easy Removal and Replacement of the Runner
One of the advantages of a nail-free installation is the ease of removing and replacing the stair runner. Whether you want to change the runner to match a new interior design or need to clean or repair it, a nail-free installation allows for quick and efficient removal. Unlike nails or staples, which can be time-consuming and difficult to remove, nail-free options such as adhesive tapes or rug pads offer a hassle-free solution. This means that you can easily switch out your stair runner whenever you desire, without any damage or residue left behind.
Flexibility in Changing the Design or Style Over Time
Another benefit of a nail-free installation is the flexibility it provides in terms of design and style. With a traditional nail or staple installation, once the runner is secured, it can be challenging to make changes without leaving visible marks or damage. However, with a nail-free method, you can easily swap out the runner for a new design or style. This gives you the freedom to update your staircase’s look as often as you like, ensuring that it complements your evolving interior decor. Whether you prefer a vibrant pattern for a bold statement or a subtle neutral for a timeless appeal, a nail-free installation allows for effortless customization.
In conclusion, understanding the benefits of a nail-free installation for your stair runner is crucial in making an informed decision. By avoiding damage to the staircase, facilitating easy removal and replacement of the runner, and providing flexibility in changing the design or style over time, a nail-free installation offers a range of advantages that traditional methods cannot. Consider opting for a nail-free approach to enjoy a beautiful, functional, and versatile stair runner installation.
Choosing The Right Stair Runner For A Nail-Free Installation
Considering the runner material and construction
When it comes to installing a stair runner without nails, it is crucial to choose the right material and construction for the runner. This will ensure a secure and stable installation that doesn’t require nails or damaging your staircase.
Material options: There are several popular options for stair runner materials, each with its own benefits and considerations. Wool is a durable and luxurious choice, providing excellent insulation and a soft feel underfoot. Synthetic materials such as nylon or polypropylene offer stain resistance and easy maintenance. Natural fibers like sisal or jute provide a more textured and rustic look. Consider your personal preferences and the level of foot traffic on your stairs when selecting the material.
Construction: Alongside the material, the construction of the runner is another important aspect to consider. Runners can be woven or tufted, with woven runners typically being more durable and long-lasting. Flatweave runners are thin and versatile, while cut-pile runners offer a plush and comfortable feel. Think about the style you prefer and the amount of wear and tear your stairs are likely to experience.
Selecting a suitable non-slip backing for stability
To ensure a nail-free installation, it is crucial to select a stair runner with a suitable non-slip backing. The backing will provide stability and prevent the runner from slipping or moving around. This is especially important for the safety of your household members, especially children or elderly individuals.
Rubberized backing: Many stair runners come with rubberized backing that grips onto the stairs, keeping the runner securely in place. Rubber backing provides excellent adhesion and minimizes the risk of accidents caused by slipping.
Determining the width and length of the runner for the staircase
When installing a stair runner without nails, it is important to accurately measure the width and length of your staircase. This ensures that the runner fits perfectly and looks aesthetically pleasing.
Width: Measure the width of each individual step, including any overhangs if present. Add a few inches to each side to allow for a slightly wider runner. This will create a snug fit and minimize the chance of the runner shifting or exposing the bare stairs.
Length: To determine the length, measure the entire length of the staircase, from the top to the bottom. Add a few extra inches to account for any turns at the bottom or top of the stairs. Remember to also measure the riser height, as runners typically cover the tread and part of the riser.
By considering the runner material and construction, selecting a suitable non-slip backing, and properly determining the width and length of the runner, you can successfully install a stair runner without nails. This approach not only ensures a secure and stable installation but also adds style and warmth to your staircase.
Step-By-Step Guide To Installing A Stair Runner Without Nails
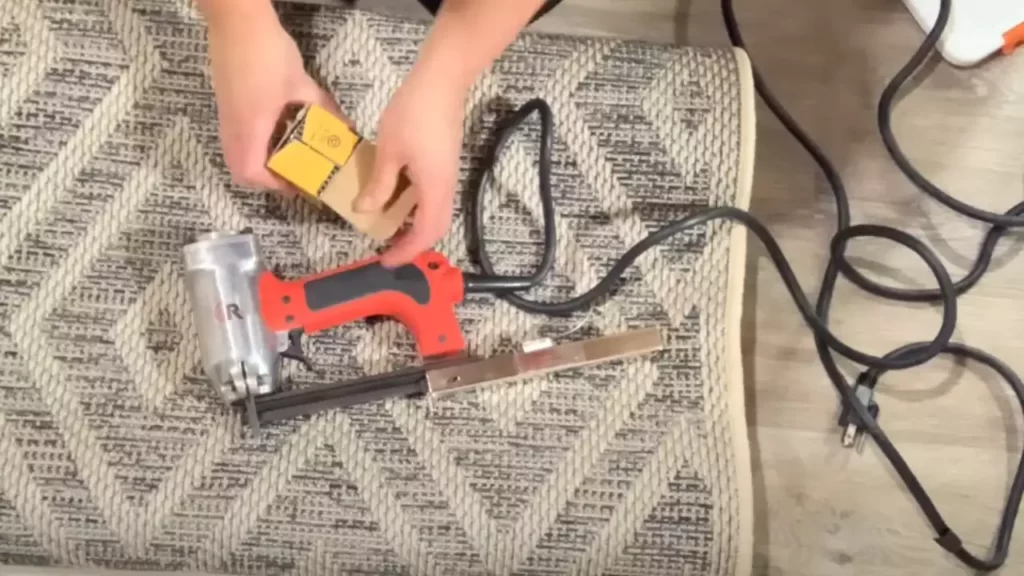
Installing a stair runner without nails is a great way to add style and safety to your staircase without damaging the surface. With the right tools and materials, you can easily accomplish this project in a few simple steps. In this guide, we will walk you through the process of measuring and preparing the staircase, securing the runner with double-sided carpet tape, attaching the runner to the bottom step with adhesive caulk, ensuring the runner is properly aligned and centered, and finally trimming and finishing the edges of the runner.
Measuring and Preparing the Staircase
The first step in installing a stair runner without nails is to measure and prepare the staircase. Start by measuring the width and length of each step, as well as the height of the riser. Use these measurements to determine the size of the runner you will need. It’s important to have a runner that is slightly wider than the step to ensure proper coverage.
Before installing the runner, make sure the staircase is clean and free of any debris or dust. This will ensure that the tape and adhesive properly adhere to the surface.
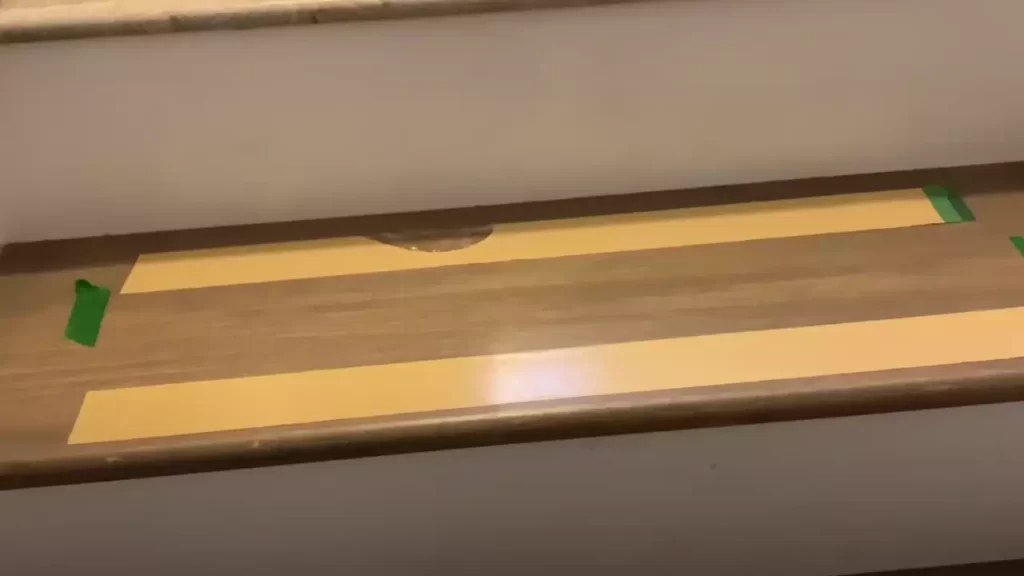
Securing the Runner with Double-Sided Carpet Tape
- Cut strips of double-sided carpet tape to the length of each step.
- Starting at the top of the staircase, carefully align the tape along the width of the step, leaving a small space between each strip.
- Remove the backing from the tape to expose the adhesive.
- Press the runner firmly onto the tape, starting from the top and working your way down the staircase.
- Continue this process for each step, ensuring the runner is straight and properly aligned.
Using double-sided carpet tape provides a strong hold for the runner without the need for nails or other hardware.
Attaching the Runner to the Bottom Step with Adhesive Caulk
Once the runner is secured with double-sided carpet tape, you will need to attach it to the bottom step using adhesive caulk. This will ensure that the runner stays in place and doesn’t slip or bunch up.
- Apply a thin line of adhesive caulk along the length of the bottom step.
- Press the runner firmly onto the caulk, ensuring it is properly aligned.
- Smooth out any wrinkles or bubbles in the runner to ensure a clean and neat appearance.
Allow the adhesive caulk to dry completely before using the staircase. This will ensure a secure and long-lasting installation.
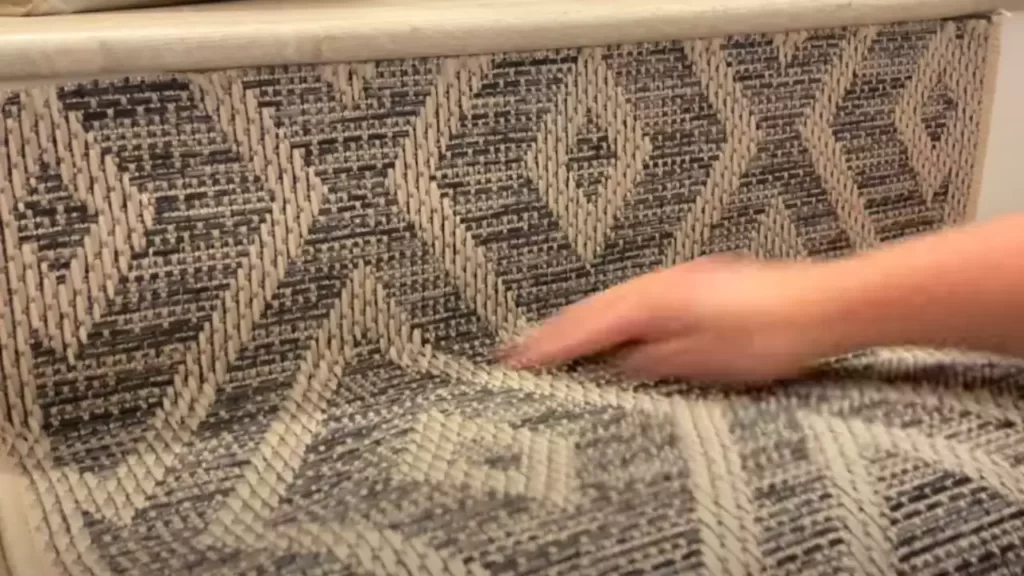
Ensuring the Runner is Properly Aligned and Centered
After the runner is secured with tape and adhesive caulk, it’s important to double-check that it is properly aligned and centered on the staircase. This will ensure a professional and polished look.
Stand at the bottom of the staircase and visually inspect the runner. Make any necessary adjustments to ensure it is straight and centered.
Additionally, you can use a tape measure or ruler to check that the runner is an equal distance from both sides of the staircase. Making these fine adjustments will result in a clean and balanced appearance.
Trimming and Finishing the Edges of the Runner
Finally, to complete the installation, you will need to trim and finish the edges of the runner. This will give it a neat and professional look.
- Measure and mark a straight line along the edge of the runner.
- Using a sharp utility knife, carefully cut along the marked line to trim any excess material.
- If your runner has fringed edges, fold them under and secure them with a small amount of adhesive caulk for a clean finish.
Take your time with this step to ensure clean and precise cuts. Once the edges are trimmed and finished, your stair runner installation is complete.
Maintaining And Caring For A Stair Runner Without Nails
Once you have successfully installed a stair runner without nails, it’s important to maintain and care for it to ensure its longevity and keep it looking its best. By following a few simple steps, you can easily keep your stair runner clean, fix any loose or frayed areas, and monitor for signs of wear and tear over time.
Regular vacuuming and cleaning techniques
Regular vacuuming is key to keeping your stair runner clean and free from dust, dirt, and debris. Use a handheld vacuum or the upholstery attachment of your vacuum cleaner to gently remove any loose particles. Be sure to pay special attention to the edges and corners, as these areas tend to accumulate more dirt.
In addition to vacuuming, periodic deep cleaning is necessary to maintain the appearance of your stair runner. Depending on the material of your runner, you may be able to use a mild detergent mixed with water to spot clean any stains. However, it’s always best to check the manufacturer’s guidelines or consult a professional cleaner to ensure you are using the correct method and products for your specific runner.
Addressing any loose or frayed areas of the runner
If you notice any loose or frayed areas on your stair runner, it’s important to address them as soon as possible to prevent further damage. One method to secure loose edges is to use double-sided carpet tape or adhesive strips specifically designed for this purpose. Carefully lift the loose edge and apply the tape or adhesive, ensuring it is securely attached.
For frayed areas, you can use fabric glue or a needle and thread to stitch the edges together. Make sure to match the thread color with the color of your stair runner for a seamless repair. Take your time and work methodically to ensure a neat and tidy result.
Monitoring for signs of wear and tear over time
Regularly inspecting your stair runner for signs of wear and tear is essential in preventing minor issues from turning into major problems. Look out for loose threads, faded areas, or any significant damage that may require professional repair or replacement.
By consistently monitoring your stair runner, you can take appropriate action timely to maintain its overall condition and prevent further damage. This way, you can enjoy your beautiful and functional stair runner for years to come.
Exploring Alternative Nail-Free Installation Methods
When it comes to installing a stair runner without nails, there are several alternative methods that you can explore. These methods not only eliminate the need for nails, but they also provide added security and ease of maintenance. In this article, we will discuss three popular nail-free installation options: using stair rods or brackets, trying out non-adhesive gripper pads or treads, and considering professional installation for a seamless finish.
Using Stair Rods or Brackets for Added Security
If you are looking for a visually appealing and secure way to install a stair runner without nails, using stair rods or brackets is a great option. These decorative accessories not only add elegance to your staircase but also hold the runner firmly in place. Stair rods or brackets are available in various finishes, styles, and materials, allowing you to choose the one that complements your home’s aesthetic. Installing stair rods or brackets is a simple process that involves attaching them to the risers or treads of your stairs using screws or adhesive.
Trying Out Non-Adhesive Gripper Pads or Treads
If you prefer a non-permanent solution, non-adhesive gripper pads or treads can be a suitable choice. These gripper pads or treads feature a specialized design that grips the back of the runner, keeping it securely in place without the need for nails. Simply place the gripper pad or tread on the step, position the runner on top, and press it down firmly. The gripper’s textured surface ensures a strong hold, preventing any movement or slipping of the runner. This method not only allows for easy removal and repositioning but also protects the stairs from potential damage caused by nails.
Considering Professional Installation Options for a Seamless Finish
If you want the assurance of a seamless and professional-looking installation, considering hiring a professional to install your stair runner is worth considering. Experienced installers have the expertise to ensure that your runner is flawlessly fitted, eliminating the risk of any loose ends or imperfections. They can employ various techniques, such as tackless installation or hidden adhesive, to secure the runner without nails. Additionally, professional installation saves you time and effort, as the experts handle the entire process from measuring and cutting to fitting and finishing, leaving you with a perfectly installed stair runner that enhances the overall aesthetic of your staircase.
In conclusion, exploring alternative nail-free installation methods allows you to install a stair runner without compromising on security or aesthetics. Whether you choose to use stair rods or brackets, non-adhesive gripper pads or treads, or opt for professional installation, these methods provide secure and visually appealing solutions. Choose the method that suits your preference and enjoy a beautiful stair runner without the hassle of nails.
Enhancing The Aesthetics Of A Stair Runner Without Nails
Installing a stair runner without nails not only preserves the quality of your stairs, but it also offers a unique and stylish look to your home. By avoiding the conventional method of nailing, you can experiment with various designs and materials, and truly enhance the aesthetics of your staircase. In this article, we will explore three different ways to boost the visual appeal of your stair runner without using any nails.
Incorporating Decorative Accents or Borders
One way to elevate the overall appearance of your stair runner is by incorporating decorative accents or borders. These elements can add a touch of elegance and individuality to your stairs. You can choose from a variety of options such as ornate trims, intricate tapestries, or even contrasting colors to create a stunning visual impact. By carefully selecting and positioning these accents or borders along the edges of your stair runner, you can transform a simple staircase into a work of art.
Mixing and Matching Patterns or Colors for a Unique Look
Another fantastic way to enhance the aesthetics of your stair runner without nails is by mixing and matching patterns or colors. This approach allows you to let your creative spirit soar, creating a truly unique look that complements your overall interior design. You can experiment with different patterns, such as geometric shapes, floral prints, or even abstract designs. Additionally, playing with diverse colors, whether coordinating or contrasting, can bring a vibrant and eye-catching element to your staircase.
Adding Stairway Lighting for a Dramatic Effect
If you wish to create a dramatic effect and illuminate your stair runner without the use of nails, adding stairway lighting is the perfect solution. Strategically placed lighting fixtures along the sides or underneath the steps can create stunning visual effects and highlight the beauty of your runner. Whether you opt for warm, soft lighting or bright LED strips, the addition of proper lighting will not only enhance the aesthetics but also add a sense of safety and elegance to your home.
With these three approaches, you can redefine the aesthetic appeal of your stair runner without nails. Incorporate decorative accents or borders, mix and match patterns or colors, and consider adding stairway lighting for a truly captivating effect. By exploring these options, you can transform your staircase into a visually striking focal point that reflects your personal style and elevates the overall ambiance of your home.
Frequently Asked Questions For How To Install Stair Runner Without Nails
Can You Install Stair Runner Without Staples?
Yes, you can install a stair runner without using staples. There are alternative methods, such as using adhesive tape or carpet rods to secure the runner in place.
Do You Glue A Stair Runner?
Yes, you should glue a stair runner.
How Do You Stick Down A Stair Runner?
To stick down a stair runner, follow these steps: 1. Prepare the stairs by cleaning and removing any debris. 2. Measure and cut the runner to fit the stairs. 3. Apply double-sided carpet tape or adhesive to the staircase. 4. Carefully press the runner onto the adhesive, starting at the bottom and working your way up.
5. Smooth out any wrinkles or bubbles. It’s done! Note: Make sure to read the manufacturer’s instructions and use appropriate safety measures while doing this task.
Do Stair Runners Need Rods?
Yes, stair runners do need rods. Rods are essential for securing and fastening the stair runner in place, preventing it from slipping or shifting. They provide stability and support, ensuring the safety and durability of the runner.
Conclusion
Installing a stair runner without nails is a practical and stylish alternative for enhancing your staircase. By using adhesive tapes or rods, you can achieve a secure and long-lasting installation without causing any damage to the stairs or the runner itself.
This DIY method allows for flexibility, as you can easily replace or remove the runner when desired. With these simple steps, you can transform your staircase while maintaining its integrity and functionality. Enhance your home with a stair runner that adds elegance and comfort without the need for nails.