To install a stabilizer bar, first, locate the brackets on the front and rear axles. Then, attach the ends of the stabilizer bar to these brackets using the provided bolts and tighten them securely.
Installing a stabilizer bar is an essential step in enhancing the stability and control of your vehicle. By reducing body roll during turns, it improves the overall handling and safety. Whether you’re a car enthusiast looking to upgrade your suspension system or a professional mechanic, knowing how to install a stabilizer bar is crucial.
We will guide you through the process in a simple and concise manner, ensuring a smooth installation experience. So, let’s dive in and learn the steps to install a stabilizer bar easily and efficiently.
What Is A Stabilizer Bar And Its Purpose
When it comes to the smooth and stable operation of your vehicle, the suspension system plays a crucial role. One essential component of the suspension system is the stabilizer bar. In this section, we will explore the definition and function of a stabilizer bar and discuss the importance it holds in the overall performance of your vehicle’s suspension system.
Definition and Function of a Stabilizer Bar
A stabilizer bar, also known as a sway bar or anti-roll bar, is a crucial part of your vehicle’s suspension system. Its primary function is to reduce body roll or sway when you navigate sharp turns or uneven road surfaces. The stabilizer bar connects the suspension components on either side of the vehicle, usually the front or the rear, and works to distribute the force and load more evenly.
It achieves this by transferring the vertical movement of one side of the vehicle to the other side, essentially tying them together. The bar resists the weight transfer that occurs during cornering by exerting torsional force, ensuring that the body of the vehicle remains level and stable.
Importance of Stabilizer Bar in Vehicle Suspension System
The stabilizer bar plays a crucial role in the overall performance and handling characteristics of your vehicle’s suspension system. Below, we discuss some of the key reasons why the stabilizer bar is essential:
- Improved Stability: The primary purpose of the stabilizer bar is to enhance stability during turns. By minimizing body roll and sway, it helps maintain tire contact with the road, providing better traction and control.
- Enhanced Safety: A properly functioning stabilizer bar ensures that your vehicle remains level and composed during maneuvers, reducing the risk of rollovers and loss of control.
- Reduced Tire Wear: When a vehicle experiences excessive body roll during turns, it puts uneven pressure on the tires. This can lead to uneven tire wear and reduced tire lifespan. The stabilizer bar helps distribute the load evenly, preventing premature tire wear.
- Improved Handling: By reducing body roll, the stabilizer bar enhances the overall handling characteristics of your vehicle. It provides a more responsive and controlled driving experience, allowing you to navigate corners with confidence.
In conclusion, the stabilizer bar serves a crucial role in the suspension system of your vehicle. It reduces body roll, enhances stability, improves safety, reduces tire wear, and enhances handling. By understanding its function and importance, you can prioritize the proper installation and maintenance of this essential component, ensuring optimal performance and a smoother ride for your vehicle.
Different Types Of Stabilizer Bars
In order to enhance the stability and control of your vehicle’s suspension system, installing a stabilizer bar is crucial. Also known as sway bars, stabilizer bars are designed to minimize body roll and improve the overall handling of your vehicle. There are two main types of stabilizer bars: solid or solid axle stabilizer bar and tubular or hollow stabilizer bar. Each type has its own unique characteristics and benefits, which we will explore in detail below.
Overview of Solid or Solid Axle Stabilizer Bar
A solid or solid axle stabilizer bar is a sturdy and traditional option that is commonly used in heavy-duty vehicles. As the name suggests, this type of stabilizer bar is solid, meaning it is made from a solid piece of metal. The solid construction provides excellent rigidity and stiffness, making it highly effective in reducing body roll during cornering.
One of the key advantages of a solid stabilizer bar is its durability. Due to its solid composition, it is less susceptible to wear and tear, making it a reliable option for vehicles that undergo frequent off-roading or heavy loads. Additionally, solid stabilizer bars are known for their cost-effective nature, as they generally come at a lower price point compared to their tubular counterparts.
Overview of Tubular or Hollow Stabilizer Bar
On the other hand, a tubular or hollow stabilizer bar features a hollowed-out design that allows for greater weight reduction without compromising strength. This type of stabilizer bar is often used in sports cars and high-performance vehicles, as it offers a balance of rigidity and flexibility, resulting in enhanced handling and responsiveness.
One of the notable advantages of a tubular stabilizer bar is its lighter weight, which contributes to improved overall vehicle performance. The hollow construction allows for optimal weight distribution, reducing unnecessary mass while maintaining structural integrity. Furthermore, tubular stabilizer bars are known for their ability to provide a more precise and controlled ride, making them a popular choice among enthusiasts.
Pros and Cons of Each Type
To help you make an informed decision, let’s take a closer look at the pros and cons of each type of stabilizer bar:
| Pros of Solid Stabilizer Bar | Cons of Solid Stabilizer Bar |
|---|---|
|
|
| Pros of Tubular Stabilizer Bar | Cons of Tubular Stabilizer Bar |
|---|---|
|
|
Ultimately, the choice between a solid or tubular stabilizer bar depends on your specific vehicle and driving preferences. If you prioritize durability and cost-effectiveness, a solid stabilizer bar might be the ideal option. On the other hand, if you seek improved performance and more precise handling, a tubular stabilizer bar could be the right choice for you. Consider your driving needs and budget when deciding which type of stabilizer bar to install.
Gathering The Necessary Tools And Equipment
Installing a stabilizer bar is essential for ensuring a smooth and stable ride in your vehicle. However, before you get started with the installation process, it’s important to gather all the necessary tools and equipment. Using the correct tools not only makes the installation easier but also ensures that the job is done correctly.
List of Tools and Equipment Needed
Before starting the installation, make sure to have the following tools and equipment ready:
| Tools | Equipment |
|---|---|
|
|
Having these tools and equipment at your disposal ensures that you will be well-prepared for the installation process. Each tool has its own role to play, making the overall process smoother and more efficient.
Importance of Using the Correct Tools
Using the correct tools is crucial when it comes to installing a stabilizer bar. Here are a few reasons why:
- Efficiency: The right tools simplify the installation process, allowing you to complete the job more quickly and efficiently. By using the appropriate tools, you can avoid wasting time and energy.
- Accuracy: Using the correct tools helps ensure that the stabilizer bar is installed correctly. This is important for maintaining the optimal performance and stability of your vehicle.
- Safety: The correct tools play a significant role in your safety during the installation process. Using improper or inappropriate tools can lead to accidents or injuries. Always prioritize safety and use the right tools for the job.
- Durability: The quality of the installation depends on the tools used. By using the correct tools, you can ensure that the stabilizer bar is installed securely, promoting longevity and durability.
Overall, gathering the necessary tools and equipment before installing a stabilizer bar is fundamental to a successful installation. Using the right tools not only makes the process easier but also contributes to the safety, efficiency, accuracy, and durability of the entire installation.
Safety Precautions
In order to ensure a smooth and successful installation of a stabilizer bar, it is crucial to take the necessary safety precautions. By following these precautions, you can protect yourself and others from potential accidents or injuries. It is always better to be safe than sorry, so let’s dive into the importance of safety precautions and some tips to ensure your personal safety.
Importance of Safety Precautions
When it comes to working with heavy-duty automobile equipment like a stabilizer bar, safety should be your utmost priority. These precautions are designed to minimize the risk of accidents or mishaps that could result in injury to you or others in close proximity. By putting safety first, you not only protect yourself from harm but also ensure a smooth installation process. Remember, a safe installation is a successful one.
Tips for Ensuring Personal Safety
To guarantee your personal safety throughout the installation process, here are some essential tips to keep in mind:
- Wear Protective Gear: Before you start the installation, make sure you are equipped with the necessary protective gear. This includes safety goggles, gloves, and closed-toe shoes. These items will shield you from any potential hazards, such as flying debris or accidental contact with sharp edges.
- Use Proper Lifting Techniques: Stabilizer bars can be heavy, so it’s important to use proper lifting techniques to avoid straining your back or causing muscle injuries. Bend your knees, keep your back straight, and lift with your legs, distributing the weight evenly.
- Secure the Vehicle: Before working on the stabilizer bar, secure the vehicle on a stable and level surface. Engage the parking brake and use wheel chocks to prevent the vehicle from rolling or shifting during the installation.
- Disconnect the Battery: To ensure electrical safety, disconnect the vehicle’s battery before starting any installation work. This will prevent accidental electrical discharge which could result in damage or injury.
- Refer to the Manufacturer’s Instructions: Always consult the manufacturer’s instructions or service manual specific to your vehicle model. These guidelines will provide you with step-by-step instructions tailored to your vehicle, ensuring a safe and accurate installation.
- Double-Check Your Work: Once you have completed the installation, it’s essential to double-check your work. Tighten all bolts and connections properly and inspect for any signs of loose or misplaced parts. This final inspection will give you peace of mind knowing that your stabilizer bar is securely installed.
Remember, safety precautions should never be overlooked or underestimated. By adhering to these tips, you can complete the installation of your stabilizer bar with confidence and peace of mind, ensuring both your personal safety and the effectiveness of the stabilizer bar.
Step 1: Preparing The Vehicle
Before you can install a stabilizer bar on your vehicle, it’s important to properly prepare the vehicle to ensure a smooth and safe installation process. This step involves lifting and securing the vehicle, as well as removing the wheels and tires.
Lifting and Securing the Vehicle
The first step in preparing your vehicle for stabilizer bar installation is to lift and secure it. Follow these simple steps to do so:
- Find a suitable location to lift the vehicle, such as a flat and level surface.
- Use a reliable and sturdy jack to lift the vehicle. Place the jack in the recommended lifting points provided by the vehicle manufacturer.
- Pump the jack handle or use the hydraulic controls to raise the vehicle until the desired height is reached. Be cautious and ensure the vehicle is stable before proceeding.
- Once the vehicle is lifted, use jack stands or vehicle ramps to secure it in place. These safety measures will prevent the vehicle from accidentally falling or rolling during the installation process.
Removing Wheels and Tires
With the vehicle properly lifted and secured, it’s time to remove the wheels and tires. Follow these steps:
- Work on one wheel at a time. Starting with the first wheel, use a lug wrench to loosen the lug nuts.
- After loosening the lug nuts, use a hydraulic jack or a suitable lifting device to raise the wheel slightly off the ground.
- Completely remove the lug nuts and set them aside in a safe place.
- Gently pull the wheel away from the vehicle until it is completely detached. Carefully place the wheel aside, ensuring it won’t roll away.
- Repeat this process for all the remaining wheels until all four are removed.
By following these steps and properly preparing your vehicle, you are now ready to move on to the next step of installing the stabilizer bar. Stay tuned for Step 2: Removing the Old Stabilizer Bar.
Step 2: Removing The Old Stabilizer Bar
Now that you have gathered all the necessary tools and equipment to install a new stabilizer bar, it’s time to remove the old one. This step is crucial to ensure a smooth installation process and optimal performance of your vehicle’s suspension system. In this section, we will guide you through the process of removing the old stabilizer bar by unbolt and removing the links, as well as detaching the brackets.
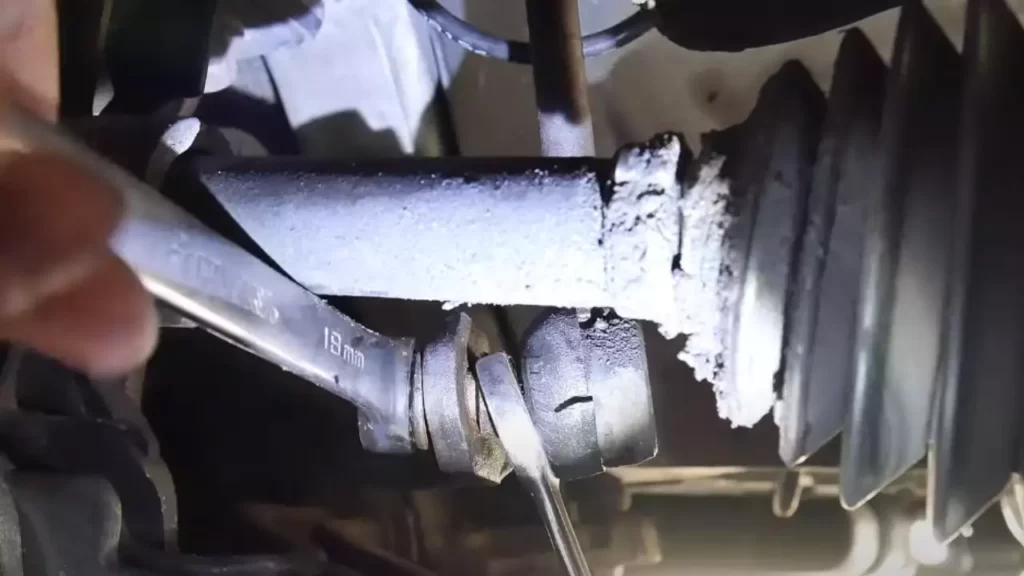
Unbolting and Removing the Links
The first task in removing the old stabilizer bar is to unfasten and remove the links. The links are typically attached to the stabilizer bar using bolts or nuts, depending on your vehicle’s make and model. Follow these steps to properly unbolt and remove the links:
- Locate the links on each side of the stabilizer bar. They are usually connected to the lower control arm or suspension strut.
- Using a suitable wrench or socket, loosen and remove the bolts or nuts that secure the links to the stabilizer bar. You may need to use a penetrating oil if the bolts are rusted or seized.
- Gently pull the links away from the stabilizer bar to fully detach them.
- Repeat this process on the other side of the stabilizer bar.
It’s important to note that some vehicles may have additional components, such as bushings or brackets, attached to the links. Make sure to remove these components if present, following the manufacturer’s instructions or referring to a vehicle-specific repair manual.
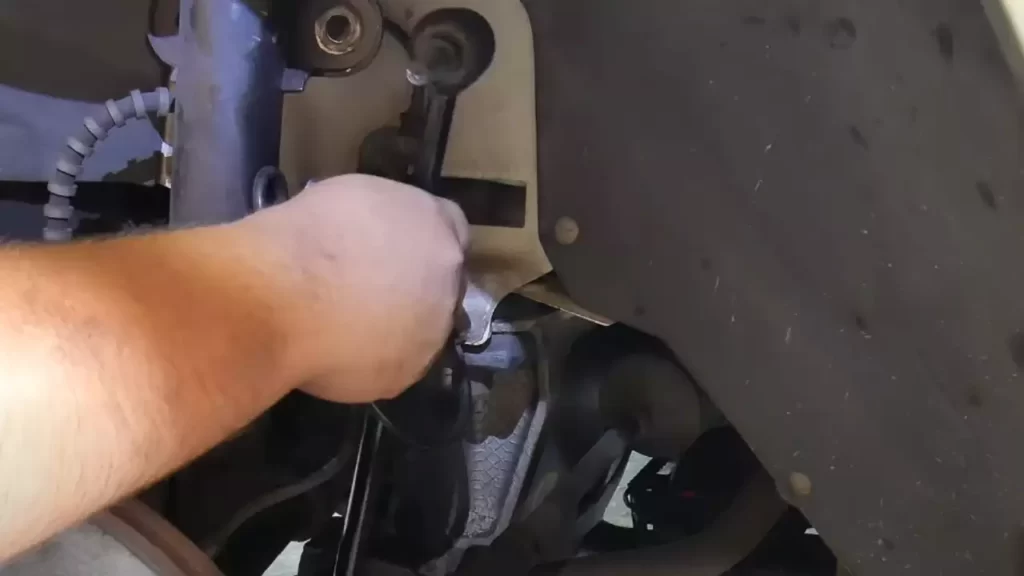
Detaching the Brackets
Once the links are removed, the next step is to detach the brackets holding the old stabilizer bar in place. The brackets are usually secured with bolts or screws and can be found at the center or sides of the stabilizer bar. Follow these steps to successfully detach the brackets:
- Identify the brackets securing the stabilizer bar. They may be located near the center of the vehicle’s chassis or along the sides.
- Using an appropriate wrench or socket, loosen and remove the bolts or screws that hold the brackets in place.
- Gently wiggle and maneuver the brackets to completely detach them from the old stabilizer bar.
- Ensure that all bolts, screws, or any other fastening devices are fully removed from the brackets and safely set them aside for later use or disposal.
It’s important to inspect the brackets for any signs of damage or wear. If the brackets are worn or damaged, it’s recommended to replace them with new ones to ensure the stability and functionality of the new stabilizer bar.
With the links and brackets successfully removed, you have completed the second step of the stabilizer bar installation process. Now, you are ready to move on to the next step, which is installing the new stabilizer bar. Stay tuned for our next blog post, where we will guide you through the installation process with detailed instructions and tips.
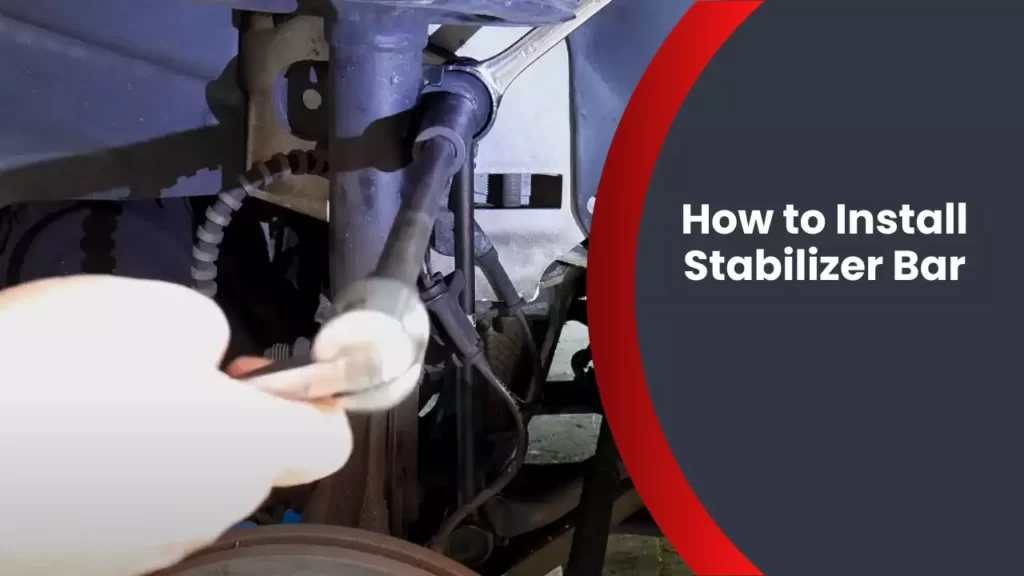
Step 3: Installing The New Stabilizer Bar
Attaching the Brackets
After removing the old stabilizer bar, it is now time to install the new one. The first step in this process is attaching the brackets. These brackets serve as the connection between the stabilizer bar and the vehicle’s frame. To securely attach the brackets, follow the steps outlined below:
1. Position the bracket: Locate the mounting points on the vehicle’s frame where the new stabilizer bar brackets will be installed. Ensure that the brackets are aligned properly and facing the correct direction.
2. Apply anti-seize compound: Apply a thin coat of anti-seize compound to the mounting points on the vehicle’s frame. This will help prevent rust and corrosion, ensuring a secure attachment.
3. Align the bracket: Carefully align the bracket with the mounting points on the vehicle’s frame. Make sure the bolt holes on the bracket line up with the corresponding holes on the frame.
4. Insert the bolts: Insert the bolts through the bracket and into the mounting points on the vehicle’s frame. Ensure that the bolts are inserted fully and securely.
5. Tighten the bolts: Using a wrench or socket set, tighten the bolts until they are snug. Be careful not to overtighten, as this can cause damage to the bracket or the vehicle’s frame. Check the manufacturer’s specifications for the recommended torque.
6. Repeat for the other bracket: Repeat the above steps for the other bracket, ensuring the same process is followed.
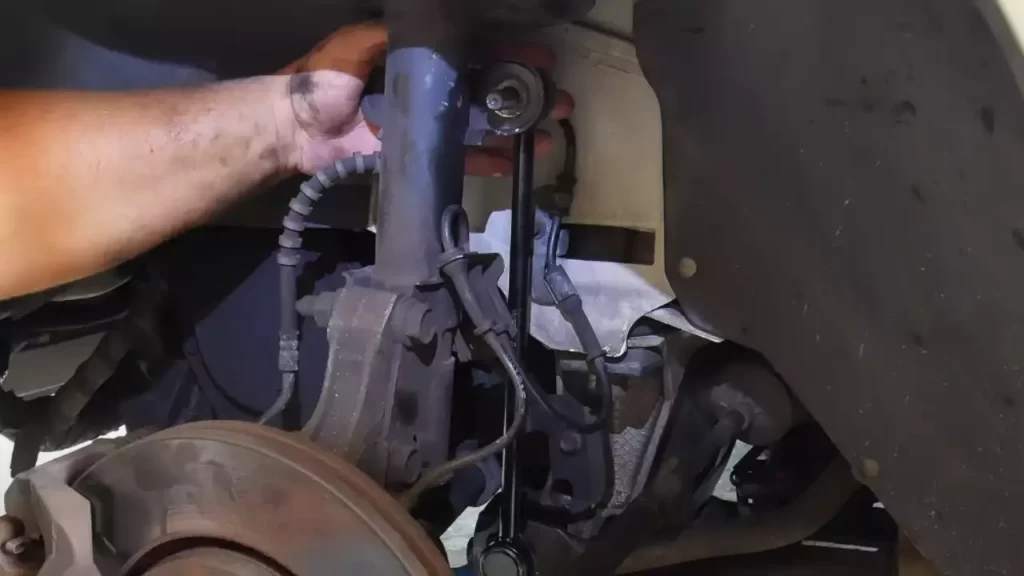
Bolting and Connecting the Links
Now that the brackets are securely attached, the next step is to bolt and connect the links of the new stabilizer bar. These links connect the stabilizer bar to the suspension components, allowing for smooth and controlled movement. Follow the steps below to properly bolt and connect the links:
1. Position the links: Position the links on each side of the stabilizer bar. Ensure that the links are aligned properly and facing the correct direction.
2. Insert the bolts: Insert the bolts through the holes in the links and into the corresponding holes in the stabilizer bar. Make sure the bolts are inserted fully and securely.
3. Tighten the bolts: Using a wrench or socket set, tighten the bolts until they are snug. Again, be careful not to overtighten, as this can cause damage to the links or the stabilizer bar. Check the manufacturer’s specifications for the recommended torque.
4. Connect the links: With the bolts tightened, connect the links to the suspension components. This may involve attaching the links to control arms, sway bar bushings, or other suspension parts. Follow the vehicle’s specific instructions or consult a professional if you are unsure.
5. Check for proper alignment: Once everything is connected, visually inspect the stabilizer bar and links to ensure they are aligned properly and securely fastened.
By following these steps, you can install a new stabilizer bar and ensure that your vehicle’s suspension system functions effectively. Remember to consult your vehicle’s specific instructions and seek professional help if needed.
Step 4: Testing And Adjusting The Stabilizer Bar
Now that you have successfully installed the stabilizer bar, it is crucial to ensure that it is working effectively. In this step, you will learn how to test and adjust the stabilizer bar to guarantee its proper functionality.
Ensuring Proper Alignment
To begin, start by inspecting the alignment of the stabilizer bar. Proper alignment is essential for optimal performance. Follow these steps to ensure that the stabilizer bar is aligned correctly:
- Visually examine the stabilizer bar to confirm that it is centered and parallel to the vehicle’s chassis.
- Check for any signs of misalignment such as unequal gaps between the bar and the chassis or any visible tilting.
- If you detect any misalignment, carefully loosen the mounting brackets or bushings.
- Slowly adjust the position of the stabilizer bar until it is centered and parallel to the chassis.
- Tighten the mounting brackets or bushings securely to hold the bar in its aligned position.
Checking for Any Issues or Inconsistencies
Once you have aligned the stabilizer bar, it is crucial to ensure that there are no issues or inconsistencies that could affect its performance. Follow these steps to thoroughly inspect the stabilizer bar:
- Inspect all the connections, including the end links, bushings, and brackets, for any signs of damage or wear.
- If you notice any cracks, excessive play, or signs of deterioration, replace the damaged components immediately.
- Check the tightness of all bolts, nuts, and fasteners related to the stabilizer bar assembly.
- Ensure that all connections are secure and tightened according to the manufacturer’s specifications.
- Perform a test drive to assess the overall performance of the stabilizer bar.
By following these steps and conducting a thorough test and inspection, you can be confident that your stabilizer bar is installed correctly and operating at its best. Remember, proper alignment and regular maintenance are key to extending the life and effectiveness of your stabilizer bar.
Problem 1: Difficulty In Removing The Old Stabilizer Bar
When it comes to installing a new stabilizer bar, one of the first hurdles you may encounter is removing the old stabilizer bar. This step can sometimes be challenging and time-consuming, but with the right approach, you can overcome this obstacle effortlessly.
Potential Causes
There are a few potential causes that can make it difficult to remove the old stabilizer bar. It’s important to identify these causes before proceeding with the removal process. Here are some potential culprits:
- Corrosion: Over time, the stabilizer bar and its components can become corroded, making removal a daunting task.
- Rust: If the stabilizer bar has been exposed to moisture or harsh weather conditions, rust may have formed, resulting in a tight grip on the mounting brackets.
- Loose or damaged parts: If any of the mounting brackets, bushings, or end links are loose or damaged, it can complicate the removal process.
Solutions and Workarounds
Now that you have identified the potential causes, let’s move on to the solutions and workarounds that will help you navigate through the obstacle of removing the old stabilizer bar:
- Use a penetrating oil: Applying a generous amount of penetrating oil to the mounting brackets, bushings, and end links can help loosen any rust or corrosion. Allow the oil to sit for a few minutes, then gently tap the components with a rubber mallet to help break up the rust.
- Apply heat: If the penetrating oil alone doesn’t provide satisfactory results, you can use a heat gun or a torch to warm up the components. The heat will help expand the metal, making it easier to remove the stabilizer bar.
- Inspect and replace damaged parts: Before installing the new stabilizer bar, thoroughly check all the mounting brackets, bushings, and end links. If you notice any loose or damaged parts, it’s crucial to replace them to ensure a smooth removal and installation process.
- Use proper tools: Make sure you have the necessary tools for the job, such as a socket wrench, pliers, and pry bar. Using the correct tools will make the removal process easier and prevent damage to the components.
By following these solutions and workarounds, you’ll be able to overcome the difficulty of removing an old stabilizer bar. Remember to take your time, be patient, and prioritize safety throughout the process. Once the old stabilizer bar is successfully removed, you’ll be one step closer to installing the new one and improving the stability of your vehicle.
Problem 2: Misalignment Of The Stabilizer Bar
One common issue that car owners might encounter is the misalignment of the stabilizer bar. The stabilizer bar, also known as the sway bar, plays a crucial role in maintaining stability and control while driving. It helps to minimize body roll during cornering and keeps the vehicle balanced.
Identifying the Signs of Misalignment
It’s important to recognize the signs of a misaligned stabilizer bar to address the problem promptly. Here are some indications that your stabilizer bar might be misaligned:
- Unusual noises: Pay attention to any clunking, knocking, or squeaking sounds coming from the front or rear of your car, especially when you drive over bumps or make turns.
- Uneven tire wear: Misalignment can cause uneven tire wear, so if you notice that your tires are wearing out faster on one side, it could be a sign of stabilizer bar misalignment.
- Increased body roll: If you feel excessive body roll when turning or cornering, it could indicate that the stabilizer bar is not functioning properly.
Recommended Solutions for Realignment
If you suspect that your stabilizer bar is misaligned, there are a few recommended solutions for realignment. Here are some options to consider:
- Inspect the bushings: Check the bushings that connect the stabilizer bar to the chassis and the control arms. If they are worn or damaged, they may need to be replaced.
- Tighten or replace the stabilizer bar links: The links that connect the stabilizer bar to the suspension components can sometimes come loose or wear out. Tighten them if necessary, or replace them if they are damaged.
- Adjust the stabilizer bar mounting brackets: The stabilizer bar is typically mounted to the chassis using brackets. Check if the brackets are loose or misaligned and adjust them accordingly.
- Seek professional assistance: If you’re unsure about how to realign the stabilizer bar yourself, it’s always recommended to seek the help of a professional mechanic who has experience in handling suspension components.
Addressing the misalignment of your stabilizer bar is crucial for maintaining a safe and smooth driving experience. By identifying the signs of misalignment and following the recommended solutions for realignment, you can ensure that your stabilizer bar functions properly and contributes to the overall stability of your vehicle.
Problem 3: Excessive Noise Or Squeaking After Installation
Possible Causes
Excessive noise or squeaking after installing a stabilizer bar can be frustrating and may indicate underlying issues. Understanding the possible causes can help you address the problem effectively.
One possible cause of excessive noise or squeaking is improper installation. When the stabilizer bar is not installed correctly, it can lead to misalignment or inadequate lubrication, resulting in noise. Another potential cause is worn-out bushings or links. Over time, these components can deteriorate, causing noise when the stabilizer bar moves.
Steps to Reduce Noise and Squeaking
If you’re experiencing excessive noise or squeaking after installing a stabilizer bar, don’t worry. There are steps you can take to minimize these issues and restore a smooth and quiet ride.
1. Inspect the installation: Start by double-checking the installation of the stabilizer bar. Ensure that all components are properly aligned and tightened according to the manufacturer’s specifications. If anything seems out of place, make the necessary adjustments.
2. Apply lubrication: Proper lubrication is essential for minimizing noise and facilitating smooth movement. Apply a high-quality lubricant to the bushings and links of the stabilizer bar. This helps reduce friction and eliminates squeaking sounds.
3. Replace worn-out components: If you notice any signs of wear or damage on the bushings or links, it’s crucial to replace them. Worn-out components can contribute to excessive noise and may compromise the performance of the stabilizer bar.
4. Check for any loose or damaged parts: Inspect the entire stabilizer bar system, including its mounting brackets and bolts. Ensure all parts are securely fastened and in good condition. Tighten any loose bolts and replace any damaged parts as necessary.
5. Consider upgrading to polyurethane bushings: Polyurethane bushings can provide improved durability and reduce noise compared to the stock rubber bushings. If you frequently encounter noise issues with stabilizer bars, upgrading to polyurethane bushings may be worth considering.
By following these steps, you can address excessive noise or squeaking after installing a stabilizer bar. Remember to consult your vehicle’s manual or seek professional assistance if you are unsure about any steps or encounter persistent issues. A properly installed and properly maintained stabilizer bar should provide a quiet and comfortable ride, ensuring optimal performance and safety.
Frequently Asked Questions
How Is Stabiliser Bar Mounted?
The stabilizer bar is mounted using brackets and bushings that connect it to the vehicle’s chassis and suspension components. It helps to control body roll and improve handling by transferring weight from one side of the vehicle to the other during cornering.
How Much Does It Cost To Install A Stabilizer Bar?
The cost of installing a stabilizer bar varies depending on the type and model of the vehicle. It can range from $100 to $500, including parts and labor. Contact your local mechanic or dealership for an accurate quote based on your specific vehicle.
Do You Need An Alignment After Replacing Stabilizer Bar?
Yes, it is advisable to get a wheel alignment after replacing the stabilizer bar. This helps ensure proper suspension and steering performance.
Do I Really Need A Stabilizer Bar?
Yes, a stabilizer bar is essential for a smooth and safe driving experience. It reduces body roll during cornering, improves vehicle stability, and enhances overall handling and control. It keeps your car better balanced and prevents excessive swaying, making it a crucial component for road safety.
Conclusion
By following these step-by-step instructions, you can easily install a stabilizer bar. Remember to check your vehicle’s manual for specific guidelines and seek professional help if needed. By properly installing a stabilizer bar, you can enhance your vehicle’s stability and performance, ensuring a safer and smoother ride.
Don’t wait any longer – get started on installing your stabilizer bar and start experiencing the benefits today!