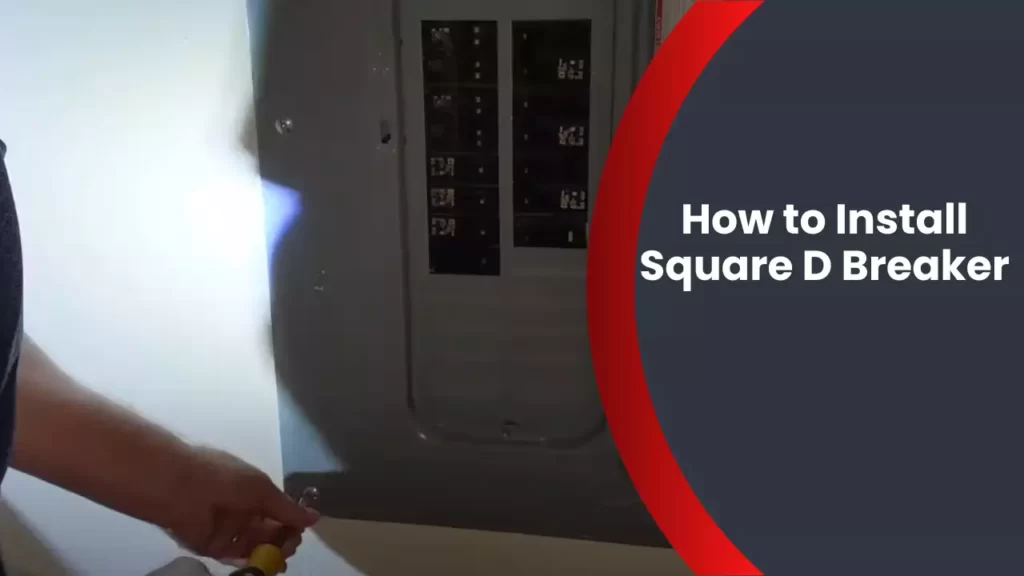
To install a Square D breaker, turn off the main power supply and remove the panel cover. Then, snap the breaker onto the panel bus bar and connect the wire to the breaker terminal.
Finally, reattach the panel cover and turn on the power. Installing a Square D breaker is a straightforward process that requires a few simple steps. First, make sure to turn off the main power supply to ensure safety. Next, remove the panel cover to access the circuit breaker panel.
Once the panel is exposed, snap the Square D breaker onto the panel’s bus bar. Make sure it securely locks into place. Afterward, connect the wire to the appropriate terminal on the breaker. Double-check that it is tightly secured. Lastly, reattach the panel cover and cautiously restore power to the main supply. Following these steps will enable you to successfully install a Square D breaker.
What Are Square D Breakers?
Before we delve into the installation process of Square D Breakers, let’s first understand what they actually are. Square D Breakers, also known as circuit breakers, are electrical switches designed to protect electrical circuits from overloads and short circuits.
Definition of Square D Breakers
Square D Breakers are a type of circuit breaker manufactured by Schneider Electric, a renowned global leader in electrical equipment. They are specifically designed to provide reliable and efficient protection for your electrical systems. These breakers are built with advanced technology and innovative features, making them a popular choice for residential, commercial, and industrial applications.
Purpose and Importance of Square D Breakers
The primary purpose of Square D Breakers is to protect the electrical circuits and the connected devices from potential damage caused by overloads or short circuits. This is achieved by automatically interrupting the flow of electricity, thereby preventing excessive current from flowing through the circuit.
Ensuring the efficient operation and safety of your electrical systems, Square D Breakers play a crucial role in:
- Preventing electrical fires: Overloads and short circuits can generate excessive heat, leading to fire hazards. Square D Breakers detect such anomalies and trip to cut off the power supply, minimizing the risk of fire.
- Protecting electrical appliances: Overloading electrical circuits can cause damage to appliances and equipment connected to them. By promptly interrupting the circuit, Square D Breakers safeguard your valuable devices from potential damage.
- Enhancing electrical system longevity: Over time, electrical systems may experience wear and tear. Square D Breakers ensure the longevity of your electrical system by preventing overload-induced stress on the circuitry.
Different Types of Square D Breakers and Their Applications
Square D Breakers come in various types, each designed to serve specific applications and electrical systems. Here are some of the common types of Square D Breakers:
| Type | Application |
|---|---|
| Standard Circuit Breakers | Used for general residential, commercial, and industrial applications. Available in different current ratings to match specific circuit requirements. |
| GFCI Breakers (Ground Fault Circuit Interrupter) | Offer advanced protection against ground faults, reducing the risk of electrical shock. Commonly used in bathrooms, kitchens, and outdoor circuits. |
| AFCI Breakers (Arc Fault Circuit Interrupter) | Detect and prevent hazardous arc faults that might lead to electrical fires. Ideal for protecting circuits in bedrooms, living rooms, and other areas where the risk of electrical arcing is high. |
| Dual Function Breakers | Combining the features of GFCI and AFCI breakers, they provide comprehensive protection against both ground faults and arc faults. |
| Specialty Breakers | Available for specific applications such as solar panels, air conditioning units, and generators. These breakers are designed to meet the unique requirements of specialized electrical systems. |
Choosing the right type of Square D Breaker for your application is crucial to ensure optimal electrical protection and performance. Consider consulting a licensed electrician or referring to the manufacturer’s guidelines for selecting the appropriate breaker.
Gathering The Necessary Tools And Equipment
List of tools required for installation
Gathering the necessary tools and equipment is the first step towards a successful Square D breaker installation. By having all the tools and safety equipment within reach, you can complete the installation smoothly and efficiently. Here is a comprehensive list of tools you’ll need:
| Tool | Description |
|---|---|
| Screwdriver | A flathead or Phillips screwdriver will be essential for removing or securing screws during the installation process. |
| Wire strippers | To safely strip the insulation off the wires, you’ll need a pair of quality wire strippers. This will ensure proper electrical contact. |
| Wire cutters | For cutting and trimming wires to the appropriate length. Ensure you have a pair of wire cutters capable of cleanly cutting through different gauges of wires. |
| Torque screwdriver | Having a torque screwdriver will allow you to correctly tighten the breaker screws to the manufacturer’s recommended specifications. This is important for maintaining electrical safety. |
| Voltage tester | To ensure that the power is disconnected and there is no voltage running through the circuit, a non-contact voltage tester can be used. Safety should always be prioritized. |
| Pliers | A good pair of pliers will be handy for gripping and twisting wires, as well as bending them into the appropriate shape for connection. |
| Labeling materials | Using labels or markers, you can mark the wires and breakers with their corresponding circuits. This will make future identification and troubleshooting easier. |
Safety equipment needed for handling electrical components
Working with electrical components requires appropriate safety measures to protect yourself and ensure the job is done without any accidents. Make sure you have the following safety equipment:
- Safety goggles
- Rubber gloves
- Close-toed shoes
- Long-sleeved shirt
- Ear protection
- Fire extinguisher

Understanding Electrical Panel Basics
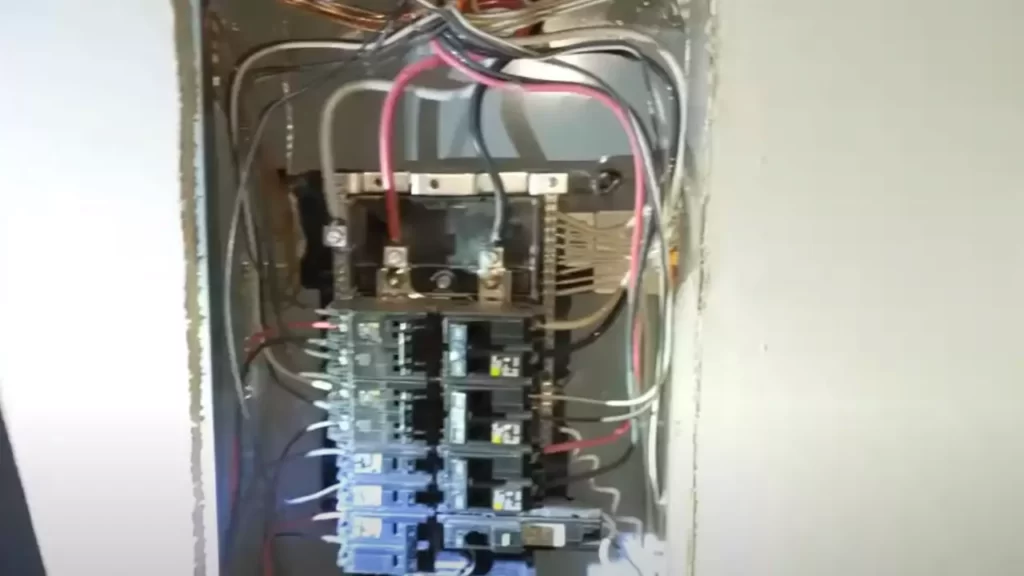
Before attempting to install a Square D breaker, it is important to have a good understanding of electrical panel basics. Electrical panels, also known as breaker boxes or fuse boxes, are an essential component of your home’s electrical system. They act as the main hub for controlling and distributing electricity throughout your property.
Overview of electrical panels and their components
Electrical panels consist of various components that work together to ensure the safe and efficient flow of electricity. Understanding these components is crucial for successful breaker installation.
Here is an overview of the main components you’ll find in most electrical panels:
| Component | Description |
|---|---|
| Main Breaker | The main breaker acts as the main power switch for your home, allowing you to shut off all electricity in case of emergencies or maintenance. |
| Circuit Breakers | Circuit breakers are individual switches that control the flow of electricity to different areas or devices in your home. They protect against overloads and short circuits. |
| Bus Bars | Bus bars are metal strips that conduct electricity and distribute it to the circuit breakers. They provide a connection between the main breaker and individual breakers. |
| Neutral Bar | The neutral bar is where the neutral wire from the utility company is connected. It distributes the return current from the circuits back to the utility’s transformer. |
| Grounding Bar | The grounding bar is where the ground wires from various circuits are connected. It helps protect against electrical shocks and provides a path for electrical faults. |
Identifying the location of the electrical panel in your home
Locating the electrical panel in your home is essential for working with it safely and effectively. In most houses, the electrical panel is typically found in a dedicated utility room, basement, garage, or on an exterior wall. Here are a few tips to help you identify the panel’s location:
- Start by looking for a metal or plastic door with hinges.
- Check the basement or utility room first, as these areas are commonly designated for placement.
- Look for a gray or beige metal box, usually mounted on a wall.
- If you live in an apartment or condominium, the electrical panel might be located in a common area or utility closet.
Remember, if you’re having trouble locating the electrical panel or if you suspect any electrical hazards, it’s always best to consult a professional electrician.
Safety precautions to take when working with electrical panels
Working with electrical panels can be hazardous if proper safety precautions are not followed. To ensure your safety, and the safety of others, here are some essential precautions to keep in mind:
- Always shut off the main power before working on the panel. This will prevent the risk of electric shock.
- Wear protective gear such as safety glasses and gloves to protect yourself from any potential hazards.
- Avoid touching any exposed wires or connections with your bare hands.
- Use proper tools for installation and make sure they are insulated.
- Keep the electrical panel area clean and free from any obstructions.
- If you encounter any issues or are unsure about something, consult a qualified electrician.
By adhering to these safety precautions, you’ll ensure a safe working environment and minimize the risk of electrical accidents.
Shutting Off The Power
When it comes to installing a Square D breaker, one crucial step that should never be skipped is shutting off the power to the circuit you’ll be working on. This not only ensures your safety, but also prevents any damage to the breaker or other electrical components.
Importance of turning off the power before installation
Before diving into the installation process, it’s important to understand why shutting off the power is necessary. The electrical panel contains live wires that carry high voltage electricity throughout your home or building. Without cutting off the power supply, you would be at risk of electric shock or even causing a short circuit.
By turning off the power, you eliminate the danger and allow yourself to work on the breaker without any risk to your safety. It also provides you with a stable and secure environment to install the Square D breaker correctly.
Locating the circuit breaker for the area where you’ll be working
Now that you understand the significance of cutting off the power, the next step is to locate the circuit breaker for the specific area where you’ll be conducting the installation. This step is crucial, as you need to ensure that the appropriate circuit is disabled.
To find the correct circuit breaker, you can use the following steps:
- Start by identifying the area or room where you’ll be working. This could be a kitchen, bathroom, bedroom, or any other space in your home.
- Consult the electrical panel’s circuit directory, which typically provides a map or a list of all the circuits and their corresponding locations in your home.
- Refer to the directory and determine which breaker controls the power supply to the area where you’ll be installing the Square D breaker.
- Once you’ve identified the correct breaker, turn it into the “OFF” position by flipping the switch or pushing the lever in the opposite direction.
Remember to double-check that the power is indeed off by testing the area with a non-contact voltage tester or a multimeter. This additional precaution ensures that you have successfully shut off the power to the circuit and that it is safe to proceed with the Square D breaker installation.
Removing The Old Breaker
If you are planning to install a Square D breaker, it is essential to know how to safely remove the old breaker first. This step is crucial to ensure a smooth and efficient installation process, while also maintaining safety standards. In this section, we will guide you through the steps to safely remove the old breaker and the proper disposal of the old breaker.
Steps to safely remove the old breaker
-
- Step 1: Turn off the power supply
Before removing any electrical component, the first and most important step is to turn off the power supply. Locate your main electrical panel and identify the breaker that controls the specific circuit you want to work on. Flip the breaker to the “off” position, completely cutting off the power supply to the circuit. This precautionary measure will protect you from potential electrical hazards.
-
- Step 2: Use appropriate personal protective equipment (PPE)
Always prioritize your safety by using the necessary personal protective equipment (PPE). Put on safety gloves and safety glasses to protect your hands and eyes from any potential harm. Safety should always be a top priority when working with electrical components.
-
- Step 3: Locate and identify the old breaker
Identify the old breaker that you need to remove. Examine the breaker panel to locate the specific breaker associated with the circuit you want to work on. Ensure that you have identified the correct breaker before proceeding with the removal process.
-
- Step 4: Loosen the wire connections
Using a screwdriver, carefully loosen the wire connections on the old breaker. Gently unscrew the screws holding the wires connected to the breaker. Take note of the wires’ positions and color coding to ensure correct reconnection later.
-
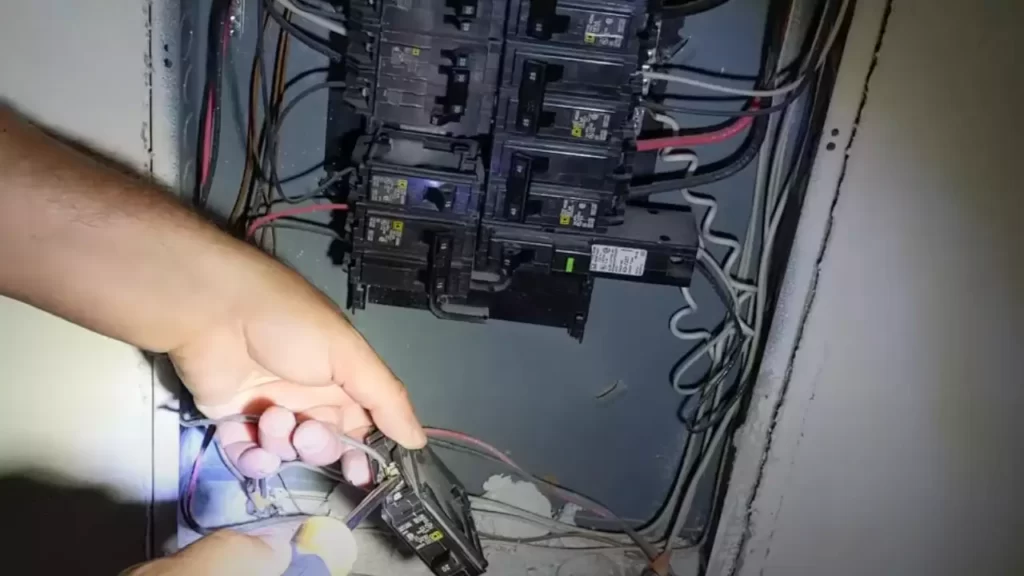
- Step 5: Remove the old breaker
Now, it’s time to remove the old breaker from the panel. Carefully pull the old breaker towards you while simultaneously lifting it out of the panel. It might require a bit of force, but be cautious not to damage any surrounding components.
Proper disposal of the old breaker
Once you have successfully removed the old breaker, it’s important to dispose of it properly to minimize environmental impact and follow local regulations. Use the steps below as a guide for the proper disposal:
-
- Step 1: Check local regulations
Before disposing of the old breaker, research your local regulations regarding the disposal of electronic waste. Different areas have different guidelines, so be sure to abide by them to avoid any legal repercussions. Take note of any specific instructions or recycling programs available in your locality.
-
- Step 2: Recycle or donate if possible
If feasible, consider recycling or donating the old breaker. Check with local recycling centers or electronic waste disposal facilities to see if they accept old breakers. Additionally, some organizations or charities may be interested in repurposing or reusing old electrical components. It’s a sustainable way to minimize waste and benefit others in need.
-
- Step 3: Proper packaging
When disposing of the old breaker, ensure proper packaging to prevent any potential hazards or damage during transport. Wrap the breaker securely in a protective material such as bubble wrap or cardboard. This step will help prevent any accidental injuries and prevent the breaker from causing damage to other items during transportation.
-
- Step 4: Dispose according to local guidelines
Follow your local guidelines for proper disposal of electronic waste. Some areas offer designated drop-off points or scheduled collections for electronic waste. Find out the appropriate method of disposal and ensure that you comply with the regulations in your area.
By following these steps to safely remove the old breaker and properly disposing of it, you are taking important measures to ensure a smooth installation process while prioritizing safety and environmental responsibility.
Installing The Square D Breaker
Installing a Square D breaker is a straightforward process that requires careful alignment, secure fastening, and proper wire connections. In this guide, we will walk you through each step of the installation process, ensuring a seamless and safe installation. Let’s get started!
Aligning the breaker with the panel
To begin the installation, the first step is to align the Square D breaker with the electrical panel. This step is essential to ensure that the breaker fits correctly and securely in place. Follow these steps to align the breaker:
- Start by turning off the main power supply to the electrical panel to ensure your safety throughout the installation process.
- Open the panel cover by removing the screws that hold it in place.
- Locate the empty slot where the Square D breaker will be installed.
- Note: It’s crucial to choose an appropriate slot that matches the amperage rating and breaker type required for your specific electrical needs.
- Gently slide the breaker into the empty slot, making sure it aligns with the mounting rail or stab bus where it will be secured.
- Check that the breaker is level and flush with the panel surface.
Securing the breaker in place
Once the Square D breaker is aligned with the panel, the next step is to secure it in place using the appropriate fastening method. Follow these steps to properly secure the breaker:
- Using the provided screws, fasten the breaker onto the mounting rail or stab bus, ensuring that it is tightly secured.
- Double-check that the breaker is firmly attached to the panel, as loose connections can lead to electrical hazards.
Connecting the wires to the breaker
After securing the Square D breaker in place, the final step is to connect the wires to the breaker. Here’s how you can do it:
- Identify the wires that need to be connected to the breaker.
- Note: It’s essential to adhere to the electrical code regulations and follow the manufacturer’s instructions for proper wire connections.
- Using a wire stripper, remove the appropriate length of insulation from the end of each wire that will be connected to the breaker.
- Insert each wire into the corresponding terminal on the breaker.
- Tighten the terminal screws using a screwdriver to ensure secure connections.
- Remember to tighten the screws firmly, but be careful not to overtighten them, as it can damage the wires.
Once you have successfully aligned the breaker, securely fastened it, and connected the wires, you have completed the installation of the Square D breaker. Remember to test the breaker and restore power to the electrical panel before closing the panel cover. By following these steps carefully, you can ensure a safe and efficient installation of your Square D breaker.
Testing The Installation
Once you have successfully installed your Square D breaker, it is crucial to verify its correct installation. Proper testing ensures the breaker is effectively protecting the electrical circuit and preventing any potential hazards. This section will guide you on how to verify the correct installation of the Square D breaker, and how to use a multimeter to check for proper voltage.
Verifying the correct installation of the Square D Breaker
Before conducting any tests, it is essential to visually inspect the breaker to ensure proper installation. Follow these steps:
- Start by turning off the main power to prevent any electrical shocks or accidents.
- Inspect the Square D breaker panel and verify that the breaker is securely and correctly installed in its designated slot. Make sure it is aligned properly and properly seated.
- Check for any loose connections or wires at the breaker terminals. If you notice any, tighten them firmly but avoid applying excessive force.
- Visually examine the breaker for any signs of damage or wear. Look out for frayed wires, burnt marks, or discoloration. If you notice any issues, consult a professional electrician before proceeding with testing.
- Once you have ensured that the breaker is securely installed and visually intact, you can proceed to test its functionality.
Using a multimeter to check for proper voltage
To test the voltage of the Square D breaker, you should use a multimeter, which is a handy device for measuring electrical parameters. Follow these steps:
- Turn off power to the circuit you are testing by flipping the corresponding breaker to the “off” position.
- Set your multimeter to measure voltage using the appropriate setting. Most multimeters have a voltage setting labeled as “V” or “VAC” for measuring alternating current voltage.
- First, test the voltage on the incoming supply wires. Place the multimeter probes on the hot (usually black or red) and neutral (usually white) wires. A reading close to the specified voltage (e.g., 120V or 240V) indicates the correct power supply.
- Next, test the voltage on the load side of the Square D breaker. Place the multimeter probes on the hot wire (usually black or red) and neutral wire (usually white). Again, verify that the reading matches the specified voltage for your electrical system.
- If the readings are significantly different from the specified voltage, there may be an issue with the installation, wiring, or the breaker itself. In such cases, it is recommended to consult a professional electrician to ensure a safe and accurate diagnosis.
By following these steps and performing the necessary tests, you can ensure that your Square D breaker is correctly installed and functioning properly. Remember, electrical work can be dangerous, so if you are unsure or uncomfortable with any step, always seek professional assistance.
Common Problems During Installation
Troubleshooting tips for common installation issues
During the installation process of a Square D breaker, it’s not uncommon to encounter certain issues that can cause frustration. Understanding these common problems and knowing how to troubleshoot them can save you time and effort in the long run. In this section, we’ll discuss some troubleshooting tips for the most frequently encountered installation issues to help ensure a successful installation.
Addressing loose connections
One of the common issues that you may come across during the installation of a Square D breaker is dealing with loose connections. Loose connections can lead to a variety of problems, including circuit tripping or even electrical fires. It’s crucial to address this issue promptly. Here are a few troubleshooting tips to help you tackle loose connections:
- Start by visually inspecting the connections to identify any obvious signs of looseness.
- Ensure that the wires are tightly secured to the breaker terminals, using a screwdriver to tighten the connection if necessary.
- Double-check that the wire is properly stripped and inserted into the terminal, making sure there is no insulation blocking the connection.
- If the connection still seems loose, consider using a torque screwdriver to ensure the terminals are tightened to the manufacturer’s recommended torque specifications.
- After making adjustments, test the breaker to ensure it functions correctly and that the connection is secure.
Wiring errors
Another common issue that can arise during the installation process is wiring errors. These can lead to faulty connections, improper breaker functioning, and safety hazards. To help you troubleshoot and address wiring errors effectively, consider the following tips:
- Refer to the manufacturer’s documentation or instructions specific to your Square D breaker model to ensure you are following the correct wiring configuration.
- Verify that the wire size matches the breaker’s rating, as using an undersized or oversized wire can lead to installation issues.
- Check for any crossed or reversed wire connections, ensuring that each wire is connected to its respective terminal.
- If you encounter any damaged or frayed wires, replace them before proceeding with the installation.
- Using a voltage tester, confirm that the power is off before making any wiring adjustments.
- After correcting any wiring errors, perform a thorough test to ensure that the breaker functions as intended and that the wiring is properly connected.
By understanding and addressing these common problems during the installation of a Square D breaker, you can ensure a successful and safe installation process. Remember to prioritize safety and consult a professional if you encounter any complex or unusual issues that require further expertise.
Safety Measures And Precautions
When it comes to installing a Square D breaker, safety should be your top priority. Electrical installations can be hazardous if not done properly. Following safety guidelines and precautions is crucial to prevent accidents and ensure a smooth installation process. In this article, we will discuss the necessary safety measures and precautions you should take during and after the installation of a Square D breaker.
Safety Guidelines to Follow During and After Installation
Installing a Square D breaker requires following specific safety guidelines to minimize the risk of electrical hazards. Here are some important safety measures to keep in mind:
- Always turn off the power: Before starting the installation, make sure to turn off the power supply to the circuit being worked on. This will prevent electric shocks and potential damage to the breaker or other electrical components.
- Use proper protective equipment: Wear appropriate safety gear, such as gloves and safety glasses, to protect yourself from any potential electrical accidents or injuries.
- Inspect the breaker: Before the installation, carefully inspect the Square D breaker for any visible damage or defects. Do not install a faulty breaker, as it can lead to electrical malfunctions and safety hazards.
- Follow manufacturer’s instructions: Adhere to the installation instructions provided by Square D. Each breaker model may have specific requirements, and following the manufacturer’s guidelines will ensure a proper and safe installation.
Preventing Electrical Hazards and Accidents
Electrical hazards can occur even after the installation is complete. Taking preventative measures can help minimize the risk of accidents. Here are some precautions to keep in mind:
- Regular inspections: Periodically inspect the breaker to ensure it is functioning properly. Look for signs of overheating, loose connections, or other indicators of potential issues.
- Maintain a clean and organized electrical panel: Keep the electrical panel free from dust, debris, and any foreign objects that could cause short circuits or obstruct the functionality of the breaker.
- Avoid overloading circuits: Do not exceed the electrical capacity of the breaker or the circuit. Overloading can lead to overheating, tripped breakers, and potential fire hazards.
- Seek professional help if needed: If you are unsure about any aspect of the installation or encounter any electrical problems, it is always best to consult a licensed electrician for assistance.
By following these safety measures and precautions, you can ensure a safe and successful installation of your Square D breaker. Remember, prioritizing safety is essential when working with electricity to avoid accidents and protect yourself and your property.
Frequently Asked Questions
How Do You Replace A Square D 30 Amp Breaker?
To replace a Square D 30 amp breaker, follow these steps: 1. Turn off the main breaker. 2. Remove the panel cover. 3. Locate the 30 amp breaker you want to replace. 4. Disconnect the wires from the old breaker.
5. Install the new 30 amp breaker and reconnect the wires.
How Do You Install Square D Breaker Ties?
To install Square D breaker ties, follow these steps: 1. Turn off the power supply. 2. Remove the panel cover. 3. Locate the breaker tie slots on the breakers. 4. Insert the breaker tie into the slots of adjacent breakers.
5. Push the breaker tie until it is securely in place.
How Do You Install A Two Pole Circuit Breaker?
To install a two pole circuit breaker, follow these steps: 1. Firstly, turn off the main power supply. 2. Open the panel cover. 3. Mount the breaker onto the panel’s rail. 4. Connect the breaker’s wires to the circuit. 5. Lastly, secure the breaker in place and close the panel cover.
Done!
How Do You Put A Breaker In A Panel Box?
To put a breaker in a panel box, follow these steps: turn off power, remove the panel cover, identify an open slot, push the breaker into the slot until it snaps in place, connect the wires to the breaker, and secure the panel cover.
Conclusion
Installing a Square D breaker is a fairly straightforward process that can be done by following these simple steps. By turning off the power, removing the panel cover, inserting the breaker, and reconnecting the circuits, you can ensure the safety and efficiency of your electrical system.
Remember to always consult the manufacturer’s instructions and if needed, seek professional assistance. Happy installation!