Installing soundproof panels is a simple process that involves measuring, marking, and attaching panels to walls or ceilings using appropriate mounting hardware and techniques, improving the acoustic properties of a space. Creating a quiet and peaceful environment is essential, especially in noisy urban areas or spaces with high sound levels.
One effective way to achieve this is by installing soundproof panels. These panels help to absorb sound waves, reducing echoes and blocking external noise. Whether you are looking to minimize noise in your home, office, studio, or any other space, soundproof panels are a practical and efficient solution.
In this guide, we will explore the step-by-step process of installing these panels, ensuring you can enjoy a serene and noise-free environment. Don’t let unwanted sound disrupt your peace; read on to discover how to install soundproof panels effectively.
Understanding The Purpose Of Sound Proof Panels
Soundproofing is essential in any space where excessive noise can disrupt daily activities or cause discomfort. Whether you live in a bustling city, work in a noisy office, or simply want a peaceful home environment, soundproofing can significantly improve the quality of your life.
What Are Sound Proof Panels?
Soundproof panels, also known as acoustic panels, are specialized materials designed to absorb sound waves and reduce noise transmission. These panels are typically made from dense materials such as foam, fabric, or composite fibers. They are specifically engineered to minimize noise reverberation and enhance sound quality within a room.
Benefits of Using Sound Proof Panels
Using soundproof panels offers numerous advantages. Apart from reducing noise, they also provide a range of benefits including:
- Improved privacy: By minimizing sound transfer, soundproof panels help maintain privacy in offices, conference rooms, and even residential spaces.
- Enhanced focus and productivity: Unwanted noise distractions can hinder concentration and productivity. Soundproof panels create a quieter environment, enabling better focus and work efficiency.
- Better acoustics: Whether it’s a recording studio, home theater, or conference room, soundproof panels improve acoustics by reducing echoes and reverberations, resulting in clearer sound quality.
- Reduced stress and fatigue: Excessive noise can cause stress, fatigue, and even health problems. Soundproof panels help create a serene environment, promoting relaxation and well-being.
Importance of Proper Installation
Proper installation of soundproof panels is crucial to ensuring their effectiveness. When installed correctly, the panels can provide optimal noise reduction and prevent sound leaks. Here are a few key reasons why proper installation is essential:
- Tight seal: To maximize sound absorption, it is important to have a tight seal between the panels and the walls, floors, or ceilings. This prevents any gaps that sound can travel through.
- Strategic placement: Soundproof panels should be strategically placed in areas where sound transmission is most significant. Identifying these areas and installing the panels accordingly brings the greatest benefit.
- Professional expertise: Working with experienced professionals ensures that the soundproofing panels are installed correctly. Professionals can provide guidance on the type of panels needed for specific applications and ensure proper placement and installation techniques.
By understanding the purpose of soundproof panels, their benefits, and the importance of proper installation, you can create an environment that is free from unwanted noise and enjoy the benefits of a quieter and more peaceful space.
Assessing The Room And Acoustic Needs
Assessing the room and understanding its acoustic needs is an important step when it comes to installing soundproof panels in your space. By identifying problem areas for sound leakage, measuring the noise levels, and determining the required level of soundproofing, you can effectively create a peaceful and acoustically balanced environment. Let’s explore these steps in more detail.
Identifying Problem Areas for Sound Leakage
The first step in assessing the room is to identify the problem areas where sound leakage occurs. These areas can include windows, doors, walls, or any other openings that allow sound to pass through. Take note of any cracks or gaps that may exist, as even the smallest opening can contribute to sound leakage. Pay special attention to shared walls if your space is located in an apartment building or office complex.
To identify problem areas, carefully inspect the room and listen for any noticeable sound leaks. A great way to test this is to have someone make noise in another room while you stand in the room you want to soundproof. Listen for any sounds that penetrate the walls or windows.
Measuring the Noise Levels
Once you have identified problem areas, it’s important to measure the noise levels in your space. This will help you determine how much soundproofing is required to achieve your desired results. Use a sound level meter, which can be easily found at your local hardware store, to measure the decibel levels in different areas of the room.
Move the sound level meter around the room, taking readings at different locations. Make sure to measure both background noise levels and specific sources of noise. By doing so, you will have a better understanding of the noise levels you are dealing with and can then choose the appropriate soundproofing materials.
Determining the Required Level of Soundproofing
With the problem areas identified and the noise levels measured, it’s time to determine the required level of soundproofing. This will depend on the nature of the noise, the sensitivity of the occupants, and the desired level of sound isolation.
Consider the activities that take place in the room and the type of sound you want to block or reduce. For example, if you are setting up a home recording studio, you might want a higher level of soundproofing compared to a living room where you simply want to reduce outside noise.
Once you have a clear understanding of your soundproofing needs, you can begin choosing the appropriate soundproof panels and materials to create a more peaceful and acoustically optimized space.
Choosing The Right Sound Proof Panels
When it comes to soundproofing a space, selecting the right soundproof panels is crucial. These panels can make a significant difference in reducing unwanted noise and creating a more peaceful environment. However, with numerous options available in the market, it can be overwhelming to determine which panels would be the best fit for your specific needs. To help you make an informed decision, consider the following factors when choosing the right soundproof panels.
Types of Sound Proof Panels Available
The first step in selecting the right soundproof panels is understanding the various types available. Different materials and designs offer varying levels of sound absorption and insulation. Here are some common types of soundproof panels:
| Panel Type | Description |
|---|---|
| Foam Panels | Made from acoustic foam, these panels are lightweight and easy to install. They absorb sound waves and reduce echo. |
| Fiberglass Panels | Fiberglass panels provide excellent sound insulation due to their dense composition. They are effective in blocking both airborne and impact noise. |
| Wooden Panels | Wooden soundproof panels add aesthetic appeal while also enhancing soundproofing. They can be customized to match the interior design. |
Factors to Consider When Selecting Panels
Choosing the right soundproof panels requires careful consideration of various factors. To ensure optimal results, keep the following factors in mind:
- Noise Source: Identify the specific type of noise you intend to block or absorb. Depending on whether it’s loud music, external traffic, or machinery noise, certain panels may be more effective.
- Installation Location: Consider where the panels will be installed. Different areas, such as walls, ceilings, or floors, may require different types of panels for optimal soundproofing.
- Soundproofing Goals: Determine your desired level of soundproofing. Some panels offer higher sound insulation, while others focus on reducing echo and improving acoustics.
- Budget: Set a budget for your soundproofing project. Keep in mind that the quality and effectiveness of the panels often correspond with the price.
Budget Considerations for Sound Proof Panels
When planning to soundproof a space, budget considerations play a significant role in decision-making. While it’s important to invest in quality panels, it’s also essential to find a balance between cost and efficiency. Here are a few things to keep in mind:
- Determine your available budget for soundproofing.
- Research and compare prices of different soundproof panels.
- Consider the long-term benefits and durability of the panels.
- Look for reputable suppliers who offer quality panels at competitive prices.
By considering these factors and budget considerations, you can confidently choose the right soundproof panels that align with your requirements and create a quieter and more comfortable environment.
Gathering The Necessary Tools And Materials
Before you start installing soundproof panels in your home or studio, it is important to gather all the necessary tools and materials. This will ensure a smooth and efficient installation process. In this section, we will discuss the essential tools, additional materials required, and safety precautions to keep in mind.
Essential Tools for Sound Proof Panel Installation
When it comes to installing soundproof panels, having the right tools is crucial. Here is a list of essential tools you will need:
- Measuring Tape: You will need a measuring tape to accurately measure the dimensions of the area where you plan to install the panels.
- Level: A level will help you ensure that the panels are installed horizontally and vertically straight.
- Stud Finder: This tool will help you locate the studs in the wall, which are necessary for securely mounting the panels.
- Electric Drill: An electric drill with the appropriate drill bits will make it easier to install the panels onto the wall.
- Screwdriver: You will need a screwdriver to tighten the screws and secure the panels in place.
Having these essential tools on hand will save you time and effort during the installation process.
Additional Materials Required for Installation
In addition to the essential tools, you will also need the following materials:
- Soundproof Panels: Choose the type and size of panels that best suit your needs. Consider factors such as the level of soundproofing required and the aesthetic appeal of the panels.
- Acoustic Caulk: Acoustic caulk should be used to seal any gaps or seams between the panels and the wall. This helps prevent sound leakage.
- Mounting Hardware: Depending on the type of panels, you might need mounting brackets, screws, or other hardware to secure the panels in place.
- Protective Gear: It is important to prioritize safety during the installation process. Wear gloves and safety goggles to protect yourself from any potential hazards.
By gathering these additional materials beforehand, you will be well-prepared to complete the soundproof panel installation with ease.
Safety Precautions to Keep in Mind
When working with tools and materials, it is important to prioritize safety. Here are some safety precautions to keep in mind:
- Use Protective Gear: As mentioned earlier, always wear gloves and safety goggles to protect yourself from any potential injuries.
- Follow Manufacturer’s Instructions: Read and follow the manufacturer’s instructions for both the tools and the soundproof panels to ensure safe and accurate installation.
- Securely Mount Panels: Ensure that the panels are securely mounted to avoid any accidents or damage.
- Work in a Well-Ventilated Area: If you are using adhesive agents such as acoustic caulk, make sure you work in a well-ventilated area to prevent inhalation of harmful fumes.
- Ask for Assistance: If the panels are large or heavy, it is advisable to ask for help during the installation process to avoid any strain or injuries.
Following these safety precautions will help you complete the soundproof panel installation safely and effectively.
Preparing The Room For Installation
Preparing the room for the installation of soundproof panels is an important step in ensuring a successful and effective soundproofing solution. By properly preparing the room, you can maximize the effectiveness of the panels and minimize any potential issues that may arise during the installation process. This section will guide you through the necessary steps to prepare the room for installing soundproof panels.
CLEARING THE AREA AND REMOVING OBSTACLES
Before you begin the installation process, it’s crucial to clear the area and remove any obstacles that may hinder the placement of the soundproof panels. Start by removing furniture, curtains, wall hangings, and any other objects that are in the way. Create a clear and open space so that you have easy access to the walls where the panels will be installed.
CLEANING AND INSPECTING THE WALLS
Once the area is cleared, it’s time to clean and inspect the walls. Dust, dirt, and other debris on the walls can hinder the adhesion of the panels. Use a damp cloth or sponge to wipe down the walls, ensuring they are free from any dirt or dust particles that can interfere with the installation process. Inspect the walls for any cracks, holes, or imperfections that need to be repaired before proceeding with the installation. Smooth out any rough patches and fill in any gaps or cracks with spackling compound or caulk.
APPLYING A PRIMER OR SEALANT FOR BETTER ADHESION
Applying a primer or sealant to the walls before installing soundproof panels can improve the adhesion and ensure a stronger bond between the panels and the walls. A primer acts as a base coat that enhances the adhesion of the panels to the walls, while a sealant creates a barrier that prevents sound leakage around the edges of the panels.
Here is a step-by-step guide on how to apply a primer or sealant:
- Clean the walls thoroughly to remove any dust or debris.
- Choose a high-quality primer or sealant specifically designed for soundproofing purposes.
- Follow the manufacturer’s instructions and mix the primer or sealant if required.
- Use a paint roller or brush to apply the primer or sealant evenly on the walls.
- Allow the primer or sealant to dry completely before proceeding with the installation of the soundproof panels.
By clearing the area, cleaning and inspecting the walls, and applying a primer or sealant, you will ensure a smooth and effective installation process for your soundproof panels. These preparatory steps are essential to achieve optimal soundproofing results and create a peaceful and quiet environment in your room.
Installing Sound Proof Panels On Walls
Are you tired of hearing the noise from neighboring rooms or outside traffic seeping into your peaceful haven? If the answer is yes, then it’s time to consider installing soundproof panels on your walls. These panels not only help in reducing noise but also add an aesthetic appeal to your space. In this guide, we will walk you through the process of installing soundproof panels on walls, step by step. Let’s get started!
Measuring and Marking the Panel Placement
The first step in installing soundproof panels on walls is to accurately measure and mark the panel placement. This ensures that your panels are installed in the right positions, maximizing their effectiveness. Here’s how you can do it:
- Start by measuring the height and width of the wall area where you want to install the panels. Use a tape measure to get precise measurements.
- With the help of a pencil, mark the top and bottom borders of the panel area on the wall. Use a level to ensure that the lines are straight.
- Divide the wall area into equal sections based on the number of panels you want to install. Mark these sections using a pencil and a measuring tape. This will help you determine the panel placement.
- Make sure to mark the vertical lines where each panel should be placed as well. This will ensure the panels are evenly spaced and aligned on the wall.
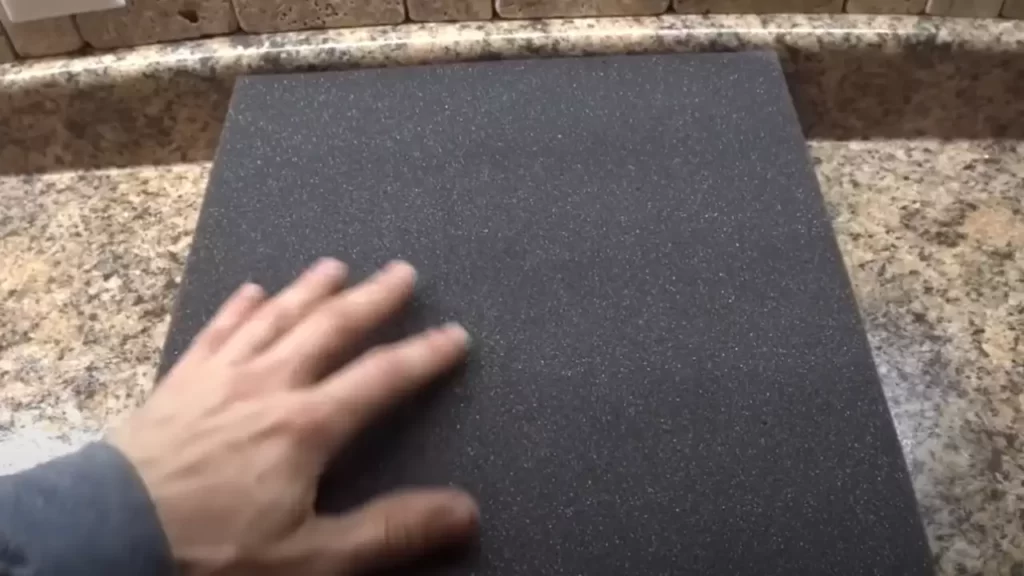
Cutting Panels to the Correct Size
Once you have marked the panel placement on the wall, it’s time to cut the soundproof panels to the correct size. Here’s how you can do it:
- Measure the dimensions of the panel area on the wall, including the spaces between each panel.
- Transfer these measurements onto the soundproof panels using a pencil and a straight edge. Make sure to mark both the height and width.
- Use a utility knife or a saw to carefully cut along the marked lines. Take your time and ensure the cuts are clean and precise.
- After cutting the panels, check if they fit perfectly within the marked areas on the wall. Make any necessary adjustments if required.
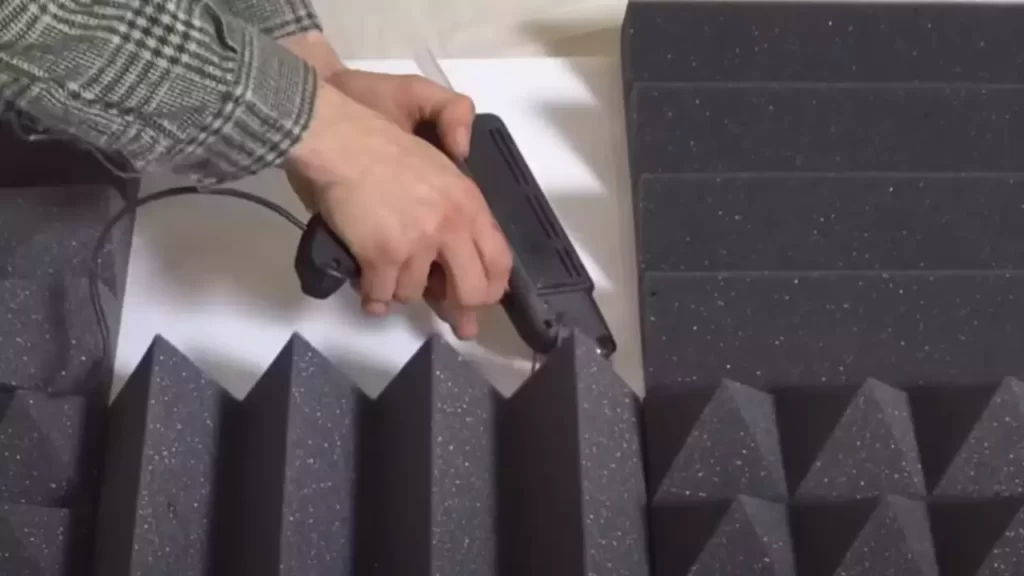
Attaching the Panels to the Wall
Now that you have measured, marked, and cut the soundproof panels to the correct size, it’s time to attach them to the wall. Follow these steps:
- Apply a strong adhesive or panel adhesive tape to the back of each panel. Check the manufacturer’s instructions for the recommended adhesive.
- Starting from the top corner of the panel area, press the first panel firmly against the wall. Make sure it aligns with the marked lines and is level.
- Continue attaching the remaining panels one by one, ensuring they are evenly spaced and aligned with the marked lines on the wall.
- Once all the panels are in place, press firmly on each panel to ensure proper adhesion.
- Leave the panels undisturbed for the specified drying time mentioned in the adhesive instructions before applying any additional treatments or decorations.
Congratulations! You have successfully installed soundproof panels on your walls, creating a quieter and more peaceful environment. Enjoy the enhanced privacy and tranquility that these panels bring to your space!
Installing Sound Proof Panels On Ceilings
Assessing the Ceiling Structure
Before installing soundproof panels on your ceilings, it is essential to assess the structure of the ceiling. This step is crucial as it helps determine the appropriate approach for panel installation.
Here are a few factors to consider:
- Identify the type of ceiling you have – whether it’s made of drywall, concrete, metal, or another material.
- Check for any signs of damage or cracks on the ceiling surface that may need repair before panel installation.
- Determine if there are any existing fixtures or electrical wiring that might interfere with the installation process.
By thoroughly assessing the ceiling structure, you can ensure a smooth and effective installation of soundproof panels.
Creating a Framework for Panel Installation
Once you have assessed the ceiling structure, the next step is to create a framework that will serve as a base for attaching the soundproof panels. This framework provides stability and ensures that the panels are securely installed.
Follow these steps to create a framework:
- Measure the dimensions of the ceiling and mark the placement for the framework.
- Using a stud finder, locate the ceiling joists and mark their positions.
- Install furring strips or wooden beams perpendicular to the joists, creating a grid-like pattern.
- Secure the furring strips or wooden beams to the joists using appropriate hardware, ensuring they are level and evenly spaced.
By creating a sturdy framework, you can ensure that the soundproof panels will be properly supported and effectively block unwanted noise.
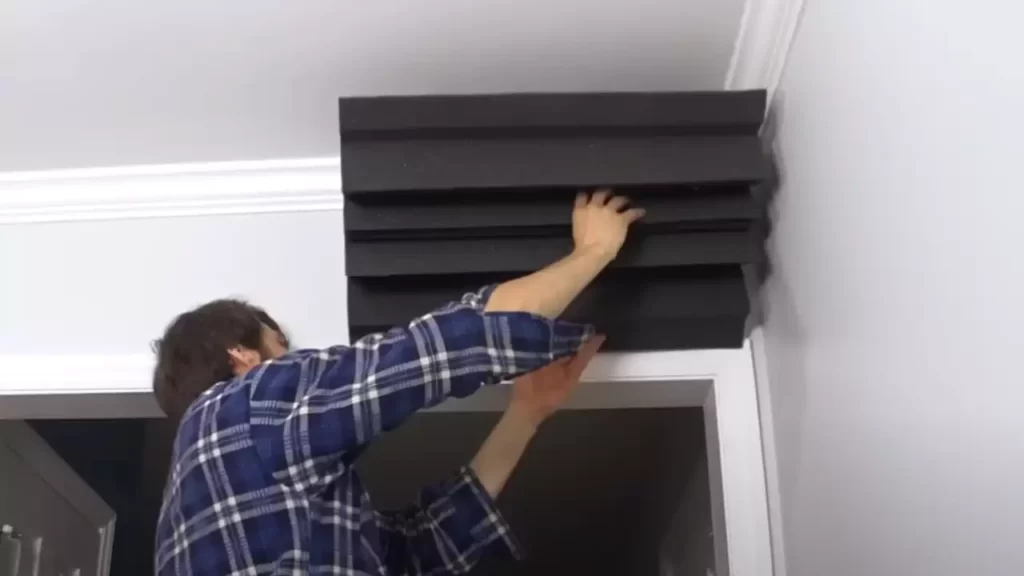
Attaching Sound Proof Panels to the Ceiling
Once the framework is in place, it’s time to attach the soundproof panels to the ceiling. This final step brings everything together and completes the installation process.
Here’s how to attach the soundproof panels:
- Measure and cut the panels to fit the dimensions of the ceiling, taking into account any fixtures or electrical outlets.
- Apply adhesive or use appropriate fasteners to secure the panels to the furring strips or wooden beams.
- Ensure proper alignment and spacing between each panel to achieve a uniform and professional look.
- Trim any excess material and make necessary adjustments for a seamless finish.
By carefully attaching the soundproof panels to the ceiling, you can enjoy enhanced sound insulation, reduced echo, and a quieter living or working space.
Finishing Touches And Maintenance
Once you have successfully installed your soundproof panels, there are a few finishing touches and maintenance steps to consider. These steps will not only enhance the overall aesthetic appeal but also ensure the longevity of your soundproofing efforts. Let’s explore the important factors to focus on: sealing any gaps or cracks, painting or camouflaging the soundproof panels, and regular maintenance.
Sealing any Gaps or Cracks
Proper sealing is essential to maximize the effectiveness of your soundproof panels. Even the smallest gaps or cracks can compromise your soundproofing efforts by allowing sound to leak through. To seal any gaps or cracks, follow these steps:
- Inspect the perimeter of each panel carefully.
- Identify any gaps or cracks that need attention.
- Apply a high-quality acoustic sealant or caulk to fill the gaps and cracks.
- Smooth the sealant with a putty knife to create a seamless finish.
By sealing any gaps or cracks, you can ensure that your soundproof panels effectively block any unwanted noise from entering or exiting the space.
Painting or Camouflaging the Sound Proof Panels
While soundproof panels are often designed with a neutral or matte finish, you may want to paint or camouflage them to match your existing decor. Here’s how to do it:
- Clean the panels thoroughly using a mild detergent and water.
- Sand the panels lightly with fine-grit sandpaper to create a rough surface for better paint adhesion.
- Apply a primer specifically designed for acoustic materials.
- Once the primer is dry, choose a paint color that complements your room’s color scheme.
- Apply the paint evenly with a roller or brush, ensuring full coverage.
Alternatively, you can use fabric, wallpaper, or decorative coverings to camouflage the soundproof panels, making them blend seamlessly into your space.
Regular Maintenance for Longevity
Maintaining your soundproof panels is crucial for their longevity and continued performance. Here are some maintenance tips to keep in mind:
- Dust the panels regularly using a soft cloth or a gentle vacuum cleaner attachment.
- Wipe any spills or stains immediately using a mild detergent and water solution.
- Inspect the panels periodically for any signs of damage or wear.
- Replace any damaged or worn-out panels to maintain the effectiveness of your soundproofing.
- Consider using a fabric refresher spray or deodorizer to keep the panels smelling fresh.
By following these maintenance practices, you can ensure that your soundproof panels remain in optimal condition and continue to provide the noise reduction benefits you desire.
Troubleshooting And Common Issues
Installing soundproof panels can greatly improve the acoustics of a room, reducing noise transmission and creating a more peaceful environment. However, there may be challenges and common issues that you may encounter along the way. Don’t worry, we have you covered! In this section, we will discuss how to identify and fix sound leakage problems, deal with excessive vibrations or resonance, and seek professional assistance if needed.
Identifying and Fixing Sound Leakage Problems
One of the most common issues when installing soundproof panels is sound leakage. Even the smallest gaps or cracks can undermine the effectiveness of your efforts. Therefore, it is crucial to identify and fix any sound leakage problems.
To identify areas where sound might be leaking, perform a thorough inspection of the room. Look for visible cracks, gaps around doors and windows, and any openings in the walls or ceiling. Once you have identified these areas, use the following methods to fix the sound leakage:
- Seal the gaps: Use a high-quality sealant or acoustic caulk to seal any visible gaps or cracks. Ensure that the sealant you choose is soundproofing-rated and is suitable for the specific material you are working with, such as wood, metal, or concrete.
- Install weatherstripping: For doors and windows, consider installing weatherstripping to create a tight seal and prevent sound leakage. Choose weatherstripping materials that are designed for soundproofing purposes.
- Use acoustic putty pads: These putty pads are effective in filling small gaps around electrical outlets, light switches, or other wall penetrations that can transmit sound. Apply the putty pads behind the switch plates or outlet covers for optimal results.
Dealing with Excessive Vibrations or Resonance
Excessive vibrations or resonance can occur when sound waves interact with the structure of the room, leading to unwanted noise or even damage. Fortunately, there are ways to tackle this issue:
- Decoupling: This method involves creating a separation between the soundproof panels and the wall or ceiling. By using resilient channels, isolation clips, or spring hangers, you can minimize vibrations and prevent sound transfer.
- Add mass: Increasing the mass of the walls or ceiling can help absorb vibrations. Consider adding additional layers of drywall or using specialized soundproofing materials with high density.
- Use vibration isolators: Vibration isolators, such as neoprene pads or rubber mounts, can be installed between the soundproof panels and the wall or ceiling. These isolators absorb vibrations and reduce resonance.
Seeking Professional Assistance if Needed
While many soundproofing projects can be successfully completed by DIY enthusiasts, some situations may require professional assistance. If you encounter complex issues or are uncertain about the best course of action, it is advisable to consult with a soundproofing professional.
A professional can assess the specific challenges of your space and recommend the most effective solutions. They have the expertise and experience to handle complex installations or troubleshoot any issues that may arise during the process.
Remember, it’s better to seek professional assistance if you are unsure rather than risk ineffective soundproofing or potential damage to your room.
Frequently Asked Questions
How Do You Install Soundproof Panels?
To install soundproof panels, start by measuring the area where you want to place them. Next, ensure that the surface is clean and dry. Use an adhesive or screws to securely attach the panels to the wall, ceiling, or floor.
Follow the manufacturer’s instructions for the specific installation process.
Where Should I Put My Sound Proof Panels?
You should place your soundproof panels in areas where noise is most likely to enter or escape, such as windows, doors, or walls facing busy streets or noisy neighbors.
How Do You Install Acoustic Panels Without Drilling?
To install acoustic panels without drilling, use adhesive hooks or velcro strips to attach the panels to the walls. Make sure the surface is clean and dry before applying the adhesive. Press firmly to ensure a secure bond. This method allows for easy removal and does not damage the walls.
How Do You Stick Foam Sheets To The Wall?
To stick foam sheets to the wall, follow these steps: 1. Clean the wall surface thoroughly. 2. Apply a strong adhesive, like construction adhesive, to the back of the foam sheet. 3. Press the foam sheet firmly against the wall.
4. Use a roller or a similar tool to ensure proper adhesion. 5. Allow the adhesive to dry as per the manufacturer’s instructions.
Conclusion
To sum up, installing soundproof panels is a practical and effective solution to reduce noise disturbance in your space. By following the steps outlined in this guide, you can easily transform your room into a peaceful haven. Remember to choose the right materials, measure accurately, and install the panels securely.
With proper installation, you’ll be able to enjoy a quieter and more comfortable environment. So, don’t wait any longer, get started on soundproofing your space today!