Installing solar panels yourself is possible by following these steps: research local regulations, choose a suitable location, assess your energy needs, purchase the necessary equipment, and install the panels properly on your roof. Solar panel installation can be a feasible DIY project that allows you to harness renewable energy and potentially save on electricity costs.
However, it is crucial to approach this task with thorough planning and attention to detail. We will guide you through the steps required to install solar panels on your own. By doing so, you can contribute to a sustainable future and reduce your environmental footprint while also decreasing your reliance on traditional power sources.
Let’s explore how you can install solar panels yourself and reap the benefits of clean energy.
1. Determining The Feasibility Of Diy Solar Panel Installation
Factors to Consider Before Installing Solar Panels Yourself
Thinking about installing solar panels yourself? Before taking on this DIY project, it’s important to determine the feasibility of such an endeavor. There are a few crucial factors you need to consider to ensure a successful installation. From assessing the suitability of your roof to understanding local regulations and permits, here’s what you need to know:
Assessing Your Roof’s Suitability for Solar Panel Installation
Before diving into the world of solar panel installation, it’s essential to evaluate whether your roof is suitable for hosting solar panels. Here are some key aspects to consider:
- The orientation of your roof: Solar panels work best when facing south, as they capture the maximum amount of sunlight throughout the day. However, east and west-facing roofs can also be viable options.
- The slope of your roof: Ideally, your roof should have a tilt between 10 and 40 degrees to optimize solar panel efficiency. Flat roofs may require additional mounting equipment.
- The condition and age of your roof: A sturdy roof is crucial for ensuring the long-term stability of your solar panel system. Assess whether your roof needs any repairs or replacements before proceeding.
Calculating Your Energy Needs and Potential Savings
Determining your energy consumption and potential cost savings is a key step in deciding whether installing solar panels yourself is worth it. Here’s what you need to consider:
- Analyzing your energy bills: Take a closer look at your electricity bills to understand your current usage patterns. This will give you an idea of how much energy you consume on average.
- Estimating your energy production: Using online calculators and tools, you can estimate how much electricity your solar panel system would generate based on your location, roof orientation, and other factors.
- Assessing potential savings: With the estimated energy production and your current electricity rates, you can determine the potential savings you could achieve by going solar.
Understanding the Local Regulations and Permits Required
Installing solar panels involves compliance with local regulations and obtaining necessary permits. Before starting your DIY project, it’s crucial to:
- Research local regulations: Look into your local zoning codes, building permits, homeowner association rules, and any other regulations that govern solar panel installations in your area.
- Contact your utility company: Reach out to your utility company to understand any interconnection agreements, net metering policies, or additional requirements you need to comply with.
- Ensure safety and code compliance: Familiarize yourself with electrical and building codes to ensure that your installation meets all safety standards.
By considering these factors and conducting thorough research, you can determine if DIY solar panel installation is feasible for your specific situation. Remember to always prioritize safety, and don’t hesitate to seek professional help if needed.

2. Preparing For Solar Panel Installation
Before diving into the exciting world of installing solar panels, it’s important to adequately prepare for the process. This includes gathering the necessary tools and equipment, prioritizing safety precautions, properly preparing your roof, and ensuring a smooth installation process. By following these steps, you’ll be well on your way to harnessing the power of the sun and contributing to a greener future.
Gathering the necessary tools and equipment
Before embarking on your solar panel installation journey, make sure you have all the necessary tools and equipment at hand. Here’s a list of items you’ll want to have:
| Tools | Equipment |
|---|---|
| Drill with various bits | Solar panels |
| Wrench | Mounting brackets |
| Ladder | Junction box |
| Tape measure | Grounding wire |
| Level | Connectors and cables |
Having these tools readily available will ensure a smoother installation and minimize any unnecessary delays.
The importance of safety precautions
When it comes to solar panel installation, safety should be your top priority. Not only will taking proper safety precautions protect you and those around you, but it will also prevent any damage to your property. Here are a few important safety tips to keep in mind:
- Wear appropriate safety gear, such as gloves and protective eyewear.
- Ensure your ladder is secure and placed on stable ground before climbing.
- Take caution when working on a roof, especially if it’s steep or slippery.
- Turn off the power supply and work with insulated tools when handling electrical components.
By following these safety precautions, you’ll create a secure environment for yourself as you embark on your solar panel installation project.
Preparing your roof for solar panel installation
Before you start installing solar panels, it’s crucial to assess and prepare your roof to ensure proper placement and support. Here’s a step-by-step guide:
- Inspect your roof for any damage or leaks, and address these issues before proceeding.
- Clear any debris or obstacles that might hinder the installation process.
- Determine the most suitable location for your solar panels based on factors such as sunlight exposure and shading.
- Check the structural integrity of your roof and reinforce it if necessary.
- Apply sealant or flashing around potential entry points to prevent water leakage.
By taking the time to properly prepare your roof, you’ll ensure a solid foundation for your solar panels and minimize the risk of any future complications.
Steps to ensure a smooth installation process
Now that you’ve gathered your tools, prioritized safety, and prepared your roof, it’s time to begin the installation process. Here are a few steps to ensure a smooth and successful installation:
- Refer to the manufacturer’s instructions for specific installation guidelines.
- Measure and mark the appropriate positions for your solar panels, ensuring they are evenly spaced.
- Secure the mounting brackets to the roof, following the recommended installation method.
- Attach the solar panels to the mounting brackets, making sure they are securely tightened.
- Connect the panels using the appropriate connectors and cables, ensuring proper electrical connections.
- Install the junction box and ground the system according to local electrical codes.
- Test the system to ensure it is functioning properly and efficiently.
By following these steps, you’ll be able to confidently install your solar panels and start reaping the benefits of renewable energy in no time.
3. Step-By-Step Guide To Installing Solar Panels Yourself
3. Step-by-Step Guide to Installing Solar Panels Yourself
Are you considering installing solar panels yourself? It’s a great way to harness the power of the sun and save on your energy bills. In this guide, we will walk you through the process of installing solar panels step by step, empowering you to take control of your energy future and make a positive impact on the environment.
Understanding solar panel wiring and components
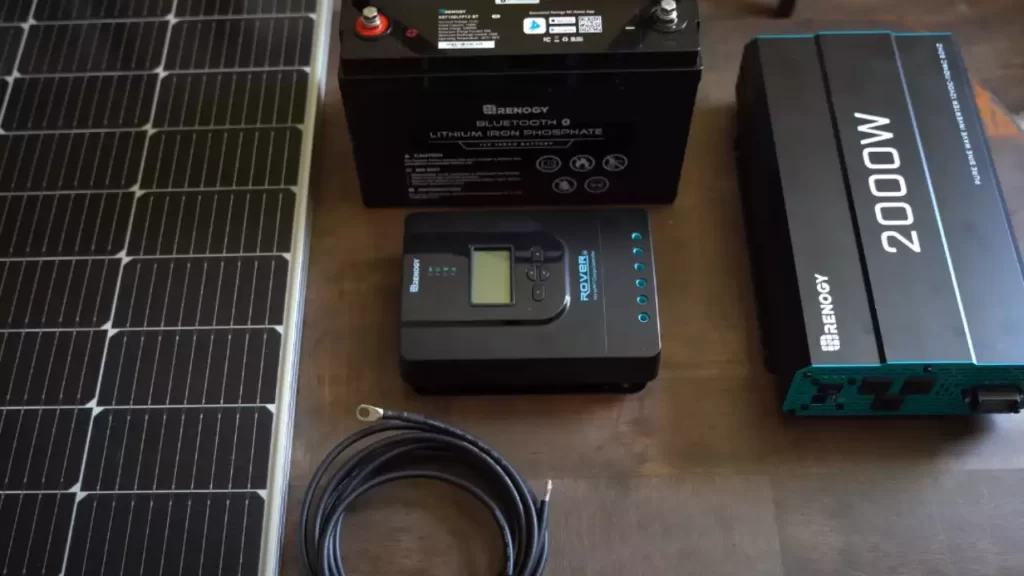
Before you start the installation process, it’s essential to understand the different components and how they are connected. Solar panels consist of photovoltaic (PV) cells that convert sunlight into electricity, and come with several key components:
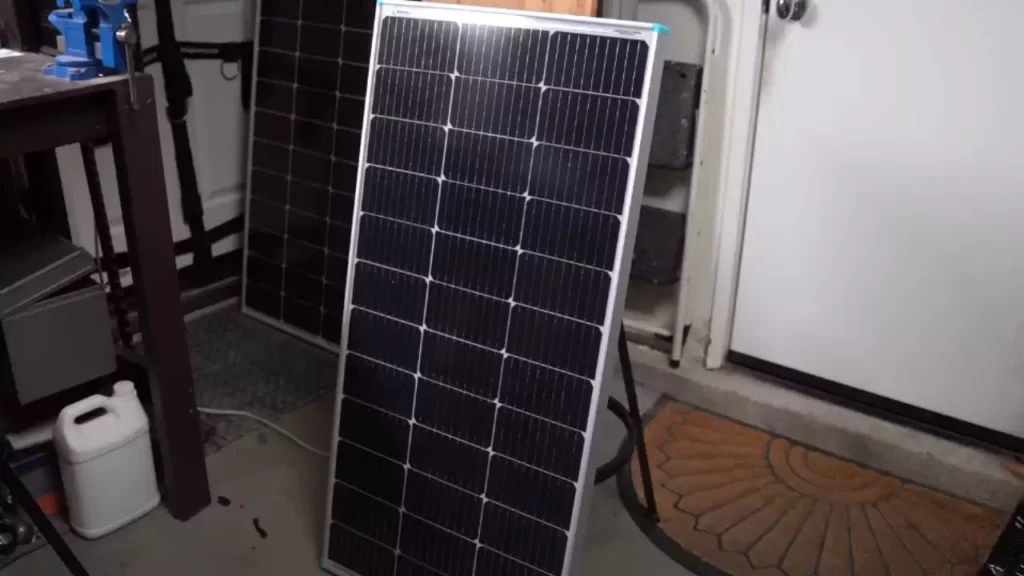
- Solar panels: These are the main units that produce electricity.
- Mounting hardware: These are used to securely attach the panels to your roof.
- Solar inverters: These convert the direct current (DC) generated by the panels into alternating current (AC) that can be used in your home.
- Electrical wiring: This connects the panels to the inverter and your home’s electrical system.
- Monitoring system: This allows you to keep track of how much energy your solar panels are producing.
Mounting the solar panels on your roof
Once you have familiarized yourself with the components, the next step is to mount the solar panels on your roof. It’s important to ensure that your roof is structurally sound and can support the weight of the panels. Here’s how to do it:
- Choose the ideal location for your panels, making sure they will receive maximum sunlight throughout the day.
- Attach the mounting hardware to the roof using secure brackets and screws. Make sure to follow the manufacturer’s instructions and guidelines.
- Place the solar panels onto the mounting hardware, ensuring they are securely fastened.
- Double-check that the panels are positioned correctly and are facing in the right direction to optimize sunlight exposure.
Connecting the solar panels to the electrical system
Now that your panels are securely mounted on the roof, it’s time to connect them to the electrical system. Here’s how you can do it:
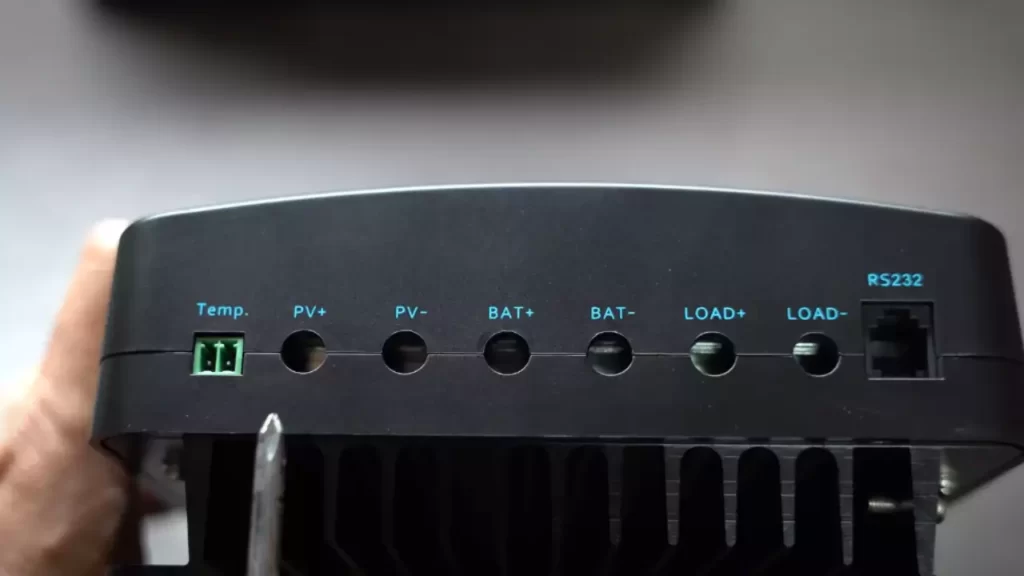
- Run the electrical wiring from the solar panels to the inverter. Make sure to follow the proper electrical codes and safety precautions.
- Connect the wires from the solar panels to the DC input terminals on the inverter.
- Connect the AC output terminals of the inverter to your home’s electrical system. This should be done by a qualified electrician to ensure compliance with local regulations.
- Install a dedicated solar production meter to measure the amount of energy your panels are generating.
Properly grounding your solar panel system
Grounding your solar panel system is crucial to ensure the safety and effectiveness of your installation. Follow these steps to properly ground your system:
- Install a ground fault circuit interrupter (GFCI) on the AC output side of your inverter to protect against electrical shocks.
- Bond the metal frames and mounting equipment of the solar panels to the grounding system of your house.
- Connect the system’s grounding conductor to your home’s grounding electrode system.
By following this step-by-step guide, you can confidently install solar panels yourself, enjoying the benefits of clean energy and reducing your carbon footprint. Remember, if you encounter any challenges or feel unsure about any steps, it’s always wise to consult a professional who can provide guidance and ensure a safe and efficient installation.
4. Testing And Maintenance Of Your Diy Solar Panel System
4. Testing and Maintenance of Your DIY Solar Panel System
Once you have successfully installed your DIY solar panel system, it’s essential to regularly test and maintain it to ensure optimal performance and maximize energy efficiency. By checking the performance of your solar panels, conducting regular maintenance, troubleshooting common issues, and monitoring your energy production and savings, you can enjoy the benefits of your solar investment for years to come.
Checking the Performance of Your Solar Panels
To ensure that your solar panels are operating at their full potential, performing routine performance checks is crucial. Keep an eye on these key aspects:
- Solar Panel Output: Check the output of each solar panel regularly. You can easily monitor this using a solar panel performance monitoring system or a digital output meter.
- Shading Issues: Pay attention to any objects that may cause shading on your panels, such as newly grown trees or nearby structures. Remove or trim these obstacles to ensure maximum exposure to sunlight.
- Optimal Angle and Orientation: Ensure that your solar panels are positioned at the correct angle and orientation to receive the maximum amount of sunlight. This will vary depending on your location and the time of year.
- Wiring and Connections: Inspect all wiring and connections regularly to ensure they are securely connected and free from damage or corrosion.
Conducting Regular Maintenance to Maximize Efficiency
Regular maintenance of your DIY solar panel system is essential to keep it operating smoothly and maintain its efficiency. Consider the following maintenance tasks:
- Cleaning the Panels: Keep your solar panels clean by removing any dirt, dust, or debris. Use a soft brush or sponge and a mild detergent to gently clean the surface of the panels. Avoid using abrasive materials that could scratch the surface.
- Checking for Damage: Inspect your panels for any signs of damage, such as cracks or delamination. If you identify any issues, it’s important to address them promptly to avoid further damage or reduced efficiency.
- Tightening Loose Connections: Regularly check all connections, including wiring connections and mounting brackets, to ensure they are tight and secure. Loose connections can lead to reduced performance or electrical issues.
- Inspecting Inverter Functionality: The inverter is an essential component of your solar panel system. Check the inverter regularly to ensure it is functioning properly and generating the expected AC power output.
Troubleshooting Common Issues
Despite regular maintenance and proper installation, issues can still arise with your DIY solar panel system. Here are some common problems to be aware of and how to troubleshoot them:
| Common Issue | Troubleshooting Steps |
|---|---|
| Low Energy Production |
|
| Inverter Failure |
|
Monitoring Your Energy Production and Savings
To ensure you are maximizing the benefits of your DIY solar panel system, monitoring your energy production and savings is essential. Consider these steps:
- Track Energy Production: Use a solar energy monitoring system to track the amount of energy your panels are generating. This will help you identify any changes in performance and potential issues.
- Monitor Energy Savings: Keep track of your energy bills to see the savings you are making with your solar panel system. Compare your previous bills with your current ones to gauge the effectiveness of your investment.
- Review System Performance: Regularly review the performance of your system to ensure it is meeting your expectations. If you notice any significant discrepancies or concerns, seek professional assistance to resolve them.
By following these testing and maintenance guidelines for your DIY solar panel system, you can enjoy the benefits of renewable energy while ensuring its long-term efficiency and performance.
5. Expanding Your Solar Panel System
Investing in solar panels is a smart way to reduce your carbon footprint and save on energy costs. But what if you want to take it a step further and expand your solar panel system? With a few simple steps, you can increase the energy output of your system and enjoy even greater energy independence. In this section, we’ll explore two popular options for expanding your solar panel setup: adding additional solar panels to your existing setup and incorporating battery storage for increased energy independence. We’ll also discuss how integrating smart home technology can optimize your energy usage. Let’s dive in!
Adding additional solar panels to your existing setup
If you’ve already experienced the benefits of solar panels and want to maximize your system’s energy production, adding more solar panels is a logical next step. By increasing the number of panels in your array, you can generate more electricity and potentially offset your energy consumption entirely. The process of expanding your solar panel system involves a few important considerations.
First, you’ll need to assess your energy needs and determine the additional capacity required. Consulting with a professional solar installer can help ensure you choose the right panel size and quantity. Once you have the necessary information, you can calculate the extra panels needed to meet your energy goals.
Next, you’ll need to evaluate the available space on your property for the new panels. It’s crucial to find an optimal location that maximizes sunlight exposure throughout the day. Orienting the panels towards the sun’s path will provide the most efficient energy production. Additionally, consider factors such as shading from trees or nearby structures that might affect panel output.
Finally, the new panels need to be integrated into your existing system. This involves connecting them to the existing wiring and configuring the system’s inverter to accommodate the increased capacity. It’s essential to follow proper safety protocols and consult an electrician or solar professional if you’re unsure about any wiring or electrical aspects.
Incorporating battery storage for increased energy independence
Adding battery storage to your solar panel system can significantly enhance your energy independence. By storing excess energy generated by your panels, you can use it later, even during periods of low sunlight or power outages. This allows you to rely less on the grid and save money by reducing your dependence on utility companies.
One option for battery storage is a solar battery backup system. This type of system is designed to provide electricity during power outages, ensuring that your essential appliances and devices continue to operate. It automatically switches from grid power to battery power, providing a seamless transition.
Another option is a solar energy storage system that enables you to store excess energy and use it during peak demand periods or when sunlight is limited. These systems integrate with your solar panel setup and can be programmed to discharge stored energy when it’s most beneficial, such as during evenings or cloudy days.
When incorporating battery storage, it’s crucial to consider factors like battery capacity, lifespan, and efficiency. Working with a knowledgeable solar installer will ensure you choose the right storage solution for your needs.
Integrating smart home technology for optimized energy usage
In today’s technologically advanced world, the integration of smart home technology can take your solar panel system to the next level. Smart home devices and systems allow you to monitor and control your energy consumption, maximizing efficiency and reducing wasted energy.
By installing smart energy monitors, you can track your solar panel system’s performance in real-time. These devices provide detailed information about energy production, usage, and savings. Armed with this data, you can identify areas where adjustments can be made to optimize energy usage further.
Additionally, smart thermostats offer the ability to control your home’s temperature remotely and create energy-efficient schedules. These devices learn your patterns and adjust settings accordingly, ensuring you’re not wasting energy on heating or cooling an empty home.
Furthermore, integrating smart lighting systems and appliances can help minimize energy waste. By automating lighting schedules and using energy-efficient bulbs and appliances, you can make the most of your solar-generated electricity.
Expanding your solar panel system is an exciting step towards a greener and more independent future. Whether you choose to add more panels, incorporate battery storage or integrate smart home technology, each option brings its unique benefits. Assess your needs, consult with professionals, and make an informed decision that aligns with your sustainability goals. Your expanded solar panel system will not only increase your energy production but also contribute to a cleaner and brighter planet.
6. Financing Options For Diy Solar Panel Installation
6. Financing Options for DIY Solar Panel Installation
When it comes to DIY solar panel installation, finding the right financing options is crucial. Not only can it help you cover the upfront costs, but it can also maximize the return on investment for your solar energy system. In this section, we will explore the available financial incentives and tax credits, consider financing options for upfront costs, and evaluate the return on investment for your DIY solar panel system.
Exploring available financial incentives and tax credits
Before diving into the financing options, it’s important to understand the financial incentives and tax credits available for DIY solar panel installation. These incentives can significantly reduce the cost of installing solar panels and make the investment more affordable.
Here is an overview of some commonly available financial incentives:
| Incentive | Description |
|---|---|
| Federal Investment Tax Credit (ITC) | A tax credit that allows you to deduct a percentage of the cost of your solar panel system from your federal taxes. |
| State and Local Solar Incentives | Various incentives offered at the state and local levels, such as rebates, grants, property tax exemptions, and sales tax exemptions. |
| Solar Renewable Energy Certificates (SRECs) | A tradable certificate that represents the environmental attributes of one megawatt-hour of electricity generated from solar energy. |
Considering financing options for upfront costs
Now that you are aware of the financial incentives and tax credits, it’s time to consider financing options for the upfront costs of your DIY solar panel installation. Here are a few options to explore:
- Solar Loans: Many financial institutions offer solar-specific loans that allow you to borrow money for your solar panel installation. These loans often have favorable terms and competitive interest rates.
- Home Equity Line of Credit (HELOC): If you have built up equity in your home, a HELOC can be a viable option. It allows you to use your home’s equity as collateral to secure a loan for your solar project.
- Solar Lease or Power Purchase Agreement (PPA): Under a solar lease or PPA, you can lease the solar panel system or enter into an agreement with a solar provider to purchase the electricity generated by the system. This option eliminates the upfront costs as the solar provider owns and maintains the system.
Evaluating the return on investment for your DIY solar panel system
When deciding on financing options for your DIY solar panel installation, it’s essential to evaluate the return on investment (ROI) for the system. The ROI helps determine the financial benefits and payback period.
To calculate the ROI, consider the following factors:
- Total cost of your solar panel installation, including equipment, permits, and installation fees.
- Estimated energy savings over the lifetime of the system.
- Financial incentives, tax credits, and savings from net metering, if applicable.
- Expected increase in your property value due to the solar panel system.
By evaluating these factors, you can ensure that your DIY solar panel system not only helps you save on electricity bills but also provides a solid return on investment in the long run.
Frequently Asked Questions
Can I install solar panels myself without professional help?
Many people wonder if installing solar panels themselves is a feasible option. The answer is yes, it is absolutely possible to install solar panels without professional help. However, it is important to note that solar panel installation requires a certain level of technical knowledge and expertise. So, if you are confident in your abilities and have some experience with DIY projects, then installing solar panels yourself can be a great way to save money and take control of your energy consumption.
What permits and regulations should I be aware of?
Before embarking on a DIY solar panel installation, it is crucial to familiarize yourself with the permits and regulations in your area. Each municipality or region may have different rules regarding solar panel installations. Some common requirements include obtaining a building permit and complying with electrical codes.
It is important to contact your local authorities or building department to obtain the necessary permits and to ensure that your installation adheres to the regulations. This way, you can avoid any potential legal issues and ensure that your installation is safe and compliant.
How much can I save by installing solar panels myself?
One of the main reasons people choose to install solar panels themselves is the potential for financial savings. By opting for DIY installation, you can eliminate the labor costs associated with hiring professionals. This can significantly reduce the overall cost of your solar panel system.
The amount you can save by installing solar panels yourself will depend on various factors, such as the size of your system, the cost of materials, and the availability of incentives or rebates. However, it is not uncommon for homeowners to save thousands of dollars by taking the DIY route.
Moreover, with the rising energy costs, installing solar panels can also save you money on your monthly electricity bills. By producing your own clean energy, you can reduce or even eliminate your dependency on the grid, leading to substantial long-term savings.
How long does a DIY solar panel installation take?
The duration of a DIY solar panel installation can vary depending on the scope of the project, your level of experience, and the available resources. While some installations can be completed within a few days, others may take several weeks to finish.
It is crucial to set aside enough time for the installation process and plan accordingly. This includes gathering all the necessary tools and equipment, obtaining the required permits, and familiarizing yourself with the step-by-step installation process.
Although the installation may require a significant time commitment, the end result is worth it. Not only will you be contributing to a greener future, but you will also have a sense of pride in knowing that you installed an efficient and cost-effective solar panel system on your own.
Frequently Asked Questions
Can I Install A Solar Panel System Myself?
Yes, you can install a solar panel system yourself. However, it is crucial to follow proper guidelines and safety measures. Make sure to obtain the necessary permits, research and understand the installation process, and use appropriate tools and equipment. If unsure, it is advisable to consult with a professional.
How Do You Install Solar Panels For Beginners?
To install solar panels for beginners, follow these steps: 1. Assess your energy needs and find a suitable location on your roof. 2. Choose the right solar panels and inverters for your system. 3. Install the mounting hardware securely on your roof.
4. Connect the wiring and install the panels properly. 5. Finally, have a professional inspect and connect your system to the electrical grid.
What Can A 300 Watt Solar Panel Run?
A 300 watt solar panel can power various appliances like lights, fans, phones, laptops, small TVs, and charge batteries. It’s ideal for off-grid cabin, RV, or boat use. It can also help reduce electricity bills by supplementing power from the grid.
Are Plug-In Solar Panels Any Good?
Yes, plug-in solar panels are a good option. They are easy to install and can save you money on your energy bills. Plus, they are portable, so you can take them with you if you move.
Conclusion
Installing solar panels yourself is a rewarding and cost-effective way to embrace sustainable energy. By following the step-by-step guide discussed in this blog post, you can confidently embark on your DIY solar panel installation journey. Remember, safety should always be a priority, so take proper precautions and seek professional assistance if needed.
With determination and the right tools, you can harness the power of the sun, reduce your carbon footprint, and enjoy the long-term benefits of renewable energy. Start your solar panel installation today and make a positive impact on the environment and your energy bill.