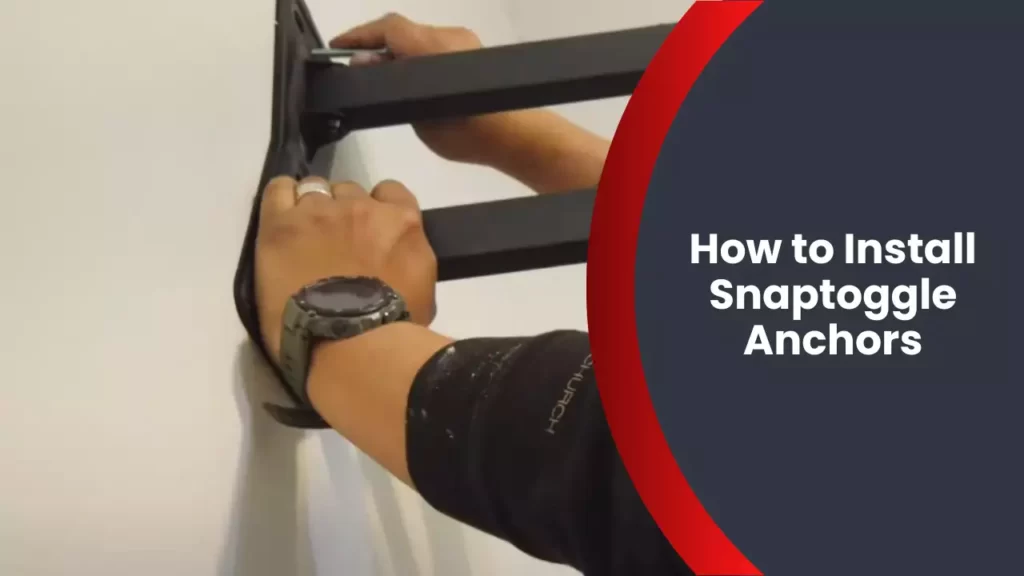
To install Snaptoggle anchors, first mark your mounting hole, then make sure the anchor is unlocked. Insert the anchor and tighten until secure.
Installing Snaptoggle anchors is a simple process that allows you to securely mount objects to walls or ceilings. By using these anchors, you can avoid the need for studs or other structural support. To begin, mark the location of your mounting hole, ensuring it is in the desired position.
Next, make sure the Snaptoggle anchor is unlocked by pushing the plastic cap flush against the wall. Insert the anchor into the hole and pull back on the plastic cap, allowing the anchor to open up behind the wall. Finally, tighten the screw until the anchor is securely in place, ready to support your object. With these easy steps, you can confidently install Snaptoggle anchors for a variety of applications.
Understanding The Snaptoggle Anchor System
Understanding the Snaptoggle Anchor System
Snaptoggle anchors are a versatile and reliable solution for securely mounting heavy objects to walls or ceilings. Whether you’re installing shelves, cabinets, or light fixtures, these anchors provide the stability you need. In this section, we’ll delve into the details of the Snaptoggle anchor system, including what they are, the benefits of using them, and how they work.
What are Snaptoggle Anchors?
Snaptoggle anchors are innovative, self-drilling drywall anchors that offer unmatched holding power. They are designed to overcome the limitations of traditional anchors, such as screws and nails, by providing a sturdy and reliable anchoring solution. Made of metal and engineered nylon, Snaptoggle anchors are built to withstand heavy loads without compromising integrity.
Benefits of using Snaptoggle Anchors
There are several advantages to using Snaptoggle anchors for your mounting needs. Here are some key benefits:
1. Strong and Reliable: Snaptoggle anchors excel at holding heavy objects securely in place. With their unique design and construction, they can bear significant weight without causing damage to the wall or ceiling.
2. Versatile Application: Whether you’re working on drywall, concrete, or tile, Snaptoggle anchors are suitable for a wide range of materials. This versatility makes them a go-to choice for both professional contractors and DIY enthusiasts.
3. Quick and Easy Installation: Snaptoggle anchors are designed for hassle-free installation. Their self-drilling feature eliminates the need for pre-drilling, saving you time and effort. Simply insert the anchor into the pre-drilled hole and tighten it with a screwdriver until it’s secure.
4. Adjustability: One of the standout features of Snaptoggle anchors is their ability to accommodate different wall thicknesses. With their hinged design, these anchors can adapt to varying depths, offering flexibility during installation.
How do Snaptoggle Anchors work?
Snaptoggle anchors work by utilizing a unique mechanism that ensures a secure hold. They consist of two main parts: the anchor and the toggle. Here’s how the process unfolds:
1. Preparing the Hole: Start by drilling a hole into the wall or ceiling using a drill bit that matches the diameter of the anchor. Ensure the hole is deep enough to accommodate the entire anchor.
2. Inserting the Anchor: Insert the anchor into the hole by holding the metal flange with one hand and pushing the collar through the hole until it’s flush with the wall or ceiling.
3. Activating the Toggle: To activate the toggle, open it by turning the anchor clockwise. This action will cause the metal flange to fold back behind the wall, securing the toggle firmly in place.
4. Tightening the Anchor: Once the toggle is activated, insert a screw into the anchor’s center hole and tighten it using a screwdriver. Applying pressure will cause the metal flange to draw up against the inner surface of the wall, creating a tight and reliable hold.
In conclusion, Snaptoggle anchors offer a robust and efficient solution for mounting heavy objects to walls or ceilings. Understanding their design, benefits, and installation process will empower you to confidently tackle any mounting project. So, let’s dive deeper into the installation steps and tips in the next section.
Preparing For Installation
Welcome to the guide on how to install Snaptoggle Anchors! Before diving into the installation process, it’s crucial to properly prepare for the task at hand. This section will cover everything you need to know about preparing for the installation, including choosing the right Snaptoggle Anchors, gathering the necessary tools and materials, and assessing the wall for suitable anchor placement.
Choosing the right Snaptoggle Anchors for your project
When it comes to choosing the right Snaptoggle Anchors, it’s essential to understand the specific requirements of your project. These anchors come in various sizes and weight capacities to accommodate a wide range of applications. Whether you’re hanging a heavy mirror or installing a shelf, selecting the appropriate anchor will ensure a secure installation.
Gathering the necessary tools and materials
To streamline the installation process, it’s vital to gather all the necessary tools and materials beforehand. Having everything within reach eliminates any delays or interruptions during the installation. Here’s a list of the essential tools you’ll need:
| Tools | Materials |
|---|---|
|
|
Assessing the wall for suitable anchor placement
Before diving into the installation process, it’s essential to assess the wall to determine the most suitable placement for the Snaptoggle Anchors. This step ensures that the anchors will be installed in a stable and secure manner. Here are the steps to assess the wall:
- Identify the location where you want to install the anchor.
- Using a level and a pencil, mark the positions for the anchors on the wall.
- Check if there are any obstructions behind the wall, such as electrical wires or pipes. It’s crucial to avoid these areas to prevent damage or accidents.
- If necessary, use a stud finder to locate any studs in the wall. Installing the anchors near studs provides extra strength and stability.
- Once you have assessed the wall and marked the anchor positions, you’re ready to proceed with the installation process.
With the right Snaptoggle Anchors, tools, and a well-assessed wall, you’re now fully prepared to install your anchors securely. The next section will cover the step-by-step installation process, ensuring a successful and hassle-free experience.
Step 1: Marking The Anchor Placement
Before you start installing Snaptoggle anchors, it’s crucial to mark the anchor placement accurately. A secure and stable installation will ensure that your heavy fixtures, such as shelves or TV mounts, are properly supported. This step-by-step guide will show you how to mark the anchor placement correctly, ensuring a hassle-free installation process.
Locating the desired position for the anchor
The first step in marking the anchor placement is to determine the desired position on the wall where you want to install your fixture. Take into consideration the weight of the object you will be hanging and the distance from any existing studs. This will help you determine the areas where the Snaptoggle anchors should be placed for maximum stability.
Marking the spots for drilling
Once you have located the desired position for the anchor, use a pencil or marker to mark the spots where you will be drilling. Make sure to mark both the top and bottom holes for each anchor. This will serve as your guide during the installation process.
Ensuring proper spacing between anchors
Another essential aspect of marking the anchor placement is ensuring proper spacing between the anchors. This will prevent overcrowding and ensure that each anchor has enough room to provide the necessary support. To determine the spacing, refer to the manufacturer’s guidelines or consult a professional if needed.
By following these simple steps to mark the anchor placement, you can ensure a successful installation of your fixtures. Taking the time to accurately mark the spots for drilling and ensuring proper spacing between anchors will result in a sturdy and secure mounting that will last for years to come.
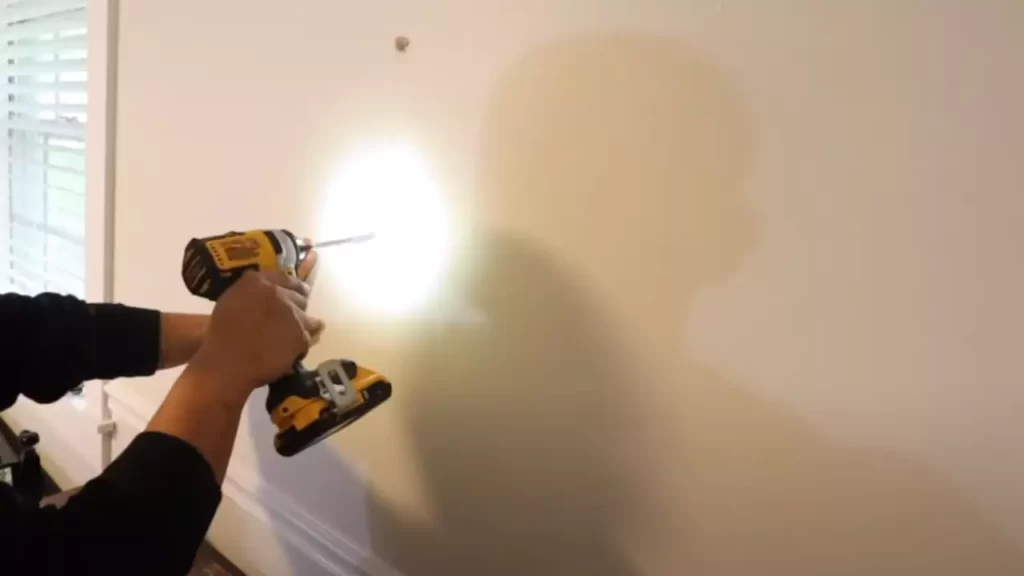
Step 2: Drilling The Holes
Once you have selected the perfect location for your Snaptoggle anchors, it’s time to move on to the next step – drilling the holes. This crucial step ensures that your anchors will be securely attached to the wall, providing a strong and reliable support for your fixtures or furniture. Follow these instructions carefully to create clean and precise holes.
Selecting the Appropriate Drill Bit Size
Before you start drilling, it’s important to choose the right drill bit size for your Snaptoggle anchors. Using the wrong size drill bit can compromise the strength and stability of the anchors, and may cause them to fail under heavy load. To ensure a secure installation, refer to the instructions provided by the manufacturer for the specific drill bit size required. Remember, accuracy is key when it comes to selecting the appropriate drill bit size – if unsure, consider seeking professional advice.
Drilling the Pilot Holes
Now that you have the correct drill bit, it’s time to start drilling the pilot holes. Pilot holes are smaller holes that serve as a guide for the larger hole needed for the Snaptoggle anchors. They help prevent the wall from splintering or cracking during the drilling process. To drill the pilot holes:
- Mark the center point for each anchor location using a pencil.
- Place the tip of the drill bit on the marked center point.
- Hold the drill firmly and start drilling at a slow speed, gradually increasing the speed as you go.
- Apply steady, gentle pressure and let the drill bit do the work. Avoid excessive force that may cause the drill bit to wander or damage the wall.
- Continue drilling until you reach the required depth for the pilot hole. Remove any debris or dust from the hole before proceeding.
Creating Clean and Precise Holes
Creating clean and precise holes is essential for a successful installation. To achieve this, follow these tips:
- Hold the drill steady and maintain a vertical angle while drilling to ensure the hole is straight.
- Use a level to double-check the alignment of the drill to maintain accuracy.
- Clear any debris or dust from the hole to ensure a proper fit.
- Avoid applying too much pressure, as this can cause the hole to become larger than intended.
By following these steps, you will be well on your way to drilling clean and precise holes for your Snaptoggle anchors. Remember, taking the time to do this correctly will result in a secure and reliable installation that will withstand the test of time.
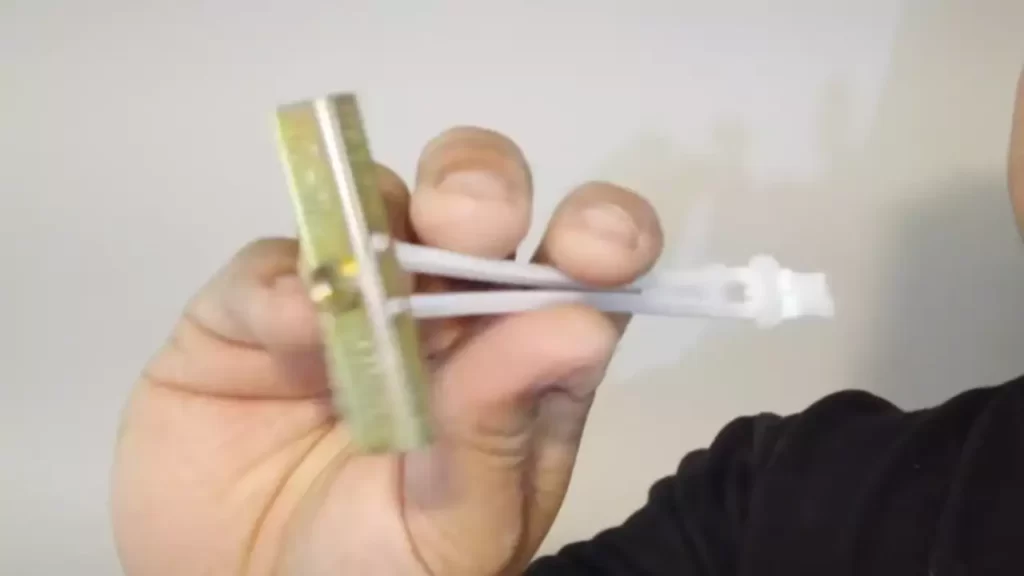
Step 3: Inserting The Anchors
Now that you have drilled the holes in the wall and prepared them for the Snaptoggle Anchors, it’s time to move on to the next step: inserting the anchors. This crucial step ensures a secure and reliable installation for whatever you’re hanging on the wall.
Inserting the Snaptoggle Anchors into the holes
With the holes ready, grab the Snaptoggle Anchors and prepare to insert them. These anchors are incredibly effective and provide superior holding power compared to traditional wall anchors. To begin, follow the steps below and ensure the toggle wings are fully open.
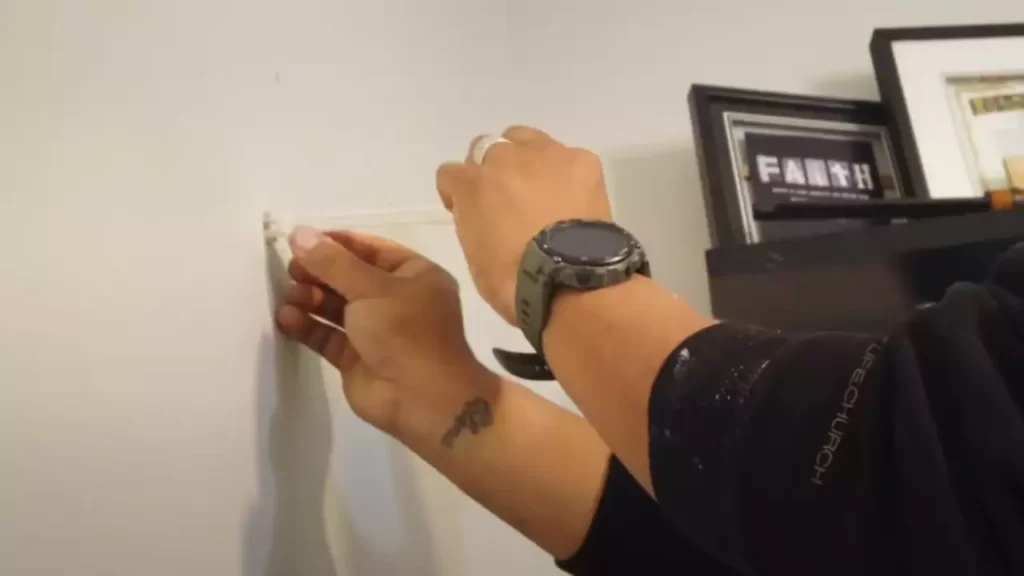
- Step 1: Hold the Snaptoggle Anchor by the collar, making sure the toggle wings are hanging down.
- Step 2: Insert the anchor through the hole in the wall. Make sure to push it all the way in until the collar is flush with the wall.
- Step 3: Hold the collar firmly and pull back on the strap. This action will cause the toggle wings to catch on the backside of the wall.
- Step 4: Keep pulling until the toggle wings are fully open behind the wall.
Once the anchor is securely inserted and the toggle wings are fully open, you can move on to the next step: properly aligning the anchors for a secure fit.
Ensuring the toggle wings are fully open
Before proceeding, it’s crucial to ensure that the toggle wings of the Snaptoggle Anchors are fully open behind the wall. This is what provides the anchors with their extraordinary strength and stability.
To check if the toggle wings are fully open, gently tug on the collar of the anchor. You should feel resistance, indicating that the toggle wings are engaged and securely anchored to the wall. If the toggle wings are not fully open, repeat the insertion process outlined in the previous section.
Properly aligning the anchors for a secure fit
To ensure a secure fit, it’s essential to properly align the Snaptoggle Anchors within the drilled holes. This step guarantees that your anchor points align accurately with the hardware you are attaching to the wall.
To achieve a secure fit, follow these simple steps:
- Step 1: Hold the anchor firmly by the collar, which prevents it from rotating.
- Step 2: Using your free hand, rotate the screw clockwise to tighten it against the wall. This action ensures the anchor remains securely fastened in the hole.
- Step 3: Repeat the process for the remaining Snaptoggle Anchors, ensuring they are all correctly aligned and tightened.
By aligning the anchors properly, you can be confident in the stability and durability of your installation. With these steps complete, you can now move on to the final phase of your project, knowing that your Snaptoggle Anchors are securely in place.
Step 4: Tightening The Anchors
Once you have successfully inserted the Snaptoggle anchors into the wall, it is crucial to tighten them properly. This step ensures that the anchors are securely fastened and provides maximum support for your installation. Follow these techniques to ensure a firm and stable fit.
Using a screwdriver to tighten the screws
After inserting the Snaptoggle anchors into the wall, use a suitable screwdriver to tighten the screws. Make sure you choose a screwdriver that matches the screw head. A Phillips or flat-head screwdriver is typically appropriate for most Snaptoggle anchors. Insert the screwdriver into the screw head, applying firm downward pressure.
Applying firm pressure while turning the screws
While tightening the screws, remember to apply firm pressure. This ensures that the anchors are securely gripping the wall material. Keep turning the screws clockwise until you feel resistance. Avoid applying excessive force, as this could damage the anchors or the surrounding wall.
Ensuring the anchors are securely fastened
Once you have tightened the screws, check for any wobbling or movement of the anchors. If you notice any instability, it means the anchors are not securely fastened. In such cases, you may need to readjust the screws or replace the anchors with a larger size. It’s essential to ensure the anchors are firmly secured to provide a reliable base for your installation.
Step 5: Testing The Anchor’S Strength
After installing the Snaptoggle anchors securely in the wall, it’s time to test their strength to ensure they can support the weight they are intended for. Testing the anchor’s stability is a crucial step to prevent any accidents or damage later on. Here are some essential steps to follow when testing the strength of your Snaptoggle anchors:
Applying gentle pressure to test the anchor’s stability
To begin, apply gentle pressure to the object or fixture that is attached to the Snaptoggle anchor, such as a shelf or a television mount. Slowly and carefully exert pressure in different directions, checking for any signs of movement or looseness. Applying gentle pressure ensures that the anchor is securely holding the object in place.
Checking for any signs of movement or looseness
Closely examine the Snaptoggle anchors for any signs of movement or looseness. Look for any gaps between the wall and the anchor or any indications that the anchor might be shifting. If you notice any movement or looseness, it is essential to address it promptly to prevent potential accidents or damage.
Making any necessary adjustments or reinforcements
If you detect any signs of movement or looseness, now is the time to make the necessary adjustments or reinforcements. This may involve tightening the screws, adding more anchors for extra support, or considering a different location for the object. Taking these precautions ensures the long-term stability and safety of your installed Snaptoggle anchors.
Installing Snaptoggle anchors correctly is essential, but equally important is testing their strength once they are in place. Following these steps will help you determine if the anchors are securely installed and can withstand the weight they are designed to support. By taking the time to test the anchor’s strength, you can rest assured knowing your fixtures and objects are safely attached to the wall.
Step 6: Repeating The Process
Once you have successfully installed the first SnapToggle anchor, it’s time to repeat the process for each anchor needed. This step-by-step guide will ensure that your installation is done with precision and accuracy.
Repeat the installation process for each anchor needed
It is important to repeat the installation process for each anchor needed to ensure that your wall mounting or hanging project is secure and stable. By following these steps consistently, you can achieve optimal performance from all of your SnapToggle anchors.
To repeat the installation process:
- Identify the location where you want to install the next anchor. Use a tape measure or level to maintain consistent spacing and alignment with the previously installed anchors.
- Mark the spot where the anchor will be inserted. Use a pencil or marker to make a small mark on the wall or surface, ensuring accuracy and precision.
- Prepare the anchor by sliding the screw through the center hole of the anchor and attaching the toggle wings onto the screw. Make sure the wings are folded flush against the screw head.
- Insert the anchor into the marked spot on the wall. Hold the screw head and begin turning the anchor clockwise until the wings expand behind the wall or surface. Continue tightening until the anchor is securely in place.
- Repeat steps 1 to 4 for each additional anchor needed. Remember to maintain consistent spacing and alignment to ensure a professional and well-balanced result.
Maintaining consistent spacing and alignment
Consistency is key when it comes to installing multiple SnapToggle anchors. To maintain consistent spacing and alignment, use a tape measure or level to measure and mark each anchor’s location accurately. This will not only enhance the aesthetics of your installation but also contribute to its overall stability and integrity.
Double-checking the stability of each anchor before moving on
Before you move on to the next anchor, it is crucial to double-check the stability of each previously installed anchor. Give them a gentle tug or shake to ensure they are firmly in place. If any anchor feels loose or unstable, readjust it or replace it with a new one to maintain the strength and security of your installation.
By repeating the installation process for each anchor, maintaining consistent spacing and alignment, and double-checking the stability before moving on, you can confidently complete your wall mounting or hanging project using Snaptoggle anchors. Follow these steps meticulously to achieve a professional, secure, and long-lasting result.
Troubleshooting And Tips
Troubleshooting and Tips
Whether you are a DIY enthusiast or a professional contractor, installing Snaptoggle anchors can be a straightforward process. However, like any installation, there may be certain challenges or issues that may arise. In this section, we will cover common issues you may encounter during the installation process and how to troubleshoot them. Additionally, we will provide you with tips and best practices to achieve optimal results when using Snaptoggle anchors.
Common issues and how to troubleshoot them
During the installation of Snaptoggle anchors, there may be a few common issues that you may face. Understanding these challenges and knowing how to troubleshoot them can help ensure a successful installation. Here are some of the most common issues and their solutions:
1. Difficulty in securing the anchor to the wall: If you find it challenging to secure the Snaptoggle anchor to the wall, consider double-checking the size of the drilled hole. Ensure that the hole is the correct diameter for the anchor and that it is deep enough to allow the anchor wings to expand fully. Also, ensure that the hole is clean of any debris or dust that may hinder the anchor’s ability to grip the wall.
2. Anchor spins in the wall: If you encounter a situation where the Snaptoggle anchor spins in the wall instead of gripping it, it is likely due to inadequate tension. To fix this, first, remove the bolt or screw from the anchor and try pulling it back toward you while applying pressure. This maneuver should engage the wings into the hollow portion behind the wall, allowing for a proper grip.
3. Anchor breaks or fails to hold weight: In rare cases, you may experience a Snaptoggle anchor breaking or failing to hold the weight it was designed for. This could be due to the density or condition of the material you are anchoring into. In such cases, consider using additional anchors to distribute the weight or consider upgrading to a larger size anchor if needed.
Tips for achieving optimal results
To ensure that you achieve optimal results when installing Snaptoggle anchors, consider the following tips:
1. Choose the correct anchor size: Snaptoggle anchors are available in various sizes to accommodate different weight capacities and wall thicknesses. Before starting the installation, ensure that you choose the appropriate anchor size for your specific application.
2. Prep the wall: Before drilling the holes, inspect the wall to ensure there are no electrical wires, plumbing, or any other potential obstacles that may be hidden. It’s also essential to clean the surface to remove any dust or debris that may affect the anchor’s grip.
3. Use the right tools: Ensure that you use the correct tools for the job, including a drill, appropriate drill bit, and a screwdriver. Using the right tools will make the installation process easier and more efficient.
Best practices for using Snaptoggle anchors
Following these best practices will help you achieve the best results when using Snaptoggle anchors:
1. Read the instructions: Before starting the installation, thoroughly read and understand the manufacturer’s instructions. Each anchor may have specific guidelines that need to be followed for optimal performance.
2. Test an anchor first: If you are unsure about the installation or concerned about the wall’s durability, consider testing a Snaptoggle anchor in a inconspicuous spot. This will help you gauge its effectiveness before proceeding with the complete installation.
3. Use a level: To ensure accuracy and a level installation, use a level to mark the precise location of the anchor holes. This will help prevent any misalignment or unevenness in the final installation.
By troubleshooting common issues, following the provided tips, and implementing best practices, you can ensure a successful installation of Snaptoggle anchors. These versatile anchors will securely hold your items in place and provide you with peace of mind knowing that your installation is reliable and sturdy.
Frequently Asked Questions
How Much Weight Can Snap Toggles Hold?
Snap toggles can hold a weight of up to 100 pounds.
What Is The Difference Between Spring Toggle And Snaptoggle?
The main difference between a spring toggle and a Snaptoggle is the design. A spring toggle uses a metal spring to provide strength and secure the fastener, while a Snaptoggle uses a plastic toggle mechanism. Both options offer secure anchoring, but the choice depends on the specific application and personal preference.
How Do You Install Winged Drywall Anchors?
To install winged drywall anchors, follow these steps: 1. Drill a small hole in the drywall at the desired location. 2. Insert the anchor into the hole and push it flush with the wall. 3. Twist the anchor clockwise to engage the wings, securing it in place.
4. Insert a screw into the anchor, using a screwdriver or drill. 5. Tighten the screw until it is firmly secured in the anchor, but avoid overtightening.
How Do You Install Ez Toggle Anchor?
To install the EZ toggle anchor, follow these steps: 1. Drill a hole in the desired location. 2. Insert the EZ toggle anchor into the hole. 3. Tighten the screw until it is secure. 4. Attach the desired item to the anchor.
5. Check for stability before applying any weight.
Conclusion
Snaptoggle anchors are a versatile and efficient solution for securely mounting heavy objects on drywall. By following the step-by-step guide outlined in this blog post, you can easily install these anchors without the need for special tools. From selecting the right anchor size to properly inserting and tightening them, this process ensures a strong and reliable installation.
Whether you’re a DIY enthusiast or a professional, Snaptoggle anchors are a must-have for your projects. So, get started and enjoy the confidence and peace of mind that comes with a secure mount!