To install smart switches, first, turn off the power supply. Remove the old switch, connect the wires to the new switch, and mount it on the wall.
Understanding Smart Switches
Smart switches are revolutionizing the way we control our home lighting and appliances. With their advanced features and capabilities, these devices provide a convenient and efficient way to manage our household electronics. In this article, we will explore what smart switches are, why they are gaining popularity, the benefits of using them in your home, and the different types available in the market.
What are smart switches and why are they gaining popularity?
Smart switches, also known as smart light switches or smart plugs, are intelligent devices that allow you to remotely control your home lighting and appliances using a smartphone or voice commands. These switches connect to your home’s Wi-Fi network and enable you to turn your lights on or off, adjust the brightness, set schedules, and even monitor energy usage.
Their increasing popularity can be attributed to several factors. Firstly, smart switches offer convenience. Gone are the days of getting up to switch off the lights or wondering if you left an appliance on. With a simple tap on your smartphone, you can control your entire home lighting system from anywhere.
Secondly, smart switches promote energy efficiency. By scheduling your lights to automatically turn off when not needed, you can reduce energy wastage and lower your energy bills. Moreover, some smart switches provide real-time energy consumption data, allowing you to identify power-hungry devices and make informed decisions to conserve electricity.
Lastly, smart switches enhance home security. With the ability to create custom lighting schedules, you can make it appear as if someone is home even when you’re away, deterring potential intruders. Additionally, some smart switches integrate with home security systems, enabling seamless automation and control of your entire smart home ecosystem.
Benefits of using smart switches in your home
There are several benefits to incorporating smart switches into your home automation setup:
- Convenience: Control your lights and appliances from the comfort of your smartphone, whether you are in bed or miles away from home.
- Energy efficiency: Set schedules and timers to optimize energy usage and reduce your carbon footprint.
- Customization: Create personalized lighting scenes or automations to suit your lifestyle and preferences.
- Enhanced safety: Make it appear as if someone is home by scheduling lights to turn on and off, adding an extra layer of security.
- Integration: Seamlessly integrate your smart switches with other smart home devices and assistants like Amazon Alexa or Google Assistant for a centralized control hub.
Different types of smart switches available in the market
The market offers a wide range of smart switch options to accommodate various needs and preferences. Here are some popular types:
| Type | Description |
|---|---|
| Wi-Fi Smart Switches | Connect directly to your Wi-Fi network, allowing you to control your devices remotely without the need for a separate hub. |
| Z-Wave Smart Switches | Utilize the Z-Wave wireless protocol to communicate with other Z-Wave devices, providing a reliable and secure home automation network. |
| Bluetooth Smart Switches | Connect to your smartphone via Bluetooth and offer local control within a limited range. Ideal for smaller spaces or individuals looking for a budget-friendly option. |
| Dimmer Switches | Allow you to adjust the brightness of your lights to create the perfect ambiance for any occasion. |
When choosing a smart switch, consider factors such as compatibility with your existing infrastructure, the range of features offered, and the ease of installation. Remember to check whether the manufacturer provides dedicated mobile apps or supports integration with popular smart home platforms.
In conclusion, understanding smart switches and the benefits they offer can empower you to create a more convenient, energy-efficient, and secure home environment. By leveraging these intelligent devices, you can take control of your lighting and appliances with a simple tap or voice command.
Preparing For Installation
Before you begin installing smart switches in your home, it’s important to properly prepare for the process. This will ensure a smooth installation and minimize any potential risks. In this section, we will walk you through the steps to assess your home’s electrical system compatibility, the tools and materials you will need, as well as the safety precautions to consider.
Assessing your home’s electrical system compatibility with smart switches
Before you dive into installing smart switches, it’s crucial to determine if your home’s electrical system is compatible with these devices. This will help you avoid any complications during the installation process. Here are a few steps to assess compatibility:
- Identify the type of wiring in your home – Typically, smart switches are compatible with standard wiring setups. However, if your home has older electrical systems, such as knob-and-tube wiring, you may need to consult with a professional electrician.
- Check the voltage requirements – Smart switches are designed to work with specific voltage levels. Make sure to verify that your home’s electrical system provides the required voltage for the smart switches you plan to install.
- Inspect the switch box – Ensure that your switch box is large enough to accommodate the smart switch. Smart switches usually require more space due to the additional components they contain.
Tools and materials needed for installation
Now that you’ve assessed your home’s electrical system compatibility, let’s take a look at the tools and materials you’ll need to install smart switches:
| Tools | Materials |
|---|---|
|
|
Safety precautions to consider before starting the installation process
Prioritizing safety is crucial when installing smart switches. Ensure you follow these safety precautions to minimize any potential risks:
- Turn off the power – Before you begin the installation process, turn off the power to the circuit you’ll be working on. This will prevent any electrical accidents.
- Use proper insulation – When handling electrical wiring, always wear rubber gloves and use insulated tools to prevent electric shock.
- Test for voltage – Before touching any wires, use a voltage tester to ensure there is no power flowing through them.
- Read manufacturer instructions – Each smart switch may have specific installation steps. Make sure to read and follow the manufacturer’s instructions for your particular model.
By taking the time to assess compatibility, gather the necessary tools and materials, and adhere to safety precautions, you’ll be well-prepared to move forward with the installation process of your smart switches. In the next section, we will guide you through the step-by-step installation instructions, ensuring you can easily transform your home into a smart haven.
Step 1: Shutting Off The Power
Before you begin installing your smart switches, it’s crucial to ensure your safety by shutting off the power to the designated circuit. This step will protect you from any potential electrical shocks or accidents. In this section, we will guide you on how to locate the electrical panel in your home, identify the correct breaker for the switch you’re installing, and switch off the power to the designated circuit.
Locating the electrical panel in your home
In order to shut off the power, you need to locate the electrical panel in your home. The electrical panel, also known as the breaker box, is usually installed in a basement, garage, or utility room. Sometimes, it may also be found on an exterior wall. Once you’ve located the electrical panel, ensure there is enough space around it to work comfortably.
Identifying the correct breaker for the switch you’re installing
Inside the electrical panel, you’ll find a series of switches or breakers. These switches control the flow of electricity to different areas of your home. Your task is to identify and locate the correct breaker for the switch you’re installing. This breaker should be labeled accordingly, indicating the area or room it supplies power to. If you cannot find a specific label, don’t worry! You can use a process of elimination to identify the right breaker by switching off one at a time and checking if the power is disconnected to the area you’re working on.
Switching off the power to the designated circuit
Once you’ve located the correct breaker, it’s time to switch off the power to the designated circuit. Before doing so, make sure to turn off all appliances and lights connected to that circuit. This will avoid any potential damage when the power is cut off. To switch off the breaker, push the switch firmly into the “off” position. A successful shut off is indicated when the switch is no longer aligned with the other switches in the panel.
Quick Tips:
- Whenever you’re unsure or uncomfortable working with electrical components, it’s always best to seek professional help.
- Consider using a flashlight to better navigate through the electrical panel if the lighting is insufficient.
- Double-check that the power is indeed off by using a non-contact voltage tester. This device helps detect the presence of electricity in wires without physically touching them.
By following these steps, you have successfully shut off the power and prepared the circuit for safely installing your smart switches. In the next step, we will guide you on how to remove the old switch and prepare for the installation process.
Step 2: Removing The Existing Switch
Step 2: Removing the Existing Switch
Removing the switch plate cover
Before you can remove the existing switch, you need to start by taking off the switch plate cover. This can be done with a small flathead screwdriver or a switch plate removal tool, if you have one. Insert the screwdriver into the slot between the switch plate cover and the wall, and gently pry it off. Be careful not to damage the wall or the cover as you do this.
Removing the screws holding the switch in place
Once you have removed the switch plate cover, you will see the screws holding the switch in place. These screws are typically located at the top and bottom of the switch. To remove them, use a screwdriver that matches the size of the screws. Insert the screwdriver into the head of the screw and turn it counterclockwise until the screw comes out. Set the screws aside in a safe place, as you will need them when installing the new smart switch.
Gently pulling out the switch from the electrical box
With the screws removed, you can now gently pull out the existing switch from the electrical box. Hold the switch by the sides and carefully pull it towards you, making sure not to tug on any wires. If the switch feels stuck, you may need to use a little bit of force, but be cautious not to damage or disconnect any wires in the process. Once the switch is completely free from the electrical box, set it aside.
By following these steps, you have successfully removed the existing switch in preparation for installing your new smart switch. Now you can move on to the next step and start connecting the wires to your smart switch.
Step 3: Wiring The Smart Switch
Now that you have understood the compatibility and gathered the necessary tools, it’s time to wire your smart switch. Proper wiring ensures the safe and efficient functioning of your new switch, so it’s important to pay attention to this step. In this section, we will guide you through the process of wiring your smart switch.
Understanding the wiring of the smart switch
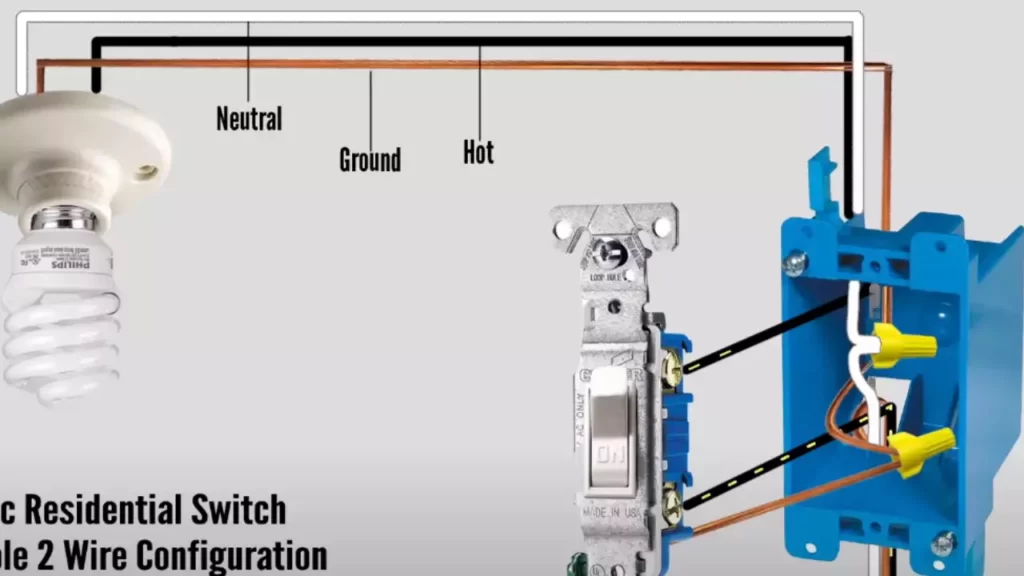
Before you start connecting the wires, it’s crucial to understand the wiring configuration of your smart switch. Smart switches usually have three main wires – the live wire (also known as the line or hot wire), the load wire, and the neutral wire.
The live wire carries the electrical current from the power source to the switch. The load wire connects the switch to the light fixture or device that you want to control. The neutral wire completes the circuit and ensures smooth operation of the switch and connected devices.
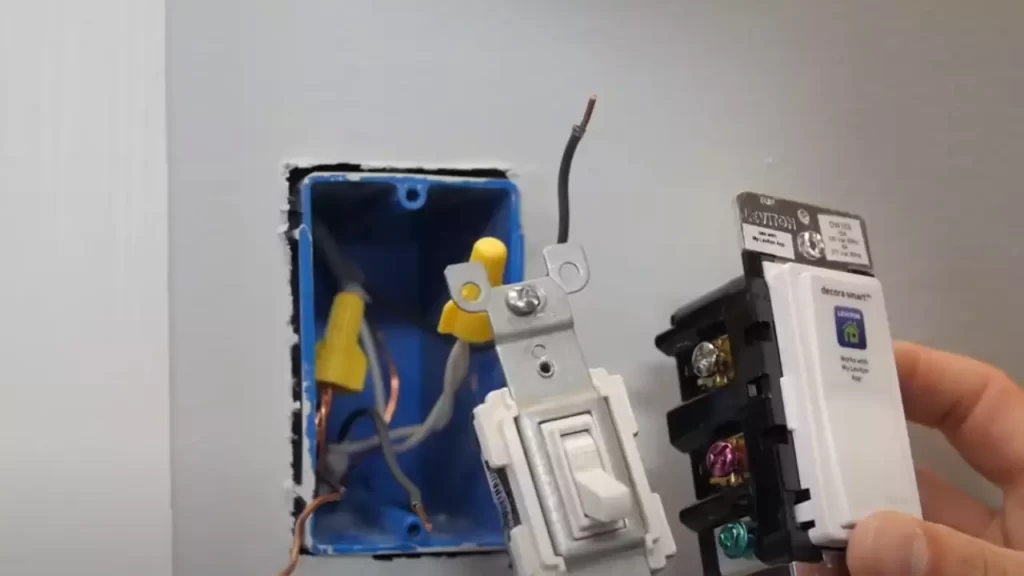
Connecting the smart switch to the existing wiring
Once you have familiarized yourself with the different wires, you can start connecting the smart switch to the existing wiring. Follow these steps:
- Start by turning off the power to the switch at the circuit breaker.
- Remove the existing switch cover plate and unscrew the switch from the electrical box.
- Take note of the wire connections on the old switch. This will help you during the installation of the new switch.
- Using wire cutters, carefully remove the wire nuts or connectors connecting the wires.
- Attach the wires from the smart switch to the corresponding wires in the electrical box. Make sure to connect the live wire to the line or hot terminal, the load wire to the load terminal, and the neutral wire to the neutral terminal of the smart switch.
- Secure the wires by twisting them together and covering them with wire nuts or connectors. Make sure the connections are tight and there are no exposed wires.
- Double-check all the connections to ensure they are properly secured.
Securing the wires with wire nuts or connectors
Once the connections are made, it’s important to properly secure the wires to avoid any hazards. Here’s how to secure the wires:
- Twist the exposed ends of the wires together in a clockwise direction.
- Place a wire nut or connector over the twisted wires.
- Turn the wire nut or connector clockwise until it is snugly tightened. Make sure there are no loose wires or gaps between the wire nut and the insulation of the wires.
Repeat this process for each set of connected wires. Once all the wires are securely fastened, you can proceed to install the smart switch into the electrical box.
By following these steps, you will successfully wire your smart switch and be one step closer to enjoying the convenience and control it offers. Remember to always prioritize safety and turn off the power before working with electrical connections.
Step 4: Installing The Smart Switch
Troubleshooting And Tips
Common installation issues and how to troubleshoot them
Installing smart switches can be a game-changer when it comes to modernizing your home and enhancing your daily convenience. However, like any technology, you may encounter a few bumps in the road during the installation process. Here are some common installation issues you may face and some troubleshooting tips to help you overcome them:
- Issue: Difficulty Connecting to Wi-Fi
If you are having trouble connecting your smart switch to your Wi-Fi network, try the following troubleshooting steps: - Ensure that the switch is within range of your Wi-Fi router.
- Check if your Wi-Fi network is working properly and the password you entered is correct.
- Reset the switch and try again.
- If the problem persists, contact the manufacturer for further assistance.
- Issue: Unresponsive or Inconsistent Performance
If your smart switch is not responding or its performance is inconsistent, consider the following troubleshooting tips: - Check for firmware updates for your switch and install them if available.
- Ensure that the switch is not experiencing any power supply issues. Check the circuit breaker or power outlet.
- Restart the switch and test its functionality again.
- If the problem persists, consider contacting technical support for further guidance.
- Issue: Compatibility with Existing Wiring
Sometimes, smart switches may not be compatible with certain types of existing wiring. In such cases, consider the following troubleshooting steps: - Consult the switch’s user manual or the manufacturer’s website to ensure compatibility with your existing wiring.
- If incompatible, you may need to consult an electrician to make the necessary wiring modifications.
Tips for maximizing the functionality of your smart switch
Now that you have successfully installed your smart switch, here are some tips to help you make the most out of its features:
- Explore the accompanying mobile app or smart home hub to unlock advanced functionality and automation options.
- Set up schedules or routines to automate the operation of your smart switch, such as turning on lights at specific times or adjusting the thermostat when you are away.
- Take advantage of voice control capabilities by integrating your smart switch with virtual assistants like Amazon Alexa or Google Assistant.
- Consider grouping multiple smart switches together to create scenes or zones for simultaneous control of multiple devices.
Maintenance and care for smart switches
To ensure the longevity and optimal performance of your smart switch, it is important to follow these maintenance and care guidelines:
- Regularly clean the surface of the switch using a soft cloth to remove dust and dirt.
- Avoid using harsh chemicals or abrasive cleaners that could damage the switch’s finish.
- Keep the switch away from extreme temperatures or humidity to prevent any potential damage.
- If you experience any technical issues or defects, refer to the manufacturer’s warranty and contact customer support for assistance.
Frequently Asked Questions
Can I Install Smart Switches Myself?
Yes, you can install smart switches yourself. Follow the instructions provided with the switch for a step-by-step guide. It’s a straightforward process that doesn’t require professional assistance. Enjoy the convenience and control of your smart home lighting!
Do You Need An Electrician To Install Smart Switches?
Yes, it is recommended to hire an electrician for the installation of smart switches.
What Wiring Do I Need For Smart Switches?
Smart switches usually require a neutral wire for proper installation. Consult an electrician to check if your existing wiring has a neutral wire. It is recommended to hire a professional electrician to ensure that the correct wiring is installed for your smart switch.
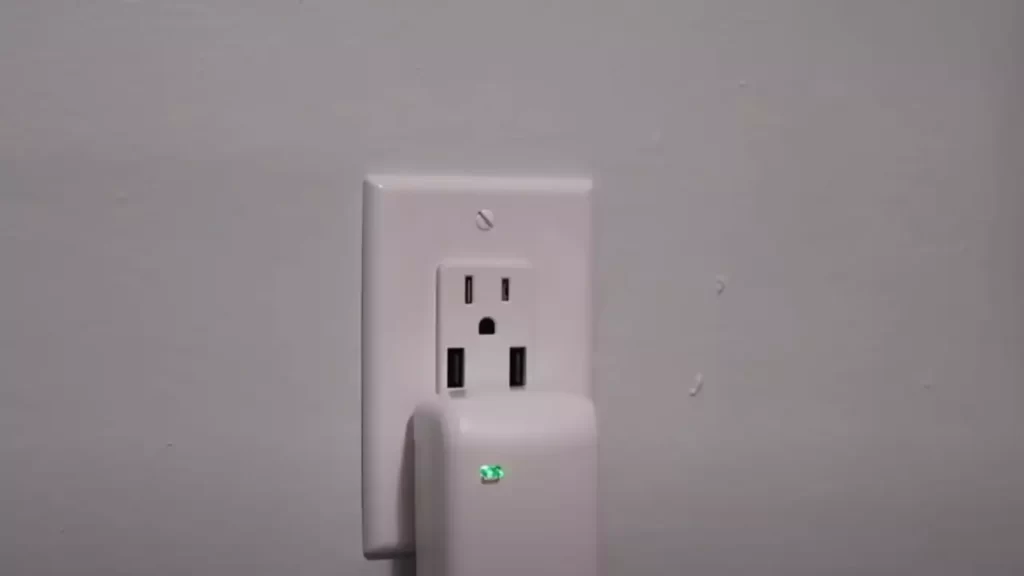
How Do I Connect My Smart Switch?
To connect your smart switch, locate the switch’s Wi-Fi network in your device’s settings. Connect to it, open the app, and follow the instructions for setup.
Conclusion
Installing smart switches is a straightforward process that can transform your home’s lighting system into a more convenient and energy-efficient setup. By following the step-by-step instructions mentioned in this blog post, you can successfully upgrade your switches without any hassle.
Remember to turn off the power, consult the manufacturer’s manual, and take the necessary safety precautions. With the right tools and a little patience, you’ll be enjoying the benefits of smart switches in no time. Embrace the future of home automation and take control of your lighting with ease.