To install shoe molding, measure and cut the molding to fit the length of the baseboard, then use a nail gun or finishing nails to attach the molding to the baseboard. Shoe molding can be installed to add a finishing touch to the baseboard and help conceal any gaps between the baseboard and the floor.
This type of molding is typically installed in areas where the baseboard meets the floor, such as along the bottom edges of walls in a room. It can be made of various materials, including wood, plastic, or vinyl, and comes in different styles and sizes to match the existing baseboard and overall decor of the room.
By following a few simple steps, you can easily install shoe molding to give your room a polished look.
Preparing For Shoe Molding Installation
When it comes to installing shoe molding, proper preparation is key to achieving a flawless finish for your flooring project. Preparing the area before installation ensures that the shoe molding will fit perfectly and enhance the overall appearance of your room. In this guide, we will walk you through the essential steps of preparing for shoe molding installation, including how to measure and plan, determine the amount needed, assess the placement, and gather all the necessary tools and materials.
Measure and Plan Your Installation
Before you start installing the shoe molding, it is crucial to measure and plan your installation to ensure an accurate fit and minimal waste. Begin by measuring the perimeter of the room where the shoe molding will be installed. Measure the lengths of all the walls, including any doorways or openings. Write down these measurements, as they will serve as the basis for determining the amount of shoe molding needed.
Determine the Amount of Shoe Molding Needed
Once you have the measurements, it’s time to determine the amount of shoe molding needed for your installation. The amount of shoe molding required is typically estimated in linear feet. To calculate the linear footage, add up the lengths of all the walls, accounting for any corners or transitions. It’s always a good idea to add a little extra to account for any potential errors or waste.
Assess the Placement of Shoe Molding
Next, assess the placement of the shoe molding to ensure it complements your flooring and enhances the overall aesthetics of the room. Consider whether you want the shoe molding to be flush with the baseboards or slightly recessed. Additionally, think about whether the shoe molding should be installed at the same height throughout the room or adjusted to accommodate variations in the floor level. Assessing these factors before installation will help you achieve a seamless and visually pleasing result.
Gather the Necessary Tools and Materials
Now that you have measured, planned, and assessed the placement, it’s time to gather all the necessary tools and materials for the shoe molding installation. Ensuring you have everything you need before you start will save you time and frustration along the way.
Tools Needed for Shoe Molding Installation
| Circular saw or miter saw | Measuring tape | Miter box or miter saw | Hammer or nail gun | Chisel | Level |
| Pencil or marker | Putty knife | Miter box or miter saw | Safety goggles | Ear protection | Dust mask |
Materials Required for Shoe Molding Installation
- Shoe molding
- Finishing nails
- Wood putty or filler
- Sandpaper
- Primer
- Paint or stain
Preparing the Area
Before you can proceed with the shoe molding installation, you need to prepare the area properly. This involves removing baseboards if necessary and cleaning and preparing the surface for installation.
Remove Baseboards if Necessary
If you already have baseboards installed, you may need to remove them before installing shoe molding. Carefully use a chisel or pry bar to remove the baseboards, taking care not to damage the walls or existing flooring. If the baseboards are in good condition and you prefer to keep them, you can install the shoe molding in front of or next to the baseboards, depending on the desired look.
Clean and Prepare the Surface for Installation
Once the baseboards are removed (if necessary), it’s important to clean and prepare the surface for shoe molding installation. Remove any debris, dust, or old adhesive from the floor and walls using a putty knife or scraper. Sand any rough spots or imperfections on the surface to ensure a smooth and even application of the shoe molding. Finally, wipe down the area with a damp cloth to remove any remaining dirt or dust. Now you’re ready to proceed with the shoe molding installation.
Installing Shoe Molding
Shoe molding, also known as quarter-round molding, is a small decorative trim that is installed at the base of baseboards. It not only adds a finishing touch to your room but also helps cover any gaps between the baseboards and the flooring. Installing shoe molding may seem like a daunting task, but with the right tools and techniques, you can achieve a professional-looking result. In this guide, we will take you through each step of the process to ensure a successful installation of shoe molding.
Cutting the Shoe Molding
Before you begin installing the shoe molding, you need to cut it to the appropriate lengths. Here’s how:
- Measure and mark the length of the molding on the back side, accounting for any corners or joints.
- Using a miter saw, make straight cuts for the lengths of molding.
- For corners and joints, you will need to create angled cuts using the miter saw to ensure a seamless fit.
Installing the Shoe Molding
With the shoe molding cut to the appropriate lengths, it’s time to install it. Follow these steps:
- Apply adhesive or liquid nails to the back of the molding to ensure a strong bond with the baseboard and wall.
- Place the molding flush against the baseboard and wall, starting at one corner.
- Secure the molding by driving finishing nails at an angle through the molding and into the baseboard.
Filling and Finishing the Shoe Molding
Once the shoe molding is installed, it’s important to finish it off for a polished look. Here’s how:
- Fill any nail holes and seams with wood putty or caulk, smoothing it out with a putty knife.
- Sand the molding using fine-grit sandpaper to create a smooth finish.
- Finally, paint or stain the shoe molding to match the color of the baseboards, ensuring a cohesive and seamless appearance.
Tips For A Professional Finish
When it comes to installing shoe molding, achieving a professional finish is crucial for a polished look in your space. Follow these expert tips and techniques to ensure seamless joints, clean corners, and straight and smooth installation of your shoe molding. We will also address common installation issues and provide troubleshooting solutions.
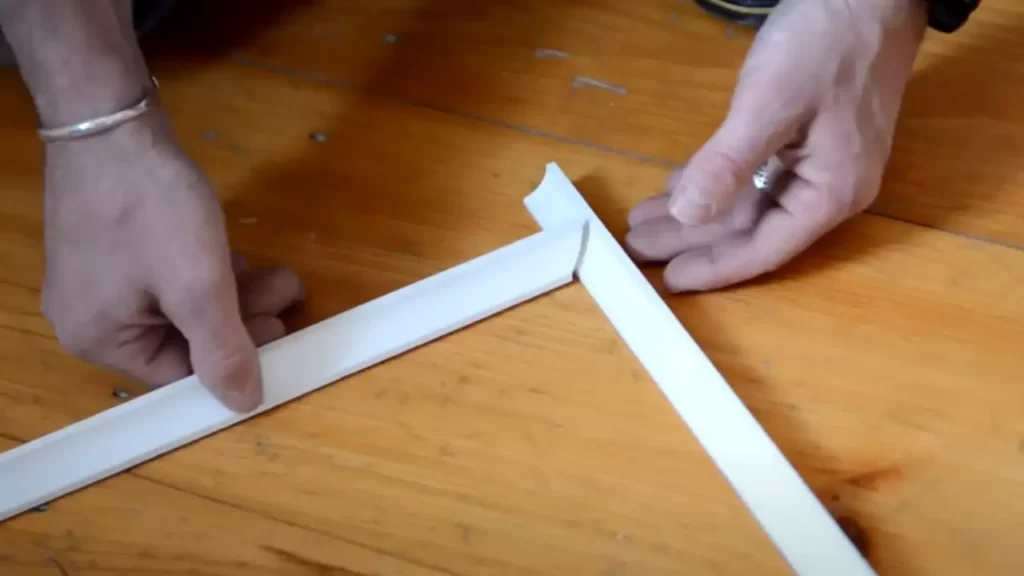
Making Seamless Joints
Seamless joints are the key to a professional-looking shoe molding installation. To achieve this, it is essential to make accurate cuts and join the molding pieces together precisely. Here’s how:
- Measure and mark the length of the molding accurately.
- Use a miter saw or a miter box to cut the molding at a 45-degree angle.
- Ensure the angles fit perfectly together, creating a tight joint.
- Apply a bead of wood glue along the joint to strengthen the bond.
- Secure the joint with finishing nails, making sure they are countersunk for a flush finish.
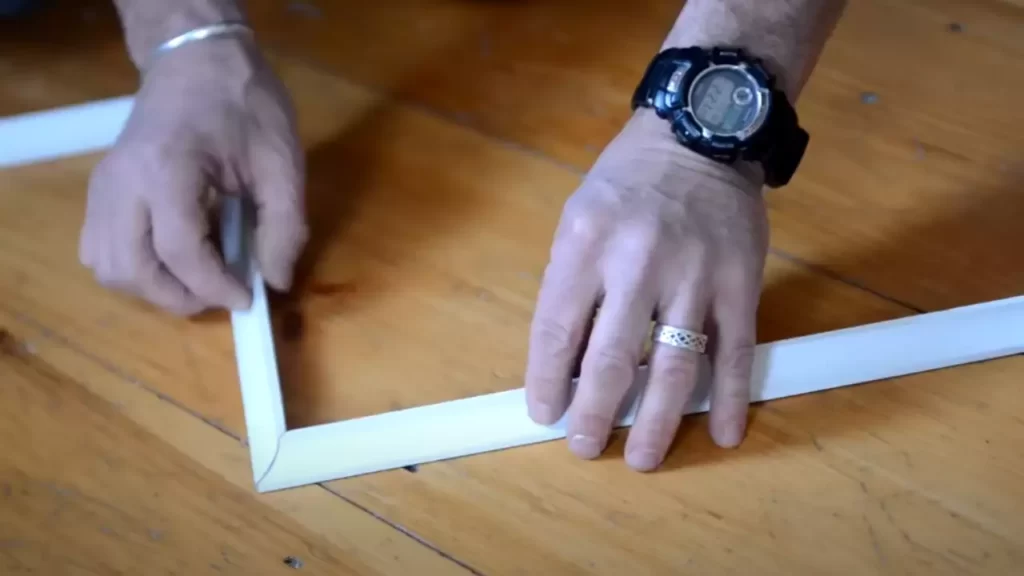
Cutting Angled Joints for a Clean Corner Finish
Corners require special attention to achieve a clean and professional finish. Follow these steps to cut angled joints for a seamless corner:
- Measure and mark the length of the molding accurately, considering the corner angle.
- Use a miter saw or a coping saw to cut the molding at the appropriate angle.
- Ensure the angles of the two pieces match perfectly for a tight joint.
- Apply wood glue and use finishing nails to secure the joint, ensuring they are countersunk.
Using a Coping Saw for Intricate Corners
For intricate corners, such as those around door frames or irregular surfaces, a coping saw is your best friend. Follow these steps to achieve a precise fit:
- Use a miter saw or a miter box to make a straight cut on the molding end.
- Use a coping saw to carefully cut along the profile of the molding, following its curves and contours.
- Fine-tune the fit by sanding or filing any rough edges or imperfections.
- Apply wood glue and secure the coping joint with finishing nails.
Ensuring Straight and Smooth Installation
Straight and smooth shoe molding installation is key to a professional finish. Here’s how to achieve it:
- Measure and mark the desired height of the molding on the wall.
- Use a stud finder to locate and mark the wall studs.
- Attach the shoe molding to the wall studs using finishing nails.
- Ensure the molding is level and straight by using a level tool.
- Secure any loose areas by adding extra nails along the length of the molding.
Sanding and Filling Imperfections for a Smooth Look
Even with careful installation, imperfections can occur. Follow these steps to sand and fill any imperfections for a smooth finish:
- Inspect the shoe molding for any visible rough spots, gaps, or nail holes.
- Sand the rough areas with fine-grit sandpaper until smooth.
- Fill any gaps or nail holes with wood putty.
- Once the putty is dry, sand it smooth with the surrounding surface.
- Clean the molding thoroughly to remove any dust or debris.
Considerations for Different Flooring Types
The type of flooring you have will impact the shoe molding installation process. Here are some specific considerations:
Installing Shoe Molding with Hardwood Flooring
When installing shoe molding with hardwood flooring, it is essential to leave a small gap between the molding and the flooring to allow for natural expansion and contraction. This gap can be covered with a thin bead of caulk for a seamless finish.
Working with Tile or Carpeted Floors
With tile or carpeted floors, the shoe molding should be installed slightly above the flooring surface to avoid interference. This creates a clean and professional transition between the molding and the flooring.
Troubleshooting Common Installation Issues
Even with careful installation, certain problems may arise. Here are some common issues and their solutions:
Dealing with Gaps or Gaps That Appear Over Time
If gaps appear between the shoe molding and the wall over time, use a wood shim to fill the gaps and create a snug fit. Secure the shim with wood glue and repaint the affected area for a seamless look.
Addressing Warped or Uneven Baseboards
If the baseboards are warped or uneven, the shoe molding may not sit flush against them. In this case, use a wood rasp or sandpaper to reshape the baseboards for a smooth and even surface. Once the baseboards are corrected, reinstall the shoe molding.
By following these tips and techniques, you’ll be able to install shoe molding with a professional finish that enhances the look of your space. Remember, accuracy, attention to detail, and the use of appropriate tools and materials are key to achieving flawless results.
Conclusion Words For Engaging Read
Conclusion Words for Engaging Read
Achieve a Professional Look with Shoe Molding Installation
When it comes to achieving a professional and polished look in your home, shoe molding installation is the final piece of the puzzle. This small detail may seem insignificant, but it can make a world of difference in elevating the overall aesthetic appeal of a room. By installing shoe molding, you can seamlessly transition between your baseboard and flooring, eliminating any unsightly gaps and providing a finished touch. With the right tools and techniques, you can transform your space into a truly professional-looking masterpiece.
Finalizing Your Baseboard Upgrade with Shoe Molding Installation
If you’ve recently upgraded your baseboards or are planning to, it’s crucial not to overlook the importance of shoe molding installation. Once you’ve installed your new baseboards, it’s only natural to want to complete the look and enhance the overall appearance of your space. Shoe molding acts as a seamless extension of your baseboards, providing a cohesive and polished finish. By paying attention to this small detail, you can ensure that your baseboard upgrade is truly complete, and your space looks impeccable.
Mastering the Art of Shoe Molding Installation for a Polished Finish
Mastering the art of shoe molding installation is a skill that can take your DIY game to the next level. While it may seem like a simple task, there are a few tips and tricks that can help you achieve a flawless and polished finish. Before starting the installation process, make sure you have the necessary tools at hand, such as a miter saw, measuring tape, and adhesive. Additionally, ensure that you measure and cut the shoe molding accurately to fit perfectly along the baseboard. With a keen eye for detail and a little patience, you’ll be able to achieve a professional and polished finish that will leave your guests impressed.
Frequently Asked Questions
Should I Glue Or Nail Shoe Molding?
It is recommended to glue shoe molding if you want a secure and durable installation. Nailing can also be used, but gluing ensures a stronger bond. Choose a high-quality adhesive and follow the manufacturer’s instructions for best results.
Is Shoe Molding Easy To Install?
Yes, installing shoe molding is easy. It can be done quickly and requires basic tools and adhesive. By following simple steps, you can effortlessly install shoe molding to enhance the look of your floors.
Can You Install Shoe Molding With Glue?
Yes, shoe molding can be installed using glue.
Can You Install Shoe Molding Without Nail Gun?
Yes, you can install shoe molding without a nail gun. You can use finishing nails and a hammer to secure the molding to the wall or baseboard. Make sure to pre-drill the holes to avoid splitting the molding.
Conclusion
Installing shoe molding is a simple yet effective way to enhance the look of your home. By following a few easy steps and using the right tools, you can achieve professional-looking results. Remember to measure accurately, cut the molding at appropriate angles, and use adhesive or nails to secure it in place.
With a little patience and attention to detail, you can transform your space and add a finishing touch that brings your room together. So go ahead and get started on your shoe molding installation project today! Your home will thank you.