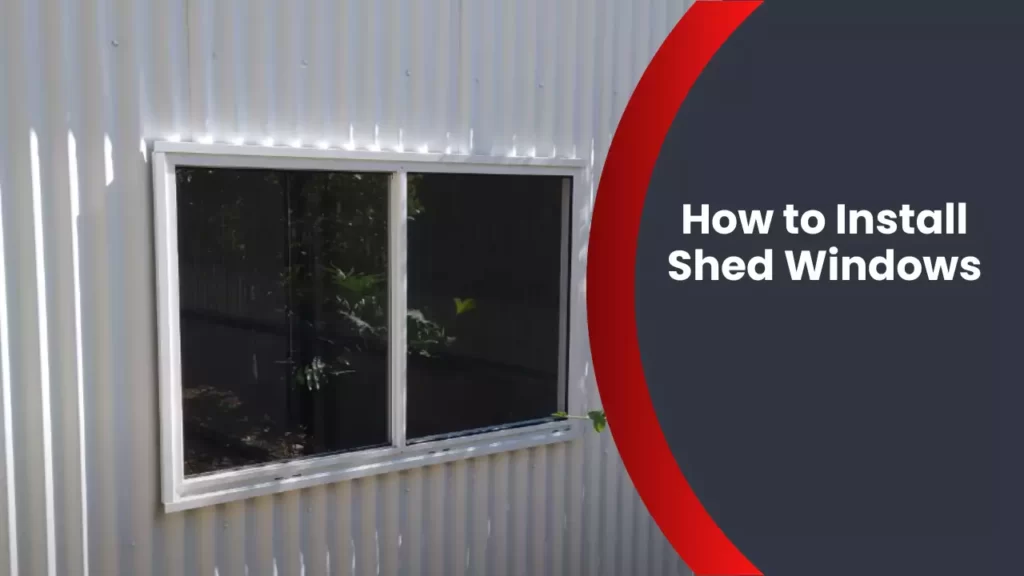
To install shed windows, measure the window opening, drill pilot holes, secure the window with screws, and seal the edges with silicone caulk. Adding windows to your shed not only enhances its aesthetic appeal, but also allows natural light to enter the space.
Installing shed windows is a simple DIY project that can be completed with basic tools and materials. This article will guide you through the step-by-step process of installing shed windows effectively. By following these instructions, you will be able to enjoy the benefits of a well-lit and ventilated shed in no time.
So, let’s get started and learn how to install shed windows in a few easy steps.
Choosing The Right Windows For Your Shed
Choosing the Right Windows for Your Shed
If you’ve ever considered adding windows to your shed, you understand the benefits they can bring. Shed windows not only provide natural light and ventilation, but they also add an aesthetic appeal to your outdoor space. However, selecting the right windows for your shed is crucial to ensure they meet your needs and complement your overall design. In this section, we will discuss the factors to consider when selecting shed windows, the different types available in the market, as well as the size and style options you should be aware of.
Factors to Consider When Selecting Shed Windows
Before diving into the different varieties of shed windows, it’s important to understand the factors that should influence your decision-making process. By considering these aspects, you can choose windows that not only fit your shed but also provide the functionality you require.
- 1. Budget: Determine how much you are willing to spend on shed windows. This will help you narrow down your options and find a product that matches your budget.
- 2. Material: Consider the material used for the window frames. Common options include vinyl, aluminum, and wood. Each material has its own pros and cons in terms of durability, maintenance, and appearance.
- 3. Weather Resistance: Assess the climate in your area and choose windows that can withstand the local weather conditions without compromising their functionality or longevity.
- 4. Security: Depending on the contents of your shed, security may be a top priority. Look for windows that come with secure locks or the option to add additional security features.
- 5. Ease of Installation: Consider your own DIY skills or the resources available to you for installation. Some windows may require professional assistance, while others can be easily installed by yourself.
Different Types of Shed Windows Available in the Market
Now that you understand the key factors to consider, let’s explore the various types of shed windows you can find in the market. By knowing the options available, you can make an informed decision based on your shed’s design and your personal preferences.
| Type | Description | Advantages |
|---|---|---|
| 1. Vertical Sliding Windows | These windows slide open vertically, allowing for easy operation and excellent ventilation. | – Easy operation – Proper airflow – Can be locked for security |
| 2. Single Hung Windows | Similar to vertical sliding windows, but only the bottom sash moves while the top remains fixed. | – Good ventilation – Enhanced security with only one movable sash |
| 3. Awning Windows | Characterized by hinges at the top, awning windows open outward, allowing air circulation even during light rain. | – Rain-resistant design – Excellent air circulation – Added architectural appeal |
| 4. Fixed Windows | These windows are non-operable and solely designed to allow natural light into your shed. | – Low maintenance – Increased natural light – Secure and affordable |
Understanding the Size and Style Options for Shed Windows
Lastly, let’s discuss the size and style options available for shed windows. By carefully considering these aspects, you can ensure that your windows not only fulfill their functional purpose but also contribute to the overall visual appeal of your shed.
- 1. Size: Measure the opening where you plan to install the windows to determine the appropriate size. Common sizes for shed windows include 14″ x 21″, 18″ x 27″, and 24″ x 27″.
- 2. Style: The style of your shed should guide your choice of window style. Whether you have a traditional, modern, or rustic shed, there are window styles to complement each design.
By carefully considering the factors, types, sizes, and styles mentioned above, you can confidently choose the right windows for your shed. Remember, the right windows can enhance both the functionality and visual appeal of your shed, making it a more enjoyable space for all your activities.
Preparing Your Shed For Window Installation
Clearing the area around the installation site
Before installing windows in your shed, it’s important to prepare the area around the installation site. Clearing the immediate vicinity of any debris or obstacles will not only make the process easier but also ensure a seamless and efficient installation. Here’s what you need to do:
- Remove any plants, shrubs, or bushes that might be obstructing the window area.
- Clean up any loose dirt, leaves, or branches that could interfere with the installation process.
- If there are any large objects, such as old furniture or tools, in close proximity to the window site, relocate them to another area.
Measuring and marking the window placement
Accurate measurements play a crucial role in ensuring a proper window installation. Before grabbing your tools, take the time to carefully measure and mark the window placement. Here’s how:
- Start by measuring the width and height of the shed wall where you intend to install the window.
- Ensure that the measurements are level and plumb, avoiding any discrepancies that may lead to an uneven installation.
- Using a pencil or marker, mark the corners and edges of the window frame on the shed wall, clearly indicating the window opening.
Gathering the necessary tools and materials for installation
Having the right tools and materials on hand is essential to a successful window installation. Before you begin, gather the following items:
| Tools | Materials |
|---|---|
| Screwdriver | Window frame |
| Drill | Screws |
| Caulking gun | Caulk or sealant |
| Tape measure | Window trim |
| Level | Paint (optional) |
Once you have gathered all the necessary tools and materials, you’ll be ready to proceed with the installation process. Remember to refer to the manufacturer’s instructions for any specific requirements or recommendations.
Step-By-Step Guide To Installing Shed Windows
Installing windows on your shed not only improves its appearance but also allows natural light and fresh air to enter, making it a more pleasant space to work or store your belongings. In this step-by-step guide, we will walk you through the process of installing shed windows, from removing any existing barriers in the window opening to testing the functionality of the window.
Removing any existing barriers in the window opening
If your shed already has a window opening, the first step is to remove any existing barriers such as nails, screws, or old windows. Carefully inspect the opening to ensure it is clean and free from any obstructions that could hinder the installation process.
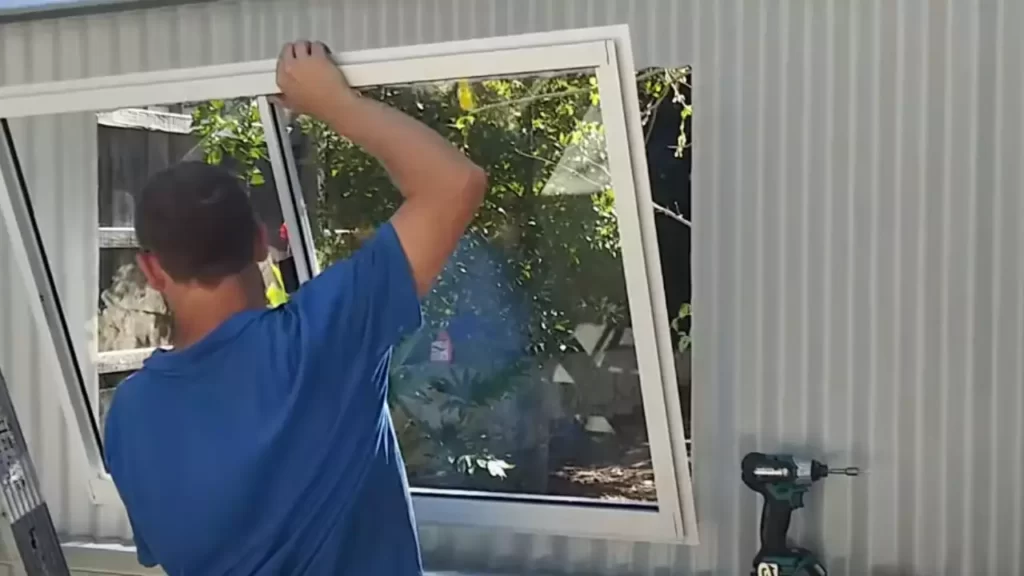
Inserting the window frame into the opening
Once the window opening is clear, it’s time to insert the window frame. Measure the dimensions of the opening and choose a window frame that fits perfectly. Gently place the window frame into the opening, making sure it is centered and level. If necessary, use shims to adjust the position of the frame.
Securing the window frame with screws or nails
With the window frame in position, it’s time to secure it in place. Use screws or nails to attach the frame to the surrounding shed structure. Be sure to place the fasteners evenly and securely, ensuring the frame is firmly held in place.
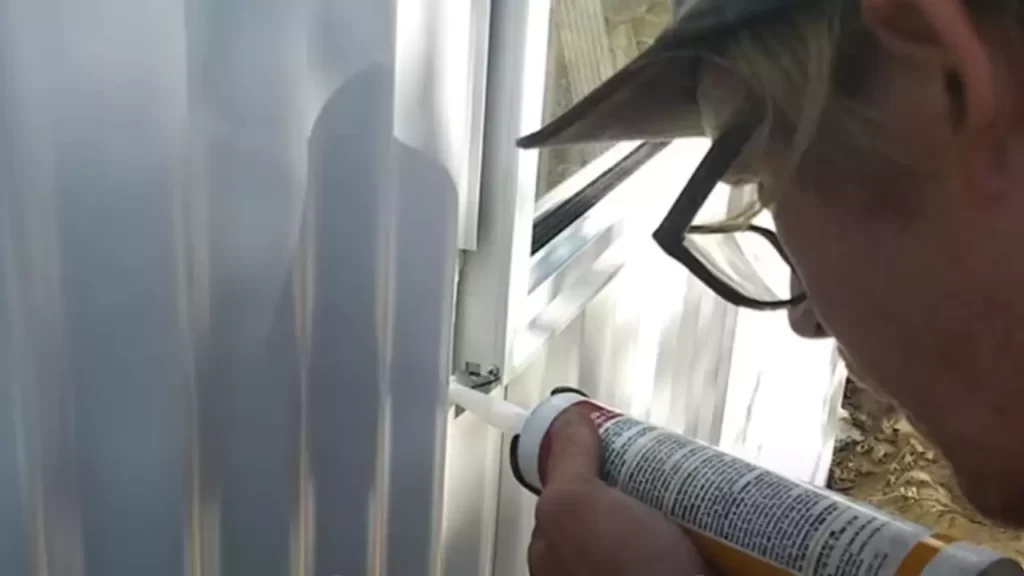
Applying caulk to seal any gaps around the frame
Sealing any gaps around the window frame is essential to prevent water and air infiltration. Apply a bead of caulk along the edges where the frame meets the shed walls, ensuring a tight seal. Smooth the caulk with a caulk smoothing tool or your finger for a clean finish.
Installing the window sash and hardware
Now it’s time to install the window sash and hardware. Carefully place the sash into the frame, ensuring it fits snugly. Secure the sash in place according to the manufacturer’s instructions, using the provided hardware such as screws or latches.
Testing the functionality of the window
With the window installed, it’s crucial to test its functionality. Open and close the window to ensure it operates smoothly. Check for any gaps or misalignments that may affect its performance. Make any necessary adjustments to ensure the window opens, closes, and locks properly.
By following this step-by-step guide, you can successfully install shed windows and enjoy the benefits of a well-lit and ventilated shed.
Additional Tips And Considerations
In addition to the basic steps of installing shed windows, there are a few additional tips and considerations that will help you make the most of your investment. By properly insulating the window, enhancing its security, and maintaining its cleanliness, you can ensure that your shed windows not only look great but also function efficiently for years to come.
Properly Insulating the Window for Energy Efficiency
Insulating your shed windows is crucial if you want to improve energy efficiency and reduce heat loss or gain in your shed. Here are a few key tips to ensure proper insulation:
- Apply weatherstripping: Consider using weatherstripping materials, such as adhesive-backed foam tape or caulking, to seal any gaps between the window frame and the shed wall. This will prevent drafts and minimize energy loss.
- Use window film: Installing window film can help improve insulation by preventing heat transfer. Choose a film that is specifically designed for insulation purposes and ensure that it is installed properly to maximize its effectiveness.
- Consider double-glazed windows: Double-glazed windows consist of two panes of glass with a layer of air or gas in between, providing better insulation than single-pane windows. If budget allows, opt for double-glazed windows to enhance energy efficiency.
Enhancing the Security of Shed Windows
While shed windows may not hold the same level of importance as those in your home, it’s still important to take steps to enhance their security. Consider the following tips to keep your shed and its contents safe:
- Install window locks: Adding locks to your shed windows is a simple yet effective way to deter potential intruders. Choose locks that are sturdy and designed specifically for shed windows to maximize their effectiveness.
- Use window bars or grilles: Window bars or grilles provide an additional layer of security to prevent unauthorized access. You can choose from a variety of designs and materials to suit your shed’s aesthetic.
- Consider security alarms: If you have valuable items stored in your shed, installing a security alarm system can provide an extra layer of protection. Look for alarms that have window sensors to detect any forced entry attempts.
Maintaining and Cleaning Shed Windows for Longevity
Proper maintenance and regular cleaning are essential to ensure the longevity of your shed windows. Follow these tips to keep your windows in top condition:
- Clean with gentle solutions: Use a mild detergent or window cleaning solution diluted in water to clean your shed windows. Avoid using abrasive cleaners or materials that could scratch the glass or window frame.
- Inspect for damage or wear: Regularly inspect your shed windows for any signs of damage or wear, such as cracks, warping, or deteriorating seals. Address any issues promptly to prevent further damage.
- Apply protective coatings: Consider applying a protective coating to your shed windows, such as a clear sealant or UV-resistant film, to protect them from the elements and prolong their lifespan.
By following these additional tips and considerations, you can enhance the energy efficiency, security, and longevity of your shed windows. With a little extra care and attention, your shed will not only serve its purpose but also become a reliable and aesthetically pleasing addition to your property.
Frequently Asked Questions
How Do You Install Windows In A Shed?
To install windows in a shed, measure and mark the window opening on the shed wall. Cut the opening using a saw, ensuring it’s the size of the window frame. Place the window in the opening and secure with screws.
Caulk around the edges and trim any excess. Finally, test the window to make sure it opens and closes properly.
How Much Does It Cost To Put Windows In A Shed?
The cost of installing windows in a shed can vary depending on factors such as the size of the windows and the materials used. On average, you can expect to pay around $200 to $500 per window, including installation.
Do Shed Windows Need A Header?
Shed windows typically do not require a header. The weight of the windows is relatively light, so a header is not necessary for support. However, it is important to ensure that the window is properly framed and securely installed to maintain the structural integrity of the shed.
How To Replace A Window In A Shed?
To replace a window in a shed, start by measuring the dimensions of the opening. Remove the old window carefully, including the frame and any caulk or sealant. Install the new window into the opening, ensuring it fits properly and is level.
Secure it with screws or nails and apply new caulk or sealant around the edges for a watertight seal.
Conclusion
In a few simple steps, you can successfully install shed windows for an improved shed experience. By carefully measuring, choosing the right windows, and using the proper tools, you can ensure a seamless installation. Remember to prioritize safety, follow the manufacturer’s instructions, and seek assistance when needed.
With well-placed windows, your shed will benefit from increased natural light and ventilation. Get started on transforming your shed into a bright and functional space today!