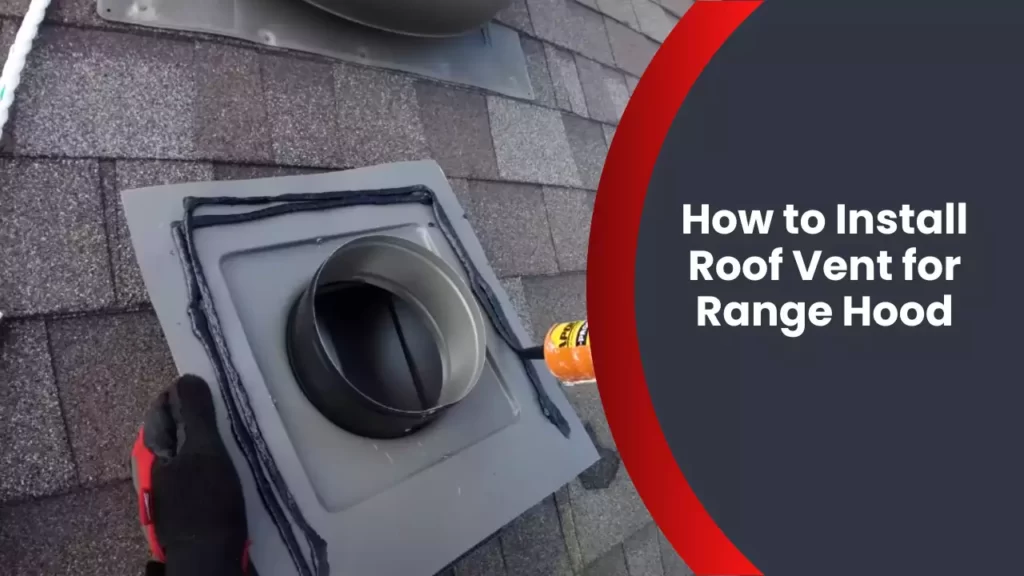
To install a roof vent for a range hood, follow these steps: Measure and mark the installation point, cut the hole in the roof, install the vent hood, and secure it with screws. Now, let’s dive into the details of how to install a roof vent for a range hood.
Is your kitchen filled with smoke every time you cook? Is the pungent smell lingering for hours? Installing a roof vent for your range hood can effectively remove smoke and odors from your kitchen, ensuring a clean and fresh environment.
We will guide you through the step-by-step process of installing a roof vent for your range hood, so you can enjoy a more pleasant cooking experience. So, let’s get started!
What Is A Roof Vent And Why Is It Important For Range Hoods?
Definition and Purpose of a Roof Vent for Range Hoods
A roof vent is an essential component of a range hood system that helps remove smoke, fumes, and odors from your kitchen. It is a ventilation outlet installed on the roof of your house, specifically designed to facilitate the proper functioning of range hoods. The purpose of a roof vent is to exhaust the air pollutants generated during cooking, ensuring a clean and healthy kitchen environment.
Importance of Proper Ventilation for Kitchen Spaces
Proper ventilation in your kitchen is crucial for several reasons, making the installation of a roof vent for range hoods a vital consideration. Here are some key reasons why proper ventilation is essential:
- Effective Smoke and Odor Removal: Cooking in a confined space can result in the accumulation of smoke and unpleasant odors. A roof vent helps to eliminate these pollutants, ensuring fresh air in your kitchen and the rest of your home.
- Improved Indoor Air Quality: Without adequate ventilation, cooking by-products such as carbon monoxide, excess moisture, and airborne contaminants can linger in your kitchen. These pollutants can have detrimental effects on your health. Proper ventilation provided by a roof vent helps maintain a healthy indoor air quality.
- Prevention of Damages: Inadequate ventilation can lead to the formation of condensation and excess humidity, causing moisture-related problems such as mold growth, mildew, and structural damages. Installing a roof vent for your range hood helps prevent these issues by providing proper air circulation.
- Enhanced Energy Efficiency: Efficient ventilation in your kitchen allows for the quick removal of heat, steam, and other cooking by-products. This helps in maintaining a comfortable temperature in your kitchen and prevents the strain on your air conditioning system.
Overall, proper ventilation provided by a roof vent is crucial to creating a safe, clean, and comfortable kitchen environment. By effectively removing smoke, odors, and pollutants, a roof vent for range hoods ensures a healthier cooking experience and contributes to the overall well-being of your home.
Choosing The Right Roof Vent For Your Range Hood
Choosing the right roof vent for your range hood is a crucial step in ensuring the proper functioning of your kitchen ventilation system. A roof vent effectively removes excess heat, steam, and odors from your kitchen, ensuring a clean and fresh cooking environment. There are several factors to consider when selecting a roof vent, as well as different types of vents available in the market. Let’s explore these aspects to help you make an informed decision.
Factors to consider when selecting a roof vent
When choosing a roof vent for your range hood, it’s essential to take the following factors into account:
- Compatibility: Ensure that the roof vent you select is compatible with your range hood model. Different range hoods may have specific requirements for installation.
- Efficiency: Look for a roof vent that provides efficient airflow and extraction. It should be capable of effectively removing smoke, grease, and cooking odors from your kitchen.
- Size: Consider the size of the roof vent and how it will fit with your range hood and kitchen setup. It should be appropriately sized to accommodate the demands of your cooking area.
- Durability: Choose a roof vent made from high-quality materials that can withstand the elements and last a long time. A durable vent will ensure consistent performance and reduce the need for frequent maintenance.
- Noise level: Pay attention to the noise level of the roof vent. Look for models that offer quiet operation, as excessive noise can be disruptive and unpleasant in your kitchen.
Different types of roof vents available in the market
There are several types of roof vents available, each with its unique features and installation requirements. Let’s take a look at some common types:
| Type | Description |
|---|---|
| Box Vents | Also known as static vents, box vents are simple and cost-effective options. They rely on natural convection currents to remove air from your kitchen. |
| Turbine Vents | These vents consist of a spinning turbine that draws out hot air from your kitchen. They are effective in areas with low wind pressure. |
| Ridge Vents | Ridge vents are installed along the length of the roof ridge, allowing hot air to escape. They provide excellent ventilation while maintaining the aesthetics of your roofline. |
| Power Vents | Also known as attic fans, power vents use electric power to extract air from your kitchen. They are ideal for areas with limited natural ventilation. |
| Soffit Vents | Soffit vents are installed under the eaves of your roof. They provide intake airflow, allowing fresh air to enter the kitchen while the roof vent removes exhaust air. |
Each type of roof vent has its advantages and considerations. Consider your kitchen’s specific requirements and consult with a professional to determine the most suitable option for your range hood installation.
Tools And Materials Needed For Installation
List of tools required for the installation process
Before you start installing a roof vent for your range hood, it’s important to gather all the necessary tools to ensure a smooth installation process. Having the right tools on hand will save you time and effort, allowing you to complete the task efficiently. Here is a list of tools you will need:
- Drill
- Measuring tape
- Roofing nails
- Screwdriver
- Utility knife
- Hammer
- Chalk line
- Ladder
- Work gloves
Necessary materials and supplies for a successful installation
In addition to the right tools, you will also need to gather the necessary materials and supplies to ensure a successful installation of the roof vent for your range hood. Here is a list of essential materials:
- Roof vent kit (including the vent, flashing, and cap)
- Caulk or roofing sealant
- Roofing tar or cement
- Roofing shingles
- Roofing nails
These materials will provide you with everything you need to properly install the roof vent for your range hood. By having all the necessary tools and materials on hand, you will be well-prepared for a successful installation process.
Planning The Installation Process
Planning the installation process for a roof vent for your range hood plays a crucial role in ensuring a seamless and efficient installation. By carefully assessing the kitchen layout and determining the ideal location for the vent, you can maximize its functionality and eliminate any potential hurdles. In this section, we will discuss the steps involved in planning the installation and provide you with the necessary guidance to make your roof vent installation a success.
Assessing the Kitchen Layout and Determining the Ideal Location for the Roof Vent
Before diving into the installation process, it is essential to assess your kitchen layout and determine the best location for the roof vent. This includes considering factors such as the proximity to the range hood, the structural integrity of the roof, and any potential obstructions that might interfere with the vent’s efficiency.
To assess the kitchen layout, begin by examining the area above your range hood. Ensure there is sufficient space for the vent passage without any overhead obstacles like plumbing or electrical wiring. Additionally, check if there are any structural elements, such as beams or joists, that could impede the vent’s path. Identifying these potential obstacles will help you choose the most suitable location for the roof vent.
Measuring and Marking the Area on the Roof for the Vent Installation
Once you have determined the ideal location for the roof vent inside your kitchen, it is time to prepare the corresponding area on the roof for installation. Start by locating the position of the vent passage from the inside, using measurements and a marking tool to precisely mark the spot on the ceiling. Consider using a plumb bob or a straightedge to ensure accuracy.
Afterward, head to the roof and locate the marked spot. Use proper safety equipment, such as a safety harness, to prevent any accidents while working at heights. Once on the roof, transfer the measurements from the ceiling to the roof surface. This will serve as your guide for the vent’s installation and ensure a seamless integration between the interior and exterior components.
When marking the area on the roof, make sure to take into account any surrounding fixtures, such as chimneys or other vents, to maintain proper clearance. The precise measurement and marking on the roof will enable you to install the vent with accuracy and make any necessary adjustments if required.
Preparing The Roof For Installation
Before venting your range hood through the roof, it is essential to adequately prepare the area to ensure a safe and secure installation. This involves taking necessary safety precautions and clearing the designated spot where the vent will be installed. Additionally, any existing roof vents must be properly sealed to prevent any air leakage or potential damage. Let’s explore each step in detail.
Ensuring Safety Precautions are in Place
When it comes to working on the roof, safety should always be your top priority. Taking proper precautions not only protects you but also enhances the effectiveness of the installation process. Here are some essential safety measures to keep in mind:
- Always use sturdy and reliable safety harnesses to prevent falls.
- Wear non-slip footwear to ensure a firm grip on the roof surface.
- Use a stable ladder that is securely placed and positioned.
- Check for any electrical wires or obstacles that may hinder the installation process.
- Ensure there is sufficient daylight for optimal visibility.
Clearing the Area on the Roof Where the Vent will be Installed
Before diving into the vent installation, it is crucial to clear the designated area on the roof. Follow these steps to create a clean and suitable space:
- Start by removing any debris, leaves, or other materials that may have accumulated in the area.
- Ensure that the surface is clean and free from dirt, dust, or any other obstructions.
- If required, trim nearby branches or plants that could potentially interfere with the venting process.
Properly Sealing Any Existing Roof Vents
Prior to installing the new roof vent for your range hood, it is important to seal any existing vents to prevent air leakage and maintain the overall integrity of your roof. Follow these steps to ensure a proper seal:
- Thoroughly inspect all existing roof vents to identify any signs of wear, damage, or deterioration.
- If any vent is damaged or no longer in use, remove it and clean the surrounding area.
- Apply a high-quality silicone sealant or roofing cement around the edges of the vent to create a watertight seal.
- Check for any gaps or openings and fill them using the same sealant or cement.
- Allow sufficient time for the sealant to dry and cure before proceeding with the new vent installation.
By carefully following these steps and adhering to proper safety measures, you can ensure a smooth and successful installation of the roof vent for your range hood. Taking the time to prepare the roof properly will not only enhance the functionality of your range hood but also contribute to the longevity and efficiency of your home.
Installing The Roof Vent
Installing the Roof Vent
Step-by-step instructions for installing the roof vent
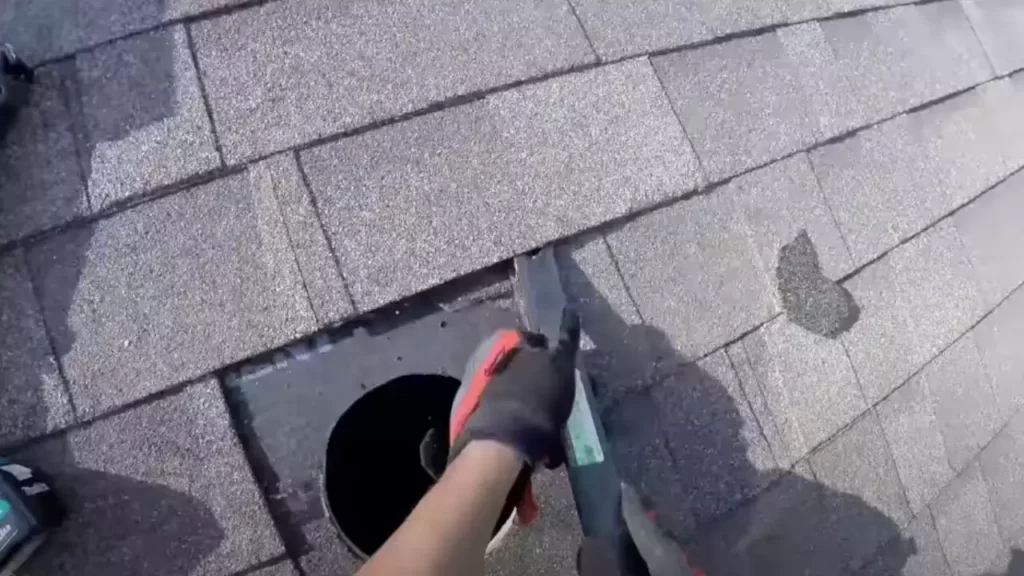
1. Cutting and lifting roof shingles
To begin the installation process for your roof vent, you’ll first need to cut and lift the roof shingles in the designated area. This will allow you to create a properly sealed opening for the vent. Start by measuring the size of the vent opening and mark it on your roof using a marker or chalk.
Next, carefully lift the roof shingles around the marked area. Use a pry bar or a similar tool to gently lift the shingles, being cautious not to damage them. It’s important to create enough space to accommodate the vent without causing any harm to the surrounding roofing materials.
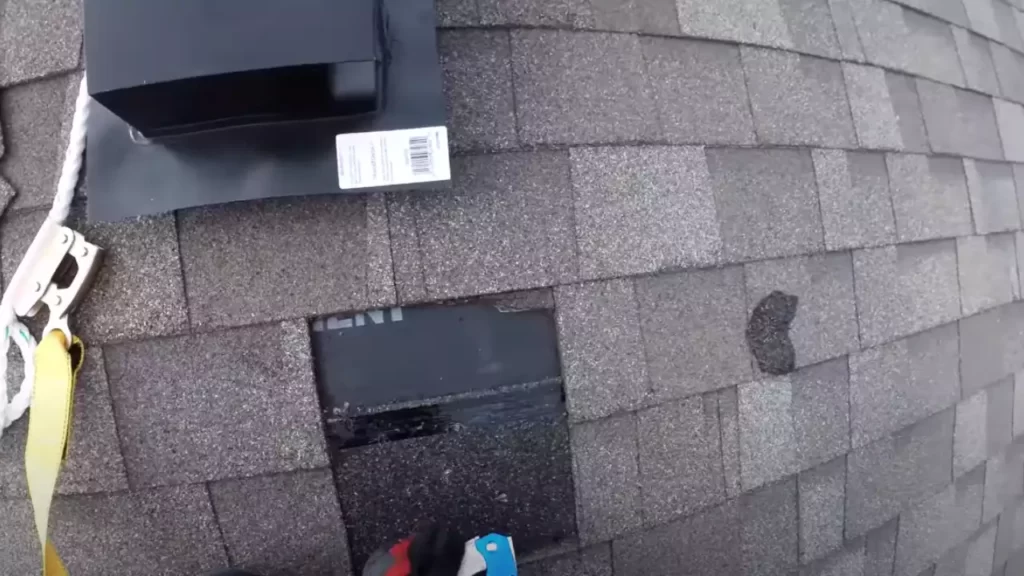
2. Positioning and securing the vent on the roof
Once you have prepared the area for installation, it’s time to position and secure the roof vent. Carefully place the vent into the opening you created, ensuring that it fits snugly and aligns properly with the surrounding roof shingles.
Use roofing screws or nails to secure the vent in place. Make sure to drive the fasteners through the designated holes in the vent, ensuring a secure attachment. Be cautious not to overdrive the screws or nails, as it can cause damage to the vent or the surrounding roofing materials.
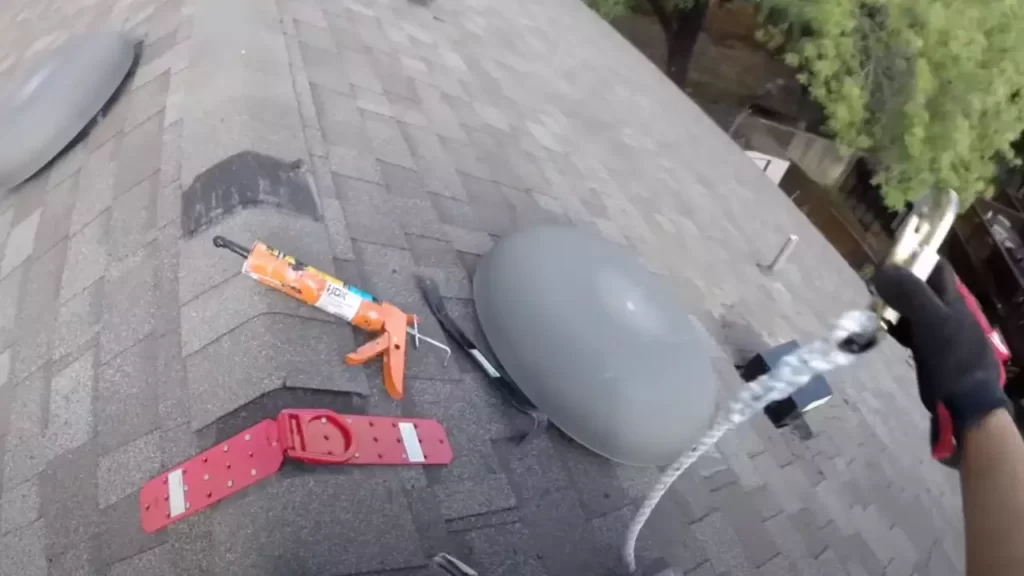
3. Properly sealing the vent to prevent leaks
To ensure your roof vent is watertight and prevents any potential leaks, proper sealing is crucial. Apply a high-quality roofing sealant around the edges of the vent, ensuring complete coverage. This step will help prevent water infiltration and protect your roof from potential damage.
Allow the sealant to dry completely before moving forward with the installation process. Check the manufacturer’s instructions for the recommended drying time. Once the sealant is completely dry, it will provide a secure and protective barrier against water intrusion.
In conclusion, installing a roof vent for your range hood may seem like a complex task, but by following these step-by-step instructions, you can successfully complete the installation process. Remember to take your time and exercise caution throughout the process to ensure a proper and secure fit. A properly installed and sealed roof vent will not only improve the ventilation in your kitchen but also protect your roof from potential damage.
Connecting The Range Hood To The Roof Vent
Connecting the Range Hood to the Roof Vent
When installing a range hood, properly connecting it to the roof vent is crucial to ensure proper ventilation and maintain indoor air quality. A secure and airtight connection between the range hood duct and the roof vent is essential to prevent any leaks or potential problems. In this section, we will discuss the necessary steps to connect the range hood to the roof vent effectively.
H3: Connecting the Range Hood Duct to the Roof Vent
To begin, gather the essential materials needed for the installation, such as the range hood duct, roof vent, clamps, and screws. Ensure that the duct size matches the range hood specifications to guarantee a proper fit.
1. Measure and Mark:
Using a measuring tape, measure the distance between the range hood and the roof vent. Make sure to consider any obstacles like joists or rafters that may require adjustments to the duct path. Mark this measurement both at the range hood and the roof vent locations.
2. Prepare the Duct:
Next, prepare the range hood duct by cutting it to the required length using tin snips or a sharp utility knife. It is essential to make clean and precise cuts to ensure a snug fit and optimal airflow. Remove any burrs or rough edges from the cut ends of the duct.
3. Attach the Duct to the Range Hood:
Slide one end of the duct onto the exhaust port of the range hood. Ensure that it fits securely and evenly, using clamps or screws if necessary. Take care to align the duct properly so that it doesn’t cause any obstructions or kinks.
4. Secure the Duct to the Roof Vent:
Carefully position the other end of the duct onto the roof vent, ensuring a tight and secure fit. Use clamps or screws to fasten the duct to the vent, ensuring a stable connection. Double-check for any gaps or loose areas that may cause air leaks.
5. Insulate and Seal:
To prevent air leakage and maintain energy efficiency, insulate the duct with suitable insulation material. This insulation will help minimize temperature fluctuations and reduce the risk of condensation. Additionally, apply high-quality HVAC foil tape or mastic sealant to seal any joints or connections.
6. Test and Adjust:
Once the duct is securely connected to both the range hood and roof vent, it is crucial to test the system. Turn on the range hood and check for proper airflow and venting. You can use a smoke pencil or tissue paper along the duct path to observe airflow patterns and identify any potential issues. If necessary, make adjustments to the duct position or secureness to ensure optimal performance.
Ensuring a secure and airtight connection between the range hood duct and the roof vent is essential for effective ventilation. By following these steps and using high-quality materials, you can install your range hood with confidence, knowing that it will properly exhaust cooking fumes and keep your kitchen air fresh and clean.
Testing And Troubleshooting
After successfully installing your roof vent for the range hood, it is crucial to test and troubleshoot the system to ensure proper ventilation and airflow. This step is vital to guarantee the efficient and effective functioning of your range hood. This section will guide you through the process of checking for proper ventilation and airflow, as well as troubleshooting common issues that may arise during installation.
Checking for proper ventilation and airflow
Ensuring that your roof vent for the range hood is providing proper ventilation and airflow is essential for maintaining a healthy and functional kitchen environment. Here are some steps to follow:
- Check the ductwork: Inspect the entire ductwork system to ensure that it is properly connected and free of any obstructions. Pay attention to any leaks or loose connections that may hinder the airflow.
- Check the hood fan: Turn on the range hood fan and listen for any unusual noises or vibrations. Ensure that the fan is running smoothly and providing adequate airflow.
- Test airflow: You can conduct a simple airflow test by lighting a smoke stick or a piece of incense and holding it near the hood vent. Observe the direction and strength of the smoke to determine if there is a proper suction effect. If the smoke is drawn into the vent, it indicates that the ventilation system is working effectively.
- Measure airflow rate: If you want to be more precise, you can use an airflow meter to measure the airflow rate. Follow the manufacturer’s instructions to test the velocity and volume of the air being discharged by the vent. This will give you a more accurate assessment of the ventilation system’s performance.
Troubleshooting common issues during installation
During the installation process of your roof vent for the range hood, you may encounter some common issues that can affect its functionality. Here are a few troubleshooting tips to address these problems:
- Leakage: If you notice any leaks in the ductwork, use duct tape or HVAC foil tape to seal the gaps. Ensure that all connections are tight and properly sealed.
- Obstructions: Check for any obstructions that may hinder the airflow, such as debris or bird nests. Clear out any blockages to allow for unobstructed ventilation.
- Improper positioning: Verify that the roof vent is installed correctly, following the manufacturer’s instructions. Ensure that it is positioned at the optimal location to maximize airflow and minimize backdrafts.
- Fan issues: If you experience problems with the range hood fan, such as it not turning on or running at a slow speed, check the electrical connections and power supply. Reset the circuit breaker if necessary and consider contacting a professional if the problem persists.
By performing these tests and troubleshooting techniques, you can rest assured that your roof vent for the range hood is functioning properly. Remember to regularly maintain and clean the vent to sustain its efficiency and prolong its lifespan. Follow these guidelines for a hassle-free and well-ventilated kitchen environment.
Safety Considerations And Tips
Important safety tips to follow during the installation process
When it comes to installing a roof vent for your range hood, ensuring your safety should be your top priority. Following proper safety considerations and tips is crucial to avoid accidents and ensure a successful installation. Below are some important safety guidelines to keep in mind:
- Wear the appropriate safety gear: Before you begin the installation process, make sure you have the necessary safety gear. This includes wearing gloves, safety glasses, and a hard hat to protect yourself from falling debris or tools.
- Turn off the power: Before you start working on the installation, you must turn off the power to your range hood. This will prevent any electrical accidents while handling the wires or working near the power source.
- Work with a partner: Installing a roof vent can be a challenging task, especially when working at heights. It is always recommended to have a partner with you to assist in lifting heavy components, stabilize ladders, and ensure your safety throughout the process.
- Secure a sturdy ladder: If your installation requires working on the roof, make sure to use a sturdy and stable ladder. Check that it is in good condition and properly placed on a level surface before ascending. This will minimize the risk of falls and accidents.
- Follow manufacturer instructions: Each range hood vent installation may have specific requirements and steps to follow. Always refer to the manufacturer’s instructions to ensure a correct and safe installation. Ignoring these guidelines could lead to improper installation or potential hazards.
By adhering to these safety tips, you can minimize the risk of accidents and ensure a safe installation process. Remember, your safety is of utmost importance, so take the necessary precautions and follow the recommended guidelines.
Regular Maintenance And Care For Roof Vents
Tips for maintaining and cleaning the roof vent
Maintaining and cleaning your roof vent is crucial for ensuring its optimal performance and longevity. By following these simple tips, you can keep your roof vent operating efficiently for years to come:
- Regularly inspect the roof vent for any debris or obstructions that may hinder the airflow. Remove any leaves, twigs, or other debris that may have accumulated on or around the vent.
- If your roof vent has a screen or filter, clean it regularly to prevent clogging. Use a damp cloth or a soft brush to gently remove any dirt or dust buildup.
- Check the seals and gaskets of your roof vent for any signs of wear or damage. Replace any faulty seals or gaskets to prevent air leaks and ensure proper ventilation.
- Keep an eye out for any signs of rust or corrosion on the surface of the vent. If you notice any, clean it with a mild detergent and water solution, and apply a rust-resistant coating to protect the vent from further damage.
Recommended maintenance schedule to ensure optimal performance
To ensure your roof vent operates at its best, it’s important to follow a regular maintenance schedule. Consider the following guidelines:
| Maintenance Task | Frequency |
|---|---|
| Inspect for debris and obstructions | Monthly |
| Clean filters or screens | Every 3 months |
| Check seals and gaskets | Annually |
| Clean and rust-proof the vent | As needed |
By following this recommended maintenance schedule, you can ensure your roof vent is in top shape to effectively remove cooking odors, smoke, and excess moisture from your kitchen.
Frequently Asked Questions
Can You Vent A Range Hood Through A Roof Vent?
Yes, a range hood can be vented through a roof vent. It is a common and efficient method to remove smoke, odors, and cooking fumes from the kitchen. Proper installation is crucial to ensure the venting is done correctly and safely.
How Much Does It Cost To Install A Roof Vent For A Range Hood?
The cost of installing a roof vent for a range hood varies depending on factors like location and complexity. It can range from $200 to $800, including labor and materials. Proper ventilation is essential for kitchen safety and indoor air quality.
How Do You Install A Ceiling Duct For A Range Hood?
To install a ceiling duct for a range hood, follow these steps: 1. Choose a suitable location for the vent duct. 2. Measure and mark the duct opening on the ceiling. 3. Cut a hole in the ceiling using a saw.
4. Attach the vent duct to the hole using screws or duct tape. 5. Securely connect the range hood to the duct. Complete the installation by testing the hood for proper airflow.
How Do I Vent My Exhaust Fan Through My Roof?
To vent your exhaust fan through your roof, follow these steps: 1. Locate an appropriate area on the roof for the vent. 2. Mark the spot and ensure there are no obstacles or obstructions. 3. Cut a hole in the roof using a saw or drill.
4. Install a roof vent cap and secure it properly. 5. Connect the exhaust fan duct to the vent cap, ensuring a tight seal.
Conclusion
Installing a roof vent for your range hood is a crucial step in maintaining a well-ventilated kitchen. By following the right steps and guidelines, you can easily install a roof vent and ensure the proper airflow in your cooking area.
Remember to choose the appropriate vent size, use the correct tools and materials, and follow safety precautions throughout the process. With a properly installed roof vent, you can enjoy a smoke-free and odor-free kitchen, making your cooking experience more enjoyable.