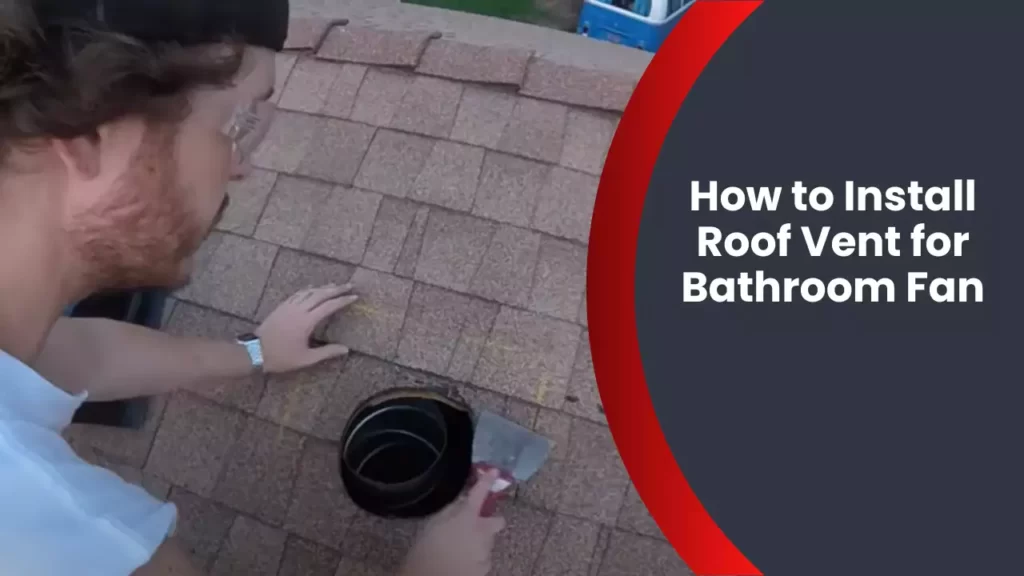
To install a roof vent for a bathroom fan, first locate the desired position for the vent on the roof and mark it. Then, using a reciprocating saw or jigsaw, cut a hole in the roof for the vent opening.
Installing a roof vent for a bathroom fan is an important step in ensuring proper ventilation and preventing moisture buildup in your bathroom. By properly venting the moist air outside, you can prevent issues such as mold and mildew growth.
While the installation process may seem daunting, it can be accomplished with the right tools and techniques. In this guide, we will outline the steps involved in installing a roof vent for your bathroom fan. By following these steps, you can ensure that your bathroom remains fresh and free from excess moisture. So let’s dive in and learn how to install a roof vent for a bathroom fan.
Importance Of Proper Ventilation In Bathrooms
Proper ventilation in bathrooms is crucial for maintaining a healthy and comfortable living environment. Without adequate ventilation, bathrooms can become a breeding ground for mold, mildew, and unpleasant odors, leading to various health issues. In addition, excessive moisture can damage the walls, flooring, and fixtures, causing costly repairs.
Effects of Inadequate Ventilation
- Mold and Mildew: Inadequate ventilation traps moisture in the bathroom, creating the perfect conditions for mold and mildew growth. These fungi not only produce an unpleasant odor but also pose health risks, especially for individuals with allergies or respiratory conditions.
- Poor Indoor Air Quality: Without proper airflow, volatile organic compounds (VOCs) emitted from cleaning products, paint, and personal care items can accumulate, leading to poor indoor air quality. Breathing in these pollutants can cause headaches, dizziness, and other health problems.
- Condensation: Lack of ventilation allows condensation to build up on bathroom surfaces such as mirrors, windows, and walls. Over time, this moisture can lead to water damage, peeling paint, and even structural issues.
Benefits of Installing a Roof Vent for Bathroom Fan
| Benefits | Explanation |
|---|---|
| Moisture Removal: | A roof vent for the bathroom fan helps to efficiently remove excess moisture from the bathroom, preventing the growth of mold and mildew. By expelling humid air outdoors, it ensures a drier environment and reduces the risk of water damage. |
| Improved Air Circulation: | A properly installed roof vent promotes better air circulation in the bathroom. It helps to remove odors, harmful chemical fumes, and reduces the concentration of pollutants in the air, resulting in fresh and healthy indoor air quality. |
| Energy Efficiency: | A roof vent for the bathroom fan can contribute to energy savings by reducing the workload on air conditioning and heating systems. By removing excess heat and humidity, it helps maintain comfortable temperatures in the bathroom. |
Installing a roof vent for your bathroom fan is a wise investment that ensures proper ventilation and prevents the associated problems caused by inadequate airflow. It not only improves the overall air quality but also extends the longevity of your bathroom fixtures. With the benefits of reduced mold growth, improved indoor air quality, and increased energy efficiency, installing a roof vent is a practical solution for a healthier and more comfortable bathroom.
Planning And Preparation
Before you begin the installation process of a roof vent for your bathroom fan, careful planning and preparation are essential. This step ensures that you have a comprehensive understanding of your bathroom layout, existing ventilation system, and the appropriate size and type of roof vent required. By assessing these factors beforehand, you can ensure a successful and efficient installation process. In this section, we will guide you through the planning and preparation process, step by step.
Assessing the bathroom layout and existing ventilation system
Begin by evaluating your bathroom layout and existing ventilation system. This assessment will help you determine the best location for the roof vent and ensure optimal airflow. Look for the following key points:
- The current placement of the bathroom fan: Is it positioned centrally or near the shower area?
- The length and configuration of the existing exhaust duct: Is it properly insulated and in good condition?
- The proximity of the bathroom to the exterior wall or roof: This will determine whether a roof vent or wall vent is more suitable.
By thoroughly examining these factors, you can make an informed decision about the placement and type of roof vent that will work best for your bathroom.
Determining the appropriate size and type of roof vent
Now that you have assessed your bathroom layout and existing ventilation system, it’s time to determine the appropriate size and type of roof vent. Here’s how you can do it:
- Calculate the square footage of your bathroom: Measure the length and width of the room, and multiply the two measurements together.
- Check the recommended CFM (cubic feet per minute) rating for your bathroom size: This rating indicates the ventilation capacity required to effectively remove moisture and odors.
- Choose a roof vent that matches the CFM rating: Consider factors such as the vent style (e.g., static vents, turbine vents), material (e.g., metal, plastic), and any additional features (e.g., bird guard, damper).
By following these steps, you can select the right size and type of roof vent that will adequately ventilate your bathroom and meet your specific requirements.
Gathering the necessary tools and materials
Before you start the installation process, gather all the necessary tools and materials. This ensures that you have everything you need at hand, minimizing delays and interruptions during the installation. Here’s a checklist of essential items:
| Tools | Materials |
|---|---|
| Screwdriver | Roof vent |
| Hacksaw | Roofing cement |
| Tape measure | Flashing |
| Pencil | Screws |
| Caulk gun | Insulation |
| Utility knife | Electrical wire connectors |
By ensuring you have all the necessary tools and materials, you can streamline the installation process and complete it without any hassle.
In conclusion, planning and preparation are vital steps when installing a roof vent for your bathroom fan. By assessing your bathroom layout and existing ventilation system, determining the appropriate size and type of roof vent, and gathering the necessary tools and materials, you can ensure a successful installation that effectively removes moisture and improves indoor air quality.
Steps To Install A Roof Vent For Bathroom Fan
Installing a roof vent for your bathroom fan is essential for proper ventilation, preventing moisture buildup, and maintaining a healthy environment. By following these simple steps, you can ensure a successful installation that will keep your bathroom fresh and odor-free.
Step 1: Choosing the right location on the roof
Before starting the installation process, you need to carefully select the optimal location for your roof vent. Ideally, it should be positioned directly above your bathroom fan to maximize airflow and minimize ductwork length. Consider obstructions such as other vents, chimneys, or electrical equipment when selecting the location. Take note that the size of your bathroom fan and the corresponding vent pipe diameter will influence the size of the roof opening required.
Step 2: Preparing the roof for installation
Once you’ve determined the location, it’s time to prepare the roof for the installation. Ensure you have all the necessary tools and materials before proceeding with this step. Start by marking the center of your chosen location on the roof with a pencil or marker. Next, use a reciprocating saw or jigsaw to carefully cut a hole in the roof, following the manufacturer’s instructions for your specific vent. It is crucial to take all necessary safety precautions, such as wearing protective eyewear and gloves, to avoid any injuries.
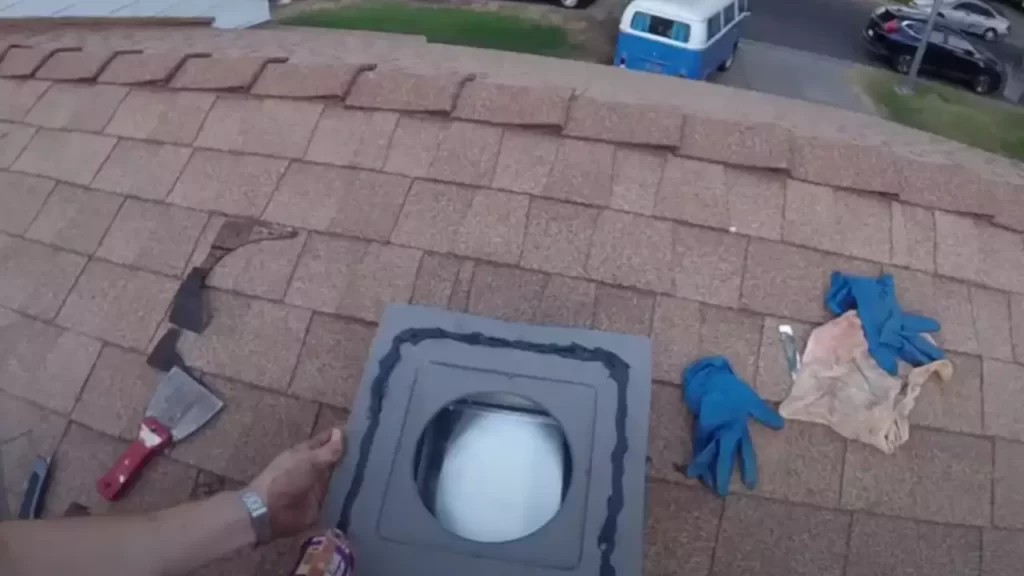
Step 3: Installing the vent flashing
After cutting the hole, you’ll need to install the vent flashing. This is a crucial step in preventing water leaks and maintaining the integrity of your roof. Begin by sliding the vent flashing under the shingles above the hole, ensuring a tight fit. Next, apply roofing caulk around the flashing’s edges to create a watertight seal. This will prevent any water from seeping into the roof and causing potential damage.
Step 4: Securing the roof vent
Now it’s time to secure the roof vent in place. Insert the vent pipe into the hole and position it so that the flanges on the vent fit snugly against the roof. To ensure a secure fit, use roofing nails or screws to attach the flanges firmly to the roof. Avoid over-tightening, as this may damage the vent or the roof. Double-check the vent for any signs of movement or instability. A properly secured roof vent will withstand various weather conditions.
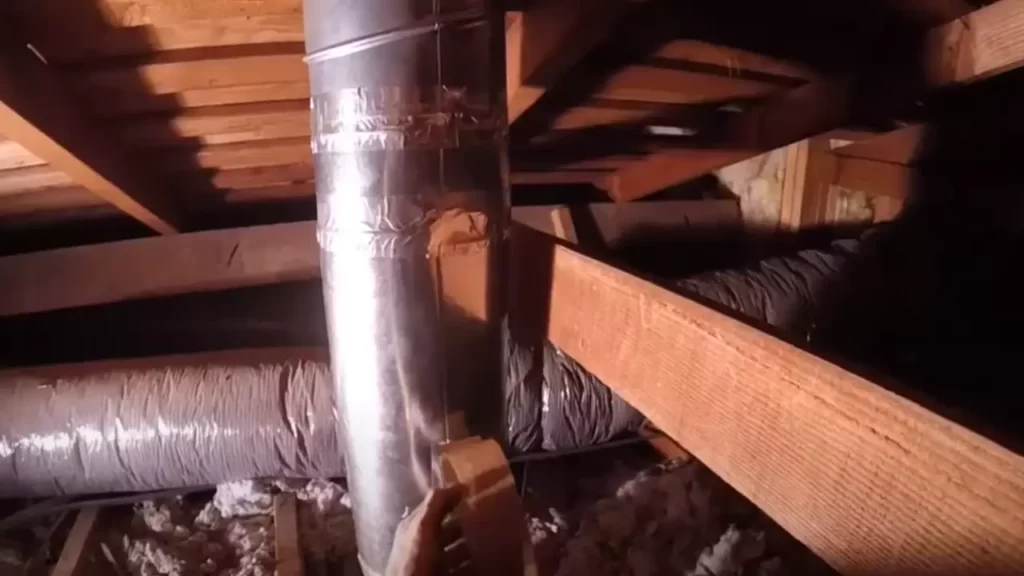
Step 5: Connecting the bathroom fan duct to the vent
With the roof vent securely installed, it’s time to connect the bathroom fan duct. Ensure that the duct extends from the fan to the vent without any kinks or bends, as this may hinder airflow. Use an appropriate connector or duct tape to attach the bathroom fan duct to the vent. Make sure the connection is tight, secure, and well-insulated to prevent any air leaks or moisture buildup.
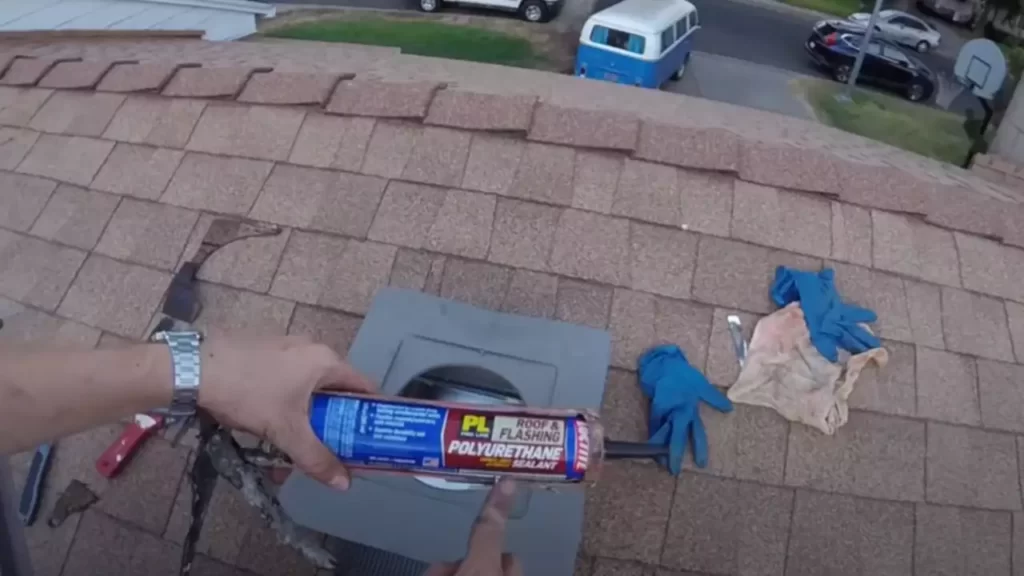
Step 6: Sealing and weatherproofing the installation
Lastly, it’s essential to seal and weatherproof the roof vent installation to protect your home from potential leaks. Apply roofing caulk around the edge of the vent where it meets the roof, ensuring an airtight seal. This will prevent any water infiltration during rain or storms. Additionally, inspect the area around the vent and use roofing cement or additional caulk to fill any gaps or cracks that may compromise the installation’s integrity.
By following these steps, you can confidently install a roof vent for your bathroom fan and ensure efficient ventilation and moisture control in your bathroom. Remember to adhere to all safety guidelines and manufacturer’s instructions for a successful and long-lasting installation.
Tips For A Successful Installation
Introductory Paragraph:
Installing a roof vent for your bathroom fan is an essential task to ensure proper ventilation and prevent moisture buildup. However, a successful installation requires careful attention to detail and some expert tips. In this article, we will provide you with three important tips to ensure a successful roof vent installation. By following these tips, you can rest assured that your bathroom fan will effectively exhaust the humid air and contribute to a healthier indoor environment.
Tip 1: Ensuring proper roof slope for water runoff
One crucial factor to consider when installing a roof vent for your bathroom fan is the slope of your roof. A sufficiently sloped roof can effectively divert water away from the vent, preventing pooling and potential leaks. Checking the slope of your roof can be easily done by using a level and measuring the rise over a length of twelve inches. For the best results, ensure that your roof has a minimum slope of 3:12. If the slope is less than this, consider consulting a professional to explore alternative venting options that will accommodate your roof’s specific characteristics.
Tip 2: Using a professional-grade roof sealant
When installing a roof vent, it is vital to establish a watertight seal around the vent to prevent any potential leaks. To achieve this, it is highly recommended to use a professional-grade roof sealant. These sealants are specifically designed to withstand the harsh weather conditions and provide long-lasting protection against water penetration. Before applying the sealant, make sure to clean the surface thoroughly and remove any dirt or debris that may compromise the adhesion. Apply the sealant generously around the base of the vent, ensuring complete coverage. This small step can go a long way in preventing future roof leaks and protecting your bathroom fan.
Tip 3: Checking for any existing roof leaks before installation
Prior to installing the roof vent, it is crucial to inspect your roof for any existing leaks. This step is necessary to address any potential issues and safeguard the integrity of your bathroom fan installation. Inspect your attic for signs of water damage, such as stains or mold growth, which may indicate an existing roof leak. Additionally, perform a visual inspection of your roof from the exterior, paying close attention to damaged or missing shingles. If you detect any signs of a leak, it is advisable to rectify the problem before proceeding with the installation. Addressing these issues beforehand will help ensure a successful installation and prevent costly repairs down the line.
By following these three essential tips, you can confidently install a roof vent for your bathroom fan and enjoy the benefits of improved ventilation and moisture control. Remember to check your roof slope, use a high-quality sealant, and address any existing roof leaks before proceeding with the installation. With these precautions in place, you can have peace of mind knowing that your bathroom fan will operate efficiently and effectively, contributing to a healthier and more comfortable indoor environment.
Common Mistakes To Avoid
Installing a roof vent for your bathroom fan is a crucial step in ensuring proper ventilation and preventing moisture build-up. However, many homeowners make some common mistakes during installation that can lead to leaks, inefficiency, and other issues.
Mistake 1: Installing the Roof Vent in a Low-Lying Area
One of the most common mistakes when installing a roof vent for a bathroom fan is placing it in a low-lying area. This can lead to water pooling around the vent, increasing the risk of leaks and damage to your roof.
To avoid this mistake, ensure that the roof vent is installed in an area with good drainage. Choose a location that is on a higher plane than the surrounding roof surface to allow water to flow away from the vent. This will help prevent water intrusion and prolong the lifespan of your roof vent.
Mistake 2: Not Properly Sealing the Vent Flashing
Properly sealing the vent flashing is crucial for preventing water leaks around the roof vent. Failing to seal the flashing properly can allow water to seep into your home, causing damage to your ceiling, walls, and even the structure of your house.
When installing the roof vent, make sure to use a high-quality roof sealant to create a watertight seal around the flashing. Apply the sealant generously and ensure it adheres to the roof surface and the vent flashing. This will help maintain the integrity of your roof and protect against water infiltration.
Mistake 3: Using the Wrong Size or Type of Roof Vent
Using the wrong size or type of roof vent can significantly impact its performance and efficiency. A vent that is too small may not provide adequate airflow, leading to poor bathroom ventilation and potential moisture issues. On the other hand, a vent that is too large can create excessive drafts and noise.
Before purchasing a roof vent, carefully measure the diameter and height of your bathroom fan duct to ensure you choose a vent that matches the specifications. Additionally, consider the type of roof vent that is suitable for your specific roof system, such as a ridge vent or a static vent. Consulting with a professional or doing thorough research can help you select the right vent for optimal performance.
By avoiding these common mistakes, you can ensure a proper installation of your roof vent for the bathroom fan, promoting effective ventilation and preventing potential issues down the line. Remember to assess your roof’s condition, take measurements accurately, and seal the vent flashing properly to guarantee a leak-free and efficient ventilation system.
Troubleshooting And Maintenance
Installing a roof vent for your bathroom fan is a great way to improve ventilation and eliminate excess moisture in your bathroom. However, like any installation, it’s not uncommon to encounter some issues or require regular maintenance to ensure optimal airflow and performance. In this section, we will discuss common troubleshooting tips for roof vent installations and provide guidance on regular maintenance practices.
Troubleshooting common issues with roof vent installations
While installing a roof vent for your bathroom fan can greatly improve ventilation, there are a few common issues that you may encounter during the installation process. By troubleshooting these issues, you can ensure that your roof vent is functioning effectively. Here are some common problems you may face:
| Problem | Possible Solution |
|---|---|
| Leakage around the vent | Tightly seal the vent to prevent water entry. Additionally, check for any cracks or damage to the vent pipe and repair or replace as necessary. |
| Inadequate airflow | Check for obstructions in the vent pipe, such as debris or bird nests, and remove them. Ensure that the pipe is correctly connected to the fan and straight for efficient airflow. |
| Noise from the vent | Inspect the vent opening for any loose or damaged parts and tighten or replace them accordingly. Consider using noise-reducing materials, such as insulated ductwork, to minimize noise further. |
Regular maintenance to ensure optimal airflow and performance
For your roof vent to function at its best, regular maintenance is crucial. By incorporating these maintenance practices into your routine, you can ensure optimal airflow and performance:
- Clean the vent periodically: Remove any debris, dust, or accumulated dirt from the vent opening to maintain proper airflow. Use a soft cloth or brush to gently clean the vent.
- Inspect for damage: Regularly check the vent pipe and surrounding areas for any signs of damage, such as cracks or loose fittings. Repair or replace any damaged components promptly.
- Monitor airflow: Pay attention to the airflow coming from the vent during operation. If you notice a significant decrease in airflow, it may indicate a blockage or obstruction that needs to be addressed promptly.
- Replace filters: If your bathroom fan has a filter, it’s important to replace it according to the manufacturer’s recommendations. Dirty or clogged filters can hinder airflow and reduce the fan’s effectiveness.
- Test the fan: Periodically test the fan to ensure it is operating smoothly. Listen for any unusual noises or vibrations that may indicate a problem.
By following these troubleshooting and maintenance tips, you can tackle any issues that arise during the installation process and ensure that your roof vent provides efficient ventilation for your bathroom. Regular upkeep will help prolong the lifespan of your roof vent, ensuring optimal airflow and performance for years to come.
Frequently Asked Questions
Can You Vent A Bathroom Fan Through A Roof Vent?
Yes, it is possible to vent a bathroom fan through a roof vent. This allows the fan to expel moist air and odors outside effectively. Proper installation is important to ensure a leak-free connection and proper ventilation.
What Is The Proper Way To Vent A Bathroom Fan?
To vent a bathroom fan properly, follow these steps: 1. Install the fan in the ceiling or wall near the shower or bathtub. 2. Connect the fan to ductwork that leads outdoors to expel moist air and odors. 3. Use a vent cap to prevent weather and pests from entering the duct.
4. Ensure the duct has a downward slope to allow proper drainage. 5. Regularly clean the fan and duct to maintain efficiency.
How Much Does It Cost To Vent A Bathroom Fan Through The Roof?
Venting a bathroom fan through the roof can cost around $300 to $600. Prices vary depending on factors like roof height, materials, and labor involved. It’s important to consult with a professional for an accurate estimate.
How Do You Vent A Bathroom Fan Through A Flat Roof?
To vent a bathroom fan through a flat roof, follow these steps: 1. Choose a location on the roof for the vent. 2. Use a reciprocating saw to cut a hole in the roof. 3. Install a roof vent flashing around the hole.
4. Connect the ductwork from the bathroom fan to the vent. 5. Ensure the ductwork is properly sealed for optimal ventilation.
Conclusion
Installing a roof vent for your bathroom fan is a crucial step to maintain proper ventilation and prevent moisture buildup. By following the step-by-step guide provided in this blog post, you can easily install a roof vent and ensure a healthier and more comfortable environment in your bathroom.
Remember to take safety precautions and consult a professional if needed. With the right installation, you can enjoy the benefits of a well-ventilated bathroom for years to come.