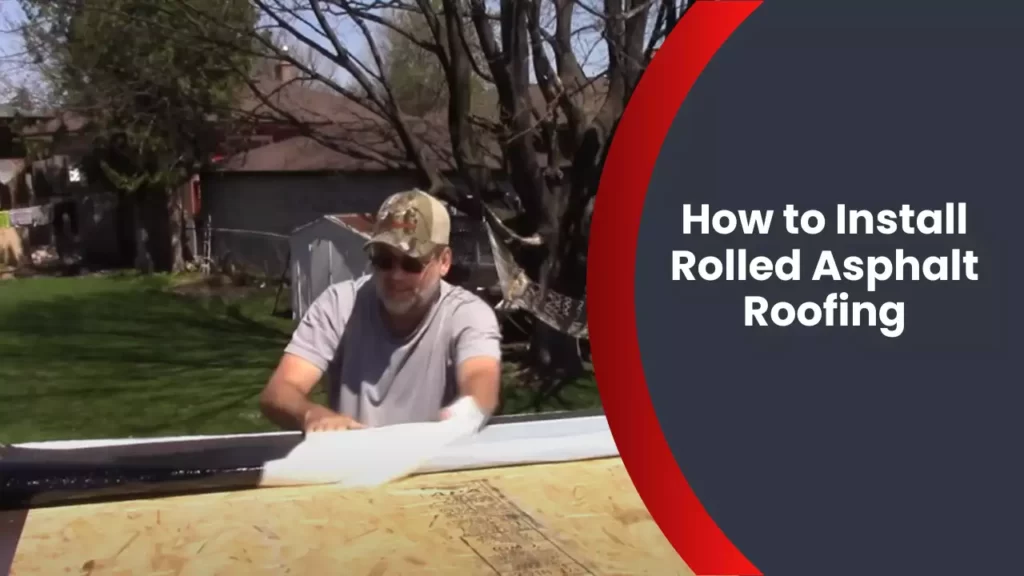
To install rolled asphalt roofing, start by cleaning and prepping the roof surface. Then, roll out the asphalt sheets and nail them in place, ensuring they overlap correctly.
Finally, apply roofing cement to seal the edges and maintain weatherproofing. Installing rolled asphalt roofing requires careful preparation and attention to detail. In this guide, we will walk you through the essential steps to install rolled asphalt roofing effectively. These steps include cleaning and prepping the roof, rolling out the asphalt sheets, properly overlapping them, nailing them in place, and sealing the edges with roofing cement.
By following these instructions, you can ensure a durable and weatherproof asphalt roof. So, let’s get started with the installation process.
Assessing The Roof Condition
Checking for existing damage or leaks
Before you begin the installation process of rolled asphalt roofing, it is crucial to assess the roof condition to ensure a smooth and successful project. Start by checking for any existing damage or leaks that might compromise the integrity of the new roofing system. Look out for signs such as water stains on the ceiling or walls, peeling paint, or damp areas. Inspect the roof surface for missing or loose shingles, cracked flashing, or damaged gutters.
If you discover any issues during this assessment, it is essential to address them before proceeding with the installation. Repairing any existing damage or leaks will help prevent further deterioration and ensure a solid foundation for your new rolled asphalt roofing.
Evaluating the roof structure and substrate
Once you have assessed the existing damage or leaks, the next step is to evaluate the roof structure and substrate. This evaluation will determine the suitability of the current roof for rolled asphalt installation and identify any potential issues that need to be addressed.
Check the overall condition of the roof structure, including the decking and support beams. Look for signs of rot, sagging, or other structural weaknesses that might compromise the durability and stability of the new roofing system. Ensure that the roof structure is strong enough to support the weight of the rolled asphalt materials and withstand the elements.
In addition to the roof structure, evaluate the substrate, which acts as the base for the roofing material. Ensure that the substrate is clean, smooth, and free from any debris or loose materials. A solid and well-prepared substrate will provide a stable surface for the rolled asphalt roofing and ensure proper adhesion.
Gathering The Necessary Tools And Materials
Before you can begin installing rolled asphalt roofing, it’s essential to gather all the necessary tools and materials. This preparation phase is crucial to ensure a smooth and efficient installation process. In this section, we’ll discuss the tools needed for the installation process, the types of rolled asphalt roofing materials to consider, and how to purchase the required supplies.
List of tools needed for the installation process
To install rolled asphalt roofing, you’ll need a specific set of tools that will assist you in the installation process. Here is a comprehensive list of tools you should have on hand:
- Roofing shovel
- Roofing hammer
- Nail gun
- Tape measure
- Razor blade or utility knife
- Straightedge
- Metal snips
- Roofing brush
- Safety goggles
- Roofing gloves
- Ladder or scaffolding
Types of rolled asphalt roofing materials to consider
When it comes to rolled asphalt roofing, there are various materials available in the market. Each material has its own unique features and benefits. It’s crucial to understand your options and choose the one that best suits your needs. Here are some common types of rolled asphalt roofing materials:
- 1. Three-tab asphalt shingles: These are the most common and cost-effective option for residential roofing. They are lightweight, durable, and available in a wide range of colors.
- 2. Architectural asphalt shingles: These are thicker and more dimensional than three-tab shingles, providing a more aesthetically pleasing look. They are also highly durable and come in a variety of styles and colors.
- 3. Rolled asphalt roofing: This type of roofing material comes in large rolls and is typically used for flat or low-pitched roofs. It is easy to install and provides excellent waterproofing.
- 4. Self-adhesive rolled asphalt roofing: This type of roofing material has a sticky backing, making it easy to install without using additional adhesives. It is commonly used for DIY projects due to its simplicity.
Purchasing the required supplies
Now that you know the tools and materials needed for installing rolled asphalt roofing, it’s time to purchase the necessary supplies. To ensure a successful installation, you should carefully plan your purchase and ensure you have all the required items. Here are a few tips for purchasing the required supplies:
- Measure the size of your roof: Accurately measure the dimensions of your roof to determine how much rolled asphalt roofing material you’ll need.
- Consider the quality: Prioritize high-quality materials to ensure a long-lasting and reliable roofing system.
- Compare prices: Shop around and compare prices from different suppliers to get the best deal for your budget.
- Check for warranties: Look for warranties provided by the manufacturer to safeguard your investment.
- Order extra materials: It’s always a good idea to order a bit more material than you think you’ll need to account for any mistakes or repairs in the future.
By following these guidelines, you’ll be well-prepared to gather the necessary tools and materials for a successful rolled asphalt roofing installation. Remember, proper preparation is key to achieving a durable and visually appealing roof that will protect your home for years to come.

Preparing The Surface
Preparing the Surface:
Before installing rolled asphalt roofing, it is crucial to properly prepare the surface to ensure a durable and long-lasting roof. This involves cleaning the roof surface, removing old roofing materials, and repairing any damaged areas. By following these steps, you can create a solid foundation for a successful roofing installation.
Cleaning the roof surface:
To start, thoroughly clean the roof surface to remove any dirt, debris, or loose materials that may interfere with the bonding of the asphalt. A clean surface ensures proper adhesion and reduces the risk of future leaks or damage. Here are some steps you can follow:
- Begin by using a broom or brush to sweep away loose debris such as leaves, twigs, and dust.
- Use a pressure washer to remove stubborn dirt and grime. Set the pressure at an appropriate level to avoid damaging the roof surface.
- Pay special attention to areas prone to gathering debris, such as roof valleys and gutters.
- Once the roof surface is clean, allow it to dry completely before proceeding to the next step.
Removing old roofing materials:
If there are existing layers of roofing materials on the surface, they need to be removed to create a smooth base for the rolled asphalt. Here’s how you can safely remove old roofing materials:
- Start by wearing appropriate safety gear, including gloves and goggles, to protect yourself from sharp objects and debris.
- Use a pry bar or roofing shovel to carefully lift and remove the old shingles, starting from the top and working your way down.
- Dispose of the old roofing materials in accordance with local regulations.
- Inspect the roof deck for any signs of damage or rot caused by the old roofing, and make repairs as needed.
Repairing any damaged areas:
Prior to installing the rolled asphalt, it’s essential to address any existing damage on the roof surface. Follow these steps to repair any damaged areas:
- Identify any cracked or missing shingles, damaged flashing, or other signs of wear and tear.
- Replace or repair any damaged shingles, ensuring they are properly secured to the roof deck.
- Inspect and repair any flashing around chimneys, vents, or other roof penetrations to prevent water infiltration.
- If there are any areas with rotted wood, replace it with new, sturdy decking material.
- Ensure that all repairs are completed and the roof surface is in optimal condition before proceeding with the installation.
Applying Underlayment
Choosing the Appropriate Underlayment
Before installing rolled asphalt roofing, it’s crucial to choose the right underlayment. The underlayment acts as an additional layer of protection against moisture, ensuring your roof remains watertight. When selecting the underlayment for your project, there are a few factors to consider:
- Weather conditions: Depending on the climate in your area, you might need an underlayment that offers increased resistance to extreme temperatures or UV radiation.
- Roof pitch: The steepness of your roof will influence the type of underlayment suitable for installation. For low-slope roofs, a self-adhering underlayment is recommended, while steep roofs require a mechanically fastened underlayment.
- Building codes: Check your local building codes to ensure compliance with any specific underlayment regulations or recommendations.
Installing the Underlayment for Added Protection
Once you’ve chosen the appropriate underlayment, it’s time to install it. Follow these steps for a successful underlayment installation:
- Clean the roof: Remove any debris, dirt, or loose materials from the roof surface to ensure proper adhesion of the underlayment.
- Start at the bottom: Begin installing the underlayment at the lowest point of the roof, such as the eaves or edges.
- Overlap properly: Each row of underlayment should overlap the previous row by at least 6 inches. This overlap ensures maximum protection against water infiltration.
- Secure with fasteners: Depending on the type of underlayment chosen, fasten it to the roof using appropriate fasteners, such as nails or staples. Ensure the fasteners penetrate the roof decking securely.
- Seal the seams: Use an appropriate sealant or roofing cement to seal the seams between each row of underlayment. This prevents water from seeping through the gaps.
Installing the underlayment for your rolled asphalt roofing not only adds an extra layer of protection but also serves as a foundation for the asphalt shingles. By selecting the right underlayment and following proper installation techniques, you can ensure the longevity and durability of your roofing system.

Installing Rolled Asphalt Roofing
Installing rolled asphalt roofing is an essential part of ensuring the durability and protection of your roof. Rolled asphalt roofing is a popular choice due to its affordability and easy installation process. In this section, we will walk you through the key steps involved in installing rolled asphalt roofing, including unrolling and positioning the first layer, nailing down the roofing material, and overlapping subsequent layers for proper sealing.
Unrolling and Positioning the First Layer
Before starting the installation, make sure you have all the necessary tools and materials, including rolled asphalt roofing, roofing nails, a hammer, a utility knife, and a measuring tape. Begin by unrolling the first layer of rolled asphalt roofing along the bottom edge of your roof. Make sure to position it with a slight overhang to allow for proper water drainage. Secure the edges of the roofing material in place using roofing nails, placing them approximately six inches apart.
Nailing Down the Roofing Material
Once the first layer is secured, continue laying and unrolling the rolls of asphalt roofing on top of the previous layer. Make sure to overlap each subsequent layer by at least two inches to ensure proper sealing. As you unroll each roll, use a measuring tape to ensure a consistent overlap distance. Secure each layer in place by nailing down the roofing material using roofing nails spaced six inches apart along the edges and twelve inches apart along the center of the rolls.
Overlapping Subsequent Layers for Proper Sealing
Overlapping the subsequent layers is crucial for preventing water penetration and ensuring a tight seal. As you position each subsequent layer, align it with the previous layer’s overlapping section. Carefully roll out the roofing material, making sure it covers the overlapping area entirely. Secure the edges with roofing nails, following the same spacing guidelines previously mentioned. Repeat this process for each additional layer you need to install to achieve the desired thickness and protection for your roof.
Remember, proper installation is key to the longevity and effectiveness of your rolled asphalt roofing. By following the steps of unrolling and positioning the first layer, nailing down the roofing material, and overlapping subsequent layers for proper sealing, you can ensure a sturdy and watertight roof that will protect your home for years to come.
Sealing And Finishing Touches
Once you have completed the main installation of rolled asphalt roofing, it’s time to focus on the sealing and finishing touches to ensure a durable and watertight roof. Paying attention to details in this stage will ensure the longevity and performance of your roof. In this section, we will discuss applying adhesive or sealant at seams and edges, installing flashing and ventilation components, and inspecting the finished installation for any necessary adjustments.
Applying adhesive or sealant at seams and edges
To create a strong seal between the rolls of asphalt roofing, it is essential to apply adhesive or sealant at the seams and edges. This will prevent any water from penetrating underneath the roofing material. Here’s a step-by-step guide to help you with this process:
- Clean the seams and edges of any dirt, debris, or loose roofing material.
- Apply a suitable roofing adhesive or sealant along the length of the seams.
- Smoothly press down the overlapping rolls of asphalt roofing onto the adhesive or sealant.
- Use a roller or hand pressure to ensure a tight bond between the layers.
- Repeat the process for all seams and edges.
Remember, a proper and secure seal is crucial to the overall integrity of your roof, so take your time and ensure each joint is thoroughly sealed.
Installing flashing and ventilation components
Flashing and ventilation components play a vital role in maintaining the effectiveness of your roof. They help prevent water infiltration and promote proper air circulation, which is essential for the longevity of the roofing system. Here are the steps to install flashing and ventilation components:
- Cut the flashing material according to the required size and shape.
- Position the flashing in the desired location, ensuring it overlaps the roofing material.
- Secure the flashing using appropriate roofing nails or screws.
- Apply roofing sealant around the edges of the flashing to prevent water leakage.
- Install ventilation components as per the manufacturer’s instructions, ensuring proper airflow.
Accurately installing flashing and ventilation will enhance the performance of your rolled asphalt roofing and protect your home or building from potential damage.
Inspecting the finished installation for any necessary adjustments
Once you have completed the sealing and installation of flashing and ventilation components, it is essential to thoroughly inspect the finished installation for any necessary adjustments. This inspection will help identify any potential issues that may require immediate attention. Here’s what you should check:
- Ensure all seams and edges are securely sealed, with no gaps or openings.
- Check the flashing for any signs of damage or improper installation.
- Verify that ventilation components are functioning correctly and allowing proper airflow.
If any issues or deficiencies are identified during the inspection, promptly make the necessary adjustments or seek professional assistance if needed. A thorough inspection will give you confidence in the durability and reliability of your rolled asphalt roofing.
By giving attention to sealing and finishing touches in your rolled asphalt roofing installation, you can ensure a watertight and long-lasting roof for your home or building. Safeguarding the seams and edges, installing proper flashing and ventilation components, and conducting a thorough inspection will contribute to the overall functionality and longevity of your roof.
Regular Inspections And Cleaning
Setting a schedule for roof maintenance
Regular inspections and cleaning are essential for maintaining the longevity and performance of your rolled asphalt roofing. By setting a schedule for roof maintenance, you can stay on top of any potential issues and prevent costly repairs down the road. It is recommended to check your roof at least twice a year, in the spring and fall seasons, to ensure it’s in optimal condition.
During these inspections, you should pay close attention to any visible signs of damage or wear. Look out for cracked or missing shingles, loose flashing, or any areas where the roofing material may be lifting or deteriorating. By catching these issues early on, you can address them promptly and minimize the risk of further damage.
Clearing debris and maintaining gutters
One of the primary reasons for regular roof inspections is to clear away any debris that may have accumulated. Fallen leaves, branches, and other debris can block drainage pathways and cause water to pool on your roof, leading to leaks and water damage. To avoid these issues, it’s crucial to clear away any debris from your roof on a regular basis.
Additionally, maintaining your gutters is paramount for proper drainage and preventing water from seeping into your home. Clogged gutters can cause water to overflow, backing up onto your roof and potentially damaging the roofing material. Regularly clean your gutters and remove any leaves, twigs, or other debris to ensure water flows freely away from your roof.
Inspecting for any signs of damage or wear
Inspecting your rolled asphalt roofing for signs of damage or wear is a crucial part of roof maintenance. During your regular inspections, carefully examine each section of your roof. Check for any cracks, splits, or blisters in the roofing material, as these can indicate areas of weakness that may lead to leaks.
Pay attention to the state of the sealant around vents, skylights, and chimneys, as well as any exposed nails or screws. These areas are prone to wear and may require resealing or fastening to maintain their effectiveness. Ensure that all flashing is securely in place and intact, as this helps to prevent water from infiltrating your roof.
By consistently inspecting for any signs of damage or wear, you can catch issues early and arrange for necessary repairs in a timely manner. Promptly addressing any problems will help extend the lifespan of your rolled asphalt roofing and maintain its protective capabilities.
In conclusion, regular inspections and cleaning are vital for the upkeep of your rolled asphalt roofing. By setting a schedule for roof maintenance, clearing debris and maintaining gutters, and inspecting for any signs of damage or wear, you can ensure the longevity and performance of your roof. Stay proactive in caring for your roof, and it will continue to provide you with reliable protection for years to come.
Addressing Repairs And Issues
Handling minor repairs and patching
If you notice minor issues or damages on your rolled asphalt roofing, it’s important to address them promptly. By handling these repairs and patching them up, you can prevent further damage and extend the lifespan of your roof. The good news is that minor repairs and patching can often be done by homeowners themselves. Here are a few steps to help you tackle these minor repairs:
- Inspect the damage: Carefully examine the affected area to determine the extent of the damage. Look for signs of cracks, leaks, or missing shingles.
- Materials needed: Gather the necessary materials and tools for the repair. This may include roofing cement, a trowel, roofing nails, and replacement shingles.
- Clean the area: Before starting the repair, make sure to remove any debris or loose materials from the damaged area. This will ensure proper adhesion of the patch.
- Apply roofing cement: Using a trowel, spread the roofing cement over the damaged area. Make sure to apply a generous amount, covering the entire damaged portion.
- Secure the patch: Place a new shingle or patch over the roofing cement, pressing it firmly into place. Use roofing nails to secure the patch and ensure it stays in position.
- Smooth out the surface: Smooth out any excess roofing cement around the patch, creating a seamless finish. This will help prevent any water infiltration.
Remember, minor repairs and patching are typically temporary solutions. While they can help address immediate issues, it’s important to monitor the area and consider more extensive repairs if the damage persists or worsens.
Dealing with larger repairs or extensive damage
In some cases, you may encounter larger repairs or extensive damage on your rolled asphalt roofing. These situations may require more time, effort, and expertise to address effectively. Here are a few steps to help you deal with larger repairs or extensive damage:
- Evaluate the damage: Assess the extent of the damage and determine whether it can be repaired or if a partial or complete roof replacement is necessary.
- Consult a professional: Large repairs or extensive damage often require the expertise of roofing professionals. Reach out to a trusted roofing contractor to get a thorough inspection and professional advice.
- Obtain necessary permits: Depending on your location and the scope of the repair, you may need to obtain permits before starting any major work. Check with your local building department to ensure compliance.
- Consider roof replacement: If the damage is significant or if your roof is nearing the end of its lifespan, it may be more cost-effective in the long run to opt for a complete roof replacement rather than extensive repairs.
Keep in mind that addressing larger repairs or extensive damage on your rolled asphalt roofing is crucial to maintain the structural integrity of your home. Having a professional assess the situation and provide the necessary repairs or replacement ensures a long-lasting and reliable roof for years to come.
Knowing when to seek professional help
While some minor repairs and patching can be done by homeowners, there are instances where it’s best to seek professional help. Here are a few signs that indicate it’s time to call in the experts:
- Extensive damage: If the damage to your rolled asphalt roofing is extensive, involving large areas or multiple sections, it’s wise to get professional assistance. They have the expertise and equipment to handle such situations effectively.
- Structural issues: If you notice any structural issues, such as sagging or weakened sections, it’s crucial to have a professional assess the situation. These issues can pose significant risks and require immediate attention.
- Warranty concerns: If your rolled asphalt roofing is still under warranty, it’s important to consult the manufacturer or a professional contractor for repairs. Attempting DIY repairs may void the warranty.
Remember, safety should always be a top priority. If you encounter any roofing issues that are beyond your comfort level or expertise, it’s best to leave it to the professionals. They will ensure the job is done correctly and safely, giving you peace of mind and a well-maintained roof.
Increasing Longevity And Performance
When it comes to installing rolled asphalt roofing, it’s not just about getting the job done; it’s about ensuring the longevity and performance of your roof. By implementing a few key measures, you can enhance the lifespan of your asphalt roof while maximizing its ability to withstand the elements. Let’s look at some essential steps you can take to increase the longevity and performance of your rolled asphalt roofing.
Applying Reflective Coatings to Reduce Heat Absorption
One effective way to increase the longevity and performance of your rolled asphalt roof is by applying reflective coatings. These coatings can significantly reduce heat absorption from the sun, helping to keep your roof and the underlying structure cooler. By minimizing heat retention, you can prevent premature aging of the roofing material and reduce energy costs associated with cooling your home.
Ensuring Proper Attic Ventilation
Another crucial factor in extending the lifespan of your rolled asphalt roof is proper attic ventilation. Without adequate ventilation, heat and moisture can build up in the attic, causing damage to both the roof and the structure below. By ensuring proper airflow through your attic, you can reduce the risk of moisture-related issues such as rot, mold, and mildew, which can compromise the integrity of your roof.
Implementing Preventive Measures to Extend the Roof’s Lifespan
Prevention is key when it comes to extending the lifespan of your rolled asphalt roof. By implementing a few preventive measures, you can proactively address potential issues and minimize the risk of costly repairs or premature replacement. These measures include:
- Regular roof inspections to identify and address any signs of damage or deterioration
- Clearing debris from the roof surface to prevent clogging of gutters and drainage systems
- Trimming overhanging trees to prevent physical damage and minimize the risk of falling branches
- Repairing any small leaks or cracks promptly to prevent water intrusion and further damage
- Applying a sealant to protect against moisture penetration and enhance the roof’s resistance to weathering
By being proactive and implementing these preventive measures, you can significantly extend the lifespan of your asphalt roof, ensuring it performs optimally for years to come.
Frequently Asked Questions
What Is The Proper Way To Install Rolled Roofing?
To properly install rolled roofing, follow these steps: 1. Prepare the surface by cleaning and removing any debris. 2. Apply a layer of roofing cement or adhesive to the surface. 3. Unroll the roofing material and align it with the edge of the roof.
4. Secure the roofing material using nails or staples, making sure to overlap the seams. 5. Finally, apply a coat of roofing cement to seal the edges and ensure a waterproof seal.
Do You Glue Down Roll Roofing?
No, roll roofing should not be glued down. It is designed to be applied using nails or adhesive strips. Gluing it down can cause improper adhesion and may affect its durability. Always follow the manufacturer’s instructions for proper installation.
Do You Need Tar For Rolled Roofing?
No, tar is not required for rolled roofing. Rolled roofing is typically made of asphalt and comes with a self-adhesive backing, eliminating the need for additional tar application.
What Adhesive Is Used For Rolled Roofing?
Rolled roofing typically requires a roofing adhesive for installation. The specific type of adhesive used may vary, but it is commonly a roofing cement or asphalt-based adhesive. It is important to choose an adhesive that is compatible with the roofing material to ensure proper adhesion and durability.
Conclusion
Installing rolled asphalt roofing is a cost-effective and durable solution for protecting your home. By following the step-by-step guide provided, you can confidently undertake this project with the right tools and knowledge. Remember to prepare the surface, lay the asphalt properly, and ensure proper ventilation.
Regular maintenance and inspections will help extend the lifespan of your new roof. Don’t hesitate to seek professional assistance if needed. Get ready to enjoy the benefits of a secure and weather-resistant roof!