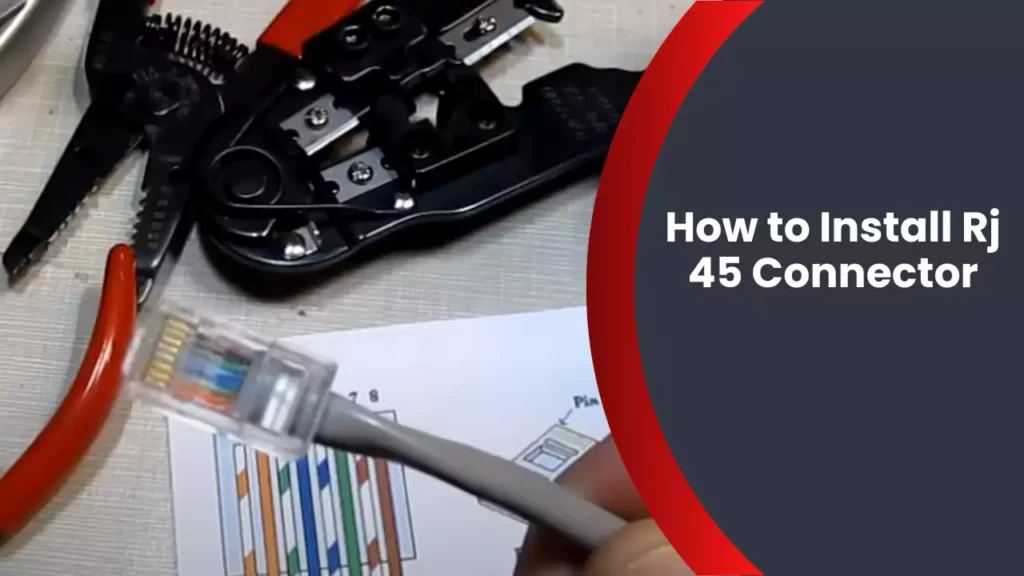
To install an RJ 45 connector, strip the outer insulation of the Ethernet cable, separate the twisted pairs, trim them to the appropriate length, insert them into the appropriate slots in the connector, and crimp it to secure the wires. It is a simple, straightforward process that requires basic tools and a little patience.
Introducing Rj 45 connectors, the standard for Ethernet networks, and understanding how to install them properly can save you time and ensure a reliable connection. This article will guide you through the step-by-step process of installing an Rj 45 connector, helping you set up your network with ease.
Following these instructions will allow you to successfully terminate your Ethernet cables and plug them into network devices, ensuring efficient data transmission. With a few basic tools and the right know-how, you’ll be able to install Rj 45 connectors like a professional.
Understanding Rj 45 Connectors And Their Importance
When it comes to network installations, one of the most crucial components is the RJ-45 connector. Whether you are setting up a small home network or a large enterprise infrastructure, understanding the importance of RJ-45 connectors is essential for seamless data transfer. In this section, we will explore what these connectors are and why they play a significant role in network installations.
What are RJ-45 Connectors and Why are They Important?
RJ-45 connectors, also known as Registered Jack-45 connectors, are standardized connectors used for Ethernet networking. These connectors have eight pins and are commonly used to terminate twisted-pair cables, such as Cat5e or Cat6, which are the foundation of most wired networks.
The importance of RJ-45 connectors lies in their ability to provide a reliable and secure connection between Ethernet devices. They ensure proper transmission of data, allowing for seamless communication within a network. These connectors establish a physical link between devices, such as computers, routers, switches, and network servers, enabling the transfer of data packets.
Exploring the Benefits of Using RJ-45 Connectors in Network Installations
Using RJ-45 connectors in network installations offers several benefits that contribute to a robust and efficient network infrastructure. Let’s take a closer look at some of these advantages:
1. Compatibility:
RJ-45 connectors are widely compatible with various Ethernet standards, making them suitable for almost all network devices, including computers, printers, and VoIP phones. This universality ensures seamless integration and easy connectivity across different devices within a network.
2. Reliability:
Thanks to their standardized design, RJ-45 connectors provide reliable connections that minimize the risk of data loss or network disruptions. The firm connection they establish guarantees consistent data transfer, reducing the chances of signal degradation or interference.
3. Speed and Performance:
RJ-45 connectors are capable of supporting high-speed data transmission rates, making them ideal for modern networks that require fast and efficient communication. With the right cables and connectors, network speeds of up to 10 Gigabit per second (Gbps) can be achieved, ensuring smooth data transfer and reduced latency.
4. Ease of Installation:
Installing RJ-45 connectors is relatively straightforward, even for those with limited technical expertise. By following a few simple steps and using basic tools like crimpers, connectors can be securely attached to cables, allowing for quick deployment and hassle-free maintenance.
5. Versatility:
RJ-45 connectors can be used in various network setups, including residential, commercial, and industrial environments. Whether you’re setting up a small home network or a large-scale enterprise infrastructure, these connectors can accommodate your needs.
In conclusion, understanding RJ-45 connectors and their importance is crucial for anyone involved in network installations. By using these standardized connectors, you can ensure a reliable, high-speed, and efficient network that meets the demands of modern communication.
Gathering The Required Tools And Equipment
Before you begin the process of installing RJ45 connectors, it’s important to gather all the necessary tools and equipment. This will ensure that you have everything you need to complete the installation efficiently and effectively. In this section, we will discuss the essential tools and equipment needed for installing RJ45 connectors, as well as provide an overview of the different types of connectors available in the market.
Essential tools and equipment needed for installing RJ45 connectors:
- Crimping Tool: The crimping tool is a must-have when it comes to installing RJ45 connectors. This tool is used to securely attach the connector to the cable by crimping the metal contacts onto the wires. Without a crimping tool, it would be nearly impossible to properly install the connector.
- RJ45 Connectors: Of course, you’ll also need the RJ45 connectors themselves. These are small plastic or metal pieces that have slots for the wires to be inserted. The quality of the connectors is crucial for a reliable and durable connection, so make sure to choose high-quality connectors for your installation.
- Stripping Tool: To prepare the cable for installation, you’ll need a stripping tool. This tool is used to remove the outer insulation of the cable to expose the individual wires. This allows for easy insertion into the connector and ensures a solid connection.
- Cable Cutter: A cable cutter is essential for trimming the cable to the desired length. It ensures a clean and precise cut, preventing any potential damage to the cable or wires.
- Wire Tester: Once the installation is complete, a wire tester is used to verify the connectivity of the installed RJ45 connectors. This tool checks for continuity and may also provide information about any wiring errors that need to be corrected.
Understanding the different types of RJ45 connectors available in the market:
When it comes to RJ45 connectors, there are a few different types available in the market. It’s important to have a basic understanding of these types in order to select the most suitable connector for your specific needs. Here are the main types:
| Type | Description |
|---|---|
| CAT5e | This is the most commonly used RJ45 connector. It supports data transfer speeds of up to 1000 Mbps and is suitable for most Ethernet applications. |
| CAT6 | The CAT6 connector offers improved performance over CAT5e, with support for data transfer speeds of up to 10 Gbps. It is commonly used in high-speed networking applications. |
| CAT6a | This is an enhanced version of the CAT6 connector, capable of supporting data transfer speeds of up to 10 Gbps over longer distances. It is commonly used in professional networking environments. |
| CAT7 | The CAT7 connector provides even higher performance than CAT6a, with support for data transfer speeds of up to 40 Gbps. It is typically used in data centers and other demanding networking environments. |
By understanding the different types of RJ45 connectors, you can choose the most appropriate connector for your specific networking requirements. This will ensure optimal performance and reliability in your installations.
Now that you know the essential tools and equipment needed for installing RJ45 connectors and have a better understanding of the different types available, you are ready to proceed with the installation process. In the next section, we will guide you through the step-by-step procedure of installing RJ45 connectors.
Step 1: Preparing The Ethernet Cable
One of the essential steps in installing an RJ 45 connector is preparing the Ethernet cable. Properly preparing the cable ensures a secure and reliable connection. This involves identifying the correct Ethernet cable for the connector installation and stripping and untwisting the cable wires properly. In this step-by-step guide, we will walk you through each of these processes to help you install your RJ 45 connector with ease.
Identifying the Correct Ethernet Cable
Before you begin the installation process, it is important to ensure that you have the correct Ethernet cable that matches the specifications of the RJ 45 connector. The two most commonly used Ethernet cables for connector installation are Cat5e and Cat6 cables.
To identify the correct cable, you can refer to the labeling on the cable itself or check the documentation provided by the manufacturer. Cat5e cables are capable of supporting speeds up to 1000Mbps, while Cat6 cables can handle speeds up to 10Gbps. Choosing the appropriate cable for your connector installation is crucial for achieving optimal performance.
Stripping and Untwisting the Cable Wires Properly
Once you have identified the correct Ethernet cable, the next step is to strip and untwist the cable wires properly. This ensures a clean and consistent connection between the cable and the RJ 45 connector.
To strip the cable, follow these steps:
- Use a cable stripper tool or a sharp knife to carefully cut through the outer insulation of the cable, ensuring not to damage the inner wires.
- Gently peel away the outer insulation to expose the inner wires.
- Arrange the wires in the correct order according to the TIA/EIA 568B wiring standard or the wiring standard specified by the manufacturer of the connector.
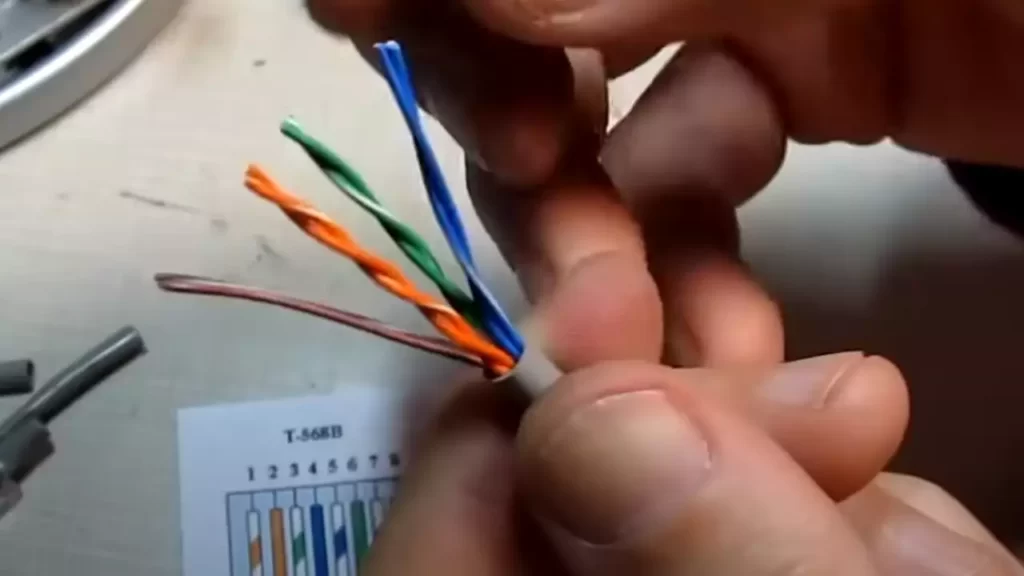
After stripping the cable, it is important to untwist the wire pairs without over-twisting or untwisting them excessively. Over-twisting or untwisting can lead to interference and signal loss. You can use your fingers or a suitable tool to untwist the pairs carefully, making sure to maintain the twist closer to the connector.
By following these steps, you will ensure that the Ethernet cable is properly prepared for the RJ 45 connector installation. This will result in a reliable and efficient connection, allowing you to enjoy uninterrupted network connectivity.
Step 2: Sorting And Arranging The Cable Wires
After preparing the RJ-45 connector by removing the outer insulation jacket, it’s time to sort and arrange the cable wires. This step is crucial for ensuring a proper and secure connection. Below, we will discuss the color codes and wire arrangement for RJ-45 connectors, as well as how to organize and align the cable wires in the correct sequence.
Understanding the Color Codes and Wire Arrangement for RJ-45 Connectors
Before starting the sorting and arranging process, it’s essential to have a clear understanding of the color codes and wire arrangement for RJ-45 connectors. These codes are standardized for proper network communication and are known as the TIA/EIA-568B color codes. The color codes consist of four pairs of wires, with each pair having a designated color and stripe pattern.
Here’s a table that provides an overview of the color codes:
| Wire Pair | Color Code |
|---|---|
| Pair 1 | White/Orange |
| Orange | |
| Pair 2 | White/Green |
| Green | |
| Pair 3 | White/Blue |
| Blue | |
| Pair 4 | White/Brown |
| Brown |
Keep these color codes in mind as we move on to organizing and aligning the cable wires.
Organizing and Aligning the Cable Wires in the Correct Sequence
To ensure a proper connection, it’s crucial to organize and align the cable wires in the correct sequence. The sequence follows the TIA/EIA-568B color codes discussed earlier. Here’s a step-by-step guide:
- Start by straightening the cable wires and arranging them in the correct order.
- Take the white/orange wire (Pair 1) and align it with the left-most pin of the RJ-45 connector.
- Next, place the orange wire (Pair 1) next to the white/orange wire.
- Moving on to Pair 2, align the white/green wire with the third pin of the connector, followed by the green wire next to it.
- For Pair 3, align the white/blue wire with the fifth pin of the connector and place the blue wire next to it.
- Finally, align the white/brown wire (Pair 4) with the seventh pin, and the brown wire next to it.
It’s essential to ensure that all wires reach the end of the connector and make good contact with the metal pins. You can use a crimping tool to secure the wires in place.
By following these steps, you’ll have successfully sorted and arranged the cable wires in the correct sequence for the RJ-45 connector.
With the wires organized and aligned properly, you’re now ready to move on to the next step in the installation process. Stay tuned for Step 3, where we will discuss securely crimping the connector and testing the connection.
Step 3: Trimming And Straightening The Cable Wires
Now that you have prepared the cable and crimped the RJ45 connector, it’s time to move on to the next crucial step: trimming and straightening the cable wires. This step ensures a clean and secure connection, allowing for optimal data transfer. In this section, we will discuss how to trim the excess wires and ensure the correct length for connection, as well as how to straighten the cable wires for easy insertion into the connector.
Trimming the Excess Wires and Ensuring the Correct Length for Connection
Trimming the excess wires is essential for achieving a neat and professional-looking Ethernet cable connection. It ensures that only the necessary length of wire is exposed, reducing the risk of tangling or damage. To properly trim the wires, follow these steps:
- Securely hold the cable close to the connector so that the wires are taut.
- Using a sharp pair of wire cutters, carefully trim the excess wires, making a clean cut.
- Ensure that approximately 0.5 inches of each wire is exposed, providing enough length for insertion into the connector.
Remember to double-check the length of the exposed wires before moving on to the next step. Having the correct length is crucial for achieving a reliable connection.
Straightening the Cable Wires for Easy Insertion into the Connector
Before inserting the cable wires into the RJ45 connector, it’s important to straighten them. This ensures that they easily slide into their respective slots, minimizing the risk of misalignment or damage. Here’s how you can straighten the cable wires:
- Hold the cable close to the cut end, allowing the wires to hang freely.
- Gently run your fingers along the length of the wires, straightening any kinks or bends.
- Continue straightening the wires until they are all aligned and parallel to each other.
Straightening the cable wires not only facilitates easier insertion but also helps maintain consistent signal performance. It promotes smooth data transmission, reducing the likelihood of interference or signal loss.
Congratulations! You have successfully trimmed and straightened the cable wires, preparing them for insertion into the RJ45 connector. In the next step, we will discuss how to carefully insert the wires into the connector slots, ensuring proper alignment and connection.
Step 4: Inserting The Cable Wires Into The Connector
After preparing the cable wires and stripping them to the proper length in Step 3, it is time to insert them into the RJ 45 connector. Properly inserting the cable wires is crucial for a secure and functional connection. Here’s a step-by-step guide to ensure a successful installation.
Properly inserting the cable wires into the RJ 45 Connector slots
Inserting the cable wires into the RJ 45 connector slots may seem intimidating at first, but with this guide, you’ll be able to do it like a pro. Follow these steps to ensure each wire is properly seated:
- Start by arranging the twisted pairs of wires according to the T568B standard. Keep in mind that the order of the colors matters, so make sure to follow the correct sequence.
- Hold the connector with the tab facing down and the gold contacts facing up.
- Gently push the prepared cable into the connector, making sure the wires reach the end of the connector and the insulation is aligned with the connector’s strain relief.
- Verify that the wires are in the correct order and fully inserted into the slots. Double-checking this step ensures a proper connection.
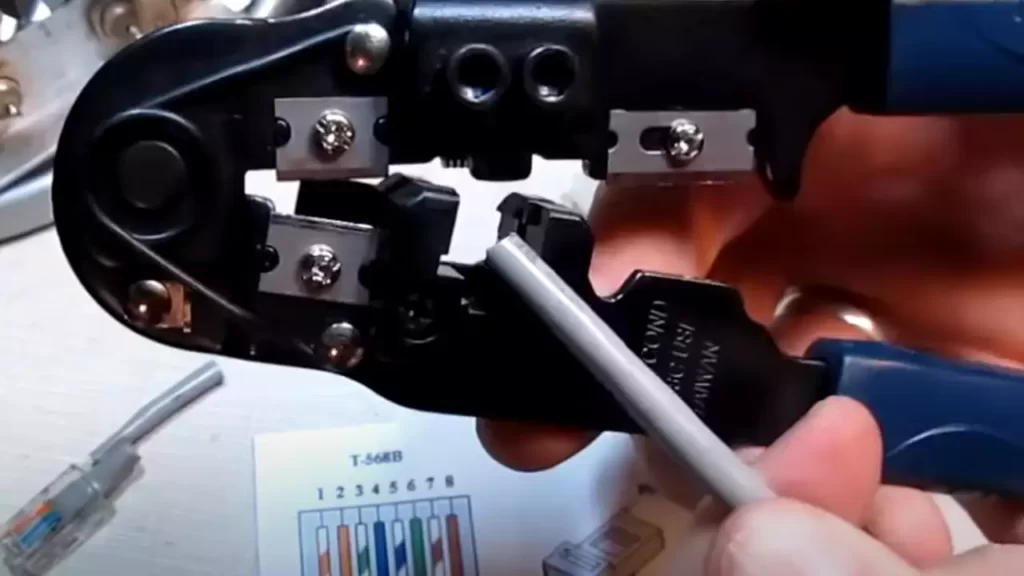
- Once you are confident that the wires are seated correctly, insert the connector into a crimping tool designed for RJ 45 connectors.
- Apply pressure on the crimping tool to secure the connector onto the cable. This step guarantees a firm and reliable connection.
- Repeat the process for each cable you need to terminate with an RJ 45 connector.
Ensuring the wires are securely seated and aligned in the connector
With the cable wires inserted into the connector, it is essential to ensure they are securely seated and aligned to avoid any future issues. Follow these tips to ensure a proper connection:
- Check that all wires have made contact with the metal contacts inside the RJ 45 connector. If any wire is not fully inserted, it may result in a weak connection or signal loss.
- Inspect the alignment of the wires within the connector. Each wire should be parallel and even with the others, forming a neat and organized arrangement.
- If necessary, gently push the wires further into the connector with a small flat-head screwdriver to ensure they are properly aligned.
- Before proceeding to the next step, give the connector a gentle tug to confirm it is securely attached to the cable. If it comes loose, you may need to repeat the insertion process.
By following these steps and ensuring the wires are securely seated and aligned, you can confidently complete the installation of your RJ 45 connector. Taking the time to do this correctly will result in a reliable and efficient network connection.
Step 5: Crimping And Securing The Connector
Step 5: Crimping and Securing the Connector
Now that you have successfully threaded the cable and arranged the wires, it’s time to crimp and secure the RJ45 connector onto the cable. This step is crucial to ensure a firm and reliable connection without any loose wires. Follow the steps below to secure the connector using a crimping tool:
Using a crimping tool to secure the RJ45 Connector onto the cable
- Take the crimping tool in hand and make sure the connector is fully inserted into the tool.
- Ensure that the wires inside the connector are aligned in the correct order and push them firmly against the pins.
- Apply steady pressure on the crimping tool to compress the connector and hold it securely in place.
- Inspect the crimped connector to make sure it is attached firmly and there are no visible signs of loose wires or misalignment.
Checking for firm and reliable connections without any loose wires
After you have crimped the RJ45 connector, it’s essential to double-check the connections to ensure they are firm and reliable. This will help prevent any future connectivity issues. Here are a few steps you can take to verify the quality of your crimped connections:
- Check for any loose wires or misalignment by visually inspecting the connector. Look for any wires that are not fully inserted or are protruding.
- Gently tug on each wire to verify that it is securely connected to the connector. If any wires come loose or disconnect, you may need to recrimp the connector.
- Once you have verified the integrity of the connections, give a gentle tug on the cable itself to ensure it is firmly attached to the RJ45 connector.
By following these steps and thoroughly checking your crimped connections, you can ensure a reliable and secure RJ45 connector installation. Remember that poor crimping can lead to signal loss and unreliable network connections, so it’s important to take the time to do it correctly.
Step 6: Testing And Verifying The Connection
After successfully wiring your RJ45 connector, it’s crucial to test and verify the connection to ensure proper functionality. This step is essential to avoid any potential network issues and ensure a seamless data transfer. In this section, we will discuss two methods to test and verify your RJ45 connection: employing a cable tester and verifying the connection with a network device or a designated tester tool.
Employing a cable tester to ensure the proper functionality of the installation
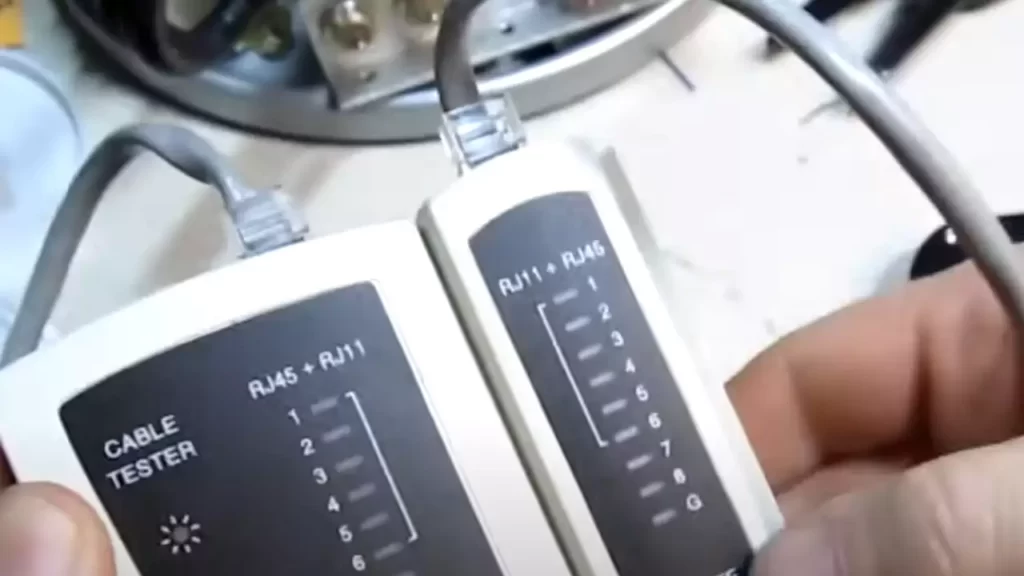
The best way to confirm the integrity of your RJ45 installation is by employing a cable tester. A cable tester performs a series of tests to validate the connections, identify incorrect wiring, and ensure optimal performance. To use a cable tester:
- Plug one end of the RJ45 connector into the main unit of the cable tester.
- Plug the other end of the RJ45 connector into the remote unit of the tester.
- Activate the cable tester and wait for the test results. The tester will indicate any issues, such as crossed wires, open circuits, or short circuits.
- Inspect the test results and troubleshoot accordingly. If any issues are identified, double-check the wiring and make necessary adjustments until the cable passes the tests successfully.
Verifying the connection with a network device or a designated tester tool
Another method to verify your RJ45 connection is by using a network device or a designated tester tool. This method allows you to test the connectivity of your RJ45 connector by connecting it to an existing network device or using a specialized tool specifically designed for network connection testing. Here’s how you verify the connection:
- Connect one end of the RJ45 connector to the intended network device using an Ethernet cable. Ensure that both ends are securely plugged in.
- Power on the network device and wait for it to establish a connection.
- If the network device successfully establishes a connection and you can access the network resources, the RJ45 connection is verified.
- If you prefer using a designated tester tool, connect one end of the RJ45 connector to the tool and follow the manufacturer’s instructions to test the connection. The tool will provide a clear indication of whether the connection is functioning properly.
Remember, testing and verifying the connection is a crucial step to ensure the effectiveness of your RJ45 installation. By employing a cable tester or using a network device, you can quickly identify any possible issues and make the necessary adjustments for a robust and reliable network connection.
Troubleshooting Common Installation Issues
Installing an RJ-45 connector may seem straightforward, but even the most experienced technicians can run into issues along the way. Don’t worry! We’ve got you covered with some troubleshooting solutions for the most common problems encountered during RJ-45 connector installations. By addressing these issues head-on, you’ll be able to ensure a smooth and successful installation process.
Addressing Common Problems Encountered during RJ-45 Connector Installations
When it comes to installing RJ-45 connectors, several problems can arise that may hinder successful connections. Let’s take a look at these common issues and the troubleshooting solutions that can help overcome them:
Solution 1: Faulty or Incorrect Wiring
One of the main reasons for connection issues is faulty or incorrect wiring. This can happen if the wires are not properly seated in the connector or if the color codes are not followed correctly. To address this problem:
- Double-check the color-coding of the wires against the standard T568A or T568B wiring schemes.
- Ensure the wires are fully inserted into the connector and that they make proper contact with the connector pins.
- Use a cable tester to verify the correct wiring configuration and continuity.
Solution 2: Poor Crimping
Poor crimping can lead to weak or unstable connections, resulting in connectivity issues. To ensure a strong and reliable crimping process:
- Use a high-quality RJ-45 crimping tool.
- Strip the cable jacket to the appropriate length, leaving the twisted pairs undisturbed.
- Straighten the wires and arrange them in the correct order before inserting them into the connector.
- Apply even pressure while crimping to ensure that the connector and the wires are securely joined.
- Inspect the crimped connector to verify that all wires are fully seated and that the outer jacket is properly secured.
Solution 3: Cable Length and Bend Radius
The length of the cable and the bend radius can also have a significant impact on the performance of the RJ-45 connection. Here’s what you can do:
- Ensure that the cable length does not exceed the maximum allowable length for the desired transmission speed.
- Avoid excessive bending or tightly coiling the cable, as it can cause signal loss or interference.
- Use cable management techniques such as cable trays or hooks to properly route and support the cable.
By addressing these common issues during RJ-45 connector installations, you’ll be able to troubleshoot and resolve the most common installation problems. Remember to follow proper wiring standards, use high-quality crimping tools, and pay attention to cable length and bend radius for optimal results. Happy installing!
Best Practices For Rj 45 Connector Installations
Following industry best practices for optimal installation quality
When it comes to installing RJ 45 connectors, following industry best practices is crucial to ensure optimal installation quality. By adhering to these guidelines, you can minimize potential issues and maximize the longevity and reliability of your connections.
Tips and recommendations to ensure long-lasting and reliable connections
Installing RJ 45 connectors correctly is essential for achieving long-lasting and reliable connections. Consider the following tips and recommendations to ensure your installations meet the highest standards:
- Use quality connectors: Using high-quality RJ 45 connectors is the first and most important step towards achieving reliable connections. Investing in reputable brands and connectors can significantly reduce the chances of signal loss and other potential issues.
- Use the appropriate tools: It is essential to use the right tools when installing RJ 45 connectors. A crimping tool specifically designed for RJ 45 connectors will ensure proper termination, leading to a secure and stable connection.
- Proper cable preparation: Before installing the connector, make sure to properly prepare the cable. This includes stripping off the outer jacket, untwisting the pairs, and trimming the wires to the appropriate length. Failing to prepare the cable correctly can result in a poor connection.
- Follow the wiring scheme: RJ 45 connectors require following a specific wiring scheme, typically T568A or T568B. Ensure you understand the wiring standard and carefully arrange the individual wire pairs accordingly. A simple mistake in the wiring scheme can lead to connectivity issues.
- Avoid excessive bending: Excessive bending of the cable near the connector can strain the wires and degrade the connection. Ensure that the cable has enough slack and maintain gentle bends to prevent unnecessary stress on the wires.
In addition to these tips, periodically inspecting your RJ 45 connections can help identify any potential issues early on. Regular maintenance and proper care can go a long way in ensuring the longevity and reliability of your connections.
Frequently Asked Questions
How Do I Connect My Rj45?
To connect your RJ45, simply insert the connector into the available port on your device. Ensure it is secure and snug. RJ45s are commonly used for Ethernet networking, so it’s important to connect them properly for reliable and fast internet connectivity.
How To Install A Rj45 Pass Through Connector?
To install a RJ45 pass through connector, follow these simple steps: Strip the outer insulation of the Ethernet cable carefully. Untwist the wires and arrange them according to the T568B wiring standard. Trim the excess wire length and insert the wires into the pass through connector.
Lastly, use a crimping tool to secure the connector.
How Do I Install An Ethernet Cable Connector?
To install an Ethernet cable connector, follow these steps: 1. Strip about 1 inch of the cable outer jacket with a cable stripper. 2. Separate the internal twisted pairs and trim them evenly. 3. Insert each wire into the appropriate slot of the connector.
4. Use a crimping tool to secure the wires in the connector. 5. Test the connection with a network cable tester to ensure proper installation.
What Order Do Rj45 Wires Go In?
The order of the RJ45 wires follows a specific pattern known as the T568B standard. The wire order is as follows: orange-white, orange, green-white, blue, blue-white, green, brown-white, and brown.
Conclusion
Installing an RJ-45 connector may seem complex at first, but with the right steps and guidance, it can be easily accomplished. By following the methods mentioned in this blog post, you can successfully connect your Ethernet cables without any difficulty.
Remember to carefully strip the wires, align them correctly, and secure them using a crimping tool. With practice, you will become confident in your ability to install RJ-45 connectors and enjoy a seamless network connection.