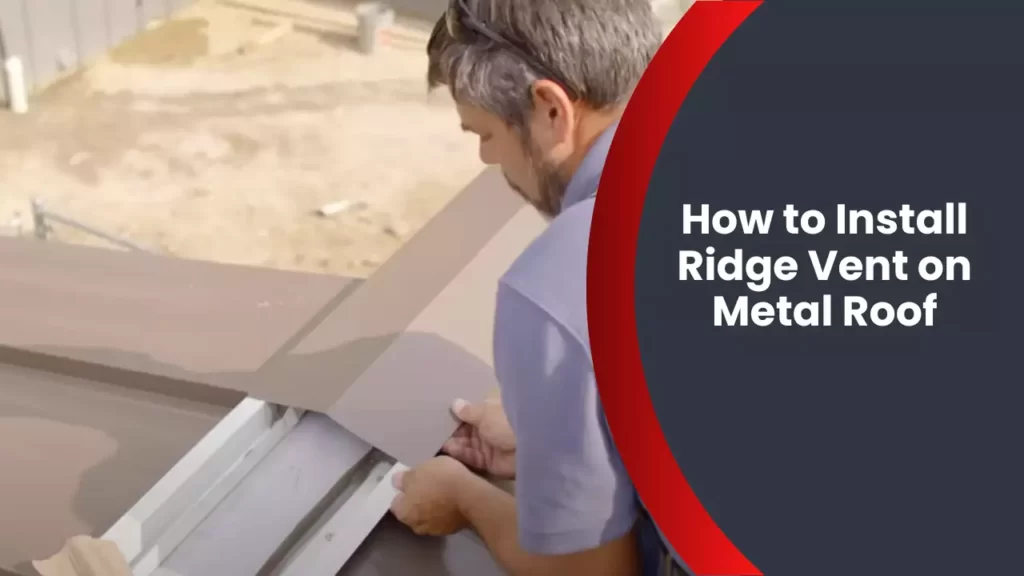
To install a ridge vent on a metal roof, you need to follow a few steps carefully. First, measure and mark the ridge line where the vent will be installed.
Then, use a circular saw to cut the ridge line according to the vent’s size and shape. Finally, secure the ridge vent in place using screws or nails, making sure it is properly aligned and sealed with appropriate roofing adhesive.
Why Ridge Vent Is Important For Metal Roofs
Benefits of Ridge Vent for Metal Roofs
Installing a ridge vent on your metal roof is a crucial step to ensure proper ventilation. Ridge vents offer numerous benefits that are essential for the longevity and performance of your metal roofing system.
Importance of Proper Ventilation in Metal Roofing Systems
Proper ventilation is of utmost importance when it comes to metal roofing systems. Without adequate airflow, your roof can suffer from a range of issues that can damage its structure and compromise its effectiveness.
Here are some key reasons why proper ventilation is crucial for metal roofs:
- Prevents Heat Build-Up: Metal roofs can absorb a significant amount of heat from the sun. Without a ridge vent, this heat can become trapped inside the attic or upper levels of your building. The accumulation of heat can cause excessive energy consumption and put strain on your cooling systems. By allowing hot air to escape through the ridge vent, proper ventilation helps regulate the temperature inside your building.
- Prevents Moisture Build-Up: Condensation can be a major concern for metal roofs. When warm, moist air enters your attic space, it can come into contact with the cooler roof surface and condense into water droplets. Over time, this can lead to mold growth, rotting wood, and corrosion of metal components. Ridge vents promote airflow, preventing the buildup of excess moisture and reducing the risk of these detrimental effects.
- Enhances Energy Efficiency: By allowing hot air to escape and cool air to circulate, ridge vents play a crucial role in maintaining proper insulation levels. This helps reduce the workload on your heating and cooling systems, resulting in lower energy consumption and utility bills.
- Prolongs Roof Lifespan: Metal roofs are known for their durability, but excessive heat and moisture can negatively impact their longevity. Proper ventilation removes heat and moisture that can potentially weaken the roof’s structure, protecting it from premature aging and deterioration.
Investing in a ridge vent system for your metal roof is a smart decision that can provide long-term benefits. Not only does it promote a healthy and energy-efficient living or working environment, but it also helps safeguard your valuable metal roof investment.
Tools And Materials Needed For Installing Ridge Vent On Metal Roof
Installing a ridge vent on a metal roof is a great way to improve ventilation and prevent the buildup of moisture and heat in your attic space. With the right tools and materials, the installation process can be relatively straightforward. In this section, we’ll discuss the essential tools you’ll need and the recommended materials and supplies to successfully install a ridge vent on your metal roof.
List of Essential Tools
Before you begin installing a ridge vent on your metal roof, make sure you have the following tools handy:
- Hammer
- Tape measure
- Straight edge or chalk line
- Tin snips or metal cutting shears
- Drill with metal-cutting bit
- Pencil or marker
- Roofing nails or screws
- Screwdriver or screw gun
- Safety goggles
- Gloves
- Ladder or scaffolding
- Ridge vent
- Roofing felt or underlayment
- Flashing
- Caulk or silicone sealant
Recommended Materials and Supplies
When it comes to installing a ridge vent on a metal roof, it’s important to use quality materials that are specifically designed for this purpose. Here are the recommended materials and supplies you’ll need:
| Materials | Supplies |
|---|---|
| – Ridge vent made of durable metal or plastic – Roofing felt or underlayment – Flashing to ensure a watertight seal – Caulk or silicone sealant to fill any gaps or seams |
– Roofing nails or screws to secure the ridge vent – Metal-cutting screws if your metal roof requires cut-outs – Safety goggles to protect your eyes – Gloves to keep your hands safe – Ladder or scaffolding for accessing the roof – Pencil or marker for marking measurements |
By using the right tools and materials, you can ensure a proper installation of a ridge vent on your metal roof. This will help improve ventilation and prolong the lifespan of your roof by preventing issues caused by heat and moisture buildup.
Preparing For Installation
Before installing a ridge vent on a metal roof, it’s important to properly prepare the roof for the installation process. This includes evaluating the roof condition and suitability for ridge vent installation and measuring and marking the ridge for proper vent placement. By following these steps, you can ensure a successful ridge vent installation that enhances the ventilation of your metal roof.
Evaluating Roof Condition and Suitability for Ridge Vent Installation
Prior to installing a ridge vent on your metal roof, it’s crucial to evaluate the condition of your roof and determine its suitability for the installation. Here’s what to keep in mind during this evaluation:
1. Inspect the Roof: Conduct a thorough inspection of the roof to check for any signs of damage, leaks, or structural issues. Ensure there are no existing ventilation systems that may hinder the installation of the ridge vent.
2. Check the Pitch: Take note of the roof pitch as it will affect the performance of the ridge vent. Not all ridge vents are suitable for every pitch, so consider the manufacturer’s recommendations and choose a vent that matches your roof’s pitch.
3. Assess Ventilation Needs: Evaluate your home’s ventilation needs to determine the appropriate size and type of ridge vent to install. Consider factors such as the roof’s size, attic space, and local climate conditions.
Measuring and Marking the Ridge for Proper Vent Placement
After evaluating the roof condition, the next step is to measure and mark the ridge for the correct placement of the ridge vent. Follow these steps to ensure accurate vent placement:
- Measure the Ridge: Use a measuring tape to determine the length of the ridge where the vent will be installed.
- Determine Vent Width: Based on the ventilation needs, determine the width of the ridge vent. Ensure it provides sufficient airflow for your roof’s size.
- Mark the Placement: Using a chalk line or a straightedge, mark the centerline of the ridge to ensure proper alignment of the vent.
- Divide the Ridge: Divide the ridge into equal sections based on the width of the ridge vent. This will help you determine the placement of each vent section along the ridge.
- Mark Vent Locations: Along the marked centerline, use a marker or spray paint to indicate the locations where each section of the ridge vent will be installed.
By accurately measuring and marking the ridge, you can ensure the placement of the ridge vent optimizes ventilation effectiveness and aesthetics.
With the evaluation of the roof’s condition and the proper measurement and marking of the ridge for vent placement, you are now prepared to move forward with the installation process. These preliminary steps lay the foundation for a successful installation and help you achieve optimal ventilation for your metal roof.
Choosing The Right Ridge Vent For A Metal Roof
If you have a metal roof, installing a ridge vent is essential for proper ventilation. A ridge vent helps to remove heat and moisture from your attic, protecting your roof from damage and extending its lifespan. However, not all ridge vents are suitable for metal roofs. Choosing the right ridge vent for your metal roof requires careful consideration of a few key factors.
Types of ridge vents available for metal roofs
When it comes to metal roofs, you have a few options for ridge vents. Here are the most common types:
- Corrugated ridge vents: These ridge vents are specifically designed for metal roofs. They are made of durable materials that withstand the harsh weather conditions and do not rust or corrode over time. Corrugated ridge vents are easy to install and provide excellent ventilation.
- Tile ridge vents: If your metal roof has a tile-like pattern, you can opt for tile ridge vent systems. These ridge vents are designed to blend seamlessly with the roof, maintaining its aesthetic appeal while providing effective ventilation.
- Capped ridge vents: These ridge vents feature a cap that covers the ridge, providing protection against the elements. Capped ridge vents are an excellent choice for metal roofs in areas prone to heavy rainfall or snowfall.
Factors to consider when selecting the appropriate ridge vent
When selecting the appropriate ridge vent for your metal roof, consider the following factors:
- Roof slope:
- The slope of your roof plays a crucial role in determining the type of ridge vent that will work best. Corrugated ridge vents are suitable for roofs with a steep slope, while tile ridge vents work well on roofs with a lower slope.
- Climate:
- The climate in your area should also be taken into account. If you live in a humid climate, you may want to choose a ridge vent that has a higher ventilation capacity to ensure proper moisture removal.
- Roof design:
- The design of your metal roof can impact the choice of ridge vent. If your roof has a unique shape or features, you may need a custom-made ridge vent to ensure a proper fit and optimal ventilation.
- Compatibility:
- Ensure that the ridge vent you choose is compatible with your specific metal roof. Consult the manufacturer’s guidelines or seek professional advice to avoid any compatibility issues.
- Budget:
- Last but not least, consider your budget. Ridge vents come in a range of prices, so it’s important to choose one that fits within your budget while still meeting your ventilation needs.
By considering these factors and choosing the right ridge vent for your metal roof, you can ensure optimal ventilation and prolong the life of your roof. Don’t hesitate to seek help from professionals if you’re unsure about the selection or installation process.
Step 1: Removing Existing Roofing Materials
Removing any shingles, underlayment, or other roofing materials covering the ridge area
Before installing a ridge vent on a metal roof, it is essential to remove any existing roofing materials that may be covering the ridge area. This includes shingles, underlayment, or any other materials that could obstruct the proper installation of the ridge vent. By following these step-by-step instructions, you can effectively remove the existing roofing materials and prepare your metal roof for the ridge vent installation process.
Step 1: Removing Shingles
The first step in removing existing roofing materials from the ridge area of your metal roof involves carefully removing shingles. Shingles typically cover the entire roof surface, including the ridge. To remove the shingles:
- Start at one end of the ridge and locate the first row of shingles.
- Using a pry bar or a shingle remover tool, gently lift the edge of the shingle to expose the nails holding it in place.
- Using a hammer, carefully remove the nails from the shingle.
- Continue this process along the entire ridge, removing one row of shingles at a time.
- Ensure that each shingle is fully removed, leaving no remaining nails or debris behind.
Step 2: Removing Underlayment
Once the shingles have been removed, it is time to remove the underlayment that lies beneath. The underlayment acts as an additional layer of protection for your roof and needs to be carefully removed to accommodate the installation of the ridge vent. Here’s how to remove the underlayment:
- Identify the underlayment material, which is usually made of felt or synthetic materials like synthetic roofing underlayment.
- Starting at one end of the ridge, locate the first section of underlayment.
- Using a utility knife or a roofing scraper, carefully cut and remove the underlayment in sections.
- Continue this process along the entire length of the ridge, ensuring all underlayment is fully removed.
- Dispose of the removed underlayment properly to maintain a clean and organized work area.
Step 3: Removing Other Roofing Materials
In addition to shingles and underlayment, there may be other roofing materials that need to be removed to create a clear path for the ridge vent installation. These materials may include flashing, mortar, or any other debris that could obstruct the proper functioning of the ridge vent. Follow these steps to remove other roofing materials:
- Inspect the ridge area and identify any other roofing materials that need to be removed.
- Using appropriate tools, such as a pry bar or a chisel, carefully remove the materials, ensuring not to damage the metal roof surface.
- Thoroughly clean the ridge area to remove any remaining debris or particles.
- Dispose of the removed materials responsibly, adhering to local waste disposal regulations.
By completing these steps, you can successfully remove the existing roofing materials that cover the ridge area of your metal roof. This sets the stage for the proper installation of a ridge vent, allowing for effective ventilation of your roofing system. Now that the ridge area is cleared, you can move on to the next step of installing a ridge vent on your metal roof.
Step 2: Ensuring Proper Airflow
Step 2: Evaluating Existing Ventilation System or Creating Channel Openings for Air Intake
Before installing a ridge vent on your metal roof, it’s essential to ensure proper airflow in your attic. This step focuses on evaluating your existing ventilation system or creating channel openings for air intake to maximize efficiency. By doing so, you’ll prevent potential issues such as condensation, mold growth, and premature roof deterioration.
Correcting Any Obstructions or Blockages in the Attic
Before proceeding, it’s crucial to correct any obstructions or blockages that may hinder proper airflow in your attic. These obstructions can include improperly installed insulation, debris buildup, or even structural elements obstructing air movement.
Here’s a step-by-step guide to correcting obstructions or blockages:
- Inspect the attic: Begin by visually inspecting your attic to identify any areas where obstructions or blockages are present. Look for signs of insulation that is covering soffit vents or blockage caused by stored items.
- Remove blockages: Clear any debris, boxes, or stored items that may be blocking the airflow in your attic. Create clear pathways for air to move through the attic space.
- Check insulation: Ensure that insulation is properly installed and does not impede the flow of air from the soffit vents to the ridge vent. If insulation is covering the vents, carefully move it aside to allow air movement.
- Seal gaps and cracks: Inspect the attic for any gaps or cracks that may be allowing air leakage or compromising the efficiency of your ventilation system. Seal these areas with appropriate materials such as caulk or foam sealant to minimize air loss.
Ensuring Each H3 Heading Adheres to HTML Syntax
In order to adhere to HTML syntax, each H3 heading in this section has been represented using the following format:
<h3><Heading Text></h3>
By utilizing proper HTML syntax, it ensures that the content is well-structured and optimized for WordPress or any other content management system.
Keep in mind that while installing a ridge vent on a metal roof is essential for proper ventilation, it’s equally important to ensure that your attic has proper airflow. By evaluating your existing ventilation system or creating channel openings for air intake and correcting any obstructions or blockages, you’ll breathe new life into your attic’s ventilation, improving the overall health and longevity of your metal roof.
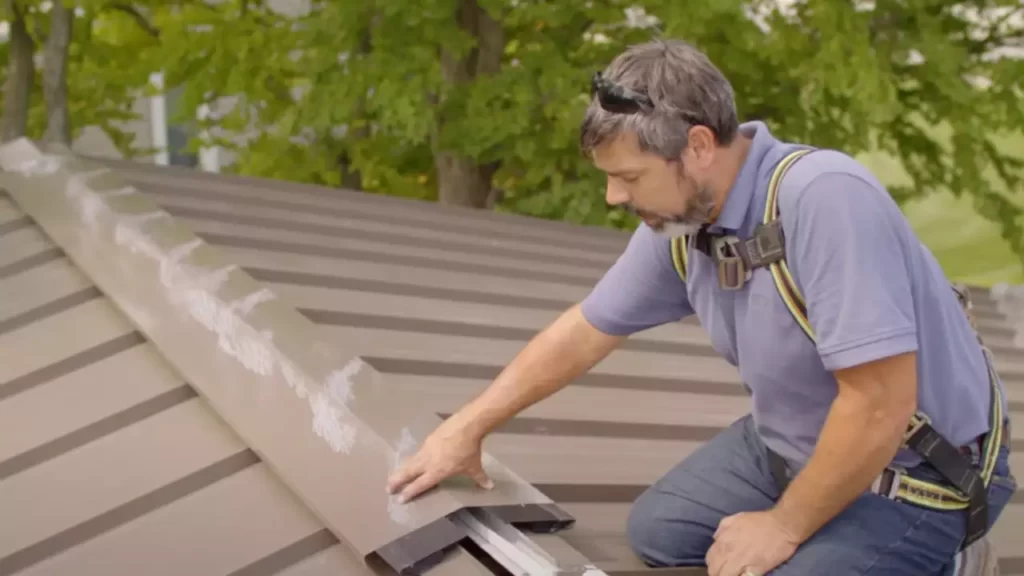
Step 3: Installing Ridge Vent Panels
Step 3: Installing Ridge Vent Panels
Once you have prepared the metal roof and installed the ridge vent flashing, it’s time to move on to installing the actual ridge vent panels. This step is crucial for ensuring proper ventilation and maintaining the integrity of your metal roof. In this section, we will discuss how to secure the ridge vent panels to the ridge using appropriate fasteners and ensure proper alignment and spacing between panels.
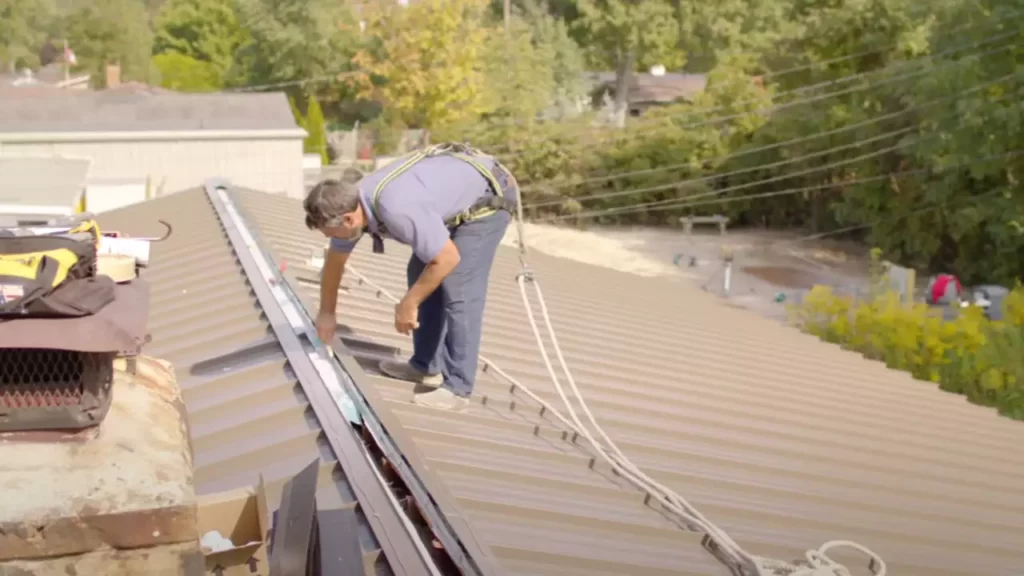
Securing the ridge vent panels to the ridge using appropriate fasteners
When it comes to securing the ridge vent panels to the ridge of your metal roof, it’s essential to use the right type of fasteners. These fasteners will depend on the material of your ridge vent panels. For metal ridge vent panels, you can use self-tapping metal screws, while for other materials like plastic or fiberglass, you may need different types of screws or nails.
Before securing the panels, make sure to position them correctly along the ridge. The panels should overlap each other and sit flush with the roof surface. This ensures proper protection against water infiltration and keeps your roof weather-resistant. Once the panels are aligned, you can proceed with securing them using the appropriate fasteners.
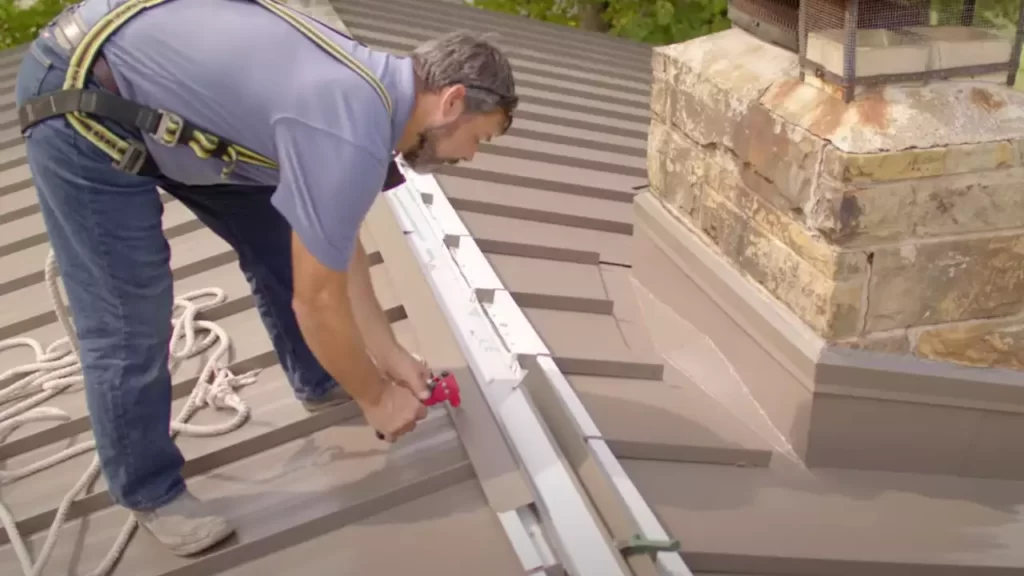
Ensuring proper alignment and spacing between panels
Proper alignment and spacing between ridge vent panels are crucial for the overall effectiveness of your ventilation system. Incorrect alignment can lead to gaps or uneven airflow, reducing the efficiency of your ridge vent. To ensure proper alignment, follow these steps:
- Start by aligning the first ridge vent panel with the edge of the ridge. Use a level to ensure it’s straight.
- Position the next panel next to the first one, making sure it overlaps the first panel according to the manufacturer’s instructions.
- Repeat this process for each subsequent panel, ensuring they are aligned properly and overlapping as required.
Additionally, maintaining the correct spacing between panels is vital. The proper spacing allows for adequate airflow while preventing the entry of pests or debris. Check the manufacturer’s guidelines for the recommended spacing between panels, as it may vary depending on the type of ridge vent.
Overall, when installing ridge vent panels on your metal roof, securing them with appropriate fasteners and ensuring proper alignment and spacing are essential for a successful installation. Following these steps will help you achieve a well-ventilated and leak-resistant metal roofing system.
Step 4: Sealing The Ridge Vent
Applying suitable sealants to prevent water penetration and secure the ridge vent in place is a critical step in the installation process. Without proper sealing, water can seep into the roof, causing damage and compromising the effectiveness of the ridge vent. Here’s how to seal the ridge vent effectively.
Applying Sealants
When it comes to sealing the ridge vent on a metal roof, the right sealant can make all the difference. Using a high-quality roofing sealant specifically designed for metal roofs is crucial. Look for sealants that are compatible with both the ridge vent material and the metal roof itself.
Before applying the sealant, ensure that the ridge vent and the metal roof surface are clean and dry. Remove any debris or dirt using a brush or a soft cloth. This will ensure proper adhesion and an effective seal.
Securing the Ridge Vent
Once the surface is clean and dry, apply a generous amount of sealant along the underside of the ridge vent. Use a caulking gun or a putty knife to evenly spread the sealant. Ensure that every area is covered, paying extra attention to the overlaps and joints.
| Quick Tip: | Wear gloves and protective goggles while working with sealant to avoid any contact with skin or eyes. Additionally, work in a well-ventilated area. |
|---|
Securing the Ridge Vent in Place
After applying the sealant, carefully position the ridge vent on the metal roof. Make sure it aligns with the roof’s ridge and adheres securely. Use nails or screws designed for metal roofs to secure the ridge vent in place. Place the fasteners at regular intervals, ensuring each one is firmly anchored.
Furthermore, it’s important to remember that over-tightening the fasteners can damage the ridge vent or the metal roof. Use a moderate amount of force to secure the vent without compromising its structural integrity.
Inspecting the Sealant
Once the ridge vent is secured, inspect the sealant to ensure proper coverage and adhesion. Carefully check for any gaps, cracks, or areas that may require additional sealant. Address these issues promptly to prevent any potential water leakage.
Finally, allow the sealant to cure as per the manufacturer’s instructions before subjecting the ridge vent to any external conditions.
By applying suitable sealants and securing the ridge vent correctly, you can ensure a watertight seal, promoting optimal ventilation and extending the longevity of your metal roof.
Step 5: Inspecting And Testing
Thoroughly inspecting the installed ridge vent for any potential issues or defects is a crucial step to ensure optimum functionality and longevity of your metal roof ventilation system. By carefully examining the ridge vent, you can identify and address any problems before they escalate into more significant complications.
Thoroughly inspecting the installed ridge vent for any potential issues or defects
When inspecting your ridge vent, pay close attention to the following:
- Check for any gaps or misalignments in the ridge vent installation.
- Ensure that the ridge vent is securely fastened and properly sealed to prevent leaks.
- Inspect the flashing to ensure it is intact and adequately covering the ridge vent.
- Look for signs of damage or corrosion on the metal roof or ridge vent panels.
- Examine the overall fit and finish of the ridge vent, ensuring a seamless integration with the metal roof surface.
By conducting a thorough inspection, you can identify any potential issues and take the necessary steps to rectify them promptly.
Testing the ventilation system for proper airflow and functionality
After inspecting the ridge vent, it’s essential to test the ventilation system to ensure it is functioning correctly. Here are a few steps to guide you:
- Observe airflow: Stand at various points around your roof and check for the presence of airflow through the ridge vent.
- Use smoke test: Light a smoke stick or incense and carefully observe the smoke movement near the ridge vent. It should be drawn upwards, indicating proper ventilation.
- Check attic temperature: Measure the temperature in your attic before and after installing the ridge vent. Proper ventilation should help reduce the overall temperature.
By performing these tests, you can ensure that your metal roof ventilation system is effectively expelling hot air and moisture, creating a healthier and more comfortable environment inside your home.
Remember, regular maintenance and inspection of your ridge vent system are crucial to prevent any potential issues and optimize its performance.
Step 6: Maintenance And Care
Regular maintenance practices to keep the ridge vent and overall roof in good condition
Maintaining your ridge vent and metal roof is crucial to ensure their longevity and optimal performance. Here are some regular maintenance practices you should follow:
- Inspect the ridge vent regularly: Perform routine inspections of the ridge vent to check for any signs of damage or blockage. Look out for debris, dirt, or leaves that may have accumulated and clear them away using a brush or compressed air to maintain proper airflow.
- Check for leaks: Inspect the ridge vent and roof for any signs of leaks. If you notice any water spots or stains on the ceiling or walls inside your home, it could indicate a problem with the ridge vent. Monitor the vent during heavy rainstorms to identify any leaks and take prompt action to fix them.
- Trim nearby trees: Overhanging branches can scrape and damage the ridge vent, so it’s important to trim any nearby trees. This will not only prevent direct physical damage but also reduce the risk of leaves and debris clogging the vent.
- Remove moss and algae: Moss and algae can accumulate on the ridge vent and roof over time, especially in humid or shaded areas. Regularly clean your roof surface using a non-pressure washing method and apply a moss and algae inhibitor to prevent their growth.
- Ensure proper attic ventilation: Adequate attic ventilation plays a critical role in maintaining the performance of the ridge vent and overall roof system. Make sure your attic is properly insulated and ventilated to reduce heat buildup, which can cause damage to the ridge vent and shingles.
- Professional maintenance: Consider scheduling professional roof inspections and maintenance at least once a year. A qualified roofing contractor can identify any potential issues early on and provide the necessary repairs or maintenance to keep your ridge vent and roof in top condition.
Common troubleshooting tips and solutions for ridge vent-related problems
If you encounter any problems with your ridge vent, there are several troubleshooting tips and solutions you can try before seeking professional help:
- Check for blockages: If you notice reduced airflow or ventilation, inspect the ridge vent for any blockages. Clear away any debris, leaves, or animal nests that may be obstructing the vent’s openings.
- Seal gaps and cracks: Over time, gaps and cracks may develop around the ridge vent, allowing water or pests to enter. Ensure the ridge vent is properly sealed using roofing cement or an appropriate sealant.
- Repair damaged shingles: If you notice damaged or missing shingles around the ridge vent, replace them promptly to prevent water infiltration and further damage.
- Address condensation issues: Excessive condensation in the attic can lead to moisture-related problems, including damage to the ridge vent. Improve attic ventilation and insulation to reduce condensation and maintain a balanced humidity level.
- Prevent ice dam formation: In cold climates, ice dams can form along the ridge vent, causing water backup and potential leaks. Install proper insulation and consider using heat cables or ice melt products to prevent ice dam formation.
By following these regular maintenance practices and troubleshooting tips, you can keep your ridge vent and metal roof in excellent condition, ensuring their durability and efficient performance for years to come.
Additional Considerations For Diy Installation
Safety Precautions and Best Practices During the Installation Process
If you’ve decided to take on the task of installing a ridge vent on your metal roof, it’s crucial to prioritize safety and follow best practices during the installation process. This will not only ensure that the installation is done correctly but also keep you and your property safe from any potential hazards.
Safety Precautions:
1. Wear Protective Gear: Before you begin, make sure to wear appropriate protective gear such as gloves, goggles, and a helmet to safeguard yourself from debris and potential accidents.
2. Use Proper Ladders and Equipment: Choose a sturdy ladder that can support your weight and reach the height of your roof. Additionally, ensure you have all the necessary tools and equipment readily available to prevent unnecessary trips up and down the ladder.
3. Watch Out for Weather Conditions: Avoid installing a ridge vent during adverse weather conditions such as high winds, rain, or extreme heat. These conditions can make it more challenging and dangerous to work on the roof, increasing the risk of accidents.
Best Practices:
- Measure Twice, Cut Once: Precision is key when installing a ridge vent. Make sure to carefully measure and mark the area where the vent will be installed before cutting into the metal roof.
- Seal Properly: To ensure an airtight seal, use appropriate sealant or flashing to cover the gaps between the ridge vent and the metal roof. This will prevent any water or moisture from seeping through and causing damage.
- Secure the Vent Properly: Use screws or nails specifically designed for metal roofing to secure the ridge vent in place. This will ensure a sturdy and long-lasting installation.
- Follow Manufacturer’s Instructions: Different ridge vent models may have specific installation instructions. It’s important to carefully read and follow the manufacturer’s guidelines to achieve optimal results.
When to Seek Professional Help for Ridge Vent Installation on a Metal Roof
While a DIY approach can save you money, there are instances when it’s best to seek professional help for the installation of a ridge vent on your metal roof. Hiring professionals ensures that the installation is done correctly and minimizes the risk of errors or damage.
1. Lack of Experience: If you have little to no experience working with metal roofs or ridge vents, it’s advisable to enlist the help of professionals. They have the necessary expertise to handle the installation safely and efficiently.
2. Complex Roof Design: If your metal roof has a complex design with multiple slopes, angles, or unique features, it’s best to leave the installation to professionals. They will have the knowledge and experience to navigate these complexities and ensure a proper installation.
3. Time Constraints: If you have a busy schedule or limited time availability, it may be more practical to hire professionals for the installation. They can complete the job swiftly and efficiently, allowing you to focus on other priorities.
Remember, the installation process can be challenging and potentially dangerous, especially if you lack the necessary skills and experience. Seeking professional help ensures a high-quality installation and provides peace of mind.
Frequently Asked Questions
Can You Put A Ridge Vent On A Metal Roof?
Yes, a ridge vent can be installed on a metal roof. It provides ventilation to prevent heat and moisture buildup in the attic, improving energy efficiency and preventing damage. It is important to hire a professional to ensure proper installation and compatibility with the metal roof.
What Is The Best Way To Vent A Metal Roof?
The best way to vent a metal roof is by installing ridge vents or soffit vents. These vents allow hot air to escape from the attic, preventing condensation and extending the roof’s lifespan. Proper ventilation also helps regulate indoor temperatures and improves energy efficiency.
What Is The Proper Way To Install A Ridge Vent?
To install a ridge vent properly, follow these steps: 1. Measure and mark the ridge line, ensuring the correct placement. 2. Remove the shingles and cut the roofing material to create an opening for the vent. 3. Position the ridge vent along the ridge line and secure it using roofing nails or screws.
4. Install the vent end caps to prevent water infiltration. 5. Finally, seal the edges of the vent with roofing cement to ensure a watertight installation.
How Much Gap Do You Need For A Ridge Vent?
A ridge vent typically requires a minimum gap of 1/2 inch on each side for proper ventilation.
Conclusion
Installing a ridge vent on a metal roof is a beneficial investment for your home’s ventilation system. By following the steps outlined in this blog post, you can ensure proper airflow and temperature regulation throughout your attic space. With these simple instructions, you can confidently undertake the installation process, improving your home’s energy efficiency and reducing the risk of moisture damage.
Don’t wait any longer—take control of your home’s ventilation system today!