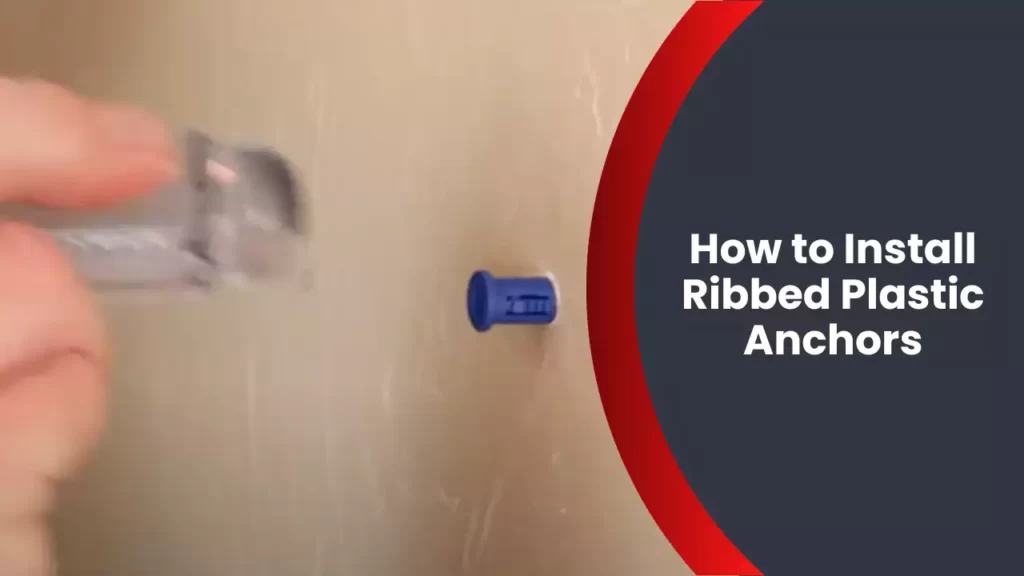
To install ribbed plastic anchors, first drill a hole, insert the anchor, and tap it flush with the surface. Next, insert the screw and tighten it until secure.
When installing ribbed plastic anchors, the process involves drilling a hole and tapping the anchor into place before inserting the screw. This ensures a secure hold and stability for your project. Proper installation of ribbed plastic anchors is essential for a successful outcome, whether you are hanging shelves, installing curtain rods, or mounting a television.
By following the steps outlined in this guide, you can ensure that your fasteners are installed correctly and provide the necessary support for your project. We will walk you through the steps to properly install ribbed plastic anchors, from drilling the hole to securing the screws, so you can complete your project with confidence.
Understanding Ribbed Plastic Anchors
What are ribbed plastic anchors?
Ribbed plastic anchors are versatile and easy-to-use fasteners designed to securely hold objects to walls or other surfaces that cannot bear weight alone. They are commonly used in construction, woodworking, and DIY projects as they provide a stable foundation for attaching items such as shelves, curtain rods, and picture frames to drywall, concrete, or brick walls.
Different sizes and types of ribbed plastic anchors
Ribbed plastic anchors come in various sizes and types to suit different applications and load-bearing requirements. The sizes typically range from small to large, accommodating different screw sizes. The anchor size should match the screw diameter to ensure a tight fit and maximum stability.
There are different types of ribbed plastic anchors, primarily distinguished by their shapes and design features. These include:
- Standard ribbed plastic anchors: These anchors have ribs on the outer surface and a split body, allowing them to expand when a screw is inserted, creating a secure hold in the wall.
- Alligator ribbed plastic anchors: These anchors have teeth or serrations on the inside, providing enhanced gripping power in various base materials.
- Self-drilling ribbed plastic anchors: As the name suggests, these anchors have built-in drill bits, eliminating the need for pre-drilling. They are convenient for quick installations, especially in harder surfaces like concrete.
Applications and benefits of ribbed plastic anchors
Ribbed plastic anchors have a wide range of applications due to their versatility and reliability. Some common uses include:
- Securing lightweight objects to drywall, such as picture frames, decorative items, and small shelves.
- Mounting fixtures on concrete walls, such as curtain rods, towel bars, and handrails.
- Attaching items to brick walls, such as outdoor lights, mailboxes, and signs.
- Hanging overhead storage in garages or basements, including hooks, racks, and tool organizers.
The benefits of using ribbed plastic anchors include:
- Easy installation: Ribbed plastic anchors are simple to install and do not require specialized tools, making them accessible for beginners and seasoned DIY enthusiasts alike.
- Secure hold: These anchors provide a reliable and sturdy grip, preventing the attached object from coming loose or falling.
- Cost-effective: Ribbed plastic anchors are affordable and readily available, making them a cost-effective solution for various projects.
- Versatility: With different sizes and types available, ribbed plastic anchors can be used in a wide range of applications, accommodating various base materials and load requirements.
By understanding the different types, sizes, and applications, you can select the appropriate ribbed plastic anchors for your project, ensuring a secure and long-lasting installation.
Tools And Materials Needed
Before you embark on any home improvement project, it’s crucial to gather all the necessary tools and materials. By doing so, you’ll save time and frustration. When it comes to installing ribbed plastic anchors, having the right tools at your disposal will make the process quick and effortless.
List of tools needed for installation
Here’s a comprehensive list of tools you’ll need to install ribbed plastic anchors:
- Drill
- Hammer
- Phillips screwdriver
- Utility knife
- Tape measure
- Pencil or marker
List of materials needed for installation
Alongside the necessary tools, you’ll also require specific materials to complete the installation. These materials include:
- Ribbed plastic anchors (quantity depending on the size and scope of your project)
- Screws (appropriate size for the anchors you are using)
- Wall or surface where you’ll be installing the anchors
Now that you have a clear understanding of the tools and materials needed, you’re one step closer to successful ribbed plastic anchor installation. With these essentials at hand, you’ll be well-prepared to tackle your next home improvement project with confidence.
Step-By-Step Guide To Installing Ribbed Plastic Anchors
Installing ribbed plastic anchors securely is essential when it comes to hanging objects on your walls. These anchors provide stability and support, making sure your wall-mounted items stay in place. In this step-by-step guide, we will walk you through the process of installing ribbed plastic anchors effectively.
Preparing the surface for installation
Before beginning the installation process, it is crucial to prepare the surface properly. Clean the area where you plan to install the ribbed plastic anchors to ensure optimal adhesion and a secure fit. Remove any debris, dust, or loose particles that could hinder the anchor’s grip.
Selecting the correct size and type of ribbed plastic anchor
Choosing the right size and type of ribbed plastic anchor is essential for a successful installation. Consider the weight and type of object you are planning to hang. Select an anchor that can support the anticipated weight and is suitable for the material of your wall. Consult the manufacturer’s guidelines or seek expert advice if necessary.
Marking the drilling points on the surface
Once you have selected the appropriate ribbed plastic anchor, mark the drilling points on the surface. Use a pencil or marker to indicate the exact spots where you will be drilling. Double-check your measurements and ensure that each mark is level and aligned with the desired positioning of your wall-mounted item.
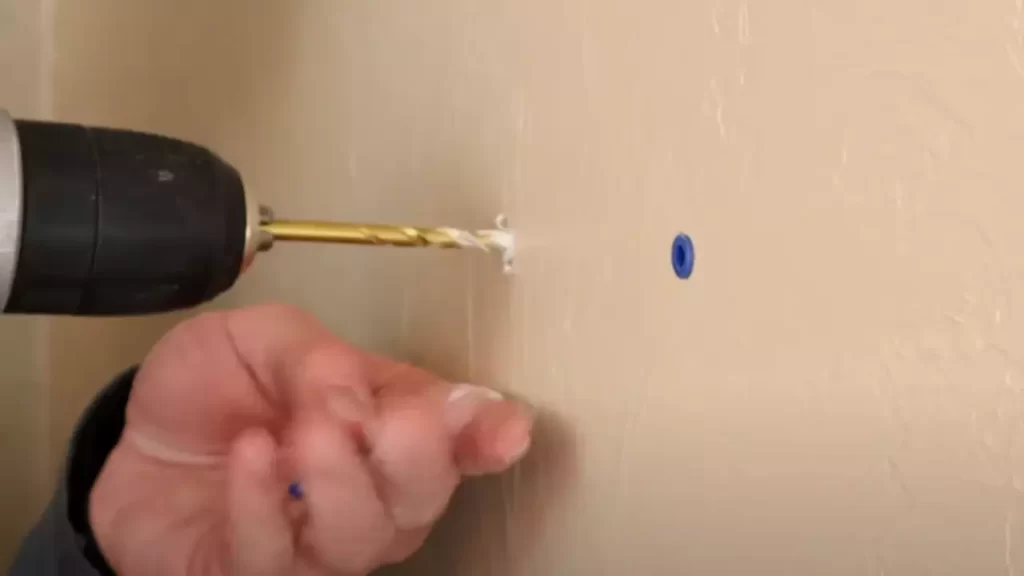
Drilling the holes
Next, it is time to drill the holes where the ribbed plastic anchors will be inserted. Use an electric drill with the appropriate-sized drill bit to create the holes. Be cautious and apply gentle pressure while drilling to avoid damaging the surface or creating larger holes than necessary.
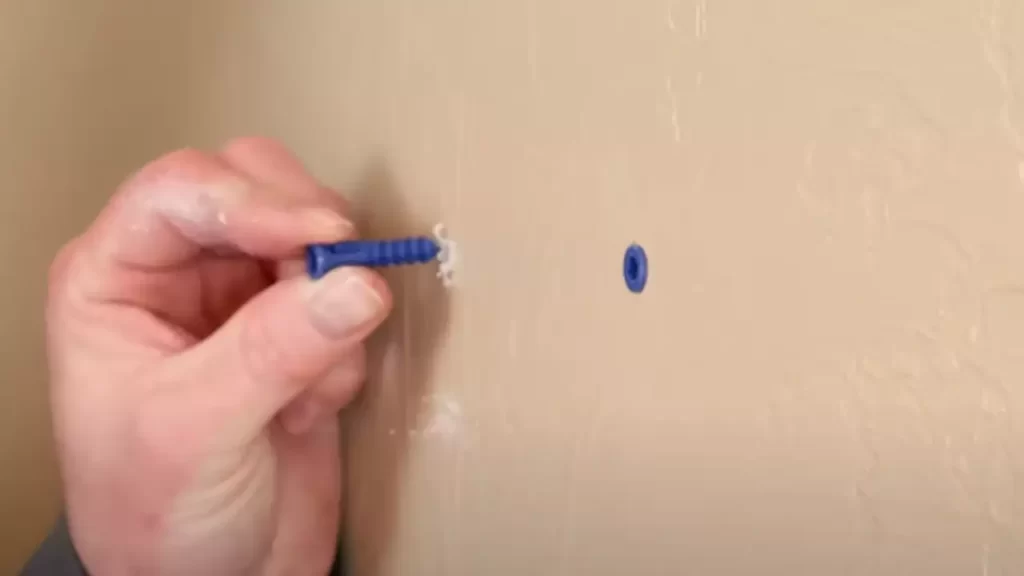
Inserting the ribbed plastic anchors
Once the holes are drilled, it is time to insert the ribbed plastic anchors. Take the anchors and align them with the holes you created. Apply firm pressure while gently pushing the anchors into the holes until they are flush with the surface. Ensure that the anchors are inserted straight and at the correct depth to maximize their stability and holding capacity.
Securing the anchors in place
After inserting the ribbed plastic anchors into the holes, you need to secure them in place. Use a hammer or rubber mallet to tap the heads of the anchors, ensuring they are fully seated and flush with the wall’s surface. This step ensures that the anchors won’t shift or dislodge when you mount your object.
Testing the anchor’s stability
Before hanging your wall-mounted item, it is crucial to test the stability of the ribbed plastic anchor. Push firmly on the anchor to check that it is firmly anchored in the wall and doesn’t move. If the anchor feels loose, you may need to remove it and insert a larger anchor or consult an expert for guidance.
Following this step-by-step guide will help you install ribbed plastic anchors properly and with confidence. By taking the time to choose the correct anchor, prepare the surface, and securely install the anchor, you can ensure the stability and longevity of your wall-mounted objects.
Tips And Best Practices
In order to ensure a secure and effective installation of ribbed plastic anchors, there are several tips and best practices that you should keep in mind. These practices will help to maximize the effectiveness of the anchors and ensure that they perform their intended function. Read on to learn more about these tips, including how to ensure proper anchor depth, choose the right drill bit size, make use of a hammer for difficult surfaces, avoid over-tightening, and ensure proper weight capacity.
Ensuring proper anchor depth
When installing ribbed plastic anchors, it’s important to ensure that they are inserted to the appropriate depth in the wall. This ensures that the anchor is fully engaged with the wall material, providing maximum holding power. To determine the proper anchor depth, consider the length of the anchor and the thickness of the material it will be inserted into. Generally, a good rule of thumb is to insert the anchor so that it is flush with the surface of the wall.
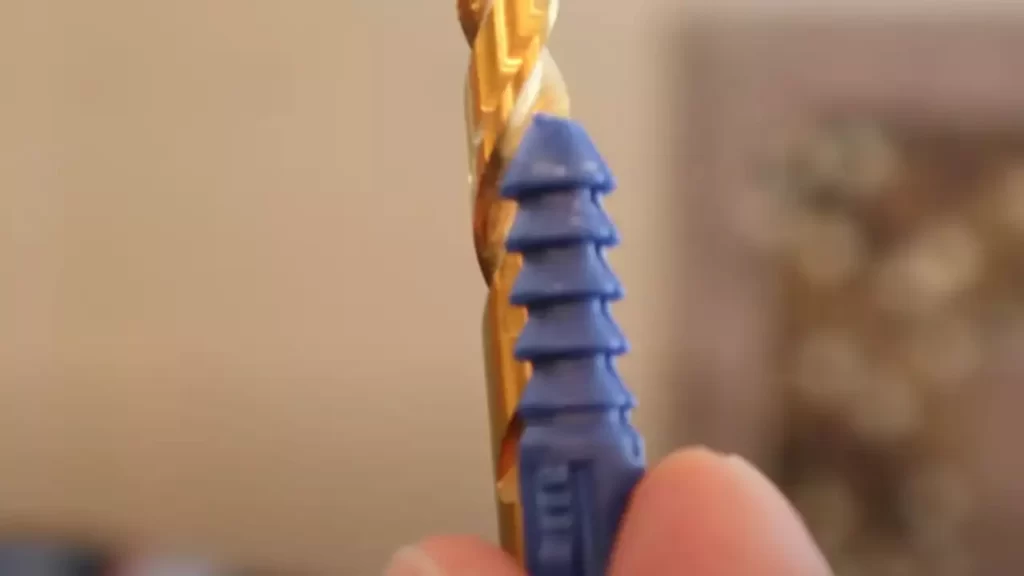
Choosing the right drill bit size
Using the correct drill bit size is crucial for a successful installation of ribbed plastic anchors. Using a drill bit that matches the size of the anchor will prevent the hole from being too large or too small, which can compromise the anchor’s grip. Before drilling, check the packaging of the anchors to find the recommended drill bit size. If no size is specified, select a drill bit that closely matches the diameter of the anchor.
Using a hammer for difficult surfaces
For surfaces that are particularly tough or resistant, such as concrete or brick, it can be helpful to use a hammer in conjunction with the drill to create a pilot hole. This will help to expedite the drilling process and make it easier to insert the anchor. With the drill bit in place, lightly tap the back end of the drill with a hammer to create a small indentation. This will provide a starting point for the drill bit and help to prevent it from slipping.
Avoiding over-tightening
While it may be tempting to tighten the screw into the anchor as much as possible, it’s important to avoid over-tightening. Over-tightening can cause the anchor to become damaged or ineffective, reducing its holding power. Instead, tighten the screw until it is snug, without applying excessive force. Be mindful of the material you are drilling into, as some materials may require a gentler touch to prevent damage.
Ensuring proper weight capacity
It’s essential to consider the weight capacity of the specific ribbed plastic anchors you are using. Each anchor will have a recommended weight limit, which should be clearly stated on the packaging. Make sure to select anchors with a weight capacity that exceeds the load you will be placing on them. This will ensure the anchors can adequately support the weight and prevent any accidents or damage.
Troubleshooting And Common Mistakes
Anchor breaking during installation
During the installation process, it is not uncommon for ribbed plastic anchors to break. This can be due to several reasons, such as excessive force applied while hammering or drilling, using an incorrect anchor size, or a poor quality anchor. To avoid anchor breakage, follow these tips:
- Choose the right anchor size: Ensure that you select an anchor that matches the weight and size of the object you are hanging. Refer to the manufacturer’s guidelines or consult an expert if you are unsure.
- Use the correct drilling technique: Before inserting the anchor, drill a hole using the recommended drill bit size. Make sure the hole is deep enough to accommodate the anchor properly.
- Apply gentle force: When hammering the anchor into the hole, use a light touch to avoid excessive force that could cause it to break. Ensure that the anchor is flush with the wall or surface.
Anchor not holding in place
One of the most frustrating problems when installing ribbed plastic anchors is when they fail to hold in place. If your anchor keeps slipping or becomes loose, consider the following solutions:
- Try a different anchor type: If the current anchor is not providing a secure hold, switch to a different type. There are various anchor options available, including toggle bolts or expansion anchors, which may be more suitable.
- Reassess the wall or surface material: Depending on the material you are drilling into, such as drywall, concrete, or plaster, you may need to adjust your installation technique or use specialized anchors designed for that specific material.
- Check the anchor placement: Ensure that the anchor is inserted into the wall or surface in the correct location. If it is too close to an edge or an existing hole, it may not provide a strong hold.
Wrong size or type of anchor used
Using the wrong size or type of anchor can lead to installation issues. Here are a few ways to rectify this common mistake:
- Assess the weight and size of the object: Determine the weight of the item you are hanging and choose an anchor that can support it. If you are unsure, err on the side of caution and opt for a stronger anchor.
- Consult an expert: If you are uncertain about which anchor size or type to use, seek advice from a professional or refer to the manufacturer’s guidelines. They can provide valuable insights and recommend the appropriate anchor for your specific needs.
Incorrect drilling technique
Using the correct drilling technique is crucial for a successful installation. If you are facing issues due to an incorrect drilling technique, keep the following in mind:
- Use the right drill bit size: Refer to the anchor’s packaging or instructions to determine the recommended drill bit size. Using the wrong size can result in a hole that is either too large or too small, compromising the anchor’s effectiveness.
- Apply consistent pressure: When drilling, maintain a steady pressure to prevent the drill bit from skipping or jumping, which can lead to an uneven or poorly drilled hole.
- Drill perpendicular to the surface: Ensure that your drill is perpendicular to the wall or surface to create a straight, vertical hole. Drilling at an angle can result in an improper anchor fit.
Now that you are aware of the common mistakes and troubleshooting tips, you should be able to install ribbed plastic anchors with confidence. By following these guidelines, you can avoid anchor breakage, ensure the anchor holds securely, use the correct anchor size and type, and employ the right drilling technique.
Frequently Asked Questions
What Size Hole Do You Need To Drill For A Ribbed Plastic Anchor?
Drill a hole slightly smaller than the diameter of the ribbed plastic anchor.
How Do You Install Plastic Anchors?
To install plastic anchors, follow these steps: 1. Choose the appropriate anchor size for your project. 2. Drill a hole in the wall using the recommended drill bit size. 3. Insert the plastic anchor into the hole until flush with the wall surface.
4. Gently tap the anchor into place with a hammer. 5. Finally, insert the screw into the anchor and tighten until secure.
What Are Ribbed Anchors Used For?
Ribbed anchors are used for securing items to various surfaces such as walls or ceilings. These anchors, featuring ridges or ribs on the outer surface, provide a secure hold and prevent items from becoming loose or falling. They are commonly used in construction and DIY projects for hanging shelves, cabinets, and other fixtures.
Do You Screw In Plastic Anchors?
Yes, plastic anchors are screwed into walls to provide extra support for hanging objects.
Conclusion
Installing ribbed plastic anchors is a simple and effective way to secure objects to walls, especially in materials like drywall. By following the step-by-step instructions in this blog post, you can successfully install these anchors and ensure stability for your hanging items.
Remember to choose the right size anchor for the job and use the proper tools for installation. With a little patience and attention to detail, you’ll have your items securely mounted in no time. Happy installing!