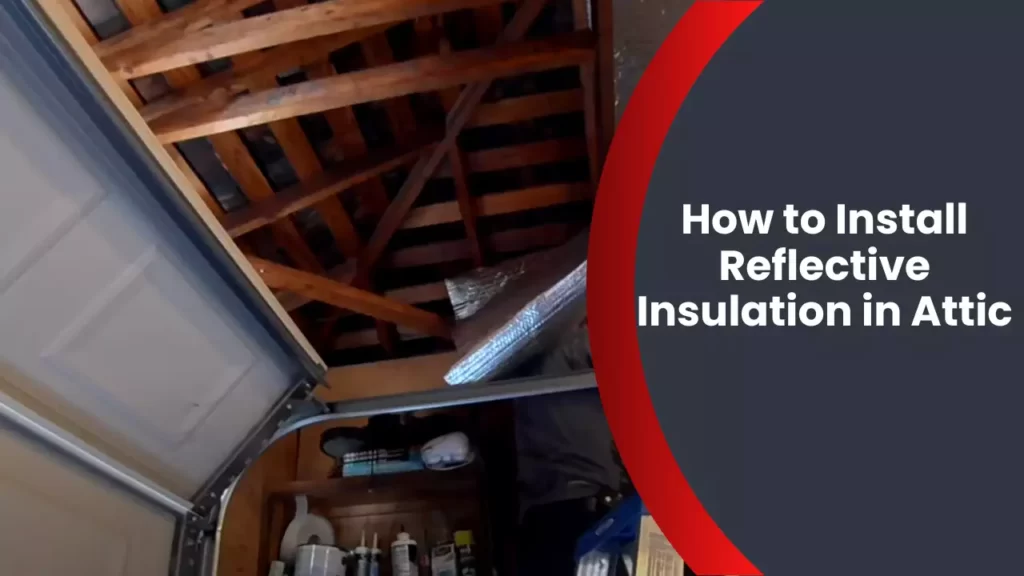
To install reflective insulation in the attic, start by cleaning the area thoroughly, and then measure and cut the insulation to fit the space. Lay the insulation with the shiny side facing down, ensuring it covers the entire attic floor.
Introducing reflective insulation in your attic can greatly improve energy efficiency and reduce heat transfer. By reflecting radiant heat away, it helps maintain a comfortable temperature in your home during hot summers and cold winters. However, installing reflective insulation requires careful planning and execution to ensure optimal results.
We will provide a step-by-step guide on how to properly install reflective insulation in your attic for maximum energy savings. By following these instructions, you can enhance the insulation in your attic and enjoy a more energy-efficient living space.
Choosing The Right Reflective Insulation For Your Attic
When it comes to improving energy efficiency in your home, installing reflective insulation in your attic can make a significant difference. Reflective insulation works by reflecting heat away from your living space, keeping your home cooler in the summer and warmer in the winter. However, with so many options available in the market, choosing the right reflective insulation for your attic can be overwhelming. This article will guide you through the process, from understanding the different types of reflective insulation to evaluating the R-value and reflectivity to ensure you make an informed decision.
Understanding the Different Types of Reflective Insulation
Before you start the installation process, it’s important to understand the different types of reflective insulation available for attics. These include:
- Radiant barrier foil: This type of reflective insulation is typically made from a sheet of aluminum foil laminated to a substrate material. It works by reflecting radiant heat, which is the primary source of heat transfer in attics.
- Radiant barrier paint: This is a spray-on paint that contains reflective particles. When applied to the underside of the roof deck or attic walls, it acts as a radiant barrier, reflecting heat away.
- Reflective bubble insulation: This type of insulation features a layer of air bubbles sandwiched between reflective foil surfaces. It provides both radiant heat reflection and some degree of thermal insulation.
Assessing Your Attic’s Insulation Needs
Before choosing reflective insulation, it’s essential to assess your attic’s insulation needs. Take into consideration factors such as the climate in your area, the current insulation level, and any existing insulation gaps or air leaks. If your attic lacks sufficient insulation, you may need to add more than just reflective insulation to achieve optimal energy efficiency. Consulting with a professional can help you determine the best insulation strategy for your specific attic.
Evaluating the R-Value and Reflectivity of Reflective Insulation
When selecting reflective insulation, it’s crucial to evaluate the R-value and reflectivity. The R-value measures the insulation’s ability to resist heat flow, indicating its effectiveness. The higher the R-value, the better the insulation. Reflectivity, on the other hand, refers to how well the insulation reflects radiant heat. Look for insulation products with high reflectivity, as they will be more efficient in reducing heat gain or loss in your attic.
Moreover, consider the durability and fire-retardant properties of the reflective insulation. You want a product that will last and meet safety standards.
By understanding the different types of reflective insulation, assessing your attic’s insulation needs, and evaluating the R-value and reflectivity, you can confidently choose the right reflective insulation for your attic. With the right installation, you’ll enjoy improved energy efficiency and a more comfortable home environment.
Preparing Your Attic For Reflective Insulation Installation
Before diving into the installation process of reflective insulation in your attic, it’s crucial to properly prepare the space. This step ensures that you maximize the energy-saving benefits of the insulation and create a sealed and efficient environment. In this section, we will cover the key tasks involved in preparing your attic for reflective insulation installation.
Clearing Out the Attic Space
Clearing out your attic space is the first essential step in preparing for the installation of reflective insulation. Remove any stored items, boxes, or debris that could obstruct the installation process. Having a clean and unobstructed area will allow for easier maneuverability and ensure that the insulation is installed evenly across the attic’s surface.
Inspecting and Repairing Any Existing Insulation
Inspecting and repairing any existing insulation in your attic is another crucial aspect of preparation. Prior to installing reflective insulation, it’s necessary to assess the condition of any insulation currently present. Look for signs of damage, mold, or deterioration, as these factors can negatively impact the effectiveness of your new insulation.
If you come across damaged or ineffective insulation, consider replacing it before proceeding with the reflective insulation installation. Repairing any existing insulation will help create a seamless and efficient thermal barrier in your attic, maximizing the energy-saving potential of the reflective insulation.
Sealing Air Leaks and Gaps
Sealing air leaks and gaps is another critical task in preparing your attic space. These gaps can enable air infiltration and reduce the overall efficiency of your insulation. Taking the time to identify and seal these gaps will help create an airtight environment that optimizes the insulation’s performance.
Start by carefully inspecting the attic for any visible cracks, holes, or gaps. Common areas to check include around ductwork, chimneys, electrical wiring, and plumbing penetrations. Use caulk, weatherstripping, or foam insulation to seal these gaps, ensuring a tight seal that prevents air leakage.
Additionally, consider insulating attic access points, such as hatch doors or pull-down stairs. Insulation covers or weatherstripping can be used to limit air movement through these openings. By sealing air leaks and gaps, you create a well-insulated attic space that promotes energy efficiency and reduces heating and cooling costs.
Installing Reflective Insulation In Your Attic
Installing Reflective Insulation in Your Attic
————————————
Installing reflective insulation in your attic is a cost-effective way to improve energy efficiency and reduce heat gain during the hot summer months. Reflective insulation works by reflecting radiant heat away from your living space, keeping it cooler and reducing the need for excessive air conditioning. In this guide, we will take you through the step-by-step process of measuring and cutting the reflective insulation sheets, applying the insulation to the attic rafters, securing the insulation in place, and ensuring proper coverage and overlap.
Measuring and Cutting the Reflective Insulation Sheets
—————————————–
Before you can install reflective insulation in your attic, you must accurately measure the area to ensure you have enough material. Start by measuring the length and width of the area where the insulation will be installed. Add a few extra inches to each measurement to allow for any discrepancies or adjustments. Once you have the measurements, you can then proceed to cut the reflective insulation sheets accordingly.
Applying the Insulation to the Attic Rafters
————————————–
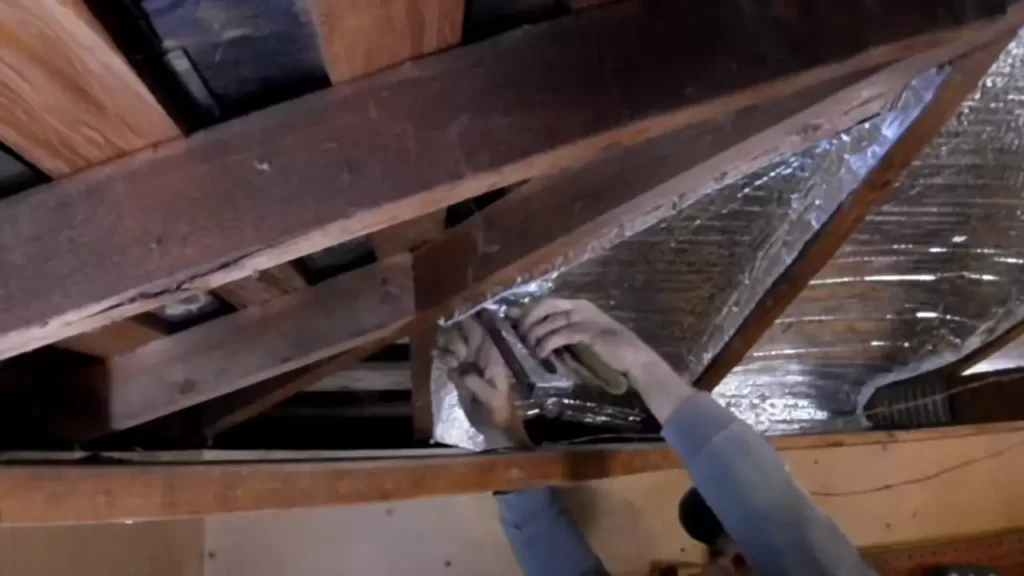
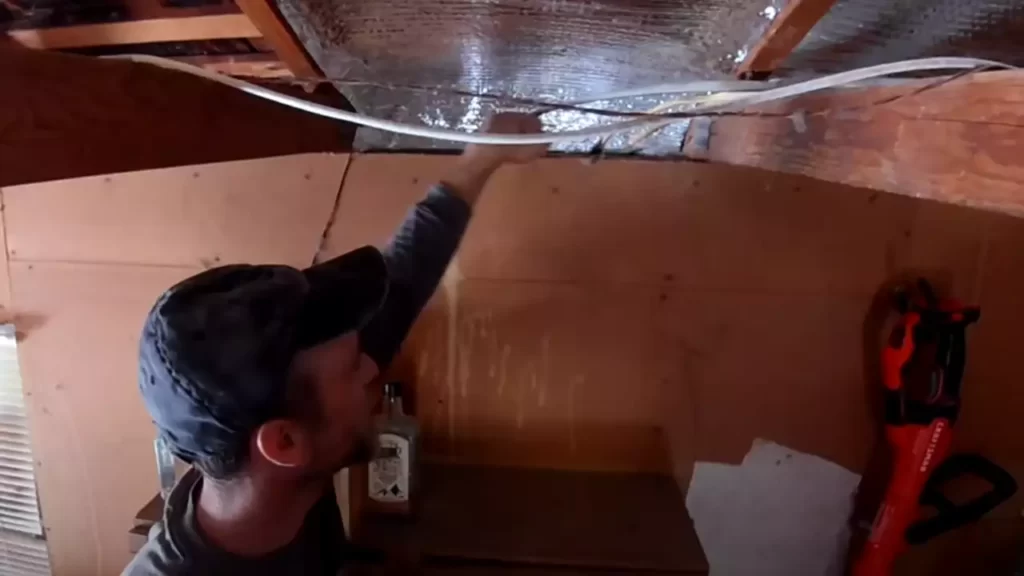
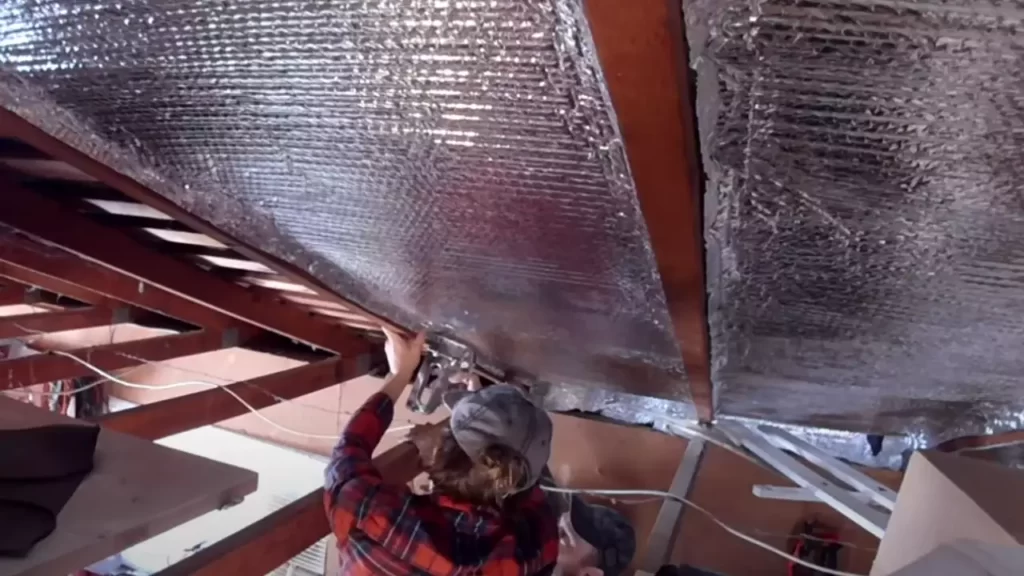
Now that you have the reflective insulation sheets cut to size, it’s time to apply them to the attic rafters. Start at one end of the attic and work your way across in a methodical fashion. Use a staple gun or adhesive to secure the insulation to the rafters, making sure it is taut and properly aligned. Repeat this process for each sheet, overlapping the edges slightly to ensure a tight seal and maximum coverage.
Securing the Insulation in Place
———————————
To ensure the insulation remains in place, it is important to secure it properly. One method is to use adhesive, applying it to the back of the insulation and pressing it firmly against the rafters. This provides a strong bond that prevents the insulation from sagging or falling down over time. Another option is to use a staple gun, carefully inserting staples through the insulation and into the rafters at regular intervals. This method is quick and efficient, but make sure not to use excessive force to avoid damaging the insulation.
Ensuring Proper Coverage and Overlap
———————————-
To maximize the effectiveness of your reflective insulation, it is crucial to ensure proper coverage and overlap. The insulation should be installed in a continuous manner, with no gaps or spaces left unfilled. Additionally, make sure each sheet overlaps with the previous one by at least a few inches. This overlap creates a seamless barrier that prevents any radiant heat from penetrating your living space. Take your time during installation to ensure these details are properly attended to.
Conclusion
—————–
By following these simple steps, you can easily install reflective insulation in your attic to improve energy efficiency. Remember to measure and cut the insulation sheets accurately, apply them securely to the attic rafters, and ensure proper coverage and overlap for maximum effectiveness. Whether you choose to use adhesive or stapling methods, prioritize securing the insulation in place to prevent sagging or falling down over time. With a properly installed reflective insulation, you can enjoy a cooler home and reduce your energy costs.
Additional Tips And Considerations For Reflective Insulation Installation
Additional Tips and Considerations for Reflective Insulation Installation
When it comes to installing reflective insulation in your attic, there are a few additional tips and considerations that can help you ensure a successful and effective installation. In this section, we will discuss important safety precautions to take during the installation process, how to address ventilation and moisture concerns, and when it might be necessary to hire a professional installer.
Safety Precautions during Installation
During the installation of reflective insulation in your attic, it is crucial to prioritize safety to prevent any accidents or injuries. Here are some essential safety precautions to keep in mind:
- Before you start working in your attic, make sure to wear protective gear such as gloves, safety goggles, and a mask to protect yourself from any potential hazards.
- Ensure that you have proper lighting in your attic to maintain clear visibility. If needed, use a portable light source or a headlamp.
- Take extra caution while walking or crawling in your attic to avoid stepping on fragile areas or damaging the insulation. It’s a good idea to lay down plywood boards as a walkway.
- If you need to access electrical wiring or fixtures in your attic, turn off the power and use appropriate safety measures, such as wearing rubber gloves.
- Always follow the manufacturer’s instructions and guidelines for handling and installing the reflective insulation.
Addressing Ventilation and Moisture Concerns
Proper ventilation is essential in an attic to prevent moisture buildup and maintain good air quality. Here are a few considerations when installing reflective insulation:
- Ensure that your attic has adequate ventilation before installing the reflective insulation. Insufficient ventilation can lead to trapped moisture and potential issues with mold and mildew.
- Check for any existing ventilation systems or vents in your attic and make sure they are not blocked or obstructed by the insulation. If needed, reroute the insulation or install baffles to maintain proper airflow.
- Consider installing a vapor barrier to prevent the transfer of moisture from the living spaces below the attic into the insulation. This can help protect the insulation and prevent any potential damage.
- If you live in an area with high humidity or prone to moisture problems, consider installing a dehumidifier in your attic. This can help regulate moisture levels and prevent any potential issues.
Hiring a Professional Installer if Necessary
While installing reflective insulation in your attic can be a DIY project, there might be instances where hiring a professional installer is necessary. Here are a few situations where seeking professional help is recommended:
- If you are unsure about the proper installation technique or lack the necessary tools and equipment, it’s best to hire an experienced professional who can ensure a proper installation.
- In homes with complex attic configurations or specific challenges, such as cathedral ceilings or dormers, a professional installer can provide expertise and guidance to overcome these obstacles.
- If you have any physical limitations or health concerns that may make it difficult for you to safely install the insulation, hiring a professional can provide the peace of mind and ensure a safe installation.
- Lastly, if you simply don’t have the time or inclination to tackle the installation yourself, hiring a professional can save you valuable time and effort.
In conclusion, by following these additional tips and considerations for reflective insulation installation, you can ensure a safe and effective installation process. Prioritizing safety, addressing ventilation and moisture concerns, and seeking professional help when necessary will help you optimize the effectiveness and longevity of your reflective insulation in the attic.
Maintaining Reflective Insulation Efficiency In Your Attic
After installing reflective insulation in your attic, it is important to regularly maintain and monitor its efficiency to ensure maximum energy savings and comfort levels in your home. By following a few simple steps, you can prolong the lifespan of the insulation and optimize its performance. Let’s take a look at some key practices to help you maintain the efficiency of your reflective insulation in the attic.
Regularly Inspecting and Cleaning the Insulation
Regular inspections of your reflective insulation are essential to catch any potential issues early on. With time, dust, debris, and pests can accumulate in the attic, affecting the performance of the insulation. By allowing uninterrupted heat flow, these factors can reduce the insulation’s ability to reflect radiant heat effectively.
To ensure your reflective insulation remains efficient, set a schedule for inspecting and cleaning your attic. Here’s how you can do it:
- Observe the condition of the reflective insulation during daylight to check for any tears, punctures, or indentation.
- Inspect the attic for signs of dust, debris, or pest infestation around the insulation.
- Clean the insulation using a soft brush or vacuum cleaner with a brush attachment to remove any debris or accumulated dust gently.
By keeping your reflective insulation clean and free from damage, you can ensure it continues to reflect radiant heat efficiently, maintaining optimal thermal performance in your attic.
Monitoring Energy Savings and Comfort Levels
Regularly monitoring your energy savings and comfort levels is crucial to determine the efficiency of your reflective insulation in the attic. By keeping an eye on these factors, you can identify potential issues early on and take appropriate action. Here’s how you can monitor the energy savings and comfort levels:
- Compare your energy bills before and after installing reflective insulation to determine the amount of energy you are saving.
- Monitor the temperature and humidity levels in your home during different seasons to assess the insulation’s impact on comfort.
- Keep track of any fluctuations in energy usage or comfort levels, as these may indicate a need for inspection or maintenance of the insulation.
By regularly monitoring and analyzing your energy savings and comfort levels, you can address any issues promptly and ensure that your reflective insulation continues to operate efficiently in your attic.
Replacing or Replenishing Reflective Insulation as Needed
Over time, reflective insulation may wear out or become less effective due to various factors such as aging, damage, or changes in the attic environment. It is essential to address these issues promptly to maintain the efficiency of the insulation. Here’s what you need to know:
If you notice any significant damage or deterioration in your reflective insulation, consider replacing it with a new one. This ensures that your attic continues to benefit from the reflectivity and thermal properties of the insulation.
In addition, if you have recently made any changes to your attic, such as adding new fixtures or conducting renovations, it is crucial to replenish the insulation to ensure its effectiveness. By doing so, you can maintain the insulation’s thermal resistance and prevent any heat loss or gain.
By replacing or replenishing your reflective insulation as needed, you can ensure that your attic’s energy efficiency and comfort levels are consistently optimized.
Common Issues And Troubleshooting
When it comes to installing reflective insulation in your attic, it is important to be aware of common issues that may arise and troubleshoot them effectively. By addressing these concerns, you can ensure that your insulation is functioning optimally and providing maximum energy efficiency.
Dealing with Mold or Mildew Growth
Mold and mildew growth can be a common issue in attics, especially in areas with high humidity levels. If you notice any signs of mold or mildew on the reflective insulation, it is crucial to address the problem promptly. Here are some steps you can take to deal with mold or mildew growth:
- Identify the source of moisture: Mold and mildew thrive in damp environments. Check for any sources of water leaks or excess humidity that may be causing the issue.
- Fix the underlying issue: Once you’ve identified the source of moisture, take the necessary steps to fix the problem. This may involve repairing roof leaks, improving ventilation, or addressing plumbing issues.
- Clean the affected area: If the mold or mildew growth is limited to a small area, you can clean it using a solution of water and mild detergent. Make sure to wear protective gear, such as gloves and a mask, to avoid inhaling spores.
- Prevent future growth: To prevent mold or mildew from returning, ensure proper ventilation in your attic and maintain a dry environment. Consider using a dehumidifier or installing vents if necessary.
Resolving Issues of Inadequate Insulation
If you notice that your attic is not sufficiently insulated, it can lead to energy loss and a less comfortable living environment. Fortunately, there are steps you can take to resolve inadequate insulation:
- Assess the insulation level: Start by determining the current insulation level in your attic. This can be done by measuring the thickness of the insulation or consulting a professional.
- Add additional insulation: If the existing insulation is not enough, consider adding more. Choose insulation materials that are suitable for your climate and follow the manufacturer’s instructions for installation.
- Seal air leaks: Inadequate insulation can be worsened by air leaks. Inspect your attic for any gaps or cracks where air may be escaping. Seal these areas using caulk, expanding foam, or weatherstripping.
- Consider professional help: If you are unsure about how to resolve the insulation issue or if it requires extensive work, it may be beneficial to consult a professional insulation contractor.
Troubleshooting Heat Transfer Problems
Heat transfer problems can arise when there are areas of your attic that are not effectively protected by reflective insulation. To troubleshoot these issues, follow these steps:
- Inspect the insulation installation: Check if the reflective insulation is properly installed and covering all the necessary areas. Ensure that there are no gaps or overlaps that can compromise its effectiveness.
- Enhance insulation coverage: If you notice any areas that are not adequately covered by the insulation, add additional insulation or use reflective foil tapes to seal any gaps.
- Address radiant heat sources: Identify any sources of radiant heat in your attic, such as HVAC ducts or recessed lighting fixtures. Use reflective barriers or insulation to block the transfer of heat towards the rest of the attic.
- Consider radiant barriers: If heat transfer issues persist, consider adding a radiant barrier, such as aluminum foil, on top of the existing insulation. This can further reduce radiant heat transfer.
By troubleshooting these common issues with reflective insulation in your attic, you can ensure that your insulation is performing optimally and providing the energy efficiency benefits you desire. Regular maintenance and addressing problems promptly will help create a more comfortable and cost-effective living environment.
Frequently Asked Questions
Where Do You Put Reflective Insulation In The Attic?
Reflective insulation should be placed on the attic floor, directly under the roof. This helps to reflect radiant heat away, keeping the attic space cooler. It also reduces heat transfer into the living areas below, leading to energy savings and improved comfort.
Does Reflective Insulation Work In Attic?
Yes, reflective insulation works in the attic. It helps prevent heat transfer and improves energy efficiency. The reflective surface bounces back the sun’s radiation, keeping the attic cool in summer and warm in winter. It’s an effective solution for saving energy and reducing utility costs.
Which Way Does Reflective Insulation Go?
Reflective insulation should be installed with the shiny side facing toward the air space, usually facing outward. This reflects radiant heat, improving energy efficiency.
Should Reflective Insulation Be In Or Out?
Reflective insulation should be installed with the reflective side facing towards the air space.
Conclusion
Installing reflective insulation in your attic is a cost-effective way to improve energy efficiency and reduce heat transfer. By following the steps outlined in this guide, you can easily complete the installation process yourself. Remember to adequately prepare the attic space, wear appropriate protective gear, and use proper techniques for securing and sealing the insulation.
With reflective insulation, you can create a more comfortable and energy-efficient home environment. So, go ahead and get started on insulating your attic today!