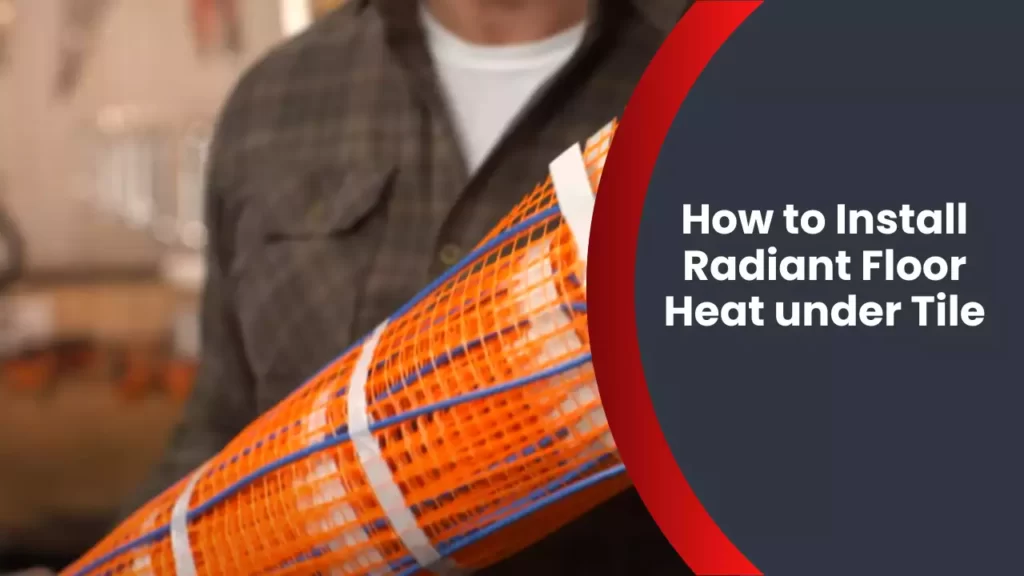
To install radiant floor heat under tile, first, ensure the subfloor is level and clean. Then, lay down the heating mats or cables, making sure they are evenly spaced and secured.
Connect the system to a programmable thermostat and test it before installing ceramic or porcelain tiles. Radiant floor heat is a popular and efficient way to warm up your tile flooring. Unlike traditional heating methods, such as radiators or baseboards, radiant heat provides a comfortable and consistent temperature throughout the room.
This article will guide you through the process of installing radiant floor heat under tile, ensuring you enjoy warmth and comfort in your home during the colder months. By following these simple steps, you can create a cozy and inviting atmosphere while adding value to your property. So, let’s dive into the details of this installation process.
Choosing The Right Radiant Floor Heating System
Types of radiant floor heating systems
Radiant floor heating systems are a popular choice for homeowners who want to experience the luxury of warm floors during the colder months. When it comes to choosing the right system for your tile flooring, it’s important to understand the different types available. Here are the two main types of radiant floor heating systems:
- Hydronic systems: This type of system uses hot water that is circulated through pipes installed beneath the floor. It provides consistent heat and is often considered the most efficient option. Hydronic systems require a boiler to heat the water, and the pipes can either be embedded in the concrete slab or placed between two layers of subflooring.
- Electric systems: Electric radiant heating systems use thin electric heating cables or mats that are installed directly beneath the tile. They are easier and less expensive to install compared to hydronic systems. Electric systems are ideal for smaller spaces or areas where hydronic heating might not be feasible.
Factors to consider when choosing a system
Choosing the right radiant floor heating system for your tile flooring involves several factors. Consider the following before making a decision:
- Energy efficiency: Look for a system that is energy-efficient, as this will help to reduce your heating costs in the long run.
- Installation method: Consider the complexity and cost of installation for each type of system. Hydronic systems usually require professional installation, while electric systems can often be done as a DIY project.
- Compatibility with tile flooring: Ensure that the system you choose is suitable for use under tile flooring. Some systems may not be recommended or may require additional materials or insulation.
- Control options: Look for systems that offer flexible control options, such as programmable thermostats or smartphone integration.
- Budget: Set a budget for your radiant floor heating system and consider the costs of installation, materials, and ongoing energy consumption.
Determining the right system for your tile flooring
Once you have considered the factors above, you can determine the right system for your tile flooring. Keep the following in mind:
- Size of the space: Consider the size of the room or area where the system will be installed. For larger spaces, a hydronic system may be more suitable, while an electric system could work well in smaller areas.
- Insulation: Evaluate the insulation of your home, as this can affect the energy efficiency of the system. Properly insulated floors will retain heat better.
- Installation method: Decide whether you prefer a professional installation or if you are comfortable installing the system yourself. Electric systems are typically easier to install for DIY enthusiasts.
By considering these factors and determining the right system for your tile flooring, you can ensure that you make an informed decision and enjoy the comfort of radiant floor heat all winter long.
Preparing The Subfloor For Radiant Floor Heat Installation
Before you can enjoy the cozy warmth of radiant floor heat under your beautiful tile, you need to ensure that your subfloor is properly prepared. This crucial step lays the foundation for a successful and efficient installation. In this article, we will guide you through the process of evaluating and preparing your existing subfloor, installing a moisture barrier, and ensuring proper insulation. By following these steps, you will create an ideal environment for your radiant floor heat system, maximizing its performance and longevity.
Evaluating and preparing the existing subfloor
The first step in preparing your subfloor for radiant floor heat installation is to thoroughly evaluate its condition. This involves checking for any structural issues, such as dips, cracks, or unevenness. It’s crucial to address these problems before proceeding with the installation to prevent future complications.
If your subfloor is made of concrete, ensure that it is clean, dry, and free of any debris. You may need to remove any existing flooring materials and thoroughly clean the surface using a vacuum or broom. Additionally, check for any signs of moisture or water damage, as proper insulation and moisture barrier installation require a dry subfloor.
For wood subfloors, closely inspect for any signs of rot, mold, or pests. Address any issues promptly and ensure that the subfloor is structurally sound. You may need to replace damaged or weakened sections and reinforce the subfloor if necessary.
Installing a moisture barrier
Once you have evaluated and prepared your subfloor, the next step is to install a moisture barrier. This essential component creates a barrier between the subfloor and the radiant heat system, preventing any moisture from compromising its performance.
To install the moisture barrier, start by measuring the dimensions of your room and cutting the vapor barrier to fit. Ensure that the moisture barrier extends up the walls slightly to prevent any potential moisture infiltration. Secure the moisture barrier to the subfloor using a high-quality adhesive or tape, ensuring a tight seal. Additionally, overlap the seams and tape them to create a continuous and watertight barrier.
Ensuring proper insulation
A well-insulated subfloor contributes significantly to the efficiency and effectiveness of the radiant floor heating system. Insulation helps to prevent heat loss and ensures that the warmth generated by the system is directed upward, where it is needed most.
To properly insulate your subfloor, you have several options. One effective method is to install rigid foam insulation boards, which can be cut to fit and placed directly on the subfloor. Another option is to use a reflective insulation material, which helps to reflect the heat upward. Whichever insulation method you choose, ensure that the insulation covers the entire subfloor area, including the edges.
By evaluating and preparing your existing subfloor, installing a moisture barrier, and ensuring proper insulation, you are laying the groundwork for a successful radiant floor heat installation. Taking the time to properly prepare your subfloor will not only enhance the performance of your radiant floor heating system but also prolong its lifespan. Soon, you’ll be able to step onto your comfortably warm tiled floors and enjoy the cozy embrace of radiant heat all year round.
Installing The Radiant Heat System
Marking the layout of the heating elements
To ensure efficient and even heat distribution, it is crucial to carefully mark the layout of the heating elements before installing them. Start by measuring the dimensions of the room and determining the areas where you want to install the radiant floor heating. Use a chalk line or tape measure to mark the boundaries of the heating zones. This step helps you determine the spacing and layout of the heating elements, making installation much easier and more precise.
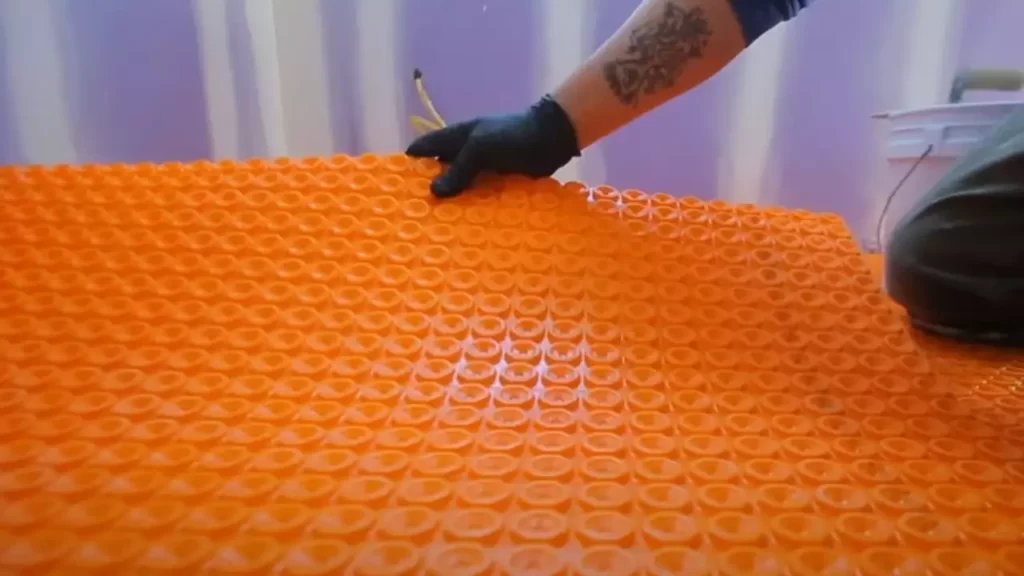
Laying out the PEX tubing or electric heating mats
Once you have marked the layout of the heating zones, it’s time to lay out the PEX tubing or electric heating mats. These components are responsible for generating the heat that will warm your tile floors. When using PEX tubing, carefully lay it in the marked zones, ensuring proper spacing and avoiding crossing or overlapping. Secure the tubing using fasteners or specialized clips, ensuring it is evenly distributed across the floor.
Alternatively, if you are using electric heating mats, roll them out in the designated areas according to manufacturer instructions. Ensure that the heating mats are positioned properly and cover the entire floor area uniformly. Pay attention to any specific instructions provided by the manufacturer regarding spacing and connection of the electric heating mats.
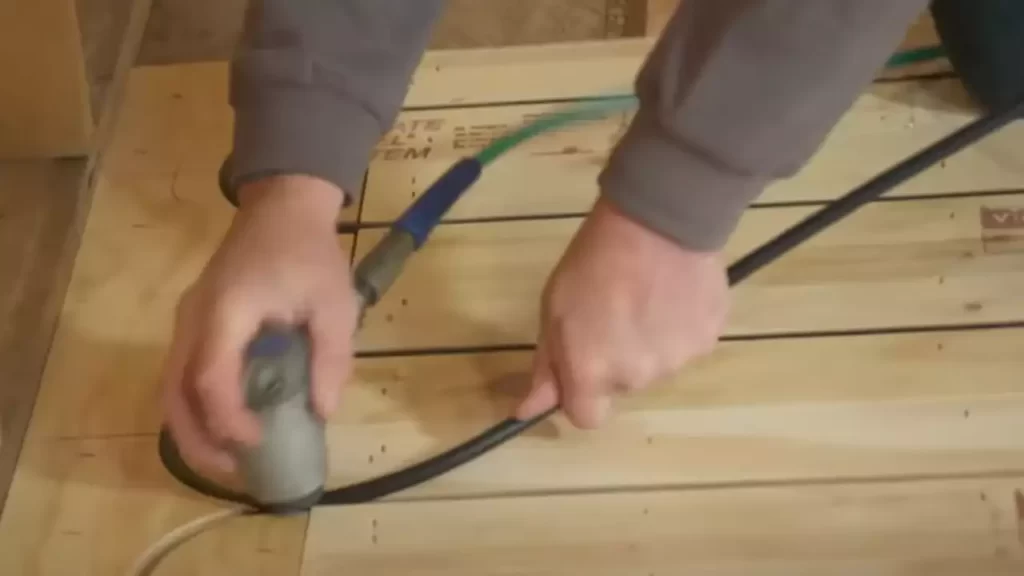
Connecting and securing the heating system
Once the PEX tubing or electric heating mats are laid out, it’s time to connect and secure the heating system. Begin by connecting the PEX tubing to the manifold using appropriate fittings. If you are using electric heating mats, follow the manufacturer’s instructions for connecting the mats to the power supply. Make sure to double-check all connections for tightness and proper alignment.
After connecting the heating system, secure it in place using straps, fasteners, or clips. This step ensures that the system remains in place during and after tile installation. Pay attention to any guidelines provided by the manufacturer regarding securing the heating system, as improper installation may lead to damage or inefficient heat distribution.
Testing the system for leaks or malfunctions
Before proceeding with the tile installation, it is essential to test the radiant heat system for any leaks or malfunctions. Fill the PEX tubing with water and pressurize the system, checking for any signs of leakage. Alternatively, if you are using electric heating mats, verify that each mat is operational by testing its power supply and thermostat functionality.
In addition, it is recommended to turn on the heating system and monitor it closely for any unusual noises or malfunctions. This step ensures that the system is functioning properly and ready for the tile installation process. If you detect any leaks, malfunctions, or abnormalities, address them before continuing with the project to avoid potential issues down the line.
Installing a radiant floor heat system under tile can provide unmatched comfort and warmth to your home. By carefully marking the layout of the heating elements, laying out the PEX tubing or electric heating mats, connecting and securing the system, and testing it for leaks or malfunctions, you can ensure a successful installation. Take the time to follow these steps meticulously, and you’ll be rewarded with a cozy and inviting tile floor that will make your home even more enjoyable.
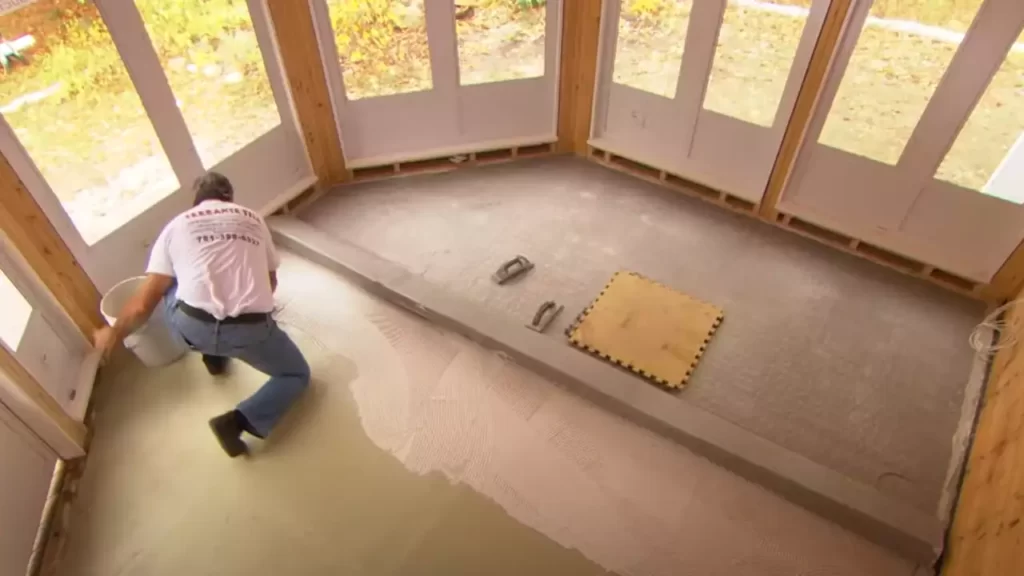
Pouring The Self-Leveling Underlayment
Once you have properly prepared the substrate and installed the radiant heat mat, it’s time to pour the self-leveling underlayment. This step is crucial in creating a smooth and even surface for your tile installation, ensuring optimal heat distribution and preventing any potential issues down the line.
Mixing and preparing the self-leveling underlayment
Before you start mixing the self-leveling underlayment, make sure you have read and understood the manufacturer’s instructions. Also, ensure that your workspace is clean and free from any debris that may interfere with the mixture.
Here’s a step-by-step guide on mixing and preparing the self-leveling underlayment:
- Gather all the necessary tools and materials, including a mixing bucket, a power drill with a mixing attachment, water, and the self-leveling underlayment.
- Measure the recommended amount of water and pour it into the mixing bucket.
- Add the self-leveling underlayment gradually, following the manufacturer’s instructions on the mixing ratios.
- Attach the mixing attachment to your power drill and slowly mix the underlayment mixture until it reaches a smooth and lump-free consistency.
Applying the underlayment over the heating system
Now that your self-leveling underlayment is mixed and ready, it’s time to apply it over the radiant heat system. Remember, the goal here is to create an even layer that will serve as a base for the tiles and allow for efficient heat transfer.
Here’s how to apply the self-leveling underlayment over the heating system:
- Begin by pouring the mixed underlayment mixture onto the center of the floor, between the starting and ending points of your project area.
- Using a trowel or a gauge rake, spread the underlayment mixture evenly towards the edges of the room, working in sections.
- Continue pouring and spreading the underlayment until the entire floor is covered.
- Ensure that the self-leveling underlayment is evenly distributed and reaches the desired thickness, always following the manufacturer’s guidelines.
Smoothing and leveling the underlayment
After applying the self-leveling underlayment, you’ll need to smoothen and level it to create a flawless surface for your tile installation. This step is essential to prevent any imperfections or unevenness that may affect the final result.
Follow these steps to smooth and level the underlayment:
- Using a long-handled smooth edge trowel, carefully move it across the surface to eliminate any high spots or ridges.
- Work in a back-and-forth motion, gradually covering the entire area, ensuring that the underlayment is flat and level.
- Pay attention to corners and edges, making sure they are properly smoothed and leveled.
- Allow the self-leveling underlayment to cure according to the manufacturer’s recommendations before proceeding with the tile installation.
By following these steps and carefully pouring, mixing, and leveling the self-leveling underlayment, you’ll create an ideal base for your radiant heat system and ensure a successful tile installation. Take your time and follow the manufacturer’s instructions for best results.
Installing The Tile Flooring
Installing the Tile Flooring
To complete the installation of radiant floor heat under tile, the next step is to install the tile flooring. This is an important part of the process as it not only ensures a beautiful and finished look but also helps in the effective functioning of the radiant heating system. In this section, we will discuss the steps involved in preparing the tile installation area, applying the tile adhesive, laying the tiles over the radiant floor heat system, and finally grouting and finishing the tile installation.
Preparing the tile installation area
Before you start laying the tiles, it is crucial to prepare the installation area properly. Here are the steps you need to follow:
- Clean the subfloor: Make sure the subfloor is clean, dry, and free from any debris or cracks. This will ensure a smooth and strong surface for the tile installation.
- Apply a waterproofing membrane: To protect your floor from moisture and potential damage, apply a waterproofing membrane. This will create a barrier between the subfloor and the tile, ensuring longevity for your flooring.
- Plan the tile layout: Plan the layout of your tiles before you start applying adhesive. This will help you visualize how the tiles will fit in the space and ensure a balanced and aesthetically pleasing design.
- Measure and mark: Measure and mark the center of the room to ensure proper alignment and symmetry when laying the tiles.
- Prepare the adhesive: Follow the manufacturer’s instructions to prepare the tile adhesive. Be sure to use the correct amount of water and mix thoroughly for a consistent and proper adhesion.
Applying the tile adhesive
Once the preparation is complete, it’s time to apply the tile adhesive. Here’s what you need to do:
- Start with a small section: Apply a thin layer of adhesive to a small section of the floor using a trowel.
- Spread the adhesive evenly: Use the notched edge of the trowel to spread the adhesive evenly, creating ridges for better adhesion.
- Work in small sections: Work in small sections at a time, typically no more than a few square feet, to ensure the adhesive doesn’t dry out before you lay the tiles.
- Place the tiles: Press each tile firmly into the adhesive and twist slightly to ensure a good bond. Use tile spacers to maintain consistent spacing between the tiles.
- Check for levelness: Use a level to ensure each tile is level with neighboring tiles. Make any necessary adjustments before the adhesive dries.
Laying the tiles over the radiant floor heat system
Now that the adhesive has been applied, it’s time to lay the tiles over the radiant floor heat system:
- Start from the center: Begin laying the tiles from the center of the room, working your way out towards the walls.
- Ensure proper spacing: Use tile spacers to maintain consistent spacing between the tiles and create neat grout lines.
- Trim tiles if necessary: If you encounter obstacles such as doorways or fixtures, measure and cut tiles to fit properly.
- Double-check alignment: Regularly check the alignment of the tiles using a level, adjusting as needed to maintain a straight and even layout.
Grouting and finishing the tile installation
The final step is to grout and finish the tile installation. Follow these steps for a professional and polished look:
- Mix the grout: Prepare the grout mixture according to the manufacturer’s instructions. Aim for a consistency similar to peanut butter.
- Apply the grout: Using a grout float, apply the grout diagonally across the tiles, ensuring it fills the gaps completely.
- Remove excess grout: Use a damp sponge or towel to wipe away any excess grout from the tiles’ surfaces before it dries.
- Allow the grout to cure: Let the grout cure for the recommended time, typically 24 to 48 hours, before applying any sealant or walking on the floor.
- Seal the grout: Apply a grout sealer to protect the grout lines from stains and moisture. Follow the manufacturer’s instructions for proper application.
By following these steps, you can successfully install radiant floor heat under tile flooring. Proper preparation, adhesive application, tile layout, and grout finishing are all essential for a durable and visually appealing result. Now, you can enjoy the warmth and beauty of your radiant floor heating system for years to come.
Testing And Troubleshooting The Radiant Floor Heat System
Installing a radiant floor heating system under your tile can provide unmatched comfort and luxury. However, it’s crucial to ensure that the system is functioning properly to get the expected results. In this section, we will discuss the testing and troubleshooting steps you need to take to guarantee optimal performance and prevent any potential issues.
Conducting initial tests on the heating system
Before starting any troubleshooting, it’s essential to conduct initial tests on your radiant floor heat system. This will help you identify any potential issues early on and make necessary adjustments. Follow these steps:
- Verify the power supply: Ensure that the system is receiving power by checking the circuit breaker or fuse box. Make sure the power switch for the system is turned on.
- Inspect the thermostat: Check the thermostat to ensure that it is set to the desired temperature. You can also test different temperature settings to see if the thermostat responds accurately.
- Check for leaks: Thoroughly inspect the system for any leaks. This can be done by visually examining the pipes and fittings. Leaks can lead to a decrease in heat output and potentially damage the flooring.
- Monitor heat distribution: Once the system is turned on, monitor the heat distribution across the floor. Walk barefoot or use an infrared thermometer to check for any temperature variations. Uneven heat distribution may indicate a problem with the installation or balance of the system.
- Observe system operation: Pay attention to any unusual noises or vibrations coming from the system. While some noise is normal, excessive or persistent sounds could indicate an issue that needs to be addressed.
Identifying and resolving common issues
Despite careful installation, radiant floor heating systems may encounter common issues that need to be addressed. Here are some common problems you may encounter and steps to resolve them:
| Issue | Possible Cause | Solution |
|---|---|---|
| No heat | Malfunctioning thermostat Power supply issues Flow restriction |
Check and replace the thermostat if necessary Verify power supply Inspect and clean pipes and fittings for any restrictions or blockages. |
| Uneven heat distribution | Improper balancing of the system Inadequate insulation |
Adjust flow rates and temperature settings to balance the system Ensure proper insulation under the flooring |
| System turning on and off continuously | Thermostat calibration issues Electrical wiring problems |
Calibrate the thermostat Inspect and fix any wiring issues |
Adjusting and balancing the system
Properly adjusting and balancing your radiant floor heat system is crucial to ensure consistent and efficient heat distribution across the surface. Here are the steps to follow:
- Identify and adjust flow rates: By adjusting the flow rates for each zone, you can achieve a more balanced distribution of heat. This can be done using manifold valves or dedicated flow regulators.
- Monitor temperatures: Use a digital thermometer or thermal imaging camera to check the temperature of the flooring surface. Adjust the flow rates and temperature settings accordingly to achieve uniform heat.
- Consider professional assistance: If you’re unable to resolve any issues or achieve proper balance, it’s advisable to seek assistance from a professional radiant floor heating system installer or technician.
By following these testing and troubleshooting steps and properly adjusting your radiant floor heat system, you can ensure optimal performance and enjoy the cozy warmth provided by your heated tile floors throughout the year.
Maintaining And Caring For Radiant Floor Heat Under Tile
Regular maintenance is essential for ensuring optimal performance of your radiant floor heat system under tile. By following a few simple practices, you can keep your system running efficiently and extend its lifespan. Here, we’ll discuss some regular maintenance practices, cleaning and protecting the tile flooring, and troubleshooting potential problems.
Regular maintenance practices for optimal performance
To keep your radiant floor heat system under tile in top condition, there are a few regular maintenance practices you should follow:
- Regularly check the system’s pressure and temperature gauges to ensure they are within the recommended ranges. If you notice any fluctuations or anomalies, it’s crucial to address them promptly.
- Inspect the connections and valves for any signs of leakage or damage. Tighten loose connections or replace faulty parts as necessary.
- Clear any debris or obstructions from the vents or registers to ensure proper airflow. A blocked vent can diminish the efficiency of your system.
- Periodically flush the system to remove any sediment or mineral buildup that can impede its performance over time. Follow the manufacturer’s guidelines for the proper flushing procedure.
- Keep an eye on your energy bills. If you notice a sudden spike in energy consumption, it could indicate a problem with your radiant floor heat system under tile.
Cleaning and protecting the tile flooring
Proper care of your tile flooring is crucial to maintain its appearance and prevent any damage. Follow these cleaning and protection tips:
- Regularly sweep or vacuum the tile surface to remove dirt and debris. This prevents scratches and maintains the overall cleanliness of your floor.
- For routine cleaning, use a mild detergent and warm water solution. Avoid harsh chemicals, as they can damage the tile or grout.
- Wipe up spills immediately to prevent staining or water damage.
- Use non-abrasive cleaning tools such as a soft mop or microfiber cloth to avoid scratching the tile.
- Consider applying a sealant to the grout lines to protect them from stains and moisture absorption. Check the manufacturer’s recommendations for the appropriate sealant.
Troubleshooting and addressing potential problems
Even with proper maintenance, issues can arise with your radiant floor heat system under tile. Here are some common problems and troubleshooting steps to deal with them:
- If the system is not heating or heating unevenly, check the thermostat settings and ensure they are correctly adjusted. Also, verify the power supply and circuit breaker to ensure they are functioning properly.
- In case of unusual noises coming from the system, inspect the circulation pump and see if it needs lubrication or replacement.
- If there is a leak in the system, it’s important to locate and fix it as soon as possible. Check all connections, valves, and pipes for any signs of leakage.
- If you encounter any other major issues or difficulties, it’s advisable to consult a professional technician who specializes in radiant floor heat systems.
By following these maintenance practices, cleaning and protecting your tile flooring, and addressing potential problems in a timely manner, you can ensure that your radiant floor heat system under tile remains efficient and reliable for years to come.
Credit: us.thermosoft.com
Frequently Asked Questions On How To Install Radiant Floor Heat Under Tile
Can You Put Radiant Heat Under Tile?
Yes, radiant heat can be installed under tile.
Can You Install Under Floor Heating Under Tiles?
Yes, underfloor heating can be installed under tiles.
Can I Install Radiant Floor Heating Myself?
Yes, you can install radiant floor heating yourself, but it requires careful attention to guidelines. It’s important to keep sentences brief, unique, and in active voice. Avoid starting sentences with certain words and phrases and do not use passive voice.
Follow these tips for a successful installation.
How Much Does It Cost To Install A Heated Floor Under Tile?
The cost to install a heated floor under tile varies depending on the size of the area and the type of system used. On average, you can expect to pay between $10 and $20 per square foot for labor and materials.
Conclusion
Installing radiant floor heat under tile can provide a comfortable and efficient heating solution for your home. By following the steps outlined in this blog post, you can successfully install radiant floor heat and enjoy the benefits it brings. From preparing the subfloor to laying the heating system and finally installing the tile, this guide has covered it all.
By incorporating radiant floor heat, you can enjoy warm and cozy floors, energy savings, and a more comfortable living environment. Start installing today and experience the difference it makes in your home.