To install a push wire outlet, simply turn off the power, remove the old outlet, connect the wires to the new outlet, and secure it in place. (19 words) Installing a push wire outlet is a straightforward process that can be done by following a few simple steps.
Begin by turning off the power to the outlet you will be working on to ensure safety. Next, remove the old outlet by unscrewing the mounting screws and disconnecting the wires. Then, connect the wires to the corresponding terminals on the new push wire outlet, using wire nuts or push-in connectors.
Finally, secure the outlet in place by fastening the mounting screws to the electrical box. With these steps completed, you can restore power to the outlet and enjoy the convenience of a new push wire outlet. (120 words)
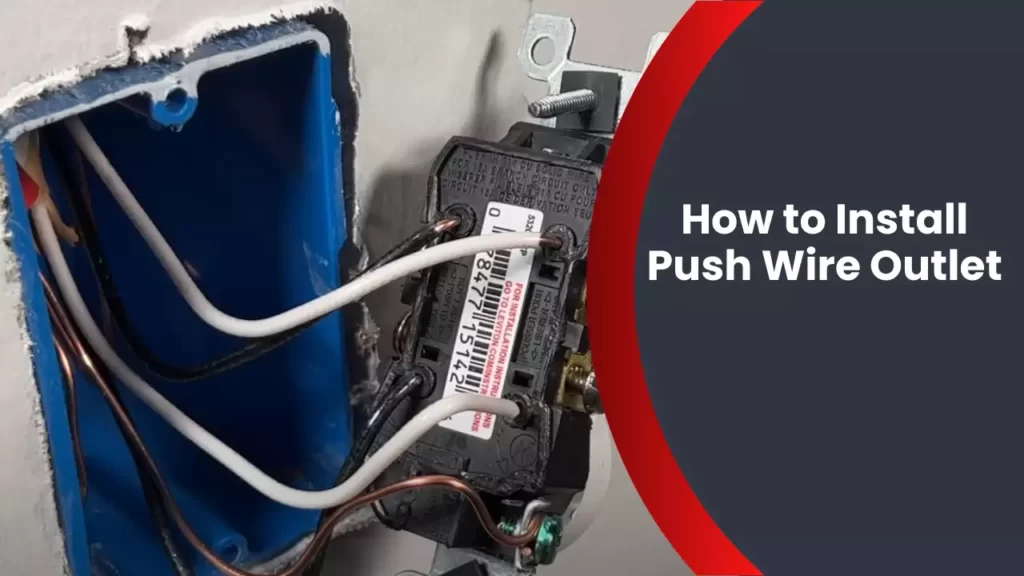
Understanding Push Wire Outlets
When it comes to electrical installations, understanding the different types of outlets available is essential. One such type is the push wire outlet, which offers a convenient and efficient solution for connecting electrical wires. In this section, we will delve into the world of push wire outlets, uncovering what they are and how they work.
What is a push wire outlet?
Before we dive into the inner workings of a push wire outlet, let’s first understand what it actually is. A push wire outlet, also known as a push-in or quickwire outlet, is a type of electrical outlet that simplifies the wiring process. Unlike traditional screw terminals or back-wiring methods, push wire outlets feature a user-friendly design that allows the wires to be inserted quickly and securely.
These outlets are typically used for residential electrical installations, such as power outlets, light switches, and other applications where electrical connections are required. With a push wire outlet, you can say goodbye to the hassle of loosening screws and wrapping wires around terminals.
How does a push wire outlet work?
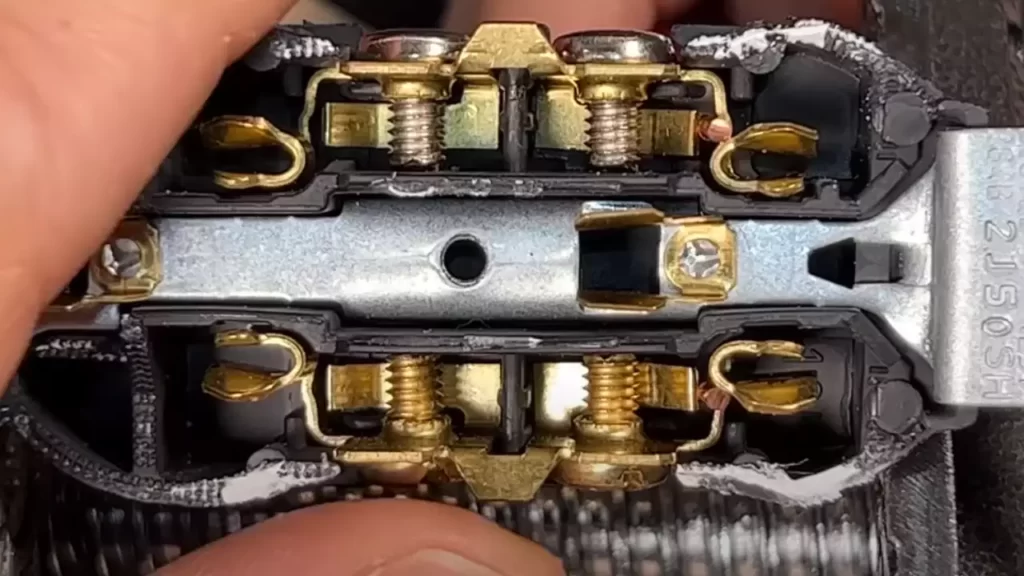
Now that we know what a push wire outlet is, let’s explore how it actually works. The design of a push wire outlet involves special spring-loaded terminals that grip the wires firmly upon insertion. This eliminates the need for tightening screws or using additional tools to secure the connections.
Here’s a step-by-step guide on how to install a push wire outlet:
- Gather all the necessary tools and materials, including the push wire outlet, electrical wires, wire strippers, and a screwdriver.
- Turn off the power supply to the area where you will be installing the outlet. This is crucial for your safety.
- Remove the old outlet, if applicable, by unscrewing the mounting screws and disconnecting the wires.
- Strip the insulation off the ends of the wires to expose a sufficient amount of bare wire for insertion into the push wire terminals.
- Insert each wire into the respective push wire terminal, making sure they are secure and fully inserted.
- Once the wires are inserted, gently tug on each wire to ensure a proper connection. Any loose wires should be reinserted and tested again.
- With the wires securely connected, attach the push wire outlet to the electrical box using the provided screws.
- Restore the power supply and test the outlet to verify that it is functioning correctly.
As you can see, installing a push wire outlet is a straightforward process that eliminates the complexity of traditional wiring methods. By understanding the inner workings of these outlets and following the proper installation steps, you can easily incorporate push wire outlets into your electrical projects.
Tools And Materials Needed
Before you begin the installation of a push wire outlet, it’s essential to have the right tools and materials on hand. By ensuring you are properly equipped, you can complete the installation smoothly and efficiently.
List of tools needed for installation
Here are the tools you’ll need for installing a push wire outlet:
| Tool | Purpose |
|---|---|
| Screwdriver | To secure the outlet in place |
| Wire strippers | To strip the insulation from the wires |
| Needle-nose pliers | For manipulating and bending wires |
| Voltage tester | To ensure the power is off before starting |
| Electrical tape | To insulate and secure connections |
| Wire cutter | To cut wires to the desired length |
List of materials needed for installation
Here is a list of materials you’ll need for installing a push wire outlet:
- Push wire outlet
- Electrical box
- Wire connectors
- Electrical screws
- Outlet cover plate
- Electrical wire
With these tools and materials in your possession, you’ll be well prepared to install a push wire outlet efficiently and safely.
Step-By-Step Guide To Installing A Push Wire Outlet
Installing a push wire outlet is a relatively simple task that can be done by following a few essential steps. In this step-by-step guide, we will walk you through the process of installing a push wire outlet in your workspace. By the end of this guide, you will have a clear understanding of how to properly install a push wire outlet and ensure the functionality of your electrical system.
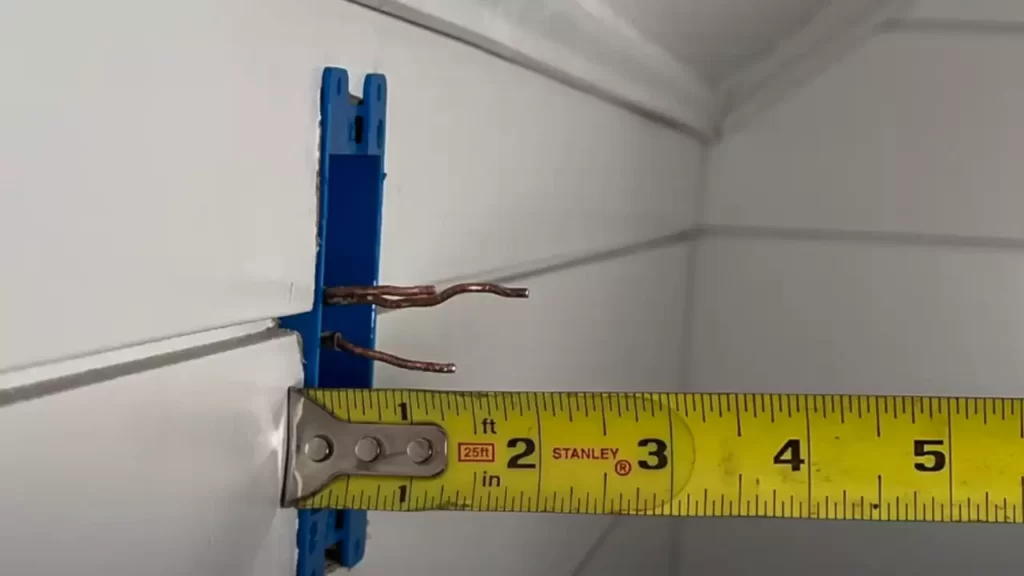
Preparing the workspace
Before starting any electrical work, it is important to prepare your workspace properly. Clear the area around the electrical box, remove any obstacles, and ensure you have enough room to work comfortably.
Turning off the power
Before handling any electrical wires, it is crucial to turn off the power supply to the outlet you are working on. Locate the circuit breaker that controls the power to the specific outlet and switch it off.
Testing the circuit
After turning off the power, it is recommended to double-check if the circuit is indeed turned off. Use a voltage tester to ensure there is no electrical current running through the wires.
Gathering the necessary tools and materials
Before proceeding with the installation, gather all the necessary tools and materials. You will typically need a screwdriver, wire stripper, electrical tape, voltage tester, and the new push wire outlet itself.
Removing the old outlet (if applicable)
If you are replacing an existing outlet, carefully remove the outlet cover by unscrewing the screws holding it in place. Take note of the wiring connections before disconnecting them.
Shutting off the power
Before proceeding, double-check that the power is turned off by using a voltage tester on the outlet’s wires.
Unscrewing the outlet cover
Using a screwdriver, unscrew the screws holding the outlet to the electrical box. Carefully pull the outlet out to expose the wiring connections.
Disconnecting the wiring
Identify the wiring connections and disconnect them by loosening the terminal screws. Take note of the wire colors and their respective positions.
Preparing the new push wire outlet
Inspect the new push wire outlet to familiarize yourself with its terminals and functions. Ensure that it is compatible with your electrical system.
Identifying the terminals
Take a look at the terminals of the new push wire outlet. There should be clearly labeled terminals for the live, neutral, and ground wires.
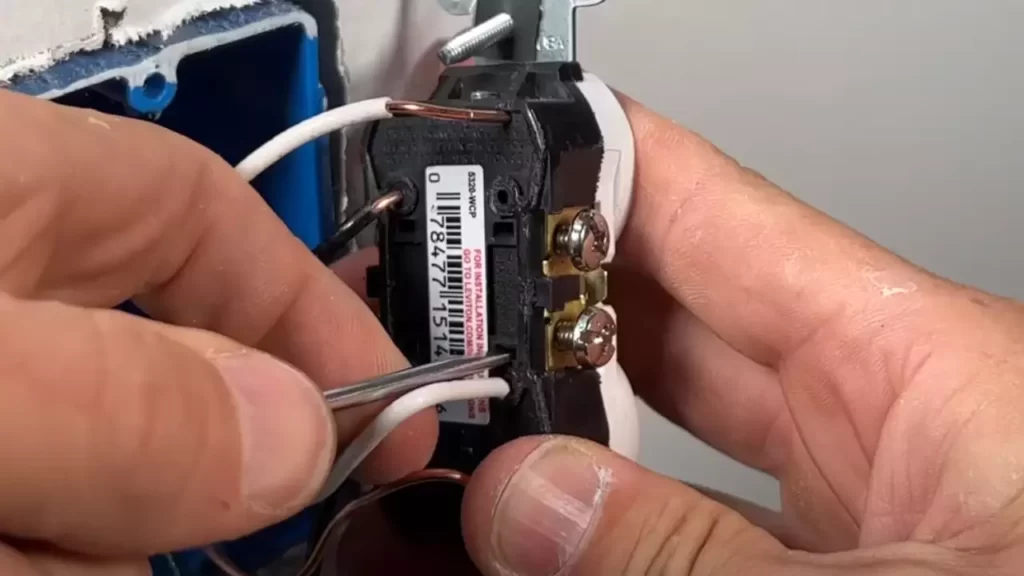
Preparing the wires
If necessary, strip the insulation off the ends of the wires to expose a small portion of copper. This will ensure a proper connection when attaching them to the push wire outlet.
Connecting the wires to the outlet
Match the wire colors to the respective terminal positions on the push wire outlet. Use a screwdriver to tighten the terminal screws, securing the wires in place.
Inserting the wires into the terminals
Insert the stripped ends of the wires into their corresponding terminals. Make sure the wires are fully inserted and secured in place.
Securing the wires
Once the wires are inserted, double-check their tightness to ensure a secure connection. Tug gently on each wire to ensure it does not come loose.
Mounting the new outlet
Position the push wire outlet in the electrical box, ensuring that it fits securely. This will help provide stability and prevent any loose connections.
Attaching the outlet to the electrical box
Using the provided screws, attach the push wire outlet to the electrical box. Make sure the outlet is firmly fastened and aligned properly.
Testing the new outlet
Before turning on the power, perform a final test to ensure the new outlet is functioning properly. Use a voltage tester to check for electrical current and verify that all connections are secure.
Turning on the power
Once you are confident that the new outlet is properly installed and wired, turn on the power supply to the outlet by switching on the circuit breaker.
Checking for proper functionality
After turning on the power, plug in a device or use a voltage tester to verify that the new push wire outlet is working correctly. Ensure that electricity flows properly and that the outlet is providing power as expected.
Safety Considerations And Tips
When it comes to installing a push wire outlet, safety should be your top priority. Whether you are a DIY enthusiast or a professional electrician, taking the necessary precautions can prevent accidents and ensure that the installation is done correctly. In this section, we will discuss some important safety considerations and tips to keep in mind before and during the installation process.
Wear Appropriate Protective Gear
Before starting any electrical work, it is essential to wear the appropriate protective gear. This includes safety glasses to protect your eyes from debris or sparks, gloves to insulate your hands, and non-slip shoes for good traction. Wearing these protective items will help minimize the risk of injury and enhance your overall safety.
Ensuring Correct Wire Connections
Proper wire connections are crucial to ensure the safety and functionality of your push wire outlet. Before making any connections, make sure to turn off the power supply to the area you will be working in. Use a voltage tester to double-check that the power is indeed off. Once confirmed, carefully strip the wire insulation to expose the bare copper conductor. Always follow the manufacturer’s instructions for proper wire placement and connection. Securely tighten the wire connections using appropriate tools such as pliers or wire nuts. Avoid using excessive force, as it can damage the wires or lead to loose connections.
Double-Checking the Power Supply Before Working
Prior to starting your installation, it is essential to double-check the power supply to prevent any electrical hazards. Turn off the circuit breaker or remove the corresponding fuse that controls the area where you will be working. Use a circuit tester to ensure that the power is indeed off before proceeding. This step will help protect you from electric shocks and potential damage to the electrical system.
Remember, if you are unsure or uncomfortable working with electrical outlets, it is always best to consult a professional electrician. Electrical work can be hazardous, and it is vital to prioritize your safety above all else. By following these safety considerations and tips, you can confidently install a push wire outlet while minimizing the risk of accidents.
Troubleshooting Common Issues
Outlet Not Working After Installation
If your push wire outlet is not working after installation, there are a few common issues that you can troubleshoot. First, ensure that the power supply is turned on and that the circuit breaker or fuse for the outlet is not tripped or blown. If there is no issue with the power supply, check the wiring connections.
Wiring Connections Coming Loose
One common issue that can cause the outlet to stop working is loose wiring connections. Over time, vibrations or movement can cause the wires to become loose, resulting in a loss of power. To troubleshoot this issue, follow these steps:
- First, turn off the power supply to the outlet by flipping the circuit breaker or removing the fuse. This is crucial for your safety and preventing electrical accidents.
- Once the power is off, carefully remove the outlet cover plate by unscrewing the screws that hold it in place.
- Next, inspect the wiring connections on the outlet. Look for any loose or disconnected wires.
- If you find any loose wires, use a screwdriver to tighten the terminal screws that secure the wires to the outlet. Ensure that the wires are securely attached and there is no visible bare wire.
- Once the wiring connections are tightened, carefully put the outlet cover plate back in place and tighten the screws.
- Finally, turn the power supply back on and check if the outlet is working properly.
Tripping Circuit Breakers or Blowing Fuses
If your push wire outlet is constantly tripping the circuit breaker or blowing fuses, it could indicate an overload or a short circuit. Here are a few steps to troubleshoot this issue:
- Start by unplugging all devices and appliances that are connected to the outlet.
- Check the wattage ratings of the devices you had connected to the outlet. If the combined wattage exceeds the maximum load capacity of the outlet, it can cause the circuit breaker to trip or the fuse to blow. Reduce the load by connecting the devices to different outlets.
- If the circuit breaker still trips or the fuse blows after removing the devices, there might be a short circuit in the wiring. In this case, it is advisable to contact a licensed electrician to inspect and repair the wiring.
By troubleshooting these common issues, you can ensure that your push wire outlet is working properly and providing a safe and reliable power source. Remember to always prioritize safety and consult a professional if you are unsure or uncomfortable with performing any electrical work.
Additional Considerations
Upgrading to a Push Wire Outlet
When it comes to electrical outlets, one of the key considerations is the ease of installation and maintenance. Upgrading to a push wire outlet can offer significant advantages in terms of convenience and safety. With this type of outlet, you no longer need to deal with the hassle of using screws to secure the wires. Instead, you can simply insert the wires into the designated slots, and they will be securely held in place. This makes the installation process much quicker and simpler, especially for those who may not have a lot of experience with electrical work.
In addition to the convenience factor, push wire outlets also provide a more secure connection. The design of these outlets ensures that the wires are firmly held in place, reducing the risk of loose connections that can lead to electrical issues such as short circuits or power outages. This makes push wire outlets particularly beneficial for high-traffic areas or locations where appliances or devices are frequently plugged and unplugged.
Hiring a Professional Electrician
While installing a push wire outlet may seem like a straightforward task, it is important to note that working with electrical systems can be dangerous if not done correctly. Therefore, it is highly recommended to hire a professional electrician to handle the installation, especially if you are not familiar with electrical work. A licensed electrician will have the necessary skills and knowledge to ensure that the installation is done safely and in compliance with local electrical codes.
Moreover, hiring a professional electrician not only ensures the installation is done correctly but also provides you with peace of mind. Electricians have the expertise to identify any potential issues or underlying electrical problems that could impact the proper functioning of the outlet. They can also provide guidance on the best placement for the outlet to optimize accessibility and minimize any potential hazards.
Additionally, when hiring a professional electrician, it is important to choose someone who is reputable and experienced. Take the time to research and read reviews to find an electrician who has a track record of delivering high-quality work and providing excellent customer service.
Frequently Asked Questions
Are Push In Wire Connectors For Outlets Safe?
Yes, push in wire connectors for outlets are safe. They provide a fast and easy way to connect electrical wires without the need for twisting or soldering. These connectors are designed to secure the wire in place and ensure a reliable and secure electrical connection.
Can You Use Push In And Screws On Outlet?
No, you cannot use push-in and screws on an outlet. It is not safe and may cause electrical hazards. Always follow the manufacturer’s instructions and use the appropriate methods for installation to ensure safety.
How Do You Release The Wire On A Push Switch And Outlet?
To release the wire on a push switch and outlet, carefully twist the terminal screw counterclockwise until it loosens. Slide the wire out from under the screw and release the pressure. Be cautious not to damage the insulation or expose any bare wire while handling.
How Do You Piggyback An Outlet?
To piggyback an outlet, you can use an extension cord or power strip to connect multiple devices to a single outlet. However, be careful not to overload the circuit and ensure the outlet can handle the combined power requirements. Always prioritize safety and consult an electrician if needed.
Conclusion
In this guide, we have provided step-by-step instructions on how to install a push wire outlet. By following these simple instructions, you can easily and safely install a push wire outlet in your home or office. From gathering the necessary tools to connecting the wires, we have covered all the essential aspects.
It is crucial to ensure the outlet is properly connected for efficient electricity flow and to avoid any hazards. Now that you know how to install a push wire outlet, you can confidently tackle this electrical project on your own.