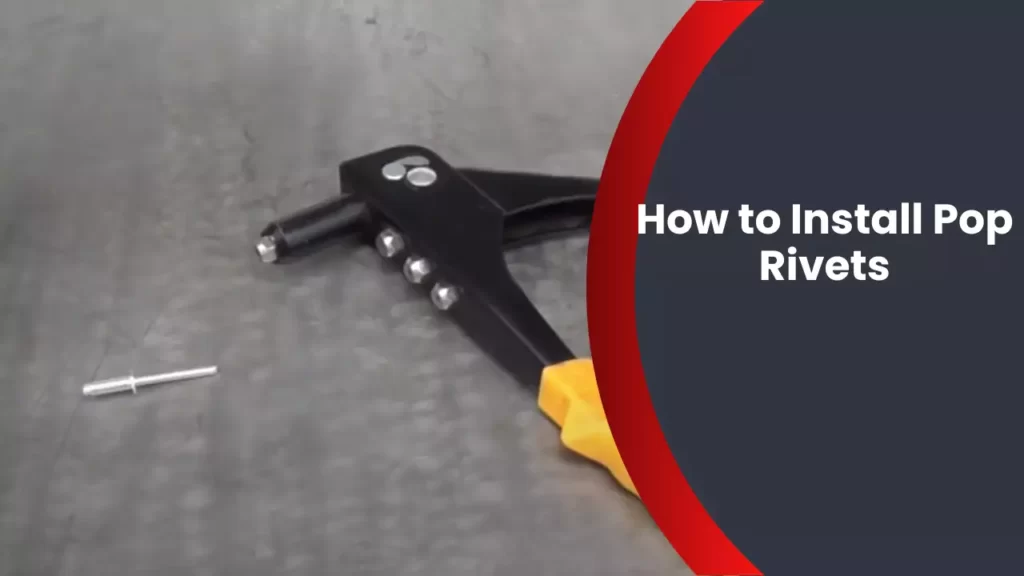
To install pop rivets, start by drilling a hole through the materials you want to join, then insert the rivet’s shank into the hole and squeeze the rivet gun until the mandrel breaks off. A pop rivet is a fastener that is used to join two or more pieces of material together.
It is commonly used in automotive, aerospace, and construction industries. Pop rivets are simple to install and provide a strong and secure connection. We will explain the step-by-step process of installing pop rivets, along with some important tips to ensure a successful installation.
So, let’s get started!
The Basics Of Pop Rivets
What are pop rivets and their uses
Pop rivets, also known as blind rivets or Rivets nuts, are mechanical fasteners used to join two or more materials together. They consist of a smooth, cylindrical shaft with a mandrel, which is a thin rod, running through the center. Once inserted into the pre-drilled holes of the materials being joined, the mandrel is pulled, causing the rivet to deform and create a secure bond.
Pop rivets have a wide range of uses across various industries. They are commonly used in automotive, aerospace, construction, and manufacturing applications. With their ability to join materials without requiring access from both sides of the workpiece, pop rivets are especially advantageous when it comes to fastening materials in confined spaces or areas that are difficult to reach.
Different types of pop rivets
There are several types of pop rivets available, each designed for specific applications. The choice of rivet depends on factors such as the materials being joined, the required strength, and the desired aesthetics. Here are three commonly used types of pop rivets:
- Standard Open-End Rivets: The most basic type, open-end rivets are suitable for general-purpose fastening of materials like metal and plastic. They have a domed head and are available in various sizes and materials.
- Closed-End Rivets: These rivets have a closed head that creates a watertight seal, making them ideal for applications where moisture resistance is necessary. Closed-end rivets are commonly used in plumbing, automotive, and marine industries.
- Peel Rivets: Peel rivets have a unique design that allows the mandrel to split into two, creating a large flange on the blind side of the material being joined. This type of rivet is commonly used in applications where a larger bearing surface is required, such as in sheet metal or electronics assembly.
Advantages of using pop rivets
Using pop rivets offers several advantages over other fastening methods. Here are some key benefits:
- Efficiency: Pop rivets can be installed quickly and easily, reducing assembly time and labor costs.
- Versatility: Pop rivets can join a wide range of materials, including metal, plastic, and composite materials.
- Accessibility: Pop rivets can be installed from one side of the workpiece, making them ideal for applications where access is limited.
- Strength: Pop rivets provide a strong and reliable joint, ensuring the stability of the assembled components.
- Vibration resistance: Pop rivets have excellent resistance to vibration, making them suitable for use in applications subject to movement or shaking.
- Aesthetics: Pop rivets offer a clean and neat appearance, as the mandrel is typically removed after installation, leaving only the rivet’s head visible.
With their simplicity, versatility, and strength, pop rivets have become a popular choice for many industries when it comes to fastening materials securely and efficiently. The different types of pop rivets available cater to specific needs and offer options for various applications, ensuring that there is a suitable rivet for every project.
Tools And Materials Needed
Before you begin installing pop rivets for your project, it’s important to gather all the necessary tools and materials. Having everything in place will ensure a smooth and efficient installation process. Below, we have listed the essential tools for pop rivet installation, discussed different types of pop rivet guns and their features, and provided tips for selecting the right pop rivets for your specific project.
Essential tools for pop rivet installation
When it comes to installing pop rivets, having the right tools is crucial. Here are the essential tools you will need:
- Rivet gun: This is the main tool used to install pop rivets. It is designed to pull the mandrel, creating a tight and secure connection.
- Drill: A drill will be needed to create a hole in the material where the rivet will be inserted.
- Drill bits: Depending on the size of the rivets, you will need suitable drill bits to create the necessary holes.
- Marker or pencil: This will be used to mark the spots where you need to drill the holes.
- Clamps or vise grips: These tools will hold the materials together securely while you work.
- Pop rivets: Of course, you will need the pop rivets themselves. Make sure to choose the appropriate size and material for your project.
- Protective gear: Safety should always be a priority. Wear gloves and safety goggles to protect your hands and eyes from any accidents.
Types of pop rivet guns and their features
When it comes to pop rivet guns, there are several types available on the market. Each type has its own features and is suitable for different applications. Here are some common types of pop rivet guns:
| Pop Rivet Gun Type | Features |
|---|---|
| Hand Riveter: | Simple and easy to use, suitable for small-scale projects. |
| Lever Riveter: | Provides more leverage, making it ideal for larger and more demanding projects. |
| Air Riveter: | Powered by compressed air, allows for faster and more efficient installation. |
These are just a few examples, and there are other types of pop rivet guns available on the market. Consider the requirements of your project and choose the appropriate type that will best suit your needs.
Selecting the right pop rivets for your project
Choosing the right pop rivets is essential for a successful installation. Here are some tips to help you select the right pop rivets for your project:
- Material: Consider the material of the rivets. Stainless steel rivets are commonly used for their durability, while aluminum rivets are ideal for lightweight projects.
- Size: The size of the rivets should match the thickness of the materials you are joining. Using the wrong size could result in a loose connection.
- Head style: Pop rivets come in various head styles, such as dome, countersunk, and large flange. Choose the appropriate head style based on your aesthetic and functional requirements.
- Grip range: Take into account the grip range of the rivets, which refers to the maximum thickness of the materials they can join together. Ensure the grip range is suitable for your project.
By considering these factors, you can ensure that you select the right pop rivets for your project, ultimately leading to a strong and reliable connection.
Step-By-Step Guide To Installing Pop Rivets
Pop rivets are versatile fasteners used for joining two or more materials together. They are commonly used in automotive, construction, and DIY projects. Installing pop rivets may seem daunting if you’re unfamiliar with the process, but with the right tools and a step-by-step guide, you’ll be able to tackle any riveting project with ease. In this guide, we’ll walk you through each step, from preparing the materials and workspace to inspecting the installed rivet for proper installation.
Preparing the materials and workspace
Before you begin installing pop rivets, it’s important to gather the necessary materials and prepare your workspace. Here’s a quick checklist:
- Rivet gun
- Pop rivets (appropriate size for your project)
- Drill and drill bits (if pre-drilling holes is required)
- Safety goggles and gloves
- Workbench or sturdy surface
Make sure you have all the materials within reach and that your workspace is clean and well-lit. Safety should be your top priority, so wearing goggles and gloves is essential to protect yourself from any flying debris.
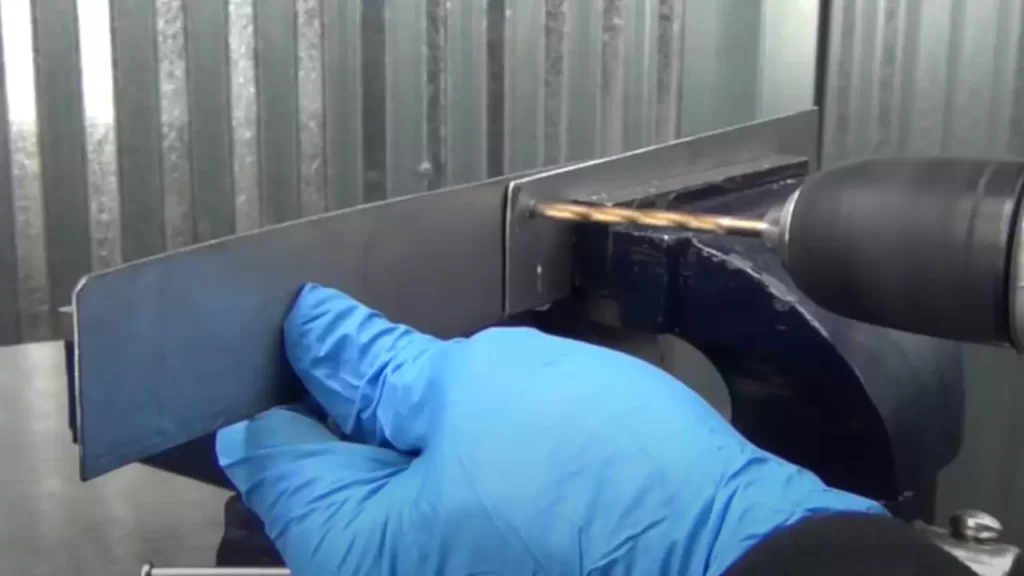
Pre-drilling holes (if necessary)
In some cases, you may need to pre-drill holes before installing the pop rivets. This is especially true if you’re working with hard or thick materials. To determine if pre-drilling is necessary, check the instructions or guidelines for your specific project.
If pre-drilling is required, use the appropriate drill bit size. Ensure that the hole diameter matches the rivet size to allow for a snug fit. Remember to apply light, steady pressure as you drill, taking care not to damage the surrounding material.
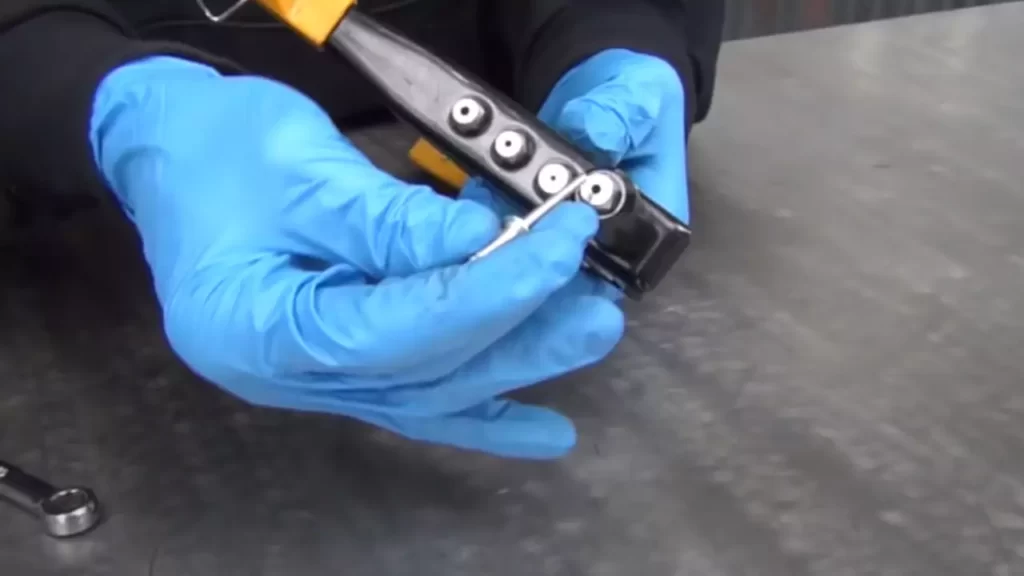
Inserting the rivet into the rivet gun
Once your holes are pre-drilled (if needed), it’s time to insert the rivet into the rivet gun. Here’s how to do it:
- Hold the rivet gun firmly, with one hand on the handles and the other hand supporting the back end.
- Align the rivet with the opening at the front of the rivet gun.
- Insert the rivet stem into the opening, making sure it is secure.
- Double-check that the rivet is properly aligned and seated in the rivet gun.
Confirming that the rivet is securely in place will ensure a smooth and efficient installation process.
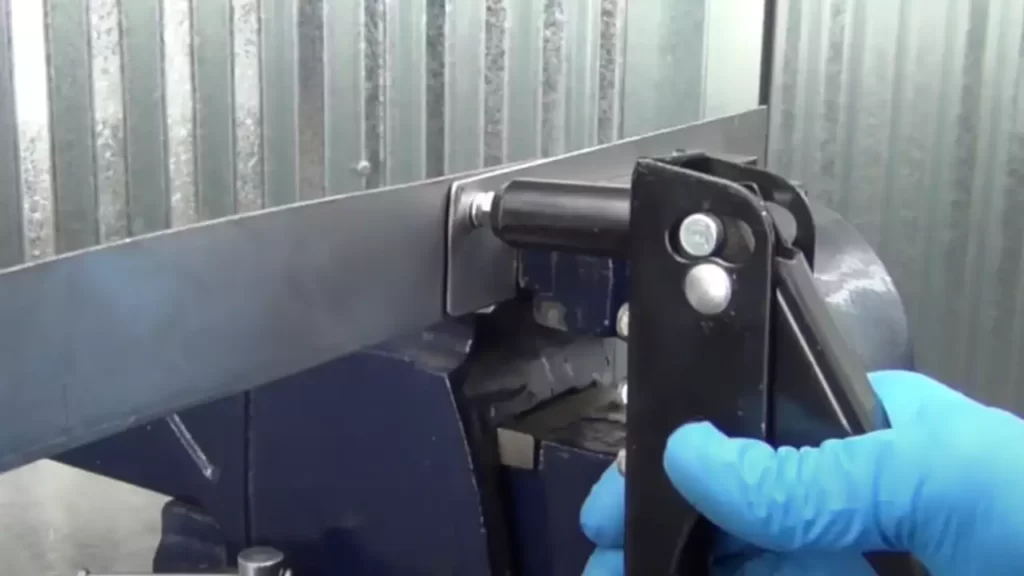
Placing the rivet into the pre-drilled hole
With the rivet in the rivet gun, it’s time to place it into the pre-drilled hole. Follow these steps:
- Position the rivet gun so that the rivet stem aligns with the hole.
- Ensure the rivet head makes contact with the surface of the material.
Properly aligning the rivet and making sure it’s in contact with the material will provide a strong and secure connection once installed.
Squeezing the handles of the rivet gun to install the rivet
Now comes the moment of truth – it’s time to install the rivet. Here’s what you need to do:
- Grasp the handles of the rivet gun firmly with both hands.
- Apply firm and steady pressure by squeezing the handles together.
- Continue squeezing until you hear a popping sound, indicating that the rivet has been installed.
It’s important to maintain a steady grip and avoid jerking or twisting the rivet gun during this process. A smooth, controlled motion will ensure a proper installation.
Inspecting the installed rivet for proper installation
Once the rivet is installed, it’s essential to inspect it to ensure a proper installation. Here’s what you need to look for:
- Check that the rivet head is flush with the surface of the material.
- Verify that the rivet is securely fastened, with no signs of looseness or gaps.
- Ensure that the rivet stem has separated from the rivet gun.
By thoroughly inspecting the installed rivet, you can be confident in the strength and stability of the connection.
Congratulations! You’ve successfully installed a pop rivet. With this step-by-step guide, you’ll be able to tackle your next riveting project like a pro.
Troubleshooting And Tips For Installing Pop Rivets
Installing pop rivets is a common task in various DIY projects and construction jobs. While the process itself is relatively simple, it’s not uncommon to encounter a few challenges along the way. In this section, we will explore some common issues that may arise during the installation of pop rivets and provide you with troubleshooting tips to overcome them. Additionally, we will share some valuable tips to help you achieve a secure and professional installation, along with essential safety precautions to consider when using pop rivet tools. Let’s dive in!
Common issues and how to troubleshoot them
During the installation of pop rivets, you may encounter a few hurdles that can affect the quality and performance of your finished project. By identifying these common issues and applying the following troubleshooting techniques, you can ensure a smooth and successful riveting process:
- Rivet not gripping properly: If the rivet fails to secure tightly or feels loose, it may be due to insufficient pressure during the riveting process. To troubleshoot this issue, ensure that the rivet gun is firmly pressed against the rivet head, maintaining steady pressure as you squeeze the handles until the rivet is fully installed.
- Rivet not setting correctly: Sometimes, you may find that the rivet fails to set or seems to get stuck. If this occurs, check to see if the mandrel has cleanly broken off and check the rivet hole for any debris. Remove any obstructions, and if necessary, apply lubrication to facilitate smooth mandrel removal.
- Rivet mandrel bending: In some cases, the mandrel may bend instead of snapping off entirely, leading to an incomplete installation. To troubleshoot this issue, ensure that the rivet material is compatible with the workpiece, providing the correct thickness and hardness. Using the appropriate size and type of rivet for your project will improve overall performance and prevent mandrel bending.
- Incorrect rivet size or type: Using the wrong size or type of rivet can lead to weak connections and potential failures. It’s crucial to select the appropriate rivet size and material based on the desired strength and the materials you are joining. Always refer to the manufacturer’s guidelines or seek expert advice to ensure you’re using the correct rivet for your specific application.
Tips for achieving a secure and professional installation
Achieving a secure and professional installation is vital to the success and longevity of your project. Follow these expert tips to ensure your pop rivets provide secure and reliable fastening:
- Prepare the workpiece: Before installing pop rivets, ensure the workpiece is clean and free from any dirt, rust, or debris. This will help create a smooth surface for the rivet to grip, ensuring a more secure and durable connection.
- Proper rivet selection: Choosing the right rivet size, material, and type is crucial for achieving a secure installation. Consider factors such as load strength, material compatibility, and environmental conditions when selecting your rivets. Applying the correct type and size of rivet will greatly enhance the strength and reliability of your fastening.
- Positioning and alignment: Accurate positioning and alignment of the rivet before installation are essential for a professional-looking outcome. Use appropriate measuring tools and marking techniques to ensure precise placement, minimizing any unnecessary adjustments or corrections.
- Apply consistent pressure: When operating the rivet tool, maintaining steady and even pressure throughout the entire installation process is crucial. This helps ensure the mandrel breaks off cleanly and that the rivet is securely set without any deformations.
- Inspect finished rivets: Once the installation is complete, it’s essential to inspect the finished rivets for any signs of defects or imperfections. Check for secure fastening, proper deformation, and any indications of stress or weakness. Proper inspection will provide reassurance that your installation is secure and reliable.
Safety precautions when using pop rivet tools
While pop riveting is generally considered a safe and straightforward process, it’s essential to prioritize your safety when working with any tools or equipment. Here are some safety precautions to keep in mind:
- Protective gear: Always wear appropriate personal protective equipment (PPE) such as safety glasses, gloves, and ear protection to prevent any potential injuries or hazards.
- Read and follow instructions: Carefully read and understand the manufacturer’s instructions for both the pop rivet tool and the specific type of rivet you are using. Follow the recommended operating procedures to ensure safe usage.
- Secure workpiece: Before riveting, ensure that the workpiece is secured in place to prevent any movement or slippage, which could lead to accidents or compromised results.
- Avoid excessive force: While applying pressure during riveting is necessary, excessive force can damage the workpiece or the rivet tool. Follow the recommended pressure guidelines and avoid overexertion.
- Store tools safely: When not in use, store your pop rivet tools in a secure and designated location, out of reach of children and away from any potential hazards or damaging elements.
By adhering to these safety precautions, you can minimize the risk of accidents or injuries, ensuring a safe and successful pop rivet installation every time. Now that you’re equipped with troubleshooting tips, recommendations for achieving a professional installation, and valuable safety precautions, you’re ready to take on your next pop riveting project with confidence!
Different Applications Of Pop Rivets
Pop rivets, also known as blind rivets, are versatile fasteners that find applications across various industries as well as in automotive projects, DIY endeavors, and household repairs. Designed to join materials together seamlessly, pop rivets offer a reliable and durable solution for a wide range of applications. In this section, we’ll explore the industry-specific uses for pop rivets, their automotive applications, and how they come in handy for DIY projects and household repairs.
Industry-specific uses for pop rivets
In several industries, pop rivets play a crucial role in streamlining production processes and ensuring structural integrity. Let’s take a closer look at some of the main fields where pop rivets are commonly employed:
Automotive applications
Pop rivets have become a staple in the automotive industry due to their ability to securely fasten different components. Whether it’s attaching trim panels, reinforcing body parts, or connecting brackets, pop rivets offer a reliable means of connecting materials like metal, plastic, and fiberglass. From car interiors to exteriors, these fasteners provide stability and strength, making them essential for various automotive applications.
DIY projects and household repairs
Pop rivets are a handy tool to have for both DIY enthusiasts and those in need of household repairs. From furniture assembly and shelving installations to fixing broken appliances and securing loose components, pop rivets provide a quick and efficient solution. Their ease of use and versatility make them a go-to option for various projects around the house or in DIY workshops. Whether you’re fixing a cabinet, repairing a gutter, or constructing a small structure, pop rivets ensure a strong and durable bond between materials.
By understanding the different applications of pop rivets across industries, in automotive projects, and for DIY tasks and household repairs, you can unleash their potential and leverage them for your specific needs. The reliable and efficient nature of these fasteners makes them a valuable addition to any toolkit, enabling you to tackle a wide array of projects with confidence and ease.
Pop Rivet Alternatives And Considerations
Pop Rivet Alternatives and Considerations
When it comes to fastening materials together, pop rivets have long been a popular choice due to their ease of use and versatility. However, it’s important to consider alternative options and evaluate the strength and durability of riveted joints before making a decision. This article will delve into other fastening options to consider, when to choose pop rivets over other methods, and how to evaluate the strength and durability of riveted joints.
Other fastening options to consider
While pop rivets are a reliable choice for many applications, it’s always a good idea to explore alternative fastening methods that may better suit your specific needs. Here are a few options to consider:
- Screws: Screws offer a secure fastening solution, especially for materials that require frequent disassembly. They come in various lengths and thread types, making them suitable for different applications. However, screws may require pre-drilling holes and often leave visible fastener heads.
- Bolts and Nuts: In situations where added strength is required, bolts and nuts offer a sturdy fastening solution. They are commonly used in construction and automotive industries. However, installation of bolts and nuts may take longer and require more tools compared to pop rivets.
- Welding: For heavy-duty applications and materials that need to withstand extreme forces, welding is a reliable choice. It provides a permanent and strong bond, but it requires specialized equipment and skills.
When to choose pop rivets over other methods
Pop rivets have their unique advantages that make them a preferred choice in many scenarios. Here are some instances when you should consider using pop rivets:
- Accessibility: Pop rivets can be installed in hard-to-reach areas where screws or bolts may not be able to reach.
- Speed and Efficiency: Pop rivets can be installed quickly using a rivet gun, making them ideal for projects with tight timelines.
- Aesthetics: Unlike screws or bolts, pop rivets can leave a clean and flush finish on the surface, providing a more visually appealing result.
- Cost-Effectiveness: Pop rivets are generally more affordable compared to other fastening methods, making them a budget-friendly option.
Evaluating the strength and durability of riveted joints
Ensuring the strength and durability of riveted joints is crucial, especially when working on projects that require reliable and long-lasting connections. Here are some factors to consider when evaluating the strength and durability of riveted joints:
| Factors | Considerations |
|---|---|
| Material Compatibility | Ensure that the materials being joined are compatible and can withstand the applied loads and environmental conditions. |
| Rivet Size and Type | Choose the appropriate rivet size and type based on the material thickness and strength requirements of the joint. |
| Rivet Installation | Properly install the rivet using the correct tools and techniques to ensure a secure and tight connection. |
| Regular Inspections | Periodically inspect the riveted joints for any signs of wear, corrosion, or loose rivets, and take necessary corrective measures. |
By considering these factors and following proper installation and maintenance practices, you can ensure that your riveted joints are strong and durable.
Maintenance And Removal Of Pop Rivets
Welcome to the maintenance and removal guide for pop rivets! Pop rivets are widely used in various industries for their strength and durability. However, like any other component, they require periodic maintenance to ensure their integrity and may need to be removed or replaced when necessary. In this section, we will delve into the essential steps for maintaining, removing, and repairing pop rivets, ensuring that your riveted parts remain functional and secure. Let’s get started!
Maintaining the Integrity of Installed Rivets
Maintaining the installed pop rivets is crucial to ensure their long-term performance and prevent any potential issues. Here, we will outline the key steps you should follow:
- Regular Inspection: Periodically inspect the riveted parts to identify any signs of wear, corrosion, or loose rivets. This step helps in catching potential issues at an early stage.
- Cleanliness: Keep the rivets and surrounding areas clean from dirt, debris, or other contaminants. Use a mild detergent and a brush to gently clean the riveted parts.
- Tighten Loose Rivets: If you notice any loose rivets during inspection, it is essential to tighten them promptly. Use a proper rivet setter tool, following the manufacturer’s instructions, to ensure a secure fit.
- Protective Coating: Consider applying a protective coating to the riveted parts, especially in corrosive environments. This helps to prevent rust and corrosion, extending their lifespan.
Removing Pop Rivets When Necessary
There may be times when you need to remove pop rivets, either for repair or replacement purposes. Here are the steps to follow:
- Identify the Rivet Type: Determine the type of pop rivet used, as different types may require specific removal techniques. Common types include blind rivets, solid rivets, and tubular rivets.
- Drill a Hole: Mark the center of the rivet head and drill a small hole using a suitable drill bit. Be careful not to damage the surrounding material.
- Punch or Pry: Once the hole is drilled, use a rivet punch tool or a small pry bar to push or pry the rivet out of the hole.
- Remove Remaining Parts: After the rivet is removed, ensure there are no remaining rivet pieces or debris in the hole. Clean the area thoroughly before installing a new rivet.
Repairing and Replacing Riveted Parts
When repairing or replacing riveted parts, it is vital to ensure proper installation for maintaining structural integrity. Here’s what you should do:
- Prepare the Replacement Component: If replacing a part, make sure to obtain the correct replacement component that matches the specifications of the original part.
- Align and Secure: Align the replacement part with the existing holes and insert the new rivet into the prepared hole.
- Rivet Installation: Use a rivet setter tool to compress and secure the new rivet in place. Follow the manufacturer’s instructions to achieve the optimal setting.
- Inspection: Once the new rivet is installed, inspect the repaired or replaced part for stability and secure fit. Make any necessary adjustments if needed.
By following these guidelines for maintenance, removal, and repair of pop rivets, you can ensure the integrity and reliability of your riveted components. Regular inspection and proper maintenance will help minimize unexpected failures and extend the lifespan of your riveted parts. Stay tuned for more informative guides on pop rivets!
Frequently Asked Questions
Can You Install A Pop Rivet Without A Gun?
Yes, you can install a pop rivet without a gun by using a hammer or pliers. Simply insert the rivet into the hole, hold the mandrel (pin) with pliers, and hammer until it’s secure. However, using a pop rivet gun is recommended for easier and more efficient installation.
Do You Need To Pre Drill Pop Rivets?
No, pre-drilling is not necessary for pop rivets. They are designed to be installed without the need for pre-drilled holes. Simply align the rivet with the materials to be joined, apply pressure, and the rivet will securely fasten the materials together.
How Are Pop Rivets Applied?
Pop rivets are applied by inserting them through pre-drilled holes in two or more materials. A rivet gun is then used to pull the mandrel, which causes the rivet to expand and secure the materials together. This process is quick, efficient, and requires no special skills.
How Do You Attach Rivets By Hand?
To attach rivets by hand, follow these steps: 1. Punch a hole in the material using a punch tool. 2. Insert the rivet through the hole. 3. Place the rivet head on a solid surface and hit the opposite end with a rivet setter or hammer.
4. This expands the rivet, securing it in place. 5. Repeat the process for additional rivets as needed.
Conclusion
Installing pop rivets is a simple and effective way to join materials together securely. By following the step-by-step guide in this blog post, you have learned the essential techniques required for successful pop rivet installation. From gathering the necessary tools to understanding the process, you now have the skills to confidently take on various projects that require pop rivets.
With practice, you will become adept at installing pop rivets and expand your DIY capabilities. Happy riveting!