To install plastic toggle anchors, drill a hole into the wall, insert the anchor, and tighten the toggle until secure. Plastic toggle anchors can provide strong support for hanging lightweight objects on walls.
When it comes to installing plastic toggle anchors, there are a few steps you need to follow. These anchors are useful for securely hanging lightweight items on your walls. Whether you want to hang a small picture frame or create a decorative wall display, plastic toggle anchors can provide the support you need.
We’ll guide you through the simple process of installing plastic toggle anchors. By following a few easy steps, you’ll be able to hang your objects securely and ensure they stay in place. Let’s get started with the installation process and make your wall hangings secure and organized.
Materials Needed
In order to install plastic toggle anchors, you will need a few essential tools and materials. These items are crucial to ensure a successful installation and a strong hold. Here are the materials you will need:
Plastic toggle anchors
Plastic toggle anchors are the main component of this installation. These anchors provide a sturdy and secure base for your screws, ensuring they hold firmly in place. Make sure to choose high-quality plastic toggle anchors that are suitable for the weight and size of your project.
Drill
A drill is an essential tool that will allow you to create the necessary holes in the wall or surface. It is recommended to use a drill with adjustable speed and torque settings, as this will give you better control and accuracy during the installation process. Ensure that the drill bit is compatible with the size of the plastic toggle anchors you are using.
Screwdriver
A screwdriver is necessary to secure the screws into the plastic toggle anchors. Depending on the type of screws and plastic toggle anchors you are using, you may need either a Phillips or flathead screwdriver. Make sure to use a screwdriver that fits securely into the screw heads to avoid any slippage or damage.
Screws
Screws are an integral part of the installation process. They secure the plastic toggle anchors into the wall or surface, providing a strong hold for your project. The size and type of screws you need will depend on the specific plastic toggle anchors you are using and the weight and size of your project. It is crucial to choose screws that are compatible with the plastic toggle anchors and the material you are anchoring into.
Measuring tape
Measuring tape is essential for accurate placement of the plastic toggle anchors. It allows you to measure the distance between the anchor points, ensuring that they are evenly spaced and aligned. This ensures a balanced and secure installation.
Pencil
A pencil is handy for marking the exact spots where the plastic toggle anchors will be installed. It allows you to make precise markings on the wall or surface, ensuring that the anchors are placed correctly. These markings serve as a guide during the drilling process, ensuring that the holes are made in the right locations.

Choosing The Right Plastic Toggle Anchors
When it comes to installing any type of wall fixture, be it shelves, curtains, or artwork, it’s important to choose the right plastic toggle anchors to ensure that your items remain securely in place. Plastic toggle anchors are versatile and easy to install, making them an excellent choice for both DIY enthusiasts and professionals. In this guide, we will walk you through the key factors to consider when selecting plastic toggle anchors for your project.
Understanding the Weight Capacity of Different Toggle Anchors
Before you begin your search for the perfect plastic toggle anchors, it’s crucial to have a clear understanding of the weight capacity you require. Different toggle anchors come with varying weight ratings, so you’ll want to ensure that the ones you choose can support the load you plan to place on them.
Here’s a quick overview of some common weight capacities:
| Toggle Anchor Type | Weight Capacity |
|---|---|
| Small Plastic Toggle Anchors | Up to 25 pounds |
| Medium Plastic Toggle Anchors | 25 to 75 pounds |
| Large Plastic Toggle Anchors | 75 to 100 pounds |
Evaluating the Material of the Wall
The material of the wall you are working with plays a crucial role in determining the type of plastic toggle anchors that will be most suitable. Different materials require different types of anchors for optimal stability. Take a moment to assess the material of your wall, whether it’s drywall, plaster, or concrete, as this will guide your anchor selection process.
Determining the Size and Type of Toggle Anchors Required
Once you know the weight capacity and have evaluated the wall material, it’s time to determine the size and type of toggle anchors required for your specific project. Consider the size and weight of the item you are planning to hang, as this will influence the length and strength of the toggle anchor needed.
Here are a few common types of toggle anchors:
- Plastic Strap Toggle Anchors
- Plastic Snap Toggle Anchors
- Plastic Wing Toggle Anchors
Make sure to choose the type that aligns with your needs and the material of your wall.
By understanding the weight capacity, evaluating the wall material, and determining the size and type of toggle anchors required, you’ll be able to select the right plastic toggle anchors for your installation project. Remember, choosing the right anchors is essential to ensure the stability and safety of your wall fixtures.
Preparing The Wall
Before you can install plastic toggle anchors, it’s important to properly prepare the wall. Taking the time to prepare the wall will ensure that your toggle anchors are securely installed and won’t cause any damage or accidents later on. In this section, we’ll guide you through the necessary steps to prepare your wall for plastic toggle anchor installation.
Locating the position for installation
The first step in preparing the wall is to locate the position where you want to install the plastic toggle anchors. Take into consideration the weight and size of the item you’ll be hanging, as well as any specific recommendations from the manufacturer. Using a measuring tape, carefully mark the desired height and width for your installation with a pencil.
Marking the spot with a pencil
Once you’ve determined the position for installation, use a pencil to mark the spot on the wall. Make sure your markings are clear and visible. If you’re planning to install multiple plastic toggle anchors, it’s helpful to use a level to ensure they are aligned properly. This will help you maintain a neat and organized appearance when all is said and done.
Checking for any electrical wires or plumbing behind the wall
Before proceeding with the installation, it’s crucial to check for any electrical wires or plumbing behind the wall. This step is essential to prevent accidents and potential damage. The last thing you want is to inadvertently puncture a pipe or disrupt electrical wiring.
To do this, you can use a stud finder, which will help detect any hidden objects behind the wall. Move the stud finder across the area where you plan to install the plastic toggle anchors, following the manufacturer’s instructions. Take the necessary precautions to avoid potential hazards before moving forward.
Remember, safety should be your top priority when preparing the wall for plastic toggle anchor installation. Following these steps will help ensure a successful and secure installation. Now that you’ve prepared the wall, you’re ready to move on to the next steps of installing the plastic toggle anchors.
Installing The Plastic Toggle Anchors
Once you have gathered all the necessary tools and materials, it’s time to start installing the plastic toggle anchors. This guide will walk you through the step-by-step process, ensuring a secure installation that will hold up your desired fixtures.
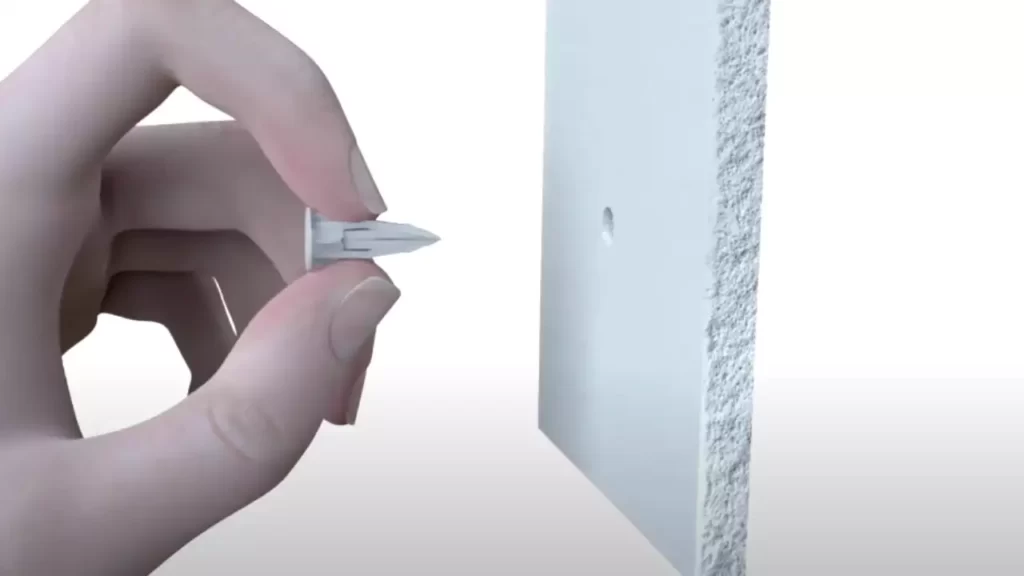
Drilling a hole in the marked spot
Before you dive into installing the plastic toggle anchors, it’s important to start with a marked spot for the anchor placement. Use a pencil or a marker to clearly indicate where you want the anchor to be inserted. This step ensures precise positioning and prevents any unnecessary damage to your walls.
Once you have marked the spot, it’s time to prepare for drilling. Ensure you have the appropriate drill bit size suitable for the plastic toggle anchors you are using. Insert the drill bit into your power drill, making sure it’s secure.
Align the drill bit with the marked spot on the wall and firmly apply pressure while drilling. Keep the drill perpendicular to the wall surface to create a straight and clean hole. Take breaks periodically to allow the drill bit to cool down and prevent any overheating.
Inserting the plastic toggle anchor into the hole
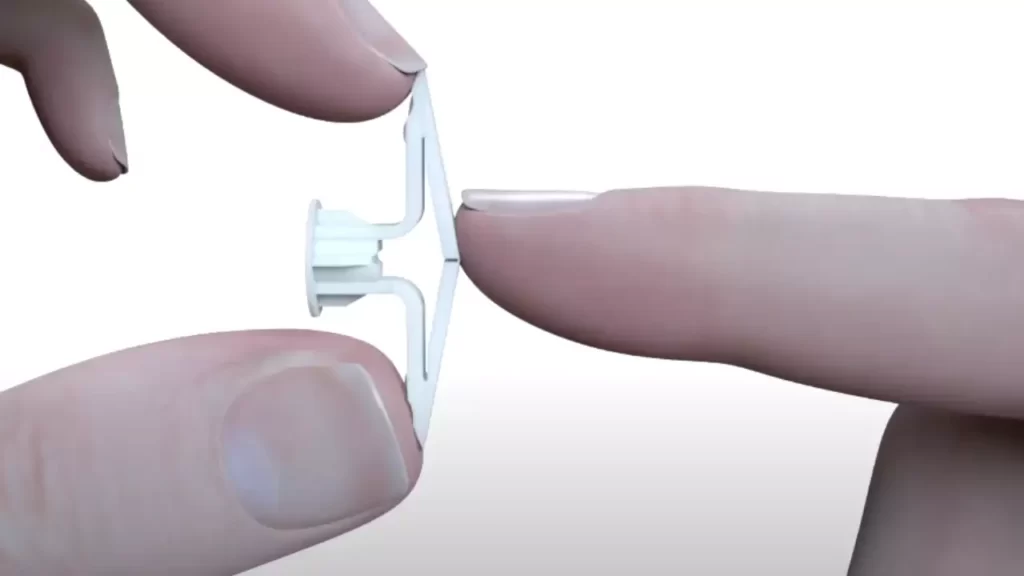
Once you have drilled the hole, gently remove any debris or dust from the area. This ensures a clean and smooth surface for the plastic toggle anchor. Take one of the plastic toggle anchors and hold it in your hand, ensuring the toggle wings are in their closed position.
Insert the plastic toggle anchor into the drilled hole, applying pressure until the anchor is flush with the wall surface. Make sure the screws on the anchor are aligned vertically, as this will ensure a more secure installation.
| Important Note: | Always refer to the manufacturer’s guidelines to determine the appropriate weight capacity and ensure the plastic toggle anchor is suitable for your specific application. |
|---|
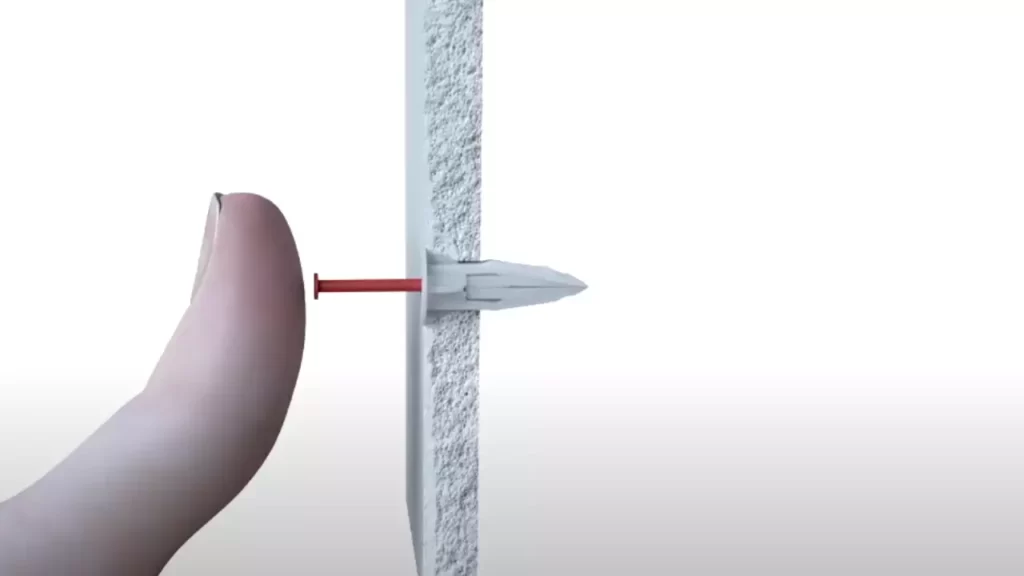
Securing the toggle anchor in place
To secure the plastic toggle anchor in place, use a screwdriver to begin turning the screw clockwise. As you turn the screw, the toggle wings will start to expand, firmly gripping the backside of the wall.
Continue tightening the screw until the anchor feels secure and doesn’t move when lightly tugged. Be careful not to overtighten, as this may cause the anchor to break or damage the surface of the wall.
Repeat the process for any additional plastic toggle anchors you need to install. Once all the anchors are in place, you can proceed with attaching your desired fixtures or hanging objects, knowing that they are securely anchored to the wall.
Attaching The Object To The Wall
Aligning the object with the toggle anchors
Before you can attach your object to the wall using plastic toggle anchors, it’s important to align it properly. By ensuring the object is positioned correctly, you can prevent any unnecessary gaps or misalignments once it is secured in place. To do this:
- Hold the object against the wall in the desired position.
- Use a level to ensure it is straight and level.
- Make any necessary adjustments until it is perfectly aligned.
Inserting screws through the object and into the toggle anchors
Once the object is aligned, you can proceed with inserting screws through it and into the plastic toggle anchors. This will provide the necessary support and stability for your object. Here’s how:
- Identify the pre-drilled holes in the object that correspond to the positions of the toggle anchors.
- Position the object against the wall, aligning the holes with the toggle anchors.
- Insert the screws through the holes, ensuring they pass through the object and into the toggle anchors.
Tightening the screws to secure the object in place
With the screws inserted into the toggle anchors, it is crucial to tighten them properly to secure the object in place. This will prevent any wobbling or potential damage. Follow these steps:
- Using a screwdriver or drill, tighten the screws clockwise.
- Apply even pressure as you tighten, ensuring the object remains firmly against the wall.
- Continue tightening until the screws are secure and the object feels sturdy.
By following these steps, you can successfully attach your object to the wall using plastic toggle anchors. Remember to align the object properly, insert the screws through the pre-drilled holes, and tighten them securely. This will ensure a secure and stable installation for your object. Now that you are familiar with the process, you can confidently hang various items around your home or office!
Tips For Successful Installation
Installing plastic toggle anchors can be a straightforward and effective way to secure objects to your walls. To ensure a successful installation, follow these tips:
Using a level to ensure the object is straight
One of the key factors in achieving a professional and visually appealing installation is making sure the object is straight. To determine this, use a level to check if the object is horizontally and vertically aligned. Simply place the level on top or alongside the object and adjust as necessary until it is perfectly level. This step is crucial for a neat and tidy end result.
Applying pressure to the toggle anchor while tightening the screws
When tightening the screws into the toggle anchor, it’s important to apply pressure. This pressure helps ensure a secure and stable hold. As you tighten the screws, use your fingers or a screwdriver to press firmly against the anchor, especially if it begins to rotate or spin. This pressure ensures that the anchor fully expands within the wall, providing strong support for your object.
Testing the stability of the installed object
After the installation is complete, it is crucial to test the stability of the installed object. Give it a gentle check by slightly pushing or pulling on the object to see if it remains firmly in place. If there is any sign of movement or instability, it may indicate that the toggle anchor was not properly installed. In such cases, consider redoing the installation or seeking professional assistance.
Troubleshooting And Faqs
What to do if the toggle anchor spins in the wall
If you find that the plastic toggle anchor starts to spin when you are trying to install it into the wall, don’t panic. This can happen occasionally, but there are simple steps you can take to remedy the situation.
- Remove the screw: First, gently unscrew the screw from the anchor, being careful not to exert too much force. This will separate the screw from the anchor and allow you to address the spinning anchor.
- Tighten the anchor: Take a pair of pliers and hold the anchor firmly in place. Apply pressure to prevent the anchor from spinning while slowly turning the screw in a clockwise direction. This will tighten the anchor securely into the wall.
- Reinsert the screw: Once the anchor is securely tightened, you can now reinsert the screw into the anchor. Make sure to turn it clockwise until it is snug but not over-tightened, as this could damage the anchor or the wall.
By following these steps, you can successfully address the issue of a spinning toggle anchor and ensure a secure installation.
How to remove plastic toggle anchors if needed
There may come a time when you need to remove a plastic toggle anchor, whether it’s because you want to replace it or because you no longer need it. Here’s how you can easily remove plastic toggle anchors without causing any damage to your walls:
- Unscrew the anchor: Begin by unscrewing the screw that is inserted into the anchor. This will detach the screw from the anchor and allow you to proceed with its removal.
- Release the wings: Take a pair of pliers and gently squeeze the wings of the anchor together. This will loosen the anchor’s grip on the wall.
- Pull out the anchor: With the wings compressed, slowly and steadily pull the anchor straight out of the wall. Be careful not to rush or apply excessive force, as this could cause damage to the wall.
Following these steps will enable you to remove plastic toggle anchors easily and effectively whenever the need arises.
Can plastic toggle anchors be reused?
Plastic toggle anchors are designed for single-use only and are not intended to be reused in subsequent installations. This is because their gripping mechanism relies on the initial installation process to secure them firmly to the wall.
When a plastic toggle anchor is removed, its gripping wings might become slightly distorted, reducing their ability to hold the anchor securely in place during a subsequent installation. Attempting to reuse a plastic toggle anchor may compromise its effectiveness, potentially causing it to fail in providing the necessary support for your wall-mounted fixtures.
It is always recommended to use new plastic toggle anchors for each installation to ensure optimal performance and reliability. This will help you avoid any potential issues or safety concerns that may arise from reusing old or worn-out anchors.
Frequently Asked Questions
How Do You Install Plastic Anchors?
To install plastic anchors, start by drilling a hole slightly smaller than the anchor’s diameter. Tap the anchor into place with a hammer until it is flush with the wall. Then, insert a screw into the anchor and tighten it securely using a screwdriver.
How Do You Use A Plastic Toggle Wall Anchor?
To use a plastic toggle wall anchor, start by drilling a small hole in the wall. Insert the anchor into the hole, then tighten it using a screwdriver. Once secure, you can hang items by screwing into the anchor. Easy and secure!
Do You Need A Drill For Plastic Anchors?
Yes, you need a drill for plastic anchors.
How Do You Install Toggle Anchors?
To install toggle anchors: 1. Drill a hole in the wall. 2. Insert the anchor into the hole. 3. Tighten the screw to expand the anchor. 4. Insert the object you want to hang onto the screw. 5. Ensure it is secure and properly positioned.
Conclusion
Installing plastic toggle anchors is a straightforward and reliable method for securing items to drywall or other hollow surfaces. By following the step-by-step guide outlined in this blog post, you can ensure a secure and sturdy installation. Remember to choose the right size of toggle anchor for your project, and always follow the manufacturer’s instructions.
With a few simple tools and a bit of patience, you can confidently tackle any mounting job with plastic toggle anchors. So, go ahead and take on your next home improvement project with ease!