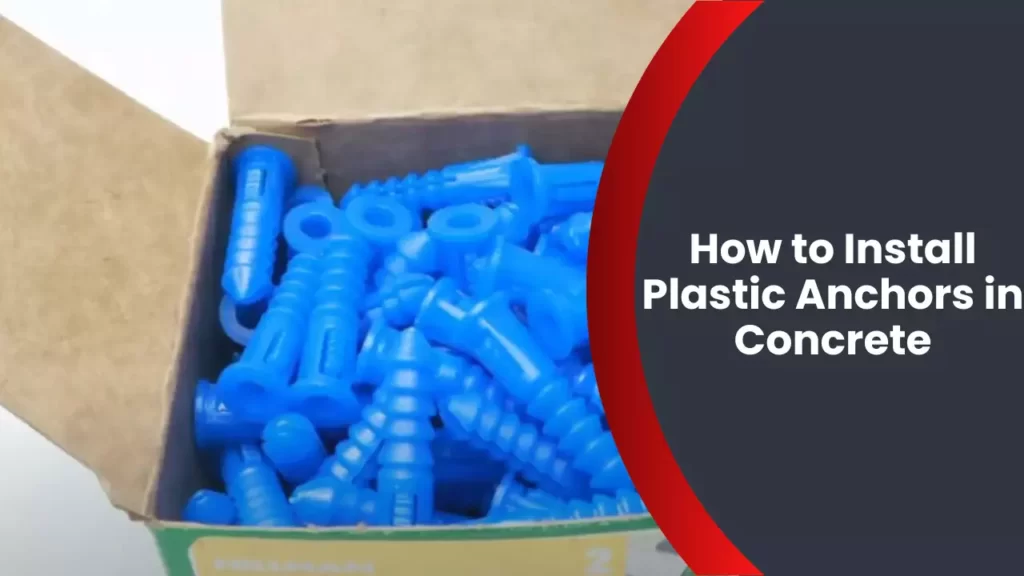
To install plastic anchors in concrete, drill a hole using a masonry bit, tap the anchor into the hole, and then tighten the screw to secure it in place. Welcome to our guide on how to install plastic anchors in concrete!
Whether you’re hanging shelves or mounting light fixtures, using plastic anchors can provide a sturdy and reliable solution. We’ll walk you through the step-by-step process of installing plastic anchors in concrete. From preparing the necessary tools to securing the anchors in place, we’ll cover everything you need to know.
So let’s get started and learn how to effortlessly install plastic anchors in your concrete walls or surfaces.
Understanding The Basics Of Plastic Anchors
When it comes to securely fastening objects to concrete surfaces, plastic anchors can be highly effective. Understanding the basics of plastic anchors is crucial to ensure a successful installation. In this section, we will explore what plastic anchors are, their different types and applications, as well as their advantages and disadvantages when used in concrete.
What are Plastic Anchors and Why are They Used?
Plastic anchors, also known as concrete anchors or wall plugs, are devices used to provide a secure attachment point in concrete. They are commonly used to anchor shelves, pictures, mirrors, and other lightweight fixtures to concrete walls or floors. Plastic anchors are designed to expand within the concrete, providing a sturdy grip that prevents the fastener from loosening or pulling out under load.
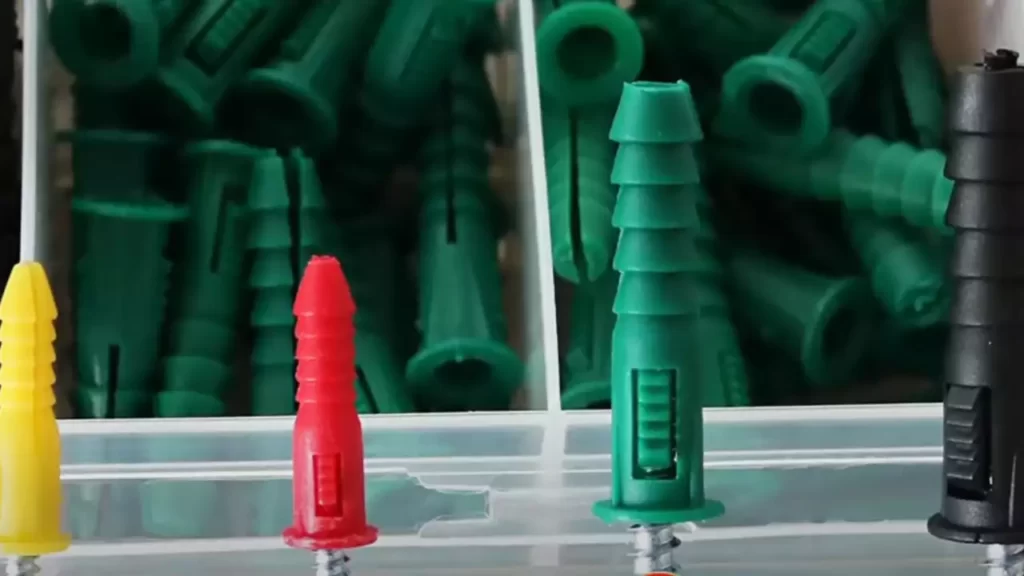
Different Types of Plastic Anchors and Their Applications
Plastic anchors come in various types, each specifically designed for different applications. Here are some common types of plastic anchors and their recommended uses:
| Type of Plastic Anchor | Applications |
|---|---|
| Ribbed Plastic Anchors | Secure lightweight objects in concrete or brick |
| Toggle Bolts | Attach heavy objects to concrete or drywall |
| Concrete Screws | Fasten objects directly into concrete without the need for anchors |
| Drop-In Anchors | Provide a secure attachment point for threaded rods in concrete |
It’s important to choose the right type of plastic anchor based on the weight and nature of the object you are installing and the condition of the concrete surface.
Advantages and Disadvantages of Using Plastic Anchors in Concrete
Using plastic anchors in concrete offers several advantages. Firstly, they are lightweight and easy to install, making them suitable for DIY projects. Additionally, plastic anchors are resistant to rust and corrosion, ensuring long-term durability. They also provide reliable holding power for lightweight fixtures.
However, there are also some disadvantages to consider. Plastic anchors may not be suitable for heavy-duty applications or objects subjected to high loads. They may also deteriorate over time due to exposure to UV radiation or extreme temperatures. It’s important to carefully assess the intended use and conditions before deciding on using plastic anchors in concrete.
In conclusion, understanding the basics of plastic anchors is essential when it comes to securely fastening objects to concrete. By selecting the appropriate type of plastic anchor and considering their advantages and disadvantages, you can ensure a reliable and long-lasting installation.
Preparing For The Installation Process
Before you begin installing plastic anchors in concrete, it’s important to take the necessary steps to prepare for the installation process. This will ensure that your anchors are properly secured and will provide the stability and support you need for your project. This section will guide you through the important steps you need to take before diving into the installation process.
Selecting the right plastic anchor for your project
The first step in preparing for the installation process is to select the right plastic anchor for your specific project. Not all anchors are created equal, and it’s important to choose one that is suitable for the weight and size of the object you will be attaching to the concrete.
When selecting a plastic anchor, consider the following factors:
- Weight capacity: Ensure that the anchor you choose has a weight capacity that exceeds the weight of the object you will be attaching to the concrete.
- Size: Take into account the size of the anchor and the size of the object. Ensure that the anchor is large enough to securely hold the object in place.
- Type of plastic: Different types of plastics have varying levels of strength and resistance. Choose a plastic anchor that is suitable for the conditions in which it will be installed.
Gathering the necessary tools and materials
Once you have selected the appropriate plastic anchor for your project, it’s time to gather the necessary tools and materials. Having everything you need on hand will make the installation process smoother and more efficient.
Here are some of the tools and materials you will need:
| Tools | Materials |
|---|---|
| Screwdriver | Plastic anchors |
| Hammer | Concrete drill bit |
| Drill | Dust mask |
| Level | Epoxy adhesive (if necessary) |
| Measuring tape |
Make sure you have all of these tools and materials ready before moving on to the next step.
Checking the quality of the concrete surface
Before you start drilling into the concrete, it’s crucial to check the quality of the concrete surface. This will help ensure that the anchors will be securely fastened and will provide the necessary support.
To check the quality of the concrete surface, follow these steps:
- Inspect for cracks: Look for any cracks or damage on the surface of the concrete. Cracks can weaken the integrity of the anchor, so it’s important to repair any damage before proceeding with the installation.
- Check for moisture: Moisture can compromise the effectiveness of the plastic anchor. Use a moisture meter or perform a simple moisture test to determine if the concrete is too damp for installation. If it is, allow the concrete to dry completely before proceeding.
- Clean the surface: Remove any debris, dirt, or loose particles from the concrete surface. This will ensure a proper bond between the anchor and the concrete.
By checking the quality of the concrete surface beforehand, you can ensure the anchors are installed in a secure and stable manner, providing the necessary support for your project.
Step 1: Marking The Anchor Placement
Determining the correct locations for the anchors
Before you can start installing plastic anchors in concrete, it’s crucial to determine the correct locations for them. This step ensures that the anchors will secure whatever you’re mounting properly.
When deciding where to place the anchors, consider the weight and size of the object you’ll be mounting. For heavier objects, it’s important to distribute the weight evenly by using multiple anchors. To determine the appropriate spacing between anchor placements, you can refer to the manufacturer’s instructions or guidelines. Keep in mind that the spacing will also depend on the thickness and strength of the concrete.
Marking the spots on the concrete surface
Once you have determined the correct locations for the anchors, the next step is to mark the spots on the concrete surface. This will act as a guide during the drilling process.
To mark the spots, you can use a pencil, marker, or chalk. Begin by positioning the object or template you’ll be mounting on the concrete surface. Make sure it is aligned correctly and level. Then, using the holes or mounting points on the object or template, carefully mark the corresponding spots on the concrete.
Ensure that your markings are clear and easily visible. You may want to mark the spots with an ‘X’ or circle to distinguish them from any other marks on the surface.
Ensuring proper spacing between anchor placements
Proper spacing between anchor placements is crucial to ensure the stability and strength of the mounted object. It helps distribute the weight evenly and prevents excessive strain on individual anchors.
To ensure the correct spacing, use a measuring tape or ruler to measure the distance between each marked spot. Pay attention to any guidelines or recommendations provided by the manufacturer.
Maintaining consistent spacing between anchor placements is essential. It helps ensure the overall integrity of the mounting and prevents any potential issues caused by uneven weight distribution.
Step 2: Drilling The Holes
Once you have chosen the appropriate plastic anchors for your project, it’s time to drill the holes in the concrete. This step is crucial to ensure the stability and effectiveness of the anchors. Follow these instructions to drill straight and precise holes in the concrete:
Choosing the appropriate drill bit size for the anchors
To begin, you need to select the correct drill bit size that matches the diameter of your plastic anchors. Using the wrong size can result in loose or inadequately secured anchors, compromising the strength of your installation. Refer to the packaging or manufacturer’s instructions for the recommended drill bit size. It’s essential to use a high-quality masonry drill bit designed specifically for drilling into concrete. This will ensure clean and accurate holes.
Drilling straight and precise holes in the concrete
Now that you have the correct drill bit in hand, it’s time to proceed with drilling the holes in the concrete. Pay careful attention to the following steps:
- Before drilling, ensure that you wear safety goggles and a dust mask to protect yourself from flying concrete particles.
- Hold the drill firmly and position it perpendicular to the concrete surface. Keeping your drill straight is crucial as it prevents the holes from being uneven or angled, which could affect the anchor’s stability.
- Start drilling at a slow speed to create a pilot hole. Apply gentle but consistent pressure. Be patient and let the drill do the work. Avoid using excessive force, as it may cause the drill bit to overheat or break.
- Once the pilot hole is created, gradually increase the drill speed until you reach the recommended drilling speed for your specific drill bit. This will vary depending on the size and type of your drill bit. Again, refer to the manufacturer’s guidelines for recommended speeds.
- Monitor the progress as you drill, making sure to keep the drill bit aligned and centered in the hole. This will result in clean and accurate holes.
- Drill to the depth recommended for your specific plastic anchors. It is crucial to drill deep enough to accommodate the entire length of the anchor, ensuring a secure and stable installation.
Removing any debris from the drilled holes
Once all the holes are drilled, take the time to remove any debris or dust that may have accumulated in them. You can use a small brush or a blast of compressed air to ensure the holes are clean and free from any loose particles. This step is important as it allows the plastic anchors to fit properly and provides a solid foundation for your installation.
Step 3: Inserting The Plastic Anchors
Selecting the correct size and type of screws for the anchors
Before inserting the plastic anchors into the drilled holes, it is crucial to select the appropriate size and type of screws for the anchors. Choosing the wrong screws can compromise the overall stability and strength of the installation. To ensure the best results, follow these steps:
- Refer to the packaging or product information provided with the plastic anchors to determine the recommended screw size for your specific application.
- Consider the weight and load-bearing capacity required for the object you’ll be fastening to the concrete. This will help you determine the appropriate screw length and gauge.
- Take note of the material the screws will be penetrating. In some cases, corrosion-resistant screws may be necessary to prevent rust or degradation.
- Choose screws with the appropriate head type for your specific needs. Flat-headed screws are typically used for flush installations, while round-headed screws are commonly used for installations that require a more pronounced appearance.
By carefully selecting the correct size and type of screws for your plastic anchors, you can ensure a secure and long-lasting installation.
Inserting the plastic anchors into the drilled holes
With the correct screws in hand, it’s time to insert the plastic anchors into the drilled holes. This crucial step provides the foundation for a secure and durable installation. Follow these steps to insert the anchors correctly:
- Start by selecting the appropriately sized masonry drill bit according to the instructions provided with the plastic anchors. Ensure the diameter of the hole matches the size of the anchor.
- Drill the holes into the concrete at the desired locations, making sure to maintain a straight angle and sufficient depth for the anchors.
- Clear away any dust or debris from the holes with a brush or compressed air to ensure a clean surface for the anchors.
- Align the plastic anchor with the drilled hole and insert it carefully, applying gentle pressure. It should fit snugly into the hole without needing excessive force.
- Repeat the process for each hole, ensuring that all anchors are aligned correctly and fully inserted.
Ensuring the anchors are securely fitted in the concrete
To guarantee the anchors are securely fitted in the concrete, it’s important to take a few extra steps. This will ensure maximum stability and strength for your installation:
- Check that each plastic anchor is flush with the surface of the concrete.
- If necessary, gently tap the anchors with a hammer to ensure they are fully seated and do not protrude.
- Inspect each anchor to ensure there are no cracks or damage that may compromise its effectiveness.
- Tighten the screws into the anchors using a screwdriver or appropriate tool. Ensure they are tightened securely but avoid over-tightening, as it can cause the plastic anchors to crack or break.
- Test the stability of the installed anchors by exerting gentle pressure or pulling on the object they are holding. If there is any movement or instability, consider repositioning or reinforcing the installation.
By following these steps and taking the necessary precautions, you can confidently insert plastic anchors into concrete, ensuring a secure and reliable installation for your desired applications.
Step 4: Tightening The Anchors
Now that you have successfully inserted the plastic anchors into the concrete, it’s time to tighten them securely. This step is crucial to ensure that your fixture or object remains stable and in place for the long haul. In this section, we will guide you through two important aspects: attaching the intended fixture or object to the anchors, and using the recommended tools to tighten the anchors effectively.
Attaching the intended fixture or object to the anchors
Once the plastic anchors are securely in place, it’s time to attach your intended fixture or object to them. Whether it’s a shelf, a wall-mounted TV, or a decorative item, this step requires precision and care. Follow these steps to ensure a proper attachment:
- Position the fixture or object against the wall and align it with the plastic anchors.
- Place the screws or bolts through the holes of the fixture or object, ensuring they align with the anchors.
- Slowly and gently tighten the screws or bolts with a screwdriver or an appropriate tool, ensuring they are securely fastened to the plastic anchors.
- For larger fixtures or objects, it’s advisable to have someone assist you in holding the item while you tighten the screws or bolts, ensuring a steady and accurate installation.
Using the recommended tools to tighten the anchors
To ensure that the plastic anchors are properly tightened, it’s essential to use the recommended tools. Using the wrong tools can lead to inadequate tightening, compromising the stability of your fixtures. Here are some recommended tools for tightening plastic anchors in concrete:
| Recommended Tools | Description |
|---|---|
| Screwdriver | A manual screwdriver is suitable for lighter applications. Choose the appropriate size and type of screwdriver head that fits the screw heads. |
| Power Drill | A power drill with a compatible screwdriver bit can make the tightening process more efficient. Adjust the speed and torque settings as necessary. |
| Torque Wrench | A torque wrench is ideal for applications that require precise tightening. Set the torque level according to the manufacturer’s recommendations. |
Remember, using the correct tools ensures that the plastic anchors are tightened effectively, reducing the risk of loosening or detachment over time.
Checking the stability and strength of the installed anchors
After tightening the anchors, it’s crucial to check the stability and strength of the installed anchors. This step ensures that your fixtures or objects are securely attached to the concrete, minimizing the chances of accidents or damages. Follow these steps to verify the stability and strength of the installed anchors:
- Gently apply pressure or try to wiggle the attached fixture or object to check for any signs of movement or looseness. It should remain firmly in place.
- If applicable, test the weight-bearing capacity of the attached fixture or object by gradually adding weight or stress to it. Observe if the plastic anchors hold up without any signs of strain or failure.
- If you detect any instability or weakness, consider reinforcing the anchors or seeking professional assistance to ensure a reliable and secure installation.
By following these steps and using the recommended tools, you can confidently tighten the plastic anchors in concrete and achieve a sturdy and durable installation for your fixtures or objects.
Tips For Effective Plastic Anchor Installation
Properly installing plastic anchors in concrete is crucial to ensuring the stability and durability of your projects. Whether you’re hanging shelves, installing cabinets, or mounting heavy objects, following a few important tips can make all the difference. From applying the right adhesive to considering weight capacity and load requirements, and properly maintaining the installed anchors, each step plays a vital role in the long-term success of your installation.
Applying a recommended adhesive for added strength
Applying a recommended adhesive when installing plastic anchors in concrete can significantly enhance their strength and stability. This adhesive creates a bond between the anchor and the concrete, preventing any loosening or shifting over time. To ensure a secure and long-lasting hold, follow these steps:
- Choose a top-quality adhesive that is specifically designed for concrete applications. Look for products that have a strong bonding capability and are recommended for use with plastic anchors.
- Before applying the adhesive, clean the surface of the concrete thoroughly. Remove any dust, debris, or grease that could interfere with adhesion.
- Follow the manufacturer’s instructions for mixing the adhesive, if applicable. Some products may require prior mixing or stirring.
- Using a caulk gun or a suitable applicator, carefully apply the adhesive into the hole where the anchor will be placed.
- Insert the plastic anchor into the hole while the adhesive is still wet. Make sure it is fully seated and flush with the surface of the concrete.
- Allow the adhesive to cure completely according to the manufacturer’s instructions before applying any load or force to the anchor.
Considering the weight capacity and load requirements
When installing plastic anchors in concrete, it is essential to consider the weight capacity and load requirements to ensure a safe and durable installation. Failing to account for these factors may result in anchors that are unable to support the intended load, leading to potential failure. Here are some key points to keep in mind:
- Determine the maximum weight that the anchor and the concrete can safely support. This information can usually be found on the packaging or in the product specifications.
- Consider the type and size of the object you will be attaching to the anchor. Heavier items will require anchors with a higher weight capacity.
- Take into account any dynamic or additional loads that may be applied to the anchor over time, such as wind forces, vibrations, or impact.
- If you’re uncertain about the weight capacity, it is always better to choose anchors that are rated for a higher load than what you anticipate to be necessary.
Properly maintaining and inspecting the installed anchors
Once the plastic anchors are installed, proper maintenance and regular inspections are essential to ensure their ongoing effectiveness and safety. Neglecting these steps may result in anchor degradation over time, compromising their ability to hold securely. Follow these guidelines to maintain and inspect your installed anchors:
- Regularly inspect the anchors for any signs of damage, corrosion, or loosening. Pay attention to cracks, deformations, or discoloration.
- If any issues are detected, promptly replace the damaged anchor to prevent further complications.
- Keep the surrounding area clean and free from debris that could hinder the anchor’s performance.
- Avoid subjecting the anchor to excessive vibrations, impacts, or stress that could weaken its hold over time.
- If you notice any unusual movement or instability in the object attached to the anchor, investigate and address the issue immediately.
By following these essential tips, you can ensure the effective installation of plastic anchors in concrete, providing a reliable and secure foundation for your projects. Remember to always use high-quality materials, consider weight capacity and load requirements, and perform regular maintenance and inspections for optimal performance. With proper care, your anchors will provide a sturdy support system for years to come.
Troubleshooting Common Installation Issues
Installing plastic anchors in concrete can be an effective way to secure objects to the wall. However, like any installation process, it is not without its challenges.
Anchors not fitting securely in the drilled holes
One of the most common issues that people encounter when installing plastic anchors in concrete is that the anchors do not fit securely in the drilled holes. This can happen for a few reasons.
- Incorrect hole size: The size of the drilled hole is crucial for a secure fit. If the hole is too small, the anchor will not go in properly. Conversely, if the hole is too large, the anchor will not have enough grip. Make sure to follow the manufacturer’s instructions for the correct drill bit size.
- Inadequate cleaning of the hole: Dust, debris, and moisture can prevent the anchor from fitting securely. Before inserting the anchor, ensure that the drilled hole is clean and dry. You can use a brush or compressed air to remove any loose particles.
- Using the wrong type of anchor: Plastic anchors come in different sizes and styles, each suited for specific applications. If the anchor is not designed for the weight or load-bearing requirements of your project, it may not fit securely or hold up effectively. Double-check that you are using the appropriate anchor for your specific needs.
Anchors breaking or failing under load
Another issue that can occur during the installation of plastic anchors in concrete is the anchors breaking or failing under load. This can be not only frustrating but also potentially dangerous if the anchored object falls.
- Inadequate weight capacity: Every anchor has a specified weight capacity, and exceeding this limit can lead to anchor failure. Before starting the installation, determine the weight of the object you intend to hang and choose an anchor that can comfortably support it.
- Poor anchor quality: Not all plastic anchors are created equal. Cheap or low-quality anchors are more prone to breaking or failing under load. Invest in high-quality anchors from reputable manufacturers to ensure durability and reliability.
- Improper installation technique: Incorrect installation technique can also contribute to anchor failure. Make sure to follow the instructions carefully, ensuring that the anchor is inserted fully and securely. Using a hammer or mallet can help provide additional force and stability.
Removing and replacing faulty or damaged anchors
Lastly, if you encounter faulty or damaged anchors during the installation process, it is important to know how to remove and replace them properly. This will ensure that your project remains secure and stable.
- Removing faulty anchors: To remove a faulty anchor, you can carefully use pliers or a screwdriver to grip and extract it from the hole. Be cautious not to damage the surrounding concrete in the process.
- Replacing damaged anchors: When replacing a damaged anchor, make sure to use a new anchor of the same size and weight capacity. Additionally, clean out the hole thoroughly before installing the new anchor to ensure a secure fit.
By understanding and troubleshooting common installation issues, you can overcome challenges and achieve successful outcomes when installing plastic anchors in concrete.
Frequently Asked Questions
Can You Use A Plastic Anchor In Concrete?
Yes, plastic anchors can be used in concrete. These anchors provide a secure and durable grip in concrete surfaces. They are easy to use and suitable for various applications such as hanging shelves, mounting brackets, or installing light fixtures.
How Do You Install Plastic Anchors?
To install plastic anchors, follow these steps: 1. Drill a hole in the wall to fit the anchor. 2. Insert the anchor into the hole until it’s flush with the wall. 3. Use a screwdriver to turn the anchor clockwise until it’s tight.
4. Insert a screw into the anchor and tighten it. 5. Make sure the anchor is secure before hanging any objects.
How Do You Install Anchors In Concrete?
To install anchors in concrete, follow these steps: 1. Drill a hole in the concrete using a masonry drill bit. 2. Clean out the hole to remove any debris. 3. Insert the anchor into the hole and tap it gently with a hammer to ensure a secure fit.
4. Tighten the anchor using a wrench or screwdriver. 5. Test the anchor’s stability before applying any weight or load.
How Do You Install A Plastic Anchor Without A Drill?
To install a plastic anchor without a drill, gently tap it into the desired spot using a hammer or a mallet. Apply pressure until it’s flush with the surface. Insert the screw or hook into the anchor, and you’re ready to hang your object securely.
Conclusion
To conclude, installing plastic anchors in concrete can be a straightforward process if you follow the right steps. By properly preparing the surface, selecting the appropriate anchor, and using the correct tools and techniques, you can ensure a secure and long-lasting installation.
Remember to always take necessary safety precautions and consult the manufacturer’s instructions for specific guidelines. With these tips in mind, you’ll be well-equipped to add stability and strength to your concrete projects. Happy anchoring!