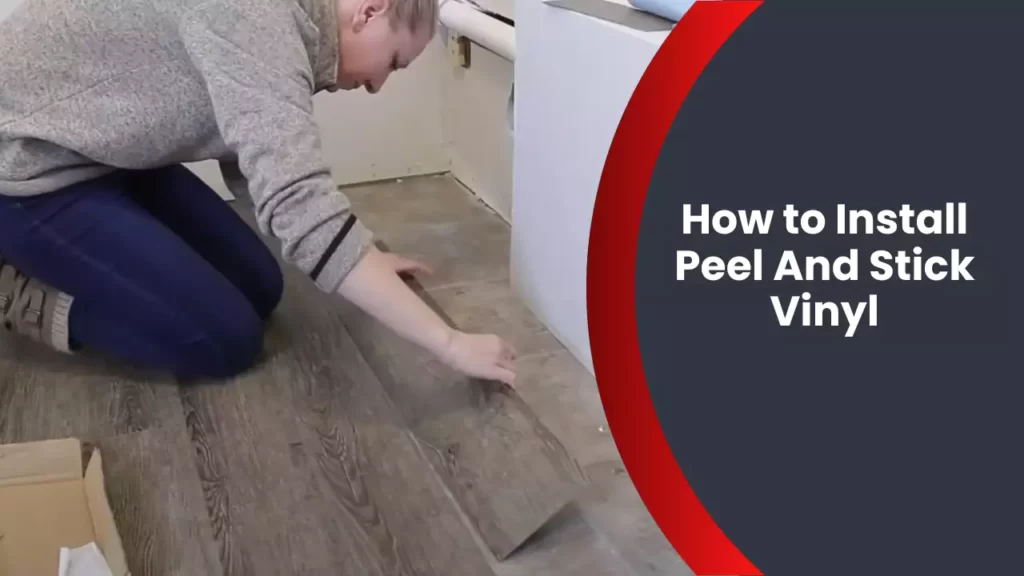
To install peel and stick vinyl, simply clean the surface, measure and cut the vinyl, and carefully stick it onto the floor or wall. Peel and stick vinyl is a popular and convenient option for homeowners looking to update their floors or walls.
With its easy installation process, it requires minimal time and effort. We will provide a step-by-step guide on how to install peel and stick vinyl. By following these instructions, you can transform your space with a stylish and durable vinyl surface.
So, let’s get started!
Materials Needed
List of Materials Required for the Installation Process
Before diving into the exciting world of peel and stick vinyl installation, it’s crucial to gather the necessary materials. Having everything you need within arm’s reach will ensure a smooth and hassle-free process. Here is a comprehensive list of the essential items:
1. Peel and Stick Vinyl TilesFirst and foremost, you’ll need high-quality peel and stick vinyl tiles. These come in various sizes, styles, and colors, so choose the ones that best fit your desired aesthetic. Remember to measure your floor space accurately to determine how many tiles you’ll require. |
2. Tape MeasureA tape measure is crucial for accurately measuring your floor space and ensuring precise cuts and placements of the tiles. Precision is key when it comes to achieving a professional-looking installation. |
3. Utility Knife or Vinyl CutterInvest in a sharp utility knife or a vinyl cutter to cut the tiles to the desired size. A clean and precise cut will ensure a seamless and polished appearance once the installation is complete. |
4. Straight Edge or T-SquareA straight edge or a T-square is essential for guiding your cuts and ensuring straight and accurate lines. This tool will help you achieve professional-looking results, even if you are a beginner. |
5. Floor Primer (if necessary)In some cases, especially if you are installing the peel and stick vinyl tiles on a concrete or uneven floor, using a floor primer is recommended. The primer helps create a smooth surface and ensures better adhesion for the tiles. |
6. Broom or Vacuum CleanerPrior to installation, ensure the floor is clean and free of dust, debris, and any other particles. Using a broom or a vacuum cleaner will help you achieve a spotless surface, enhancing the adhesive properties of the peel and stick vinyl tiles. |
7. Rubber Mallet or Hand RollerTo ensure proper adhesion and eliminate any air bubbles, a rubber mallet or a hand roller comes in handy. These tools help firmly press the tiles onto the floor, ensuring a secure bond with the adhesive. |
8. LevelA level is essential for maintaining an even and balanced installation. It helps you ensure that the tiles are properly aligned and that the final result is visually pleasing. |
9. Notched TrowelIf you are working with a specific adhesive recommended by the manufacturer, a notched trowel will help you achieve the correct adhesive thickness. This tool ensures an optimal bond between the tiles and the floor. |
10. Cleaner or Adhesive RemoverLastly, having a cleaner or an adhesive remover on hand will be beneficial during the installation process. In case of any spills or excess adhesive, you can quickly clean up without compromising the overall installation. |
By ensuring you have all these materials readily available, you are setting yourself up for success in your peel and stick vinyl installation. With the right tools and attention to detail, you’ll transform your space into a stunning showcase of style and functionality.
Preparing The Surface
Cleaning the surface thoroughly
Before you begin the installation process of peel and stick vinyl, it is crucial to prepare the surface properly. This will ensure a strong bond and a long-lasting result. The first step in surface preparation is to clean it thoroughly. Remove any dust, dirt, or debris using a broom or vacuum cleaner. This will help the adhesive to adhere better to the surface and prevent any bumps or lumps that could affect the appearance of your vinyl flooring.
If there are any stubborn stains or residue on the surface, you can use a mild detergent mixed with warm water to scrub them away. Avoid using harsh chemicals or abrasive cleaners as they can damage the surface and affect the adhesive’s performance. Rinse the surface well with clean water to remove any soapy residue, and allow it to dry completely before proceeding to the next step.
Ensuring the surface is dry and smooth
In addition to cleaning the surface, it is essential to ensure that it is dry and smooth before applying the peel and stick vinyl. Moisture can compromise the adhesive’s effectiveness and lead to the vinyl loosening over time. Therefore, it is crucial to check the moisture levels of the surface using a moisture meter. Ideally, the moisture content should be below 5% to proceed with the installation.
If you find that the surface is overly moist, you may want to use a dehumidifier or a fan to dry it out. Also, it is important to make sure the surface is smooth. Remove any loose or peeling paint, wallpaper, or old flooring. Sand down any rough patches or uneven areas. This will not only provide a smooth surface for the peel and stick vinyl but also ensure a better bond between the adhesive and the surface.
Once you have cleaned the surface thoroughly and ensured it is dry and smooth, you are ready to move on to the next steps of installing peel and stick vinyl. Taking the time to prepare the surface properly will ultimately result in a professional-looking and durable flooring that you can enjoy for years to come.
Measuring And Marking
Taking accurate measurements of the area
Making accurate measurements is the first crucial step in any DIY project, and installing peel and stick vinyl is no exception. By accurately measuring the area, you can ensure that you have enough vinyl to cover the entire space without wasting any material.
To begin, gather your measuring tape, a pencil, and a piece of paper or a notebook to jot down the measurements. Start by measuring the length and width of the room or space where you plan to install the peel and stick vinyl. Take your time and measure both the longest and widest points to get the most precise measurements.
Pro tip: If you have irregular or angled walls, measure the individual sections separately to account for any changes in width or length.
Once you have the length and width measurements, multiply them together to calculate the total square footage of the area. This will help you determine how much peel and stick vinyl you’ll need to purchase. Remember to add a little extra material to accommodate any cuts or mistakes.
Marking guidelines for alignment
Aligning the peel and stick vinyl properly is crucial for achieving a seamless and professional-looking installation. By marking guidelines on the floor, you can ensure that each piece of vinyl aligns perfectly, leaving no gaps or uneven edges.
Step 1: Start by locating the center of the room. Measure the length and width of the space and divide each measurement by 2. Mark these halfway points with a small mark using your pencil.
| Halfway Point | Length | Width |
|---|---|---|
| Center of the room | 10 ft | 8 ft |
Step 2: Next, use a long straight edge or a chalk line to create guidelines from the center marks. Align the straight edge or chalk line with the center mark and extend it towards the edges of the room. This will create two perpendicular lines that intersect at the center of the room.
Step 3: Repeat this process for the other side of the room, ensuring that the guidelines are perpendicular to the first set of lines.
Pro tip: Before applying the peel and stick vinyl, it’s recommended to lay out the pieces without removing the backing to verify that the alignment is correct. Adjust the guidelines if needed.
Following these guidelines will help you achieve a precise and visually appealing installation of peel and stick vinyl. Plus, by taking the time to measure accurately and mark guidelines for alignment, you’ll save yourself from potential challenges and frustrations later on.
Applying The First Tile
When it comes to installing peel and stick vinyl, proper application of the first tile is crucial for a successful installation. This initial step sets the foundation for the entire project and ensures a professional and seamless finish. In this section, we will guide you through the process of applying the first tile, from peeling off the backing to pressing and smoothing it onto the surface.
Peel off the backing and align the first tile
To begin, carefully peel off the backing of the first tile. Make sure to peel it completely without leaving any residue. It’s important to note that different peel and stick vinyl products may have varying backing materials or instructions, so always refer to the manufacturer’s guidelines for optimal results.
After peeling off the backing, align the first tile with precision. Measure and mark the desired position of the tile before applying it. This will help ensure a straight and symmetrical layout.
Pressing and smoothing the tile onto the surface
Once the first tile is aligned, it’s time to press and smooth it onto the surface. Begin by firmly placing the tile on the marked position. Apply even and consistent pressure, using a hand roller or a clean cloth, to ensure proper adhesion. This step helps eliminate any trapped air bubbles or wrinkles that may compromise the appearance and longevity of the installation.
Take the time to make sure each section of the tile adheres well to the surface, ensuring a tight bond. Pay extra attention to the edges and corners, as these areas tend to be more prone to lifting or peeling over time.
Moreover, if you notice any misalignment or errors while pressing and smoothing the first tile, don’t panic. Peel off the tile carefully and reposition it as necessary. Remember, it’s always better to take the time to achieve a flawless result than to rush through the installation process.
In conclusion, the correct application of the first tile is a critical step when installing peel and stick vinyl. By following the steps outlined above, you can ensure a smooth and professional-looking installation that will enhance the beauty and functionality of your space.
Installing The Remaining Tiles
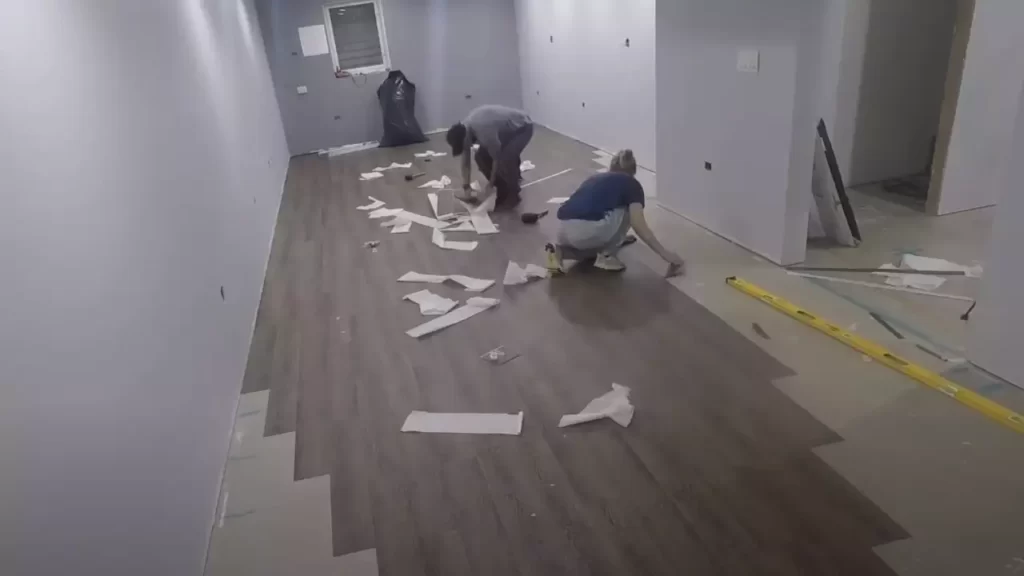
Working row by row for a systematic approach
When it comes to installing the remaining peel and stick vinyl tiles, it’s important to adopt a systematic approach to ensure a smooth and professional-looking finish. Working row by row allows you to maintain consistency and avoid any mistakes along the way. Here are the steps to follow for this method:
- Start by identifying the starting point for your first row. Usually, it’s best to begin along a straight edge or a wall, as it provides a solid reference point for the rest of the installation.
- Prepare the adhesive backing of the first tile by peeling off the protective film. Be sure to do this right before placing the tile to prevent dust or debris from sticking to the adhesive.
- Align the tile with the starting point, making sure it is perfectly parallel to the edge or wall. Press down firmly on the tile to firmly adhere it to the surface. Repeat this process for the remaining tiles in the row, making sure each tile is properly aligned.
- Continue to the next row by placing the first tile slightly overlapping the previous row. This staggered pattern helps to create a more visually appealing look and enhances the overall durability of the installation.
- Repeat the process of aligning and adhering the tiles in the new row, ensuring they are consistent in spacing and alignment with the previous rows. Being meticulous in this step will help you achieve a seamless and professional result.
- Continue this row-by-row installation method until you have covered the entire area with peel and stick vinyl tiles. Take your time to adjust and align each tile properly, as this will greatly impact the final appearance of your flooring.
By following this systematic approach, you can ensure that the installation of the remaining peel and stick vinyl tiles is organized and yields an impressive end result.
Ensuring proper alignment and spacing between tiles
Proper alignment and spacing between tiles are vital to achieving a flawless and visually appealing peel and stick vinyl flooring. Here are some essential tips to ensure that each tile is accurately placed:
- Carefully measure and mark the desired spacing between tiles before installation. This step will give you a visual guide to follow and prevent variations in spacing.
- Always double-check the alignment of each tile before pressing it down firmly. Use a straight edge or a level to ensure that the tiles are parallel and in line with the surrounding surfaces.
- If you find a need to adjust the placement of a tile, gently peel it off and reposition it. The adhesive backing of peel and stick vinyl tiles allows for some flexibility, but remember to be cautious to avoid damaging the tile or the surface.
- As you progress with the installation, periodically step back and assess the overall alignment and spacing of the tiles. This approach will help you identify any irregularities or mistakes early on and make any necessary adjustments before it’s too late.
By paying attention to proper alignment and spacing, you can guarantee a professional finish to your peel and stick vinyl flooring project.
Dealing With Obstacles
When installing peel and stick vinyl, you may encounter various obstacles that require careful handling. Whether it’s fitting tiles around corners, dealing with edges, or maneuvering around obstacles, we’ve got you covered. In this section, we will provide clear instructions on how to tackle these challenges to ensure a seamless installation process.
Cutting tiles to fit around corners, edges, and obstacles
One of the most common obstacles when installing peel and stick vinyl is fitting the tiles around corners, edges, and obstacles. To achieve a professional and flawless result, follow these simple steps:
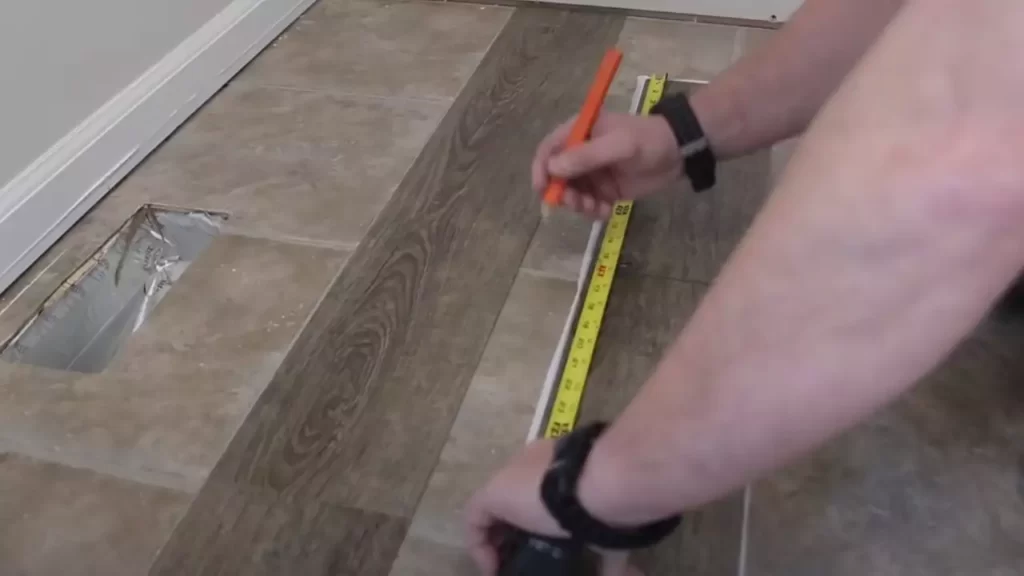
Step 1: Measure and mark
Start by measuring the area where the tile needs to be cut. Use a measuring tape to determine the length and width accurately. Once measured, mark the tile with a pencil or marker according to the measurements.
Step 2: Cut the tile
Using a utility knife or scissors, carefully cut along the marked lines. Remember, precision is key here, so take your time and ensure a clean and accurate cut. For curved cuts, you can make small slits around the edge and then trim off the excess.
Step 3: Test the fit
After cutting the tile, test its fit by gently placing it in the desired position. Make adjustments if necessary to ensure a snug and seamless fit. It is essential to avoid gaps or overlapping between the tiles for a professional finish.
Step 4: Apply the tile
Once you are satisfied with the fit, peel off the backing of the peel and stick tile, and carefully press it onto the surface. Start from one side and gradually smooth it out, applying pressure to ensure proper adhesion. Repeat the process for other cut tiles as needed.
Remember, taking accurate measurements and cutting with precision will help you achieve a professional-looking installation even when dealing with corners, edges, and obstacles.
Using a utility knife or scissors for precision
When it comes to achieving precise cuts while installing peel and stick vinyl, having the right tools is key. Here are some tips for using a utility knife or scissors to ensure precision:
- Choose the right blade: Select a sharp blade suitable for vinyl cutting. A new blade will provide clean and smooth cuts.
- Score the tile: Start by scoring the tile lightly along the marked lines. This will create a guide for the blade to follow.
- Apply even pressure: When cutting, apply even pressure to avoid jagged or uneven edges. Slow and steady movements will yield better results.
- Replace the blade if needed: If you notice the blade becoming dull or not cutting smoothly, replace it to ensure clean cuts throughout the installation process.
By following these guidelines and using the right tools, you can achieve precise cuts and ensure a professional-looking installation.
Handling Tricky Areas
When it comes to installing peel and stick vinyl tiles, handling tricky areas can be a bit challenging. However, with the right techniques and tips, you can achieve a professional looking installation even in those difficult spots. In this section, we will discuss how to install tiles around doorways and cabinets, as well as effective overlapping or underlapping techniques.
Tips for installing tiles around doorways and cabinets
Installing peel and stick vinyl tiles around doorways and cabinets requires careful attention to detail. Here are some tips to help you achieve a seamless and professional installation:
- Measure and cut the tiles: Before you start installing, measure the area around the doorway or cabinet and cut the tiles accordingly. It is essential to have accurate measurements to ensure a perfect fit.
- Dry fit the tiles: Before applying adhesive to the tiles, dry fit them in the designated area. This will allow you to make any necessary adjustments and ensure that the tiles fit properly.
- Use a utility knife: When cutting the tiles to fit around door frames or cabinet edges, a utility knife will be your best friend. The sharp blade will enable you to achieve precise cuts and ensure a clean finish.
- Trim excess material: Once the tiles are installed, you may find that there is excess material overlapping or protruding around the door frames or cabinets. Use a utility knife to carefully trim any excess material for a neat and professional appearance.
Overlapping or underlapping techniques
When it comes to installing peel and stick vinyl tiles, overlapping or underlapping techniques can be used to ensure a secure and durable installation. Here’s how you can effectively use these techniques:
- Overlapping: To overlap tiles, simply align the edge of one tile with the middle of another tile, creating an overlapping effect. This technique provides extra stability and prevents the tiles from lifting or peeling at the edges.
- Underlapping: Underlapping involves tucking the edge of one tile underneath the adjacent tile, creating a smooth and seamless appearance. This technique is ideal for areas where you want a continuous flow of the tile pattern without any visible seams.
Whether you choose to use overlapping or underlapping techniques will depend on your personal preference and the specific requirements of the installation. Both methods can result in a secure and visually appealing installation.
By following these tips and techniques, you can confidently tackle tricky areas when installing peel and stick vinyl tiles. Remember to take accurate measurements, dry fit the tiles, and use the appropriate techniques for a professional finish. With a little patience and attention to detail, you can achieve a stunning and durable vinyl tile installation in any area of your home.
Creating A Professional Finish
When it comes to installing peel and stick vinyl tiles, creating a professional finish is essential for a visually striking and long-lasting result. This section will walk you through two crucial steps that will not only enhance the durability of the tiles but also ensure a smooth and flawless appearance.
Applying pressure to ensure strong adhesion
To guarantee a strong and lasting bond between the peel and stick vinyl tiles and the underlying surface, applying pressure during installation is crucial. This pressure helps activate the adhesive and ensures that the tiles are securely attached, preventing any issues such as peeling or lifting.
To apply pressure effectively, start by firmly pressing each tile onto the surface using your hand. Make sure to apply even pressure across the entire tile, paying extra attention to the edges and corners. If any bubbles or wrinkles appear, gently lift the tile and reapply it, smoothing out any imperfections as you go. Continue this process until all the tiles are properly adhered.
Rolling the tiles with a vinyl roller for a smooth finish
While applying pressure by hand is important, using a vinyl roller takes the adhesion process to the next level by ensuring a consistently smooth finish. This tool helps remove any air bubbles trapped underneath the tiles and flattens them evenly onto the surface, resulting in a visually appealing and professional-looking installation.
Here’s how to use a vinyl roller effectively:
- Start in one corner of the room and position the roller slightly behind the first tile.
- Apply even, downward pressure as you roll the tool across the tile, gradually moving towards the opposite corner.
- Repeat this process for each tile, systematically working your way across the entire floor.
- Make sure to overlap each roll slightly to ensure complete coverage.
- Pay extra attention to seams between tiles, as rolling over them guarantees a seamless appearance.
By using a vinyl roller, you not only achieve a smooth finish but also enhance the overall durability of your peel and stick vinyl tiles. This technique eliminates potential weak spots and increases the likelihood of a long-lasting installation.
Remember to follow the manufacturer’s instructions for the specific vinyl tile product you are using, as there may be additional recommendations or precautions you need to take into account. Taking the time to properly adhere and roll the tiles will give you peace of mind and ensure that your peel and stick vinyl flooring looks professionally installed.
Completing The Installation
Checking for any loose or misaligned tiles
Before finalizing the installation of your peel and stick vinyl flooring, it’s crucial to check for any loose or misaligned tiles. This step ensures that the finished look of your flooring is seamless and professional. Here’s a simple guide to help you complete this essential task:
- Start by carefully inspecting the surface of your flooring, looking for any tiles that may have shifted or become loose during the installation process.
- With a keen eye, examine each tile individually, noting any areas that appear raised or uneven.
- If you spot any tiles that are misaligned or loose, gently press down on them with your hand to test their adherence to the floor. Take note of tiles that move under the pressure.
- If you come across any issues, don’t worry. This is not uncommon during the installation process. In fact, it’s much easier to address and rectify these problems now rather than down the line.
Securing any loose edges with additional adhesive if needed
If you’ve identified any loose edges during the inspection, it’s crucial to secure them with additional adhesive to ensure the longevity and stability of your peel and stick vinyl flooring. Follow these steps to secure any loose edges:
- Prepare a suitable adhesive recommended by the manufacturer of your peel and stick vinyl flooring. This may be a specialized adhesive designed specifically for these types of tiles.
- Carefully lift the loose edge of the tile, applying a small amount of adhesive to the affected area.
- Press down firmly on the tile to ensure it adheres securely to the floor.
- Wipe away any excess adhesive immediately to prevent it from drying on the surface of the tile.
- Allow the adhesive to dry completely before walking on or applying any pressure to the secured tile.
- Repeat this process for any additional tiles with loose edges, ensuring that each one is firmly adhered to the floor.
Maintaining Your Peel And Stick Vinyl
Maintaining your peel and stick vinyl is crucial to ensure its long-lasting beauty and durability. By implementing proper cleaning and care instructions, you can keep your floors looking pristine for years to come. In this post, we will explore the essential steps you need to follow to maintain your peel and stick vinyl effectively.
Cleaning and Care Instructions for Long-Lasting Results
Regular cleaning is key to maintain the appearance and longevity of your peel and stick vinyl. Here are some essential cleaning and care instructions:
Avoiding Harsh Chemicals
When cleaning your peel and stick vinyl, it’s important to avoid harsh chemicals that can damage the surface. Instead, opt for gentle cleaning solutions that are specifically formulated for vinyl floors. These mild cleaners can effectively remove dirt and grime without causing any harm. Additionally, avoid using abrasive cleaning tools such as steel wool or stiff brushes, as they can scratch the surface of your vinyl.
Preventing Excessive Moisture
Excessive moisture can be detrimental to your peel and stick vinyl, causing the adhesive to weaken or even detach. To prevent this, avoid excessive water usage while cleaning your floors. Instead, damp mop the vinyl using a well-wrung mop or cloth. If any spills occur, promptly wipe them up to prevent moisture from seeping into the vinyl. Furthermore, placing doormats at entryways can help trap dirt and moisture before it reaches your floors.
Additionally, maintaining a consistent indoor humidity level can also help prevent moisture-related issues. Ensure proper ventilation and use dehumidifiers in areas with high humidity to avoid any potential problems.
Tips for Long-Lasting Results
To further extend the life of your peel and stick vinyl, consider implementing the following tips:
- Use furniture pads or coasters to protect your floors from scratches and indentations caused by heavy furniture.
- Avoid dragging heavy objects across the surface, as this can lead to damage.
- Regularly sweep or vacuum your floors to remove loose dirt and debris that can cause abrasions over time.
- Place rugs or mats in high-traffic areas to minimize wear and tear.
- Trim your pet’s nails regularly to prevent them from scratching the surface of the vinyl.
By following these cleaning and care instructions, you can ensure that your peel and stick vinyl maintains its beauty and durability throughout its lifespan. Remember, a little effort goes a long way in preserving the appearance and functionality of your floors.
Troubleshooting Common Issues
Addressing potential problems like peeling corners or lifting edges
Peel and stick vinyl is a popular flooring choice due to its easy installation process. However, like any home improvement project, it can encounter some common issues that may require troubleshooting. One such issue is peeling corners or lifting edges, which can occur over time or due to poor installation. But don’t worry, these issues can be easily addressed.
Tips for fixing loose tiles or removing air bubbles
If you notice loose tiles or air bubbles forming after installing peel and stick vinyl, don’t panic. Here are some tips to fix these problems:
- Fixing loose tiles: If you find one or more tiles coming off, don’t wait to address the issue. Start by gently lifting the affected tile and applying a small amount of adhesive under it. Press it firmly back into place and hold it for a few seconds to ensure proper bonding. Repeat this process for any other loose tiles.
- Removing air bubbles: Air bubbles can sometimes appear during the installation process. To remove them, start by making a small incision in the center of the bubble using a sharp utility knife. Gently lift the vinyl and apply pressure to release the trapped air. Smooth the vinyl back into place, ensuring it adheres properly.
Ensuring each H3 heading adheres to HTML syntax
When it comes to creating content for your WordPress blog, it is essential to adhere to the HTML syntax for headings. By using the appropriate <h3> tags, you ensure that search engines understand the structure of your content and readers can easily navigate through your troubleshooting tips.
The <h3> tag is used to indicate subheadings within your blog post. It helps to break down your content into digestible sections and makes it more visually appealing. By following proper HTML syntax, you create a more SEO-friendly and user-friendly experience.
Remember, when using HTML syntax for your headings, make sure to close the tag correctly with a </h3> at the end. This way, your content remains compliant with WordPress standards and ensures consistency throughout your blog post.
Enhancing The Look With Trims And Molding
Adding trims and molding to your peel and stick vinyl flooring is an excellent way to elevate its overall appearance. Not only do trims and molding provide a polished and finished look, but they also serve functional purposes by protecting the edges of your floors and creating seamless transitions between adjoining rooms. However, it is crucial to choose the right trims and molding options that complement your vinyl flooring to ensure a cohesive and aesthetically pleasing result.
Adding trims and molding for a polished appearance
When it comes to enhancing the look of your vinyl flooring, adding trims and molding is an essential step. These elements help create clean lines, add depth, and give your space a more professional and sophisticated appeal. Here are some tips to consider when selecting trims and molding for your peel and stick vinyl flooring:
- Choose matching colors: Select trims and molding that match or complement the color of your vinyl flooring, ensuring a seamless and cohesive look throughout the room.
- Consider the style: Take into account the overall style and theme of your space. Whether you have a contemporary, traditional, or rustic design, there are trims and molding options available to suit every aesthetic.
- Pick the right size: Trims and molding come in various sizes and profiles. Consider the width and thickness of your vinyl flooring and choose trims and molding that balance and enhance its visual appeal.
- Coordinate with existing elements: Ensure that your trims and molding align with existing architectural features, such as baseboards, door frames, and windowsills. This coordination will create a cohesive and harmonious look.
Choosing the right trims and molding options to complement your vinyl flooring is crucial in achieving a polished and put-together appearance. By considering factors such as color, style, size, and coordination with existing elements, you can elevate the overall look of your space and create a seamless transition between the flooring and other architectural features.
In conclusion, adding trims and molding to your peel and stick vinyl flooring not only enhances its appearance but also protects its edges and creates a polished and finished look. By carefully selecting trims and molding that match the color, style, size, and existing architectural elements, you can achieve a visually appealing and cohesive result. Take your time to explore the various options available and choose the ones that best complement your vinyl flooring for a stunning and professional finish.
Frequently Asked Questions
Do You Have To Put Anything Under Peel And Stick Vinyl Flooring?
No, you do not need to put anything under peel and stick vinyl flooring. It can be applied directly on a clean and smooth surface for easy installation.
Is Peel And Stick Vinyl Flooring Hard To Install?
Install peel and stick vinyl flooring easily. It is not hard to install, and you can do it yourself. Just peel off the backing and stick it onto a clean, flat surface. No need for glue or special tools. It’s a budget-friendly and convenient option for flooring.
Should I Use Adhesive With Peel And Stick Vinyl?
No, adhesive is not required for peel and stick vinyl. The adhesive already applied to the back of the vinyl is sufficient for proper installation.
Where Do I Start Peel And Stick Vinyl?
Start by preparing the surface, ensuring it’s clean and dry. Measure and cut the vinyl to fit the area. Remove the backing and carefully stick the vinyl onto the surface. Smooth out any air bubbles and trim any excess.
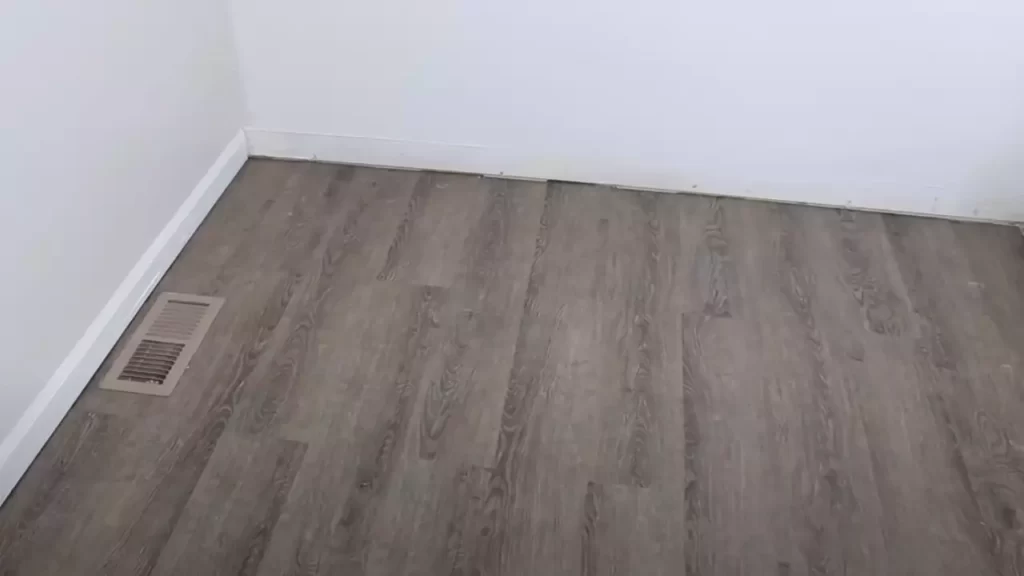
Conclusion
Installing peel and stick vinyl is a simple and cost-effective way to update your space. With the right tools and preparation, anyone can achieve professional-looking results. By following our step-by-step guide, you can ensure a smooth and durable installation. Remember to thoroughly clean and level the surface, carefully align the tiles, and apply pressure to ensure proper adhesion.
With these tips in mind, you can easily transform your room with peel and stick vinyl.