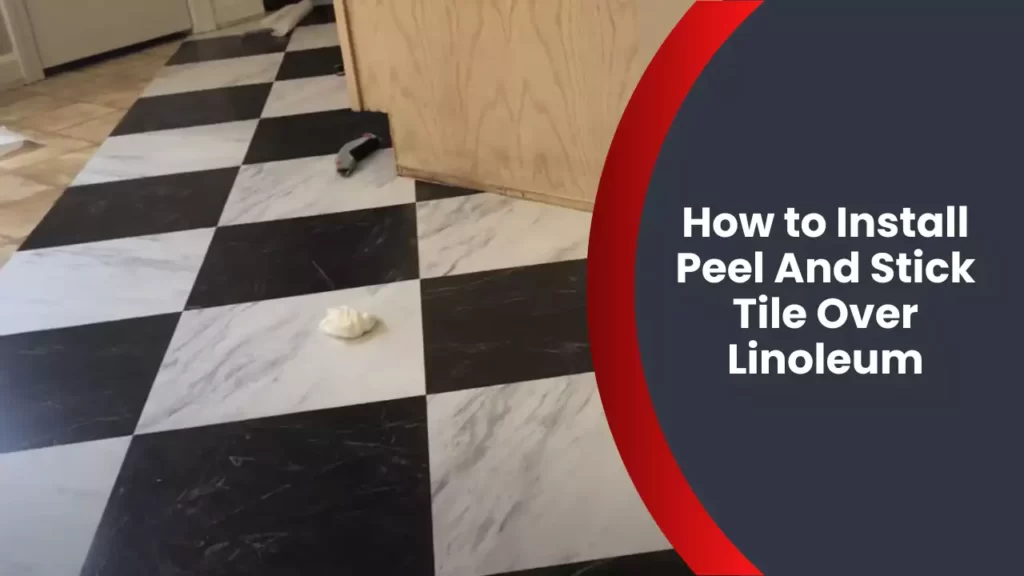
To install peel and stick tile over linoleum, first clean and prime the linoleum surface, then carefully align and press the tiles into place, ensuring a smooth and even finish. Introducing a stylish and affordable way to update your floors, installing peel and stick tile over linoleum can be a convenient and DIY-friendly option.
If you’re looking to refresh your space without the hassle and expense of removing old linoleum, this method allows you to transform your floors with minimal effort. By following a few simple steps, you can achieve a professional-looking installation, creating a durable and attractive surface that will enhance any room in your home.
We will guide you through the process of installing peel and stick tile over linoleum, providing you with the knowledge and confidence to tackle this project on your own.
Cleaning The Linoleum Surface
Removing dirt and debris
Before you can begin installing peel and stick tile over linoleum, it’s crucial to clean the surface thoroughly. Start by removing any loose dirt and debris that may have accumulated over time. This will ensure a smooth and seamless installation process.
To remove dirt and debris from the linoleum surface, follow these simple steps:
- Sweep the entire floor using a broom to remove larger particles of dirt.
- Vacuum the floor to eliminate any remaining dirt and dust from hard-to-reach corners.
- Use a damp mop or a cloth to wipe away any stubborn stains or dirt spots.
- Inspect the floor carefully to ensure that no debris is left behind.
Using a mild detergent solution to clean
Once you’ve removed all the dirt and debris from the linoleum surface, it’s time to give it a thorough cleaning using a mild detergent solution. This will help remove any stubborn stains, grease, or grime that may be present.
Here’s how you can clean the linoleum surface using a mild detergent solution:
- Dilute a small amount of mild detergent with warm water in a bucket.
- Stir the solution gently until the detergent is fully dissolved.
- Using a sponge or a mop, apply the detergent solution to the linoleum surface.
- Scrub the floor gently, paying extra attention to any stubborn stains or high-traffic areas.
- Rinse the floor thoroughly with clean water to remove any residue from the detergent solution.
- Dry the floor completely using a clean rag or a towel.
By following these steps and cleaning the linoleum surface properly, you’ll ensure that the peel and stick tile adheres securely and creates a beautiful and long-lasting floor in your space.
Repairing Any Damage On The Linoleum
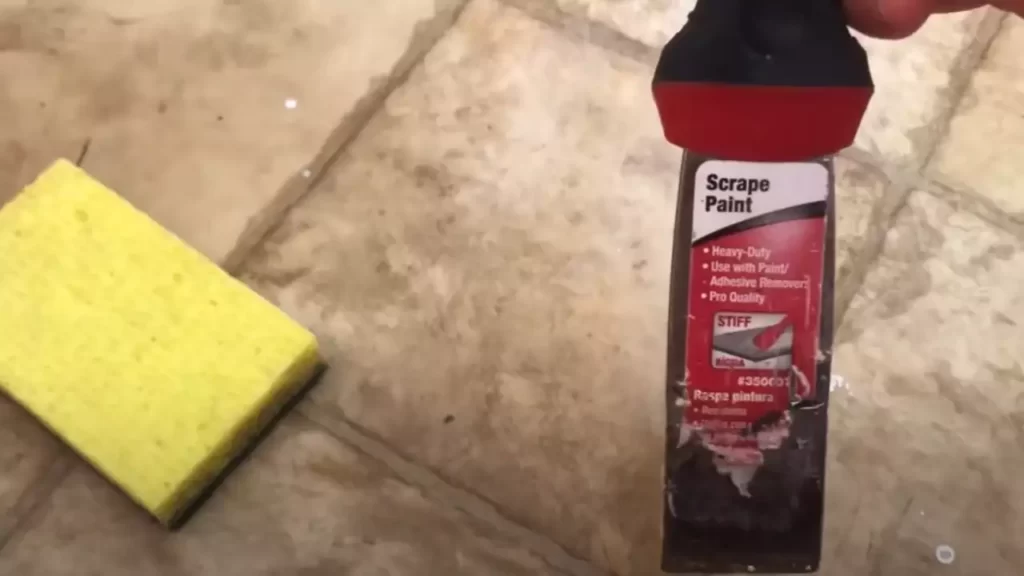
If you’re planning to install peel and stick tile over linoleum, it’s essential to repair any damage on the linoleum surface beforehand. This step will ensure a smooth and long-lasting installation. By filling in cracks and holes and sanding down uneven areas, you’ll create a solid foundation for your new tiles. Here’s how you can effectively repair any damage on your linoleum:
Filling in cracks and holes
To fill in cracks and holes on your linoleum, you’ll need a suitable filler material and a putty knife. Follow these steps:
- Clean the damaged area: Start by thoroughly cleaning the cracked or holed area. Remove any debris or loose linoleum, making sure the damaged surface is clean and dry.
- Select a filler material: Choose a filler material that matches the composition and color of your linoleum. Some suitable options include linoleum patch kits or a standard wood filler.
- Apply the filler: Using a putty knife, carefully apply the filler material to the cracks or holes. Apply an even layer and smooth it out to match the surrounding linoleum surface.
- Let it dry: Allow the filler to dry completely. This process may take a few hours or longer, depending on the type of filler used. Refer to the manufacturer’s instructions for drying times.
- Sand the filled area: Once the filler is dry, gently sand the filled area using fine-grit sandpaper. This step helps to create a smooth and level surface for the peel and stick tiles to adhere to.
- Remove dust: After sanding, wipe away any dust or debris from the repaired area. Use a damp cloth or vacuum cleaner to ensure a clean and debris-free surface.
Sanding down uneven areas
If you notice any uneven areas on your linoleum, sanding them down will help create a level surface for the peel and stick tiles. Follow these steps:
- Identify the uneven areas: Examine the linoleum surface and identify any uneven or raised areas. This could be due to wear and tear or uneven subflooring.
- Prepare the sanding tool: Choose a handheld sanding block or an orbital sander with fine-grit sandpaper. This will allow you to sand the surface without causing further damage.
- Sand the uneven areas: Gently sand the uneven areas, moving the sanding tool in a circular motion. Be careful not to apply too much pressure or sand excessively, as this can damage the linoleum.
- Check for levelness: Periodically check the sanded areas for levelness. Continue sanding until the surface feels smooth and even to the touch.
- Remove dust: Once you’re satisfied with the sanded surface, remove any dust or debris using a damp cloth or vacuum cleaner. A clean surface will ensure proper adhesion of the peel and stick tiles.
By repairing any damage on your linoleum, you’ll create a suitable foundation for installing peel and stick tiles. Filling in cracks and holes, as well as sanding down uneven areas, will not only enhance the visual appeal of your new flooring but also ensure its longevity.

Gathering The Necessary Tools And Materials
If you’re looking to upgrade the look of your linoleum floors without the hassle of a full renovation, installing peel and stick tiles is a great DIY solution. Not only are peel and stick tiles easy to install, but they also provide a durable and stylish flooring option. Before you get started, it’s important to gather all the necessary tools and materials. Having everything you need on hand will ensure a smooth and efficient installation process. In this article, we’ll discuss the essential tools and materials you’ll need to complete the installation of peel and stick tiles over linoleum.
Measuring tape
A measuring tape is an essential tool when installing peel and stick tiles over linoleum. Before you start laying down the tiles, it’s important to measure the dimensions of your room accurately. This will ensure you purchase the correct amount of peel and stick tiles, minimizing waste and potential delays. Use the measuring tape to calculate the length and width of the room, as well as any odd-shaped areas or corners that require special attention. By taking accurate measurements, you can plan the layout of the tiles effectively and achieve a professional-looking result.
Level
A level tool is crucial for ensuring that your peel and stick tiles are perfectly aligned and straight. Before you begin installing the tiles, take the time to check if your linoleum floor is level. Use the level tool to identify any uneven or sloping areas. If you notice any significant discrepancies, it may be necessary to address them before proceeding with the installation. This could involve using self-leveling compound to create a smooth and even surface. By ensuring the subfloor is level, you’ll achieve a visually appealing and long-lasting finished floor.
Peel and stick tile
The star of the show, peel and stick tiles, are the main material you’ll be using to transform your linoleum floors. These tiles come in various colors, patterns, and designs, allowing you to create a unique and personalized look for your space. When selecting peel and stick tiles, it’s important to consider the overall style and aesthetic you’re aiming for. Whether you prefer a classic checkerboard pattern or a modern geometric design, you’ll find a wide range of options to choose from. Ensure you have enough peel and stick tiles to cover your measured area, accounting for any waste or mistakes.
In conclusion, gathering the necessary tools and materials is the first step in installing peel and stick tiles over linoleum. With a measuring tape, level, and the peel and stick tiles of your choice, you’ll be well-prepared to tackle this DIY project. Remember to accurately measure your space, check the levelness of your floor, and select the peel and stick tiles that best suit your style. Armed with the right tools and materials, you’ll be on your way to enjoying a brand new, upgraded flooring in no time.
Measuring The Linoleum Surface Area
When it comes to installing peel and stick tile over linoleum, the first step is to properly measure the surface area of the linoleum. This will ensure that you have accurate calculations for ordering the correct amount of tiles and a smooth installation process. In this section, we will go over the process of measuring the linoleum surface area and calculating the total square footage as well as determining the number of tiles needed.
Calculating total square footage
Before you can determine the number of tiles needed, it’s important to calculate the total square footage of the linoleum surface. This will give you an idea of how much tile you will need to cover the entire area. To calculate the total square footage, follow these steps:
- Start by measuring the length of the room in feet using a measuring tape.
- Next, measure the width of the room in feet.
- Multiply the length by the width to get the total square footage. For example, if the room is 10 feet long and 8 feet wide, the total square footage would be 10 x 8 = 80 square feet.
By calculating the total square footage, you will have a better understanding of the tile quantity required for the installation.
Determining the number of tiles needed
Once you have the total square footage of the linoleum surface, you can determine the number of tiles needed for the installation. Peel and stick tiles typically come in various sizes, so it’s important to choose the appropriate size for your project. To determine the number of tiles needed, you can follow these steps:
- Decide on the size of the peel and stick tiles you will be using for the installation.
- Divide the total square footage of the linoleum surface by the coverage area of one tile to find out how many tiles you will need. For example, if each tile covers 1 square foot and the total square footage is 80, you will need 80 tiles.
It’s always a good idea to add a few extra tiles to your order to account for any mistakes or future replacements.
By measuring the linoleum surface area accurately and calculating the total square footage, you can ensure that you order the correct number of peel and stick tiles for a successful installation. Taking the time to properly measure will save you time, money, and potential headaches down the road.
Sketching A Layout Plan For Tile Placement
When it comes to updating your linoleum floors, peel and stick tiles are a popular and affordable option. Not only do they provide a fresh new look, but they are also easy to install. One essential step in the installation process is sketching a layout plan for tile placement. By carefully mapping out where each tile will go, you can ensure a smooth and seamless finished look. In this article, we will explore the importance of sketching a layout plan and provide you with some helpful tips to make the process a breeze.
Using a grid or pattern
Before starting the installation, it’s crucial to have a clear vision of how you want the tiles to be laid out. One effective method is using a grid or pattern. This involves creating a visual representation of the floor area and laying a grid or pattern over it, similar to a blueprint.
Using a grid allows you to accurately measure and plan the placement of each tile. You can use graph paper or an online design tool to create your grid. The size of the grid squares will depend on the size of your tiles. For example, if you’re using 12×12-inch tiles, you could choose a 1-inch square for each grid box.
A pattern, on the other hand, can be helpful if your tiles have a specific design or if you want to create a visually interesting layout. You can lay out the tiles in a staggered or diagonal pattern, experimenting with different arrangements to find the one that suits your space best.
Planning for cuts around corners and edges
When sketching your layout plan, you also need to consider any corners or edges that will require tile cuts. This is an important step to ensure a professional-looking finish. Begin by measuring these areas and marking them on your grid or pattern. By doing this, you can determine the exact size and shape of the tiles needed for these spaces.
Next, it’s time to plan for the actual cuts. Instead of eyeballing it, use a straight edge and a pencil to mark the cutting lines directly onto the tiles themselves. It’s advisable to leave a small gap between the tiles and the wall or any other fixed objects. This gap will be covered by baseboards or trim, allowing for expansion and contraction of the tiles.
If you have complex cuts, such as around door frames or irregular shapes, it might be helpful to create a paper template. Simply trace the shape onto a piece of paper, transfer it onto the tile, and carefully cut along the lines.
Starting From A Corner Of The Room
If you’re looking for an affordable and easy way to update your linoleum floors, peel and stick tiles are the perfect solution. Not only are they simple to install, but they can also give your room a whole new look. One important step in this process is starting from a corner of the room. By doing so, you can ensure a clean and seamless installation. Let’s dive in and explore the steps you need to follow to get the job done right.
Ensuring a Clean and Dry Surface
Before you begin installing peel and stick tiles over your linoleum floor, it’s crucial to have a clean and dry surface. This will help the adhesive on the tiles stick properly and prevent any future issues. Here are a few simple steps to follow:
- Start by removing any obstacles from the area, such as furniture or rugs.
- Thoroughly sweep or vacuum the linoleum floor to remove any dust, dirt, or debris.
- If there are any sticky residues or stains on the linoleum, clean them using an appropriate cleaner or a mixture of warm water and mild detergent. Be sure to rinse the area thoroughly and allow it to dry completely before proceeding.
By ensuring a clean and dry surface, you are setting the stage for a successful installation of your peel and stick tiles.
Peeling the Backing Off the First Tile
Now that your linoleum floor is clean and dry, it’s time to start installing the peel and stick tiles, beginning from a corner of the room. Here’s how to do it:
- Choose a corner of the room to be your starting point. This can be any corner you prefer, but it’s typically best to start in one of the back corners.
- Take your first tile and carefully peel off the backing, exposing the adhesive side of the tile.
- Align the exposed adhesive side of the tile with the corner you chose as your starting point. Make sure the tile is square with the walls and positioned as desired.
- Press the tile firmly onto the linoleum floor, applying even and consistent pressure. Ensure that the tile adheres securely to the surface.
- Continue peeling off the backing and placing each tile next to the previous one, creating a row. Remember to align each tile properly and press firmly to ensure a secure bond.
By starting from a corner of the room and peeling the backing off the first tile, you can easily progress from one tile to the next, creating a beautifully installed peel and stick tile floor over your linoleum.
Installing peel and stick tile over linoleum is a rewarding DIY project that can transform the look of any room. By following these steps, you can achieve professional-looking results and enjoy your new flooring in no time. Remember to take your time and ensure each tile is placed correctly for a durable and visually appealing finish.
Applying The Tile To The Linoleum Surface
Once you have prepared the linoleum surface properly and gathered all the necessary materials, it’s time to start applying the peel and stick tile. This step-by-step guide will walk you through the process, ensuring a successful installation of your new tiles.
Pressing down firmly for adhesion
To ensure the peel and stick tile adheres securely to the linoleum surface, it’s important to apply pressure while installing. Follow these steps to achieve proper adhesion:
- Begin by removing the backing of one tile, exposing the adhesive side.
- Position the tile at the starting point of your layout plan, aligning it with the edges of the linoleum surface.
- Press down firmly on the tile, using your hands or a roller tool, to create a strong bond between the tile and the linoleum.
- Continue this process for each tile, working your way across the linoleum surface according to your layout plan.
- Be sure to overlap the edges of the tiles slightly to prevent any gaps or misalignment.
| Tips for proper adhesion: | |
|---|---|
| 1. | Apply even pressure across the entire surface of each tile to ensure all areas are securely adhered. |
| 2. | Use a roller tool specifically designed for peel and stick tiles to apply sufficient pressure and evenly distribute it. |
| 3. | If any air bubbles form beneath the tile, press them out with your hands or the roller tool to create a smooth and flat surface. |
Aligning the tile with the layout plan
Proper alignment of the peel and stick tiles is crucial for achieving a professional and visually appealing result. Here’s how to align each tile with your layout plan:
- Before removing the backing of a tile, place it on the linoleum surface without applying pressure.
- Make sure the tile is positioned exactly where it needs to be according to your layout plan.
- Once aligned, remove the backing and press down firmly to secure the tile in place.
- Continue this process for each tile, constantly checking the alignment to maintain a cohesive and balanced pattern.
- If needed, gently lift and reposition tiles to correct any misalignment.
By following these steps, you can successfully apply peel and stick tiles over linoleum. Remember to press down firmly for proper adhesion and align the tiles accurately with your layout plan. Now, you’re one step closer to transforming your space with a beautiful and easy-to-install flooring solution.
Continuing The Installation In Rows
Once you have prepared the surface and laid out the first row of peel and stick tiles over your linoleum, it’s time to continue the installation in rows. This step-by-step guide will walk you through the process, ensuring that your peel and stick tile installation goes smoothly and produces stunning results.
Staggering the Tiles for a Seamless Look
To achieve a professional and seamless look with your peel and stick tile installation, it’s important to stagger the tiles. Staggering involves placing the tiles in a staggered pattern, alternating the starting point of each row to create a visually appealing layout. Follow these simple steps to stagger your tiles effectively:
- Begin the second row by placing a full tile directly next to the first full tile in the first row. Make sure the edges of the tiles are aligned.
- Take the next tile and cut it in half using a utility knife. Place one half at the start of the second row, adjacent to the full tile. The other half will be used at the end of the row.
- Continue installing full tiles and half tiles alternately, taking care to align the edges and maintain a consistent gap between each tile for grout if applicable. This staggered pattern will create a seamless look and avoid any visible seams or lines.
- Repeat the same process for subsequent rows, ensuring that each row is staggered with the row above it.
- Measure and cut tiles to fit at the end of each row, if needed. Remember to leave some space for expansion if recommended by the manufacturer.
Trimming Tiles for a Perfect Fit Around Obstacles
When installing peel and stick tiles, it’s common to encounter obstacles such as corners, electrical outlets, or pipes. Trimming the tiles to fit perfectly around these obstacles will give your installation a clean and professional look. Follow these steps to trim tiles around obstacles:
- Measure the area around the obstacle and transfer the measurements onto the tile. Use a straightedge to ensure accuracy.
- Place the tile on a cutting surface, ensuring it is securely held in place.
- Using a utility knife, carefully cut along the marked lines. Apply enough pressure to cut through the tile but avoid cutting too deep.
- Test the trimmed tile around the obstacle to ensure it fits correctly. Make any necessary adjustments by carefully trimming the tile further if needed.
- Once you have achieved the perfect fit, remove the backing from the trimmed tile and press it firmly onto the surface, ensuring proper adhesion.
By following these steps to stagger the tiles and trim them around obstacles, you can ensure a professional and seamless peel and stick tile installation over linoleum. With a little patience and attention to detail, your new flooring will enhance the beauty of your space and provide lasting durability.
Dealing With Corners And Edges
Cutting tiles to fit around corners
When it comes to installing peel and stick tiles over linoleum, dealing with corners and edges can be a bit tricky. However, with the right techniques and tools, you can achieve a seamless and professional-looking result. One of the key steps in this process is cutting the tiles to fit around corners.
To start, make sure you have the necessary tools on hand:
- Measuring tape
- Straight edge ruler
- Sharp utility knife
Here’s a step-by-step guide on how to cut tiles to fit around corners:
- Measure and mark: Begin by measuring the distance from the edge of the last full tile to the corner. Use a measuring tape and mark the measurement on the back of the tile you’ll be cutting.
- Score the tile: Place the straight edge ruler over the marked line and press down firmly. Using a sharp utility knife, score the tile by running the knife along the ruler in one fluid motion. Apply enough pressure to cut through the top layer of the tile, but avoid cutting too deeply.
- Break the tile: Once the tile is scored, use your hands or a pair of tile nippers to carefully snap the tile along the scored line. Apply even pressure to both sides of the score to ensure a clean break.
- Trim if necessary: After breaking the tile, you may need to trim any jagged edges or excess material. Use the utility knife or a pair of tile nippers to remove any unwanted portions.
- Test the fit: Before applying the cut tile, test its fit around the corner. Make any additional adjustments as needed to ensure a snug fit.
- Apply the tile: Once you are satisfied with the fit, remove the adhesive backing from the tile and carefully press it into place. Smooth out any air bubbles or wrinkles using a straight edge or your hands.
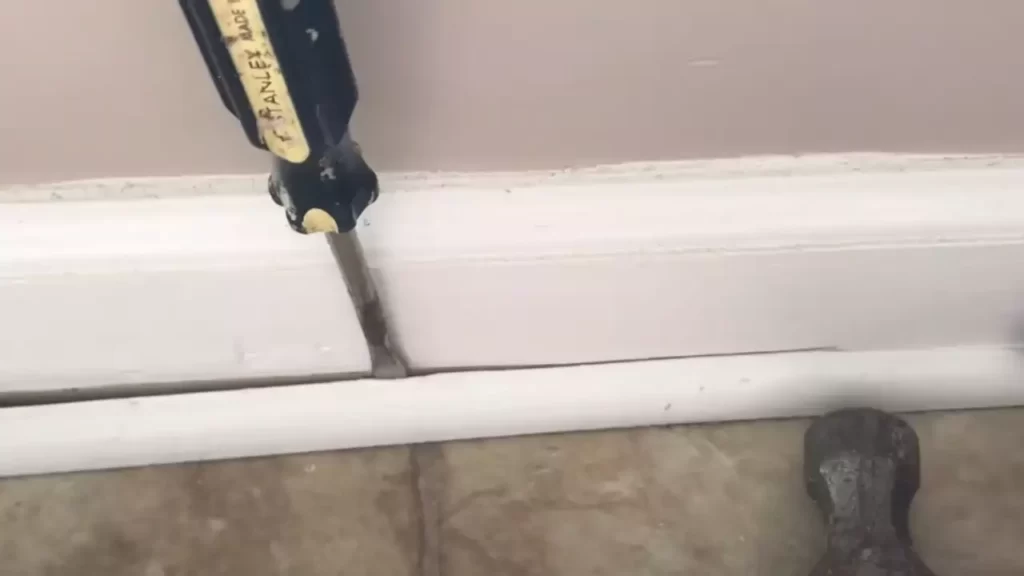
Using a transition strip for a finished edge
Another aspect to consider when dealing with corners and edges during the installation of peel and stick tiles is creating a finished edge with a transition strip. Transition strips not only provide a clean and polished look but also help to protect the exposed edges of the tiles.
Here’s how you can use a transition strip:
- Measure and cut: Start by measuring the length of the exposed edge where you want to install the transition strip. Use a saw or a utility knife to cut the transition strip to the appropriate length.
- Prepare the surface: Ensure that the surface where the transition strip will be installed is clean and free of any debris. Use a damp cloth to wipe away any dirt or dust.
- Apply adhesive: Apply a thin layer of adhesive along the backside of the transition strip. Be sure to follow the manufacturer’s instructions for the specific adhesive being used.
- Press the strip into place: Carefully align the transition strip with the exposed edge of the tiles. Press the strip firmly into place, ensuring that it is level and secure.
- Allow for curing time: Give the adhesive sufficient time to dry and cure before walking or placing any objects on the transition strip. This will help to ensure a strong and long-lasting bond.
By following these steps, you can achieve a smooth and professional-looking finish around corners and edges when installing peel and stick tiles over linoleum. Remember to take your time, measure accurately, and use the right tools for the job. With a little patience and practice, you’ll be able to create a stunning and durable flooring transformation.
Applying Pressure To Ensure Proper Adhesion
Using a roller or applying pressure with a clean towel
Applying pressure is a vital step in installing peel and stick tile over linoleum. This ensures proper adhesion and helps your new tiles stay securely in place. There are two commonly used methods to apply pressure: using a roller or applying pressure with a clean towel.
Using a roller
Using a roller is a simple and effective way to ensure proper adhesion of your peel and stick tiles. A small, hand-held roller is ideal for this task. Here’s how you can use a roller:
- Start by placing the roller at one corner of the tile.
- Apply firm and even pressure as you roll the roller across the tile.
- Continue rolling in a back and forth motion until you have covered the entire tile.
- Repeat this process for each tile, ensuring that you roll over all edges and corners.
Applying pressure with a clean towel
If you don’t have a roller on hand, you can still achieve proper adhesion by using a clean towel. Here’s how you can use a towel to apply pressure:
- Start by placing a clean towel over the tile that needs pressure.
- Use both hands to firmly press down on the towel, applying even pressure.
- Move your hands in a circular motion to ensure the pressure is evenly distributed.
- Repeat this process for each tile, ensuring you cover all areas of the tile.
Remember, regardless of the method you choose, it’s essential to apply enough pressure to bond the peel and stick tile with the linoleum surface. By taking the time to apply pressure correctly, you’ll ensure that all tiles are securely in place, minimizing the risk of any future issues.
Allowing The Tiles To Set And Cure
After you have successfully installed the peel and stick tiles over your existing linoleum floor, it is crucial to allow them sufficient time to set and cure. This will ensure that the adhesive bond is strong, and the tiles will adhere properly to the surface. Following the manufacturer’s instructions and taking certain precautions during the drying process are essential for achieving optimal results.
Following the manufacturer’s instructions for drying time
Every peel and stick tile brand may have different recommendations for drying time, so it is vital to carefully read and follow the manufacturer’s instructions provided with the product. These instructions will typically indicate the specific time required for the adhesive to cure. Failure to comply with the recommended drying time could lead to tiles that do not adhere properly or prematurely peel off.
Once the tiles are installed, ensure that the room is well-ventilated by opening windows or using fans. Adequate ventilation will help in drying the adhesive more quickly.
Avoiding heavy foot traffic during the curing process
During the curing process, it is essential to minimize foot traffic on the newly installed tiles. Heavy foot traffic can disrupt the adhesive bond and lead to tiles shifting or coming loose. To prevent this, consider placing temporary barriers or cautionary signs to prevent accidental damage or disturbances.
If there is a need to walk on the tiles during the curing process, try to distribute the weight evenly and avoid dragging heavy objects across the floor, as these actions can also compromise the adhesive bond.
Remember, allowing ample time for the tiles to set and cure is crucial for a durable and long-lasting installation. By following the manufacturer’s instructions for drying time, avoiding heavy foot traffic, and taking proper precautions, you will ensure a successful peel and stick tile installation over your linoleum floor.
Sealing The Edges And Joints
Sealing the edges and joints is a crucial step when installing peel and stick tile over linoleum. Properly sealing the edges and joints ensures that your tile installation is not only aesthetically pleasing but also durable and long-lasting. In this section, we will guide you through the process of applying a clear silicone caulk for added protection and how to smooth the caulk using a caulk tool or your finger.
Applying a clear silicone caulk for added protection
Once you have installed the peel and stick tiles over the linoleum, it’s time to seal the edges and joints with a clear silicone caulk. This caulk not only provides an extra layer of protection but also helps to prevent water seepage and keeps the edges and joints securely in place. Follow these simple steps to apply the caulk:
- Clean the edges and joints with a damp cloth to ensure that they are free from any dust, debris, or residue.
- Cut the tip of the clear silicone caulk at a 45-degree angle to create a small opening.
- Hold the caulk gun at a 45-degree angle and apply a thin bead of silicone caulk along the edge or joint where two tiles meet.
- Make sure to apply the caulk in a continuous line, without any breaks or gaps, to ensure proper sealing.
- Continue applying the caulk along all the edges and joints of the peel and stick tiles.
- Be careful not to apply too much caulk as it may overflow and create a messy appearance. A thin, even layer of caulk is sufficient for sealing.
Smoothing the caulk with a caulk tool or finger
Once you have applied the clear silicone caulk along the edges and joints, it’s important to smooth it out for a neat and professional finish. Here’s how you can do it:
- Using a caulk tool or your finger, gently press and smooth the caulk along the edges and joints.
- Begin at one end and work your way towards the other end, applying consistent pressure to ensure that the caulk is evenly distributed.
- If using a caulk tool, hold it at a slight angle and run it along the caulk line, pressing firmly to create a smooth, rounded finish.
- If using your finger, wet it lightly and glide it along the caulk line, applying gentle pressure to smooth out any bumps or ridges.
- Continue smoothing the caulk along all the edges and joints, making sure to remove any excess caulk that may have squeezed out during the application.
- Allow the caulk to dry completely, as per the manufacturer’s instructions, before walking or placing any objects on the newly sealed edges and joints.
Sealing the edges and joints of your peel and stick tile installation is a crucial step to ensure its longevity and visual appeal. By applying a clear silicone caulk and smoothing it out, you not only add an extra layer of protection but also create a seamless and professional finish. Follow these steps carefully, and you’ll have a beautifully sealed installation that will withstand the test of time.
Cleaning And Maintenance Tips
Proper cleaning and maintenance are crucial for ensuring the longevity and beauty of your peel and stick tile installation over linoleum. By following a few simple steps, you can keep your floors looking pristine for years to come.
Using a non-abrasive cleaner for regular cleaning
To keep your peel and stick tiles looking their best, it’s important to use a non-abrasive cleaner for regular cleaning. Harsh abrasives can scratch the surface of the tiles and diminish their appearance over time. Instead, opt for a gentle cleaner specifically formulated for vinyl or tile surfaces. Dilute the cleaner according to the manufacturer’s instructions and use a soft mop or cloth to wipe away dirt and grime. Regular sweeping or vacuuming is also recommended to prevent dirt buildup.
Avoiding harsh chemicals that may damage the tiles
Be cautious when choosing cleaning products for your peel and stick tiles. Harsh chemicals, such as bleach, ammonia, or abrasive cleaners, can cause discoloration or damage to the tiles. It’s best to stick to mild, non-abrasive cleaners that are safe for vinyl or tile surfaces. Always read the labels of cleaning products to ensure they are suitable for use on your peel and stick tiles. If you encounter any spills, it’s important to clean them up promptly to prevent staining or damage.
By following these cleaning and maintenance tips, you can keep your peel and stick tile installation over linoleum in top condition. Regular cleaning with non-abrasive cleaners and avoiding harsh chemicals will help preserve the beauty and durability of your floors. Remember to always refer to the manufacturer’s guidelines and recommendations for specific cleaning and maintenance instructions for your peel and stick tiles.
Frequently Asked Questions
Can Peel And Stick Tiles Go Over Linoleum?
Yes, peel and stick tiles can be applied over linoleum without any issues.
Can I Put Peel And Stick Tile Over Vinyl Flooring?
Yes, you can put peel and stick tile over vinyl flooring.
How Do You Prepare Vinyl Flooring For Peel And Stick Tile?
To prepare vinyl flooring for peel and stick tile, follow these steps: 1. Clean the floor thoroughly by sweeping and mopping. 2. Ensure the surface is flat and level by applying a self-leveling compound if needed. 3. Prime the floor with a vinyl flooring primer to improve adhesion.
4. Allow the primer to dry completely before installing the peel and stick tiles. 5. Finally, carefully follow the manufacturer’s instructions for installing the tiles.
What Kind Of Underlayment Do You Use For Peel And Stick Tile?
Peel and stick tile typically requires a smooth and clean surface for proper adherence. An underlayment, such as plywood or cement board, can be used to provide a suitable base.
Conclusion
Installing peel and stick tile over linoleum is a convenient and cost-effective way to give your space a fresh look. By following the steps outlined in this blog post, you can easily transform your floors without the need for extensive prep work or professional assistance.
With proper preparation and attention to detail, you can achieve professional-looking results. So, go ahead and give it a try, and enjoy the beautiful new floors in your home!