Installing an outlet box in an existing wall is a simple process. Cut a hole in the desired location, run electrical wires to the box, and secure it in place using screws.
This ensures a safe and functional electrical outlet in your home. Introducing an outlet box in an existing wall allows you to conveniently access a power source wherever you need it. Whether you want to add outlets for new appliances or create a more accessible power supply, this step-by-step guide will help you navigate the installation process with ease.
By following these instructions, you can complete the project safely and efficiently, ensuring that your electrical system meets your needs.
Assessing The Wall And Planning The Installation
Assessing the wall and planning the installation are crucial steps when it comes to installing an outlet box in an existing wall. By inspecting the wall for electrical wiring and potential obstacles, identifying the desired location for the outlet box, and determining the size and type of outlet box to use, you can ensure a smooth and successful installation. In this section, we will delve into each of these steps in detail, providing you with the necessary guidance to proceed with confidence.
Inspecting the wall for electrical wiring and potential obstacles
Before installing an outlet box in an existing wall, it’s crucial to inspect the wall for electrical wiring and potential obstacles that may impede the installation process. Start by shutting off the power to the area where you plan to install the outlet box to ensure safety.
Next, visually examine the wall and feel for any electrical wires running behind it. Electrical wires are typically run vertically or horizontally, so pay close attention to these directions. Use a stud finder or a non-contact voltage tester to detect any hidden wires within the wall.
Identifying the desired location for the outlet box
Once you have determined that there are no electrical wires or obstacles in the wall, it’s time to identify the desired location for the outlet box. Consider the functionality and aesthetics of the space when choosing the location. You may want to place the outlet box in proximity to existing electrical outlets or appliances for convenience.
It’s important to note that building codes often have specific requirements for outlet box placement, especially in kitchens and bathrooms. Consult your local building codes to ensure compliance.
Determining the size and type of outlet box to use
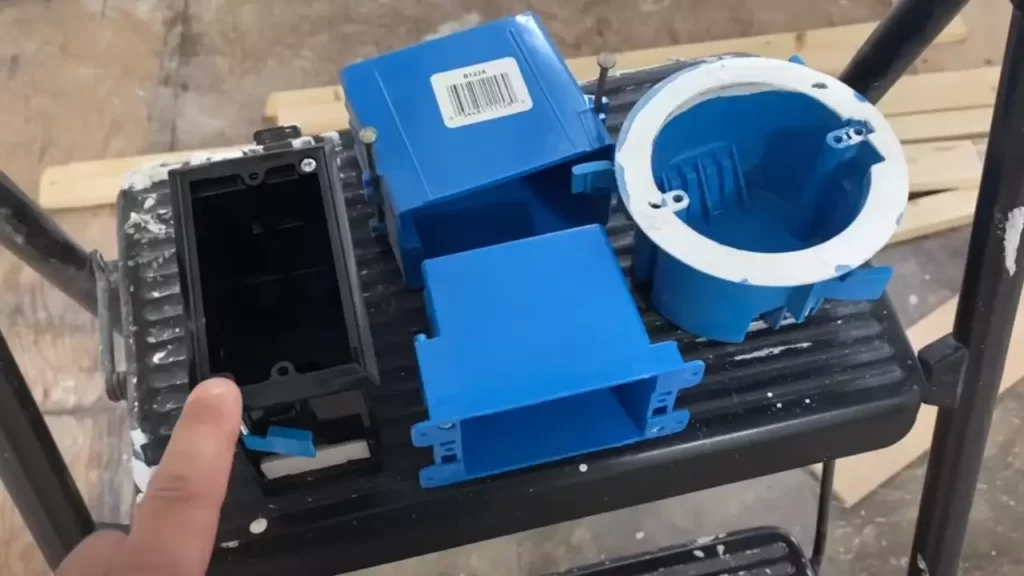
After choosing the location, you need to determine the size and type of outlet box that suits your needs. Outlet boxes come in various sizes and materials, such as metal or plastic.
To determine the appropriate size, consider the number of electrical cables you need to connect to the outlet box and the space available within the wall. Ensure that the outlet box is deep enough to accommodate the wires and any additional devices, such as dimmer switches or USB ports.
Once you have identified the size, material, and type of outlet box, you can proceed with confidence to the next steps of the installation process.
Gathering The Necessary Tools And Materials
When it comes to installing an outlet box in an existing wall, gathering the necessary tools and materials is the first and crucial step. By preparing a comprehensive list of tools and materials, you can ensure a smooth and efficient installation process. So, let’s jump right in and take a look at what you’ll need.
List of Tools Needed for the Installation Process
To successfully install an outlet box in an existing wall, you’ll need the following tools:
- Measuring Tape: This will help you measure the placement of your outlet box accurately.
- Wire Strippers: Essential for stripping the electrical wire to connect it to the outlet box.
- Screwdriver: A Phillips or flathead screwdriver, depending on the types of screws you’re using.
- Needle-Nose Pliers: These will come in handy for bending and shaping wires as needed.
- Drill and Bits: For creating holes in the wall for the outlet box and screws.
- Level: Ensures that the outlet box is perfectly straight and level.
- Stud Finder: Helps locate wall studs to ensure secure installation.
- Pencil or Marker: Essential for marking the measurements on the wall.
List of Materials Required
Now, let’s move on to the materials you’ll need to complete the installation process successfully. Here’s what you should gather:
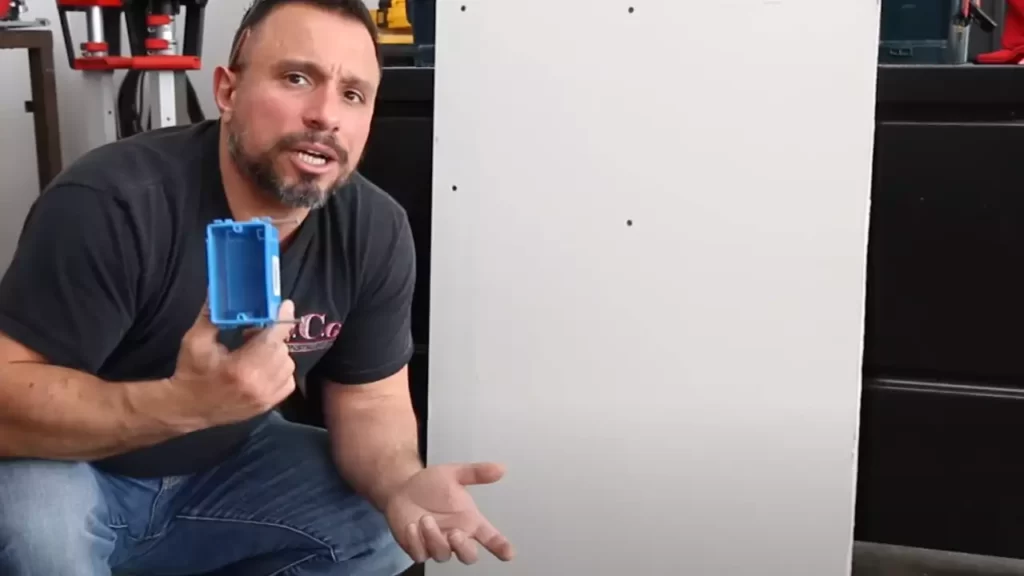
- Outlet Box: Choose a box with the appropriate size and style for your specific needs.
- Screws: Ensure that you have the right size and type of screws for attaching the outlet box to the wall.
- Electrical Wire: Depending on the electrical requirements, select the appropriate gauge and type of wire.
- Wire Nuts: Used to secure and connect the electrical wires together.
- Electrical Tape: Necessary for insulating wire connections and providing added safety.
- Outlet Cover Plate: The finishing touch for your outlet box, which includes the necessary screw(s) for attachment.
With the tools and materials mentioned above, you’ll be well-prepared to tackle the process of installing an outlet box in an existing wall. Take the time to organize and gather everything you need beforehand, as it will make the installation process much smoother and hassle-free.
Remember always to prioritize safety and consult professionals or experts if you’re unsure about any aspect of the installation.

Preparing The Wall And Making The Required Openings
Before installing an outlet box in an existing wall, it is crucial to properly prepare the wall and make the necessary openings. This involves a few key steps which we will discuss in detail below. It is important to follow these steps carefully and ensure your safety by turning off the power supply before getting started.
Removing the switch or receptacle cover plate
The first step in preparing the wall is to remove the switch or receptacle cover plate. This is done to gain access to the existing electrical outlet and prepare it for installation. To remove the cover plate, follow these steps:
- Using a screwdriver, carefully unscrew the screws holding the cover plate in place.
- Once the screws are removed, gently pull the cover plate away from the wall.
- Set the cover plate aside in a safe location.
Turning off the power supply to the existing electrical outlet
Before making any electrical connections or working with the existing outlet, it is crucial to turn off the power supply. This step ensures your safety and prevents any potential electrical hazards. To turn off the power supply, follow these steps:
- Locate the main electrical panel in your home.
- Identify the breaker that supplies power to the room where the outlet is located.
- Flip the corresponding breaker to the “off” position.
- Use a non-contact voltage tester to double-check that the power is indeed turned off.
Cutting a hole in the wall to accommodate the outlet box
Once the power supply is turned off, it’s time to cut a hole in the wall to accommodate the outlet box. Follow these steps to ensure a clean and precise opening:
- Measure and mark the desired location for the outlet box on the wall.
- Using a drywall saw or a keyhole saw, carefully cut along the marked lines.
- Be cautious of any electrical wires or cables that may be hidden within the wall. Take necessary precautions to avoid damaging them.
- Remove the cut piece of drywall or plaster to create an opening for the outlet box.
By following these steps, you will have successfully prepared the wall and made the required openings for installing an outlet box in an existing wall. These initial preparations are crucial for ensuring a safe and efficient installation process.
Installing The Outlet Box In The Wall
When it comes to installing an outlet box in an existing wall, there are a few key steps you need to follow. In this section, we will guide you through the process of inserting the outlet box into the hole, securing it in place with screws or fasteners, and connecting the electrical wiring to the outlet box.
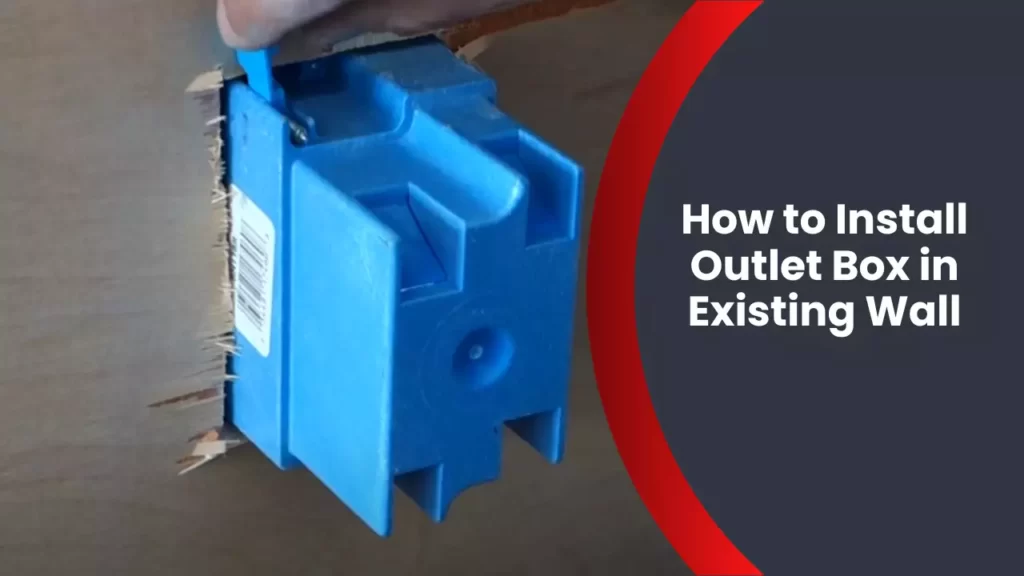
Inserting the Outlet Box into the Hole
Before you can secure the outlet box in place, you’ll need to properly insert it into the hole you’ve made in the wall. Begin by positioning the outlet box over the hole, ensuring that it is level with the wall surface. Once in position, gently push the box into the hole until it is fully inserted.
Securing the Box in Place with Screws or Fasteners
To ensure that the outlet box stays securely in place, you’ll need to use screws or fasteners. Grab your screws or fasteners and insert them into the pre-drilled holes on the outlet box. Using a screwdriver or drill, tighten the screws or fasteners until the box is firmly secured to the wall. Ensure that the box remains level and flush with the wall surface throughout this process.
Connecting the Electrical Wiring to the Outlet Box
With the outlet box securely in place, you can now focus on connecting the electrical wiring. Begin by stripping off about half an inch of insulation from the ends of the electrical wires. Insert the wires into the appropriate terminals on the outlet box, making sure to match the color coding (typically black for hot, white for neutral, and green or bare copper for ground).
Once the wires are inserted, tighten the terminal screws to firmly secure the wires in place. Take care not to overtighten, as this could damage the wires. After connecting the wires, carefully tuck them into the outlet box, ensuring that there is no excessive slack or exposed wiring.
In conclusion, installing an outlet box in an existing wall requires careful attention to detail. By following these steps of inserting the outlet box into the hole, securing it in place with screws or fasteners, and connecting the electrical wiring correctly, you can ensure a safe and functional installation.
Testing And Finishing The Installation
Restoring the Power Supply and Testing the Newly Installed Outlet
Once you have successfully installed the outlet box in your existing wall, the next step is to restore the power supply and test the newly installed outlet. This will ensure that everything is functioning properly and that the installation was done correctly. Follow these steps to complete this important phase of the installation process.
1. Turn off the power: Begin by heading to your electrical panel and identifying the circuit that controls the area where you installed the outlet box. Flip the corresponding breaker to the off position to ensure your safety while handling the wires.
2. Connect the wires: Now, it’s time to connect the wires from the outlet box to the electrical supply. Using wire connectors, match the black wire from the outlet box to the black (hot) wire in the wall. Connect the white (neutral) wires in the same manner. It’s important to ensure a secure connection by twisting the wires together and capping them with the wire connectors.
3. Ground the outlet box: Properly grounding the outlet box is essential for safety. Locate the bare copper or green wire in the wall and connect it to the green grounding screw on the outlet box. This will help protect against electrical shocks and potential hazards.
4. Secure the outlet: Carefully slide the outlet into the box and use screws to secure it in place. Double-check that all connections are snug and secure to prevent any accidents or electrical issues.
Installing a Cover Plate on the Outlet Box for the Final Finishing Touch
After testing the newly installed outlet and ensuring everything is working correctly, it’s time to give it a polished look by installing a cover plate. This final step not only adds aesthetic appeal but also provides an added layer of safety. Follow these simple instructions to complete the installation with a professional finish:
1. Choose the right cover plate: Select a cover plate that matches your personal style and the design of your room. Choose a color and finish that complements the outlet box and blends seamlessly with your overall decor.
2. Turn off the power: Before installing the cover plate, turn off the power to the circuit once again to ensure your safety while working with electrical components.
3. Line up the plate: Hold the cover plate over the outlet box, making sure that it aligns perfectly with the holes for the outlet and the screws. Ensure that it sits flush against the wall for a clean and seamless appearance.
4. Secure the plate: Insert the screws into the holes of the cover plate and tighten them until the plate is securely attached to the outlet box. Be careful not to overtighten, as this could damage the plate or the outlet box.
5. Test the cover plate: After securing the cover plate, turn on the power and test the functionality of the outlet once again. Plug in a device or use a non-contact voltage tester to confirm that the outlet is providing power correctly. If everything is working as expected, congratulations! You’ve successfully installed an outlet box and finished it off with a cover plate.
By following these steps and taking the necessary precautions, you can confidently install an outlet box in an existing wall, test the installation, properly ground the outlet box, and finish off the project by installing a cover plate. Remember to prioritize safety throughout the process and, if you’re unsure about any step, consult a professional electrician for assistance.
:strip_icc()/wall-insert-remodel-box-23a80c74-e061f8ded2ec450dae19b0a4c75cadda.jpg)
Credit: www.bhg.com
Frequently Asked Questions
Can You Attach An Outlet Box To Drywall?
Yes, you can attach an outlet box to drywall. It is important to securely fasten the box to the wall using appropriate hardware. Make sure to follow the manufacturer’s instructions and consult a professional if needed.
Do You Need An Electrician To Install An Outlet Box?
Yes, it is recommended to have an electrician install an outlet box. Professional expertise ensures proper installation, complying with electrical codes and safety standards.
How Do You Install An Outlet Box In Drywall Without Studs?
To install an outlet box in drywall without studs, first, mark the desired location on the wall. Then, use a drywall saw to cut a hole along the markings. Insert a metal or plastic remodeling box into the hole and secure it with screws.
Lastly, connect the electrical wires and install the outlet.
Does Outlet Box Have To Be Attached To Stud?
No, outlet boxes do not have to be attached to a stud. However, attaching them to a stud provides additional support and improves stability. It is recommended to attach outlet boxes to studs for better safety and durability.
Conclusion
Installing an outlet box in an existing wall doesn’t have to be a daunting task. By following these step-by-step instructions, you can successfully add a new outlet to meet your electrical needs. Remember to turn off the power before starting the installation process and always double-check your work for safety.
With a little patience and the right tools, you’ll have a new outlet up and running in no time. Happy DIY-ing!