To install a new outlet in an existing wall, determine the desired location and turn off the power to the area. Cut a hole in the wall using a drywall saw, fish a new electrical cable through the wall cavity, and connect it to the outlet.
Assessing The Feasibility And Safety
Determining if the wall can accommodate a new outlet
Before diving into the installation process of a new outlet in an existing wall, it’s crucial to assess whether the wall can accommodate it. This step ensures that you won’t encounter any unexpected hurdles or disappointments along the way.
Firstly, check the location of nearby electrical outlets. They’re usually installed 12-18 inches above the floor, so if you have one nearby, it’s a good indicator that there’s likely enough space in the wall to accommodate another outlet. However, if there are no outlets nearby, it doesn’t necessarily mean you can’t install a new one. You can still proceed with caution, but it’s recommended to consult a professional electrician.
Another important consideration is the presence of studs in the wall. These vertical wooden or metal beams provide structural support to the wall. The presence of studs affects how easily you can install the outlet. To check for studs, use a stud finder or look for nails or screws that may indicate their presence. If you locate a stud, you need to adjust the placement of the outlet accordingly, as it must be installed between the studs.
Checking the electrical load capacity of the existing circuit
Installing a new outlet requires assessing the electrical load capacity of the existing circuit. This ensures that the circuit can handle the additional load without overloading, which can lead to tripped breakers or other electrical issues.
To determine the load capacity, you need to know the amperage rating of the circuit. This information is usually indicated on the circuit breaker in the electrical panel. It’s typically 15 or 20 amps for residential circuits.
Next, you need to calculate the total load of the existing outlets and devices connected to the circuit. Add up the wattage rating of each device and divide it by the circuit’s voltage (usually 120 volts in residential settings) to get the amperage. Make sure the total amperage does not exceed the circuit’s rating. If it does, you may need to consider installing a new circuit or redistributing the load among different circuits with the help of a professional electrician.
Ensuring safety measures are in place
When installing a new outlet, safety is paramount. Taking proper precautions will help prevent electrical accidents or hazards.
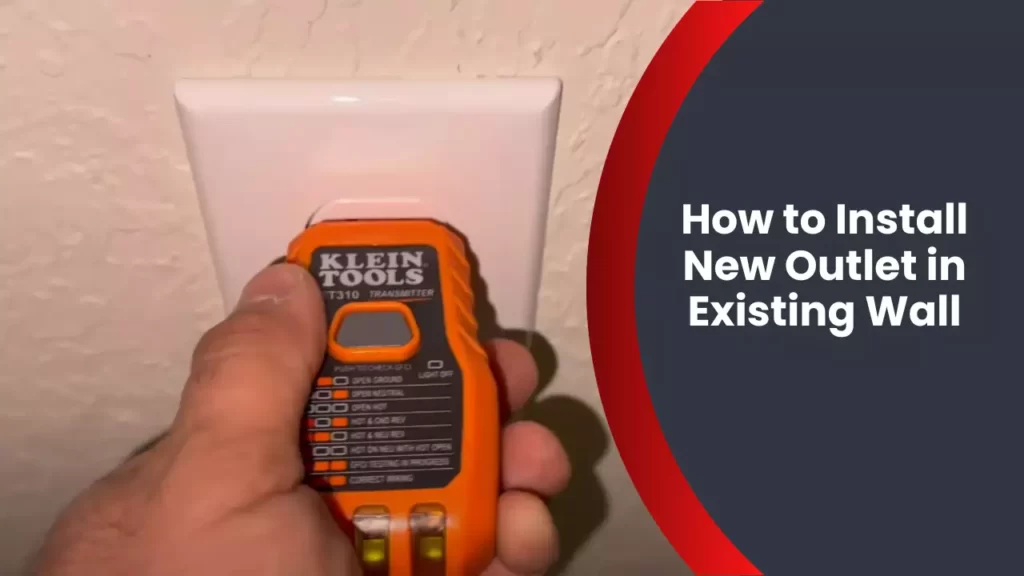
Firstly, always turn off the power to the circuit you’ll be working on. Locate the correct circuit breaker in the electrical panel and switch it to the “off” position. Use a non-contact voltage tester to double-check that there is no current flowing to the outlet.
- Wear protective gear: Ensure you wear safety glasses, gloves, and appropriate clothing to protect yourself from electrical shock and other potential hazards.
- Proper wiring: Follow proper wiring techniques and ensure all connections are secure. Use wire nuts or electrical tape to cover exposed wires.
- Grounding: Ensure the outlet is properly grounded to prevent electrical shocks. Check for a grounding wire and connect it securely.
- Use quality materials: Invest in high-quality electrical components to ensure the longevity and safety of your new outlet.
- Comply with local codes: Familiarize yourself with local building codes and regulations to ensure compliance and safety standards.
Focusing on these safety measures will help ensure the successful installation of your new outlet while prioritizing the well-being of you and your home.
Gathering The Tools And Materials
Before you begin installing a new electrical outlet in an existing wall, it is important to gather all the necessary tools and materials. Having everything you need ready will make the installation process smoother and more efficient. In this section, we will discuss the tools needed for the installation process, the essential materials required for the project, and additional safety equipment and precautions to ensure a successful and safe installation.
Tools needed for the installation process
Here is a list of the tools you will need to install a new outlet in an existing wall:
- Wire stripper
- Wire cutter
- Flathead screwdriver
- Phillips screwdriver
- Drill
- Drill bits
- Fish tape
- Electrical tape
- Voltage tester
- Multimeter
These tools will assist you in cutting, stripping, and connecting wires, as well as drilling holes and testing the electrical connections.
Essential materials required for the project
To install a new outlet in an existing wall, you will need the following materials:
- Electrical box and mounting screws
- New electrical outlet
- Electrical wire
- Wire nuts
- Outlet cover plate
These materials are essential for housing the electrical connections, connecting the wires, and providing a finished look to the outlet.
Additional safety equipment and precautions
Your safety should always be a top priority when working with electrical installations. In addition to the tools and materials mentioned above, you should also have the following safety equipment:
- Safety glasses
- Gloves
- Long-sleeved shirt
- Circuit breaker finder
Wearing safety glasses and gloves will protect you from any potential hazards, while a long-sleeved shirt can prevent accidental contact with live wires. Additionally, using a circuit breaker finder will help you identify the correct breaker to turn off before starting the installation.
Remember, always turn off the power supply to the area you are working on at the circuit breaker before beginning any electrical work. Also, be cautious and avoid working in wet conditions to minimize the risk of electrical shock.
Gathering the necessary tools, materials, and safety equipment before starting the installation process will help ensure a smooth and safe electrical outlet installation in an existing wall. Stay tuned for the next section, where we will discuss the steps for installing the outlet.
Preparing The Wall And Outlet Location
Preparing the Wall and Outlet Location
Before installing a new outlet in an existing wall, it is crucial to properly prepare the wall and identify the ideal location for the new outlet. This involves a few important steps, including identifying the ideal location, cutting the hole in the wall for the outlet box, and removing any obstacles or obstructions.
Identifying the Ideal Location for the New Outlet
When identifying the ideal location for the new outlet, you need to consider a few factors. Firstly, you should determine the nearest electrical circuit that can supply power to the new outlet. This is important because it ensures that the outlet functions properly without overloading the circuit. Secondly, it is crucial to choose a location that is convenient and easily accessible. This will allow you to plug in and use your devices without any hassle.
Cutting the Hole in the Wall for the Outlet Box
Once you have identified the ideal location for the new outlet, the next step is to cut a hole in the wall for the outlet box. Here’s a step-by-step guide to help you:
- Turn off the power to the area where you’ll be working using the circuit breaker.
- Mark the location of the outlet box on the wall using a pencil and a level. Ensure that the hole is at a comfortable height and matches the other outlets in the room.
- Use a stud finder to locate any studs or other obstacles in the wall. It’s important to avoid cutting through any structural supports.
- Using a drywall saw or a keyhole saw, carefully cut along the marked lines to create the hole for the outlet box. Be sure to cut straight and clean lines to ensure a proper fit.
- Remove any excess drywall or insulation from the hole, making sure the area is clean and free of debris.
Removing Any Obstacles or Obstructions
Before proceeding with the installation of the new outlet, it is essential to remove any obstacles or obstructions that might hinder the process. This includes removing any nails, screws, or other objects that may be present in the wall. Additionally, if there are other electrical wires in close proximity to the new outlet location, it is important to ensure that they are properly insulated and secured to prevent any potential hazards.
Once you have completed these steps, you are now ready to proceed with installing the new outlet in the existing wall. Following these guidelines will help ensure a successful installation and safe use of the new outlet.
Running The Wiring
Running the wiring is a crucial step when installing a new outlet in an existing wall. Properly installed and secured wiring ensures the safe and efficient flow of electricity to your new outlet. In this section, we will cover important considerations when running the wiring, including choosing the appropriate wiring method, running the wires from the main electrical panel, and securing the wires to protect them from damage.
Choosing the appropriate wiring method
Before starting the wiring process, it is important to determine the appropriate wiring method for your specific installation. There are a few options to consider:
- Non-metallic sheathed cable (NM cable): This is a common wiring method that consists of plastic-insulated wires bundled together. NM cable is suitable for interior walls and ceilings.
- Conduit: When dealing with exposed wiring or certain locations that require additional protection, conduit can be a good choice. It provides a mechanical barrier and can be made of metal or plastic.
- Armored cable (AC cable): AC cable consists of individual wires encased in a flexible metal armor. This method offers added protection in areas where the wiring may be subject to damage.
Consider the specific needs of your installation and consult local electrical codes to determine the appropriate wiring method.
Running the wires from the main electrical panel
Once you have chosen the appropriate wiring method, it’s time to run the wires from the main electrical panel to the location of the new outlet. Follow these steps:
- Turn off the power: Before starting any electrical work, always turn off the power at the circuit breaker to ensure your safety.
- Plan the route: Determine the most direct route for running the wires. It’s best to avoid areas with existing plumbing, HVAC systems, or other obstacles that may interfere with the wiring.
- Drill holes: Use a drill and appropriate-sized drill bit to create holes in the studs or joists where the wires will pass through. Ensure the holes are at least 1 1/4 inches away from the wall’s surface to protect the wires.
- Fish the wires: Attach a fish tape or a bent wire to the end of the cable and carefully guide it through the holes, pulling it out at the outlet location.
Remember to leave enough slack in the wires at both the panel and outlet ends to make the necessary connections.
Securing the wires and protecting them from damage
Once the wires are in place, it’s important to secure them properly and protect them from any potential damage. Here are a few key steps to follow:
- Fasten the wires: Use cable staples or clips to secure the wires along the framing members every 4½ feet or less, and within 12 inches from boxes or panel enclosures.
- Avoid sharp bends: When routing the wires, avoid sharp bends or kinks that could damage the insulation or affect the flow of electricity.
- Protect the wires: If the wires are located in an area where they may be exposed or potentially damaged, such as unfinished basements or garages, consider using a protective conduit or conduit sleeves for added safeguarding.
By adhering to these guidelines, you’ll ensure that the wiring is secure, protected, and meets the necessary electrical codes for a safe and successful installation.
Installing The Outlet Box
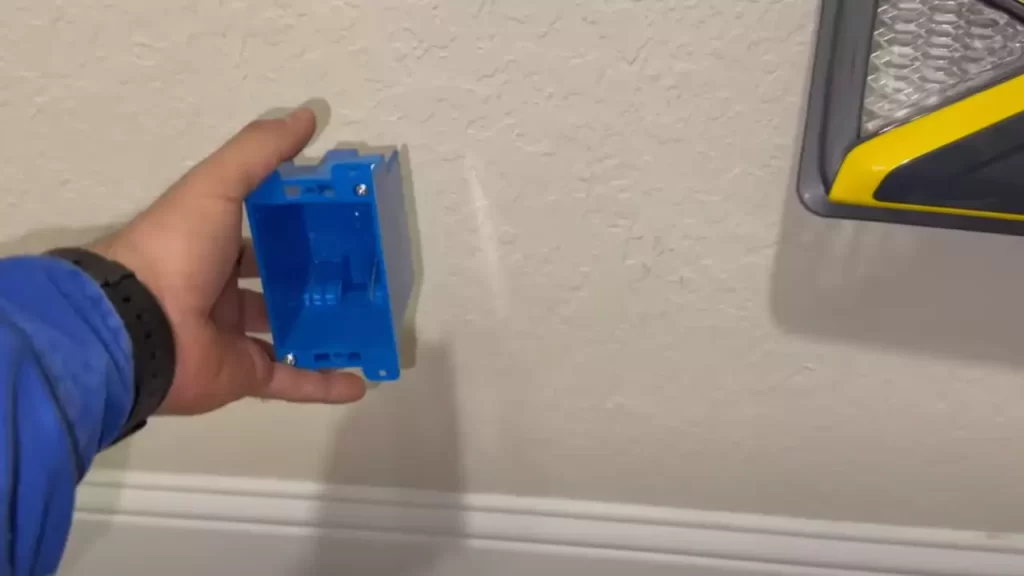
Selecting the Right Type of Outlet Box
Before you start installing a new outlet in an existing wall, it is crucial to select the right type of outlet box. There are different types of outlet boxes available in the market, and choosing the one that suits your specific requirements is essential. The most commonly used outlet boxes are plastic and metal boxes. Plastic boxes are lightweight and easy to install, making them ideal for DIY projects. On the other hand, metal boxes provide better durability and grounding. Selecting the appropriate outlet box will ensure that your newly installed outlet is safe and secure.
Mounting the Box Securely in the Wall
Once you have chosen the right type of outlet box, the next step is to mount it securely in the wall. This involves carefully cutting a hole in the desired location for the outlet and inserting the box into the opening. It is crucial to ensure that the box is flush with the wall surface and firmly attached to the studs or other support structures within the wall. This will provide stability and prevent the box from coming loose over time. Remember to use appropriate screws or nails to secure the box, depending on the type of box and the material of the wall. This step is crucial for the overall stability and longevity of the outlet.
Ensuring Proper Alignment and Level
Proper alignment and level are essential when installing an outlet box in an existing wall. You want your outlet to be aesthetically pleasing and blend seamlessly with the surrounding wall surface. To achieve this, it is important to ensure that the outlet box is aligned correctly with adjacent electrical boxes and other elements of the wall. Use a level to ensure that the box is perfectly horizontal or vertical as required. This attention to detail will result in a professional-looking installation and minimize any future issues with the outlet.
Connecting The Wiring To The Outlet
Stripping and preparing the wire ends
Before connecting the wires to the outlet terminals, it’s important to properly strip and prepare the wire ends to ensure a secure and reliable connection. Follow these steps:
- Start by using a wire stripper tool to remove the insulation from the end of each wire.
- Place the wire inside the appropriate gauge slot on the wire stripper and gently squeeze the handles together.
- Rotate the wire stripper around the wire, ensuring it doesn’t cut into the actual wire strands.
- Gently pull back the insulation, exposing the bare wire.
- Repeat this process for each wire that needs to be connected to the outlet.
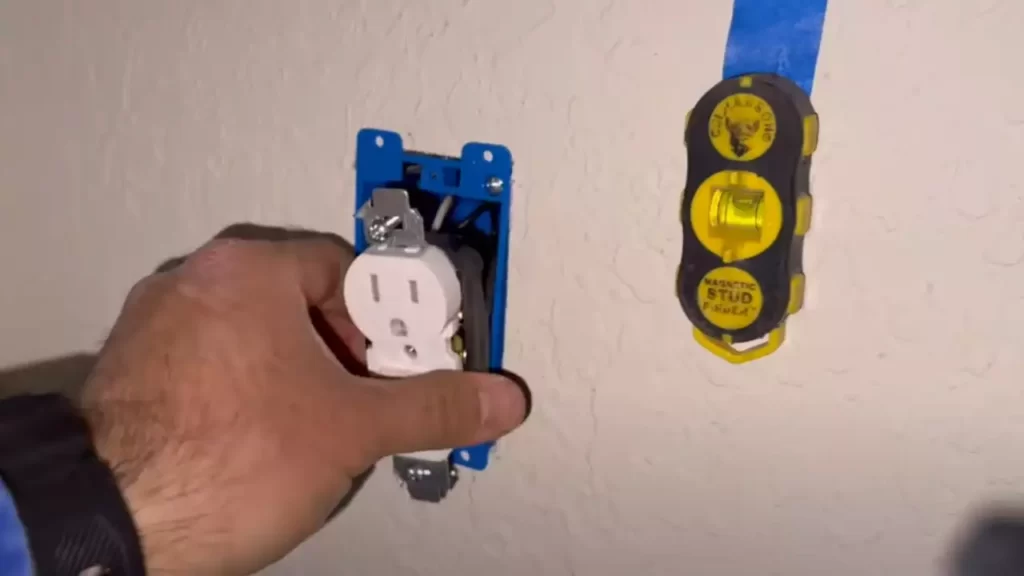
Connecting the wires to the outlet terminals
Once the wire ends are properly stripped and prepared, you’re ready to connect them to the outlet terminals. Follow these steps:
- Identify the terminal screws on the outlet. Typically, there will be two brass screws (for the hot wires), one silver screw (for the neutral wire), and one green screw (for the ground wire).
- Take one of the stripped wire ends and wrap it clockwise around one of the brass screws, ensuring the bare wire is securely wrapped around the screw.
- Using a screwdriver, tighten the screw to firmly secure the wire in place.
- Repeat this process for the remaining hot wire, ensuring it is connected to the second brass screw.
- Next, take the stripped end of the neutral wire and wrap it clockwise around the silver screw. Tighten the screw to secure the connection.
- Finally, connect the stripped end of the ground wire to the green screw in the same manner as the previous steps.
Double-checking the connections for accuracy
After connecting the wires to the outlet terminals, it’s crucial to double-check the connections for accuracy. This will help ensure that the wiring is correct and minimize the risk of electrical hazards. Follow these steps to double-check your connections:
- Visually inspect each connection to ensure the wire is securely wrapped around the terminal screw.
- Gently tug on each wire to ensure it is firmly attached and doesn’t come loose.
- Using a voltage tester, check the outlet to ensure it is receiving power.
- If all connections are secure and the voltage tester confirms power, you can proceed with installing the outlet into the wall.
By following these steps to properly connect the wiring to the outlet, you can ensure a safe and functional electrical installation in your existing wall.
Securing The Outlet And Finalizing The Installation
Placing the Outlet into the Box and Securing It
Once you have made all the necessary electrical connections in the previous steps, it’s time to place the outlet into the electrical box and secure it. Follow these simple steps:
- Take the outlet and gently insert it into the electrical box. Make sure to align the screw holes on the outlet with the holes on the box.
- Using a screwdriver, insert the screws provided with the outlet through the screw holes and securely tighten them. This will ensure that the outlet remains in place and does not move.
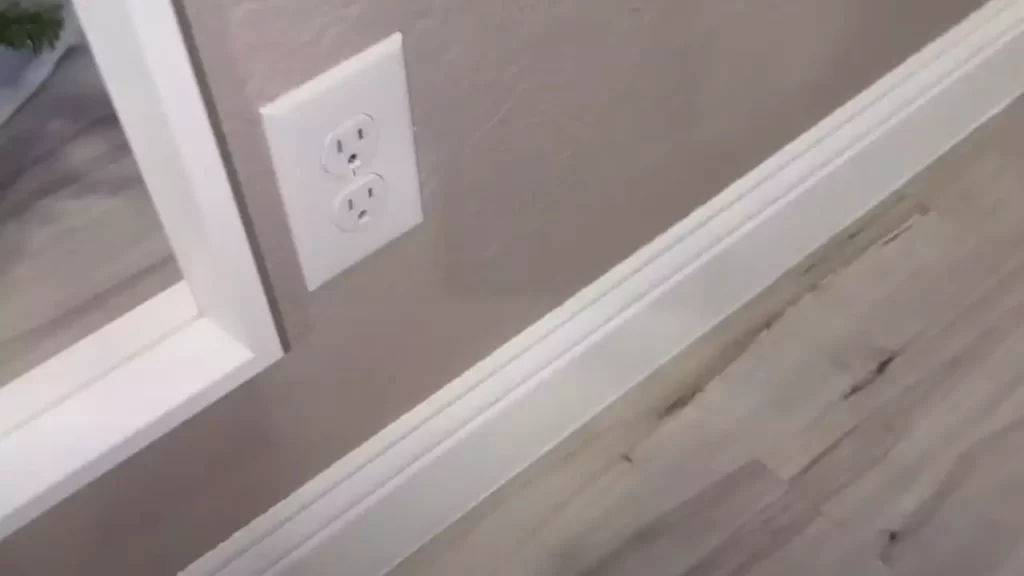
- Check that the outlet is flush with the wall surface. If it is not, you may need to adjust the screws or reposition the outlet within the box until it sits correctly.
- Double-check that there are no exposed wires or loose connections sticking out of the box. Any loose wires can be a safety hazard and may cause electrical issues.
Double-Checking for Any Loose Connections
Before proceeding further, it is crucial to double-check for any loose connections. Loose connections can lead to power outages, electrical fires, or damage to your electrical devices. Take the following steps to ensure everything is properly secured:
- Inspect each wire connection to the outlet and ensure that they are tightly connected. Use a screwdriver to tighten any loose screws.
- Verify that all wire nuts are securely twisted onto the corresponding wires. Slightly tug on each wire to confirm that it is firmly connected.
- If you notice any loose connections or exposed wires, turn off the power and rectify the issue before proceeding.
Testing the Outlet for Functionality and Safety
Now that the outlet is secured and all connections have been checked, it’s time to test the outlet for functionality and safety. Follow these steps:
- Ensure that the circuit breaker corresponding to the outlet is turned off.
- Insert a voltage tester into the outlet to confirm that there is no electrical current present. If the tester does not indicate any voltage, you can proceed to the next step.
- Turn on the circuit breaker and insert a tester or an electrical device into the outlet to check if it is working correctly. If the device powers on or the tester indicates the presence of voltage, your new outlet is functioning properly.
- Perform a visual inspection of the outlet to ensure there are no sparks, unusual noises, or signs of overheating. If you notice anything suspicious, immediately turn off the circuit breaker and consult a professional electrician.
Securing the outlet and finalizing the installation involves placing the outlet into the electrical box, tightening the screws to hold it in position, and double-checking all connections for tightness. Testing the outlet for functionality and safety is crucial to ensure that there are no loose connections or potential hazards once the circuit is energized. By following these steps, you can confidently complete the installation of a new outlet in an existing wall.
Frequently Asked Questions
Can You Add Another Outlet To A Wall?
Yes, it is possible to add another outlet to a wall. A qualified electrician should be hired to ensure safety and compliance with electrical codes.
How Hard Is It To Add Another Outlet?
Adding another outlet is a relatively simple task. It requires proper planning, electrical knowledge, and the right tools. A licensed electrician can safely install a new outlet in a short amount of time, ensuring it meets electrical code requirements.
How Do You Add An Outlet In The Middle Of A Run?
To add an outlet in the middle of a run, first turn off the power to the circuit. Next, use a stud finder to locate a spot between two existing outlet boxes. Cut a hole for the new outlet, and run electrical cable through the wall to connect the new outlet.
Attach the wiring to the outlet, secure it in the wall, and turn the power back on.
How Many Outlets Can You Add To An Existing Outlet?
You can add multiple outlets to an existing outlet as long as you don’t exceed the electrical load capacity. However, it’s best to consult a professional electrician to ensure proper installation and avoid any safety hazards.
Conclusion
Adding a new outlet to an existing wall is a simple yet effective way to enhance your home’s electrical system. With the right tools and steps in place, you can successfully complete this DIY project. Remember to prioritize safety, carefully plan the location, and follow the electrical code regulations.
By following these guidelines, you’ll be able to enjoy the convenience of an additional outlet without the need for professional assistance. Happy wiring!