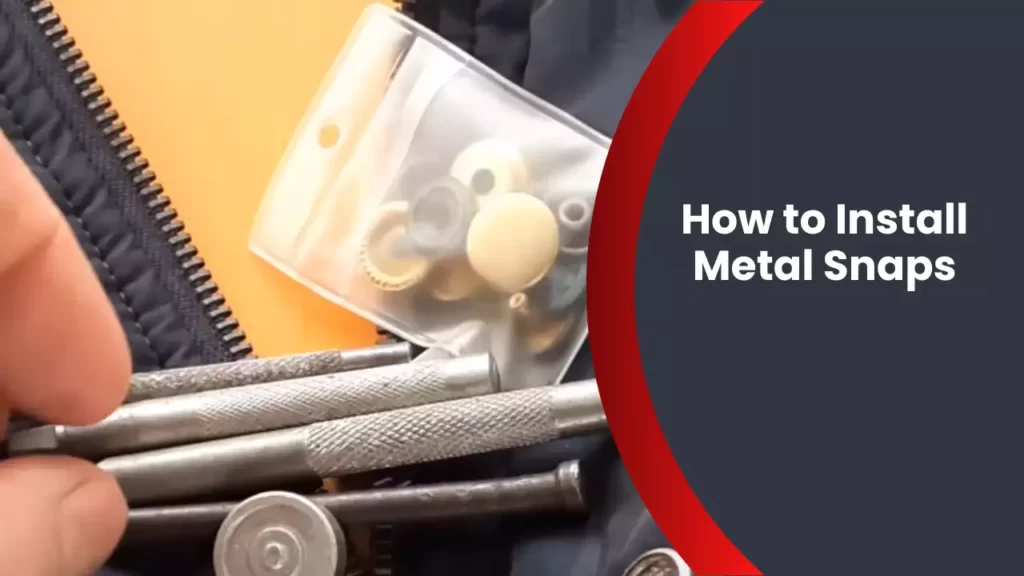
To install metal snaps, start by marking the placement of the snaps on the fabric. Then, use an awl to create small holes in the marked spots and position the two parts of the snap on either side of the fabric.
Finally, use a snap setter tool to secure the snaps together. Metal snaps are a versatile and secure fastening option commonly used in sewing projects such as garments, bags, and accessories. They offer a stylish and efficient way to connect fabrics or secure closures.
Installing metal snaps may seem daunting at first, but with the right tools and technique, it can be easily accomplished. In this guide, we will walk you through the step-by-step process of installing metal snaps, ensuring a professional and long-lasting result. By following these instructions, you’ll be able to add snaps to your projects with confidence and precision. So, let’s get started and learn how to install metal snaps effortlessly.
Understanding Metal Snaps
Metal snaps are an essential component used in various DIY projects, clothing design, and even industrial applications. These versatile fasteners provide a secure and efficient way to connect and disconnect two pieces of fabric or material. Understanding the different types of metal snaps, their components, and the advantages they offer is key to successfully installing them. In this article, we will delve into the world of metal snaps, providing you with the knowledge and guidance you need.
Different types of metal snaps
When it comes to metal snaps, there is a wide range of options available, each suitable for different purposes. Understanding the different types will help you choose the right one for your specific project. Here are some popular types of metal snaps:
- Prong snaps: These snaps consist of four separate parts – the cap, socket, stud, and eyelet. They are commonly used in garments, bags, and accessories.
- Ring snaps: These snaps have a ring-shaped spring on the socket, which allows them to be used on thicker fabrics. They are commonly used in jackets, pants, and upholstery.
- Press studs: Also known as snap fasteners or poppers, press studs are composed of two discs that snap together when pressed. They are frequently used in clothing, baby items, and home décor.
- Magnetic snaps: These snaps have magnets embedded in their components, providing a strong and effortless closure. They are often used in bags, purses, and wallets.
Components of a metal snap
A metal snap consists of several key components that work together to create a secure fastening. Understanding the purpose and function of each component will help you install metal snaps correctly. Here are the main components of a metal snap:
| Component | Description |
|---|---|
| Cap | The decorative top part of the snap that is visible on the fabric surface. |
| Socket | The female part of the snap that receives the stud or post. |
| Stud | The male part of the snap that interlocks with the socket. |
| Eyelet | A small metal ring that reinforces the fabric where the snap is installed. |
Advantages of using metal snaps
Metal snaps offer several advantages over other fastening methods, making them a popular choice for many projects. Here are some key advantages of using metal snaps:
- Easy installation: Metal snaps can be installed quickly and easily, requiring minimal tools and expertise.
- Durability: Metal snaps are highly durable and can withstand repeated use and washing without losing their functionality.
- Secure closure: Metal snaps provide a secure closure that keeps fabrics and materials firmly connected, preventing accidental openings.
- Aesthetic appeal: With a wide variety of colors, finishes, and designs available, metal snaps can add a decorative element to your projects.
- Versatility: Metal snaps can be used in various applications, including garments, bags, home decor, and even industrial purposes.
Now that you have a better understanding of metal snaps, their types, components, and advantages, you are ready to begin installing them in your projects. Stay tuned for our upcoming articles, where we will provide step-by-step instructions on how to install metal snaps correctly and efficiently.
Tools And Materials Required For Installation
List of tools needed
Before you begin installing metal snaps, make sure you have all the necessary tools and materials at hand. Having the right tools will ensure a smooth and efficient installation process. Here is a list of tools you will need:
- Needle and thread
- Chalk or fabric marker
- Scissors
- Snap fastener kit
- Anvil or hard surface
- Hammer
- Awl or punch tool
Types of fabric suitable for metal snaps
Choosing the right fabric is crucial for a successful installation of metal snaps. Not all fabrics are suitable for snaps, and selecting the appropriate fabric type will ensure that the snaps stay secure and do not damage the fabric. Some fabrics that work well with metal snaps include:
- Cotton: Cotton fabric is a popular choice for installing metal snaps due to its durability and versatility.
- Denim: Denim is known for its strength and ability to hold up well against metal snaps.
- Canvas: Canvas fabric is sturdy and can withstand the pressure applied during snap installation.
- Leather: If you’re working with leather, ensure it is thick enough to accommodate the snap and avoid tearing.
- Heavy-duty materials: Fabrics like heavy-duty nylon or polyester are also suitable for metal snaps.
Choosing the right metal snaps for your project
When it comes to metal snaps, there are various types available in the market. Choosing the right snaps for your project is essential to ensure they match your fabric’s thickness and aesthetic requirements. Here are a few considerations to keep in mind:
- Snap Size: Consider the size of the snap based on your fabric and the desired look. Larger snaps are more noticeable, while smaller snaps are more discreet.
- Material: Metal snaps come in different materials such as brass, stainless steel, or aluminum. Choose a material that complements your fabric and provides the desired durability.
- Attachment Method: There are different attachment methods available, including prong, sew-on, and post snaps. Select the attachment method that suits your project and fabric type.
- Finish: Metal snaps come in various finishes, such as silver, gold, or black. Consider the overall look of your project and choose the finish that enhances its appearance.
By carefully selecting the right tools, fabric, and metal snaps, you will be well-prepared to install metal snaps for your project. Follow the step-by-step installation instructions for a secure and professional finish.
Step-By-Step Installation Process
Metal snaps are a popular and reliable option for fastening fabrics together. Whether you are working on a sewing project or need to fix a broken snap, installing metal snaps can be a simple and effective solution. In this step-by-step guide, we will walk you through the process of installing metal snaps, ensuring a secure and professional finish. Let’s get started!
Preparing the fabric and snaps
Before you begin the installation process, it is essential to prepare both the fabric and the snaps for attachment. Start by determining the location where you want to install the snaps. This will depend on the purpose of your project, such as a closure for a garment or a fastening point for a bag. Once you have identified the placement, ensure that the fabric is clean and free from any dirt or debris that could interfere with the snap’s attachment.
Marking the placement for snaps
To ensure accurate and symmetrical placement of the snaps, mark the fabric using a fabric pen or chalk. This will serve as a guide for aligning the snaps later on. Take the cap of the snap and place it on one side of the fabric, then push down firmly to create a visible imprint. Repeat this process on the opposite side of the fabric, ensuring the imprints are aligned. These markings will indicate the precise location for attaching the snaps.
Making pilot holes
Once the snap placement is marked, it’s time to create pilot holes on the fabric. This is an important step to prevent the fabric from tearing when inserting the snaps. Using a small awl or a sharp-pointed object, gently poke a hole through the marked imprints. Ensure the hole is just large enough to accommodate the snap components without compromising the fabric’s integrity. Repeat this process for all the marked snap positions.
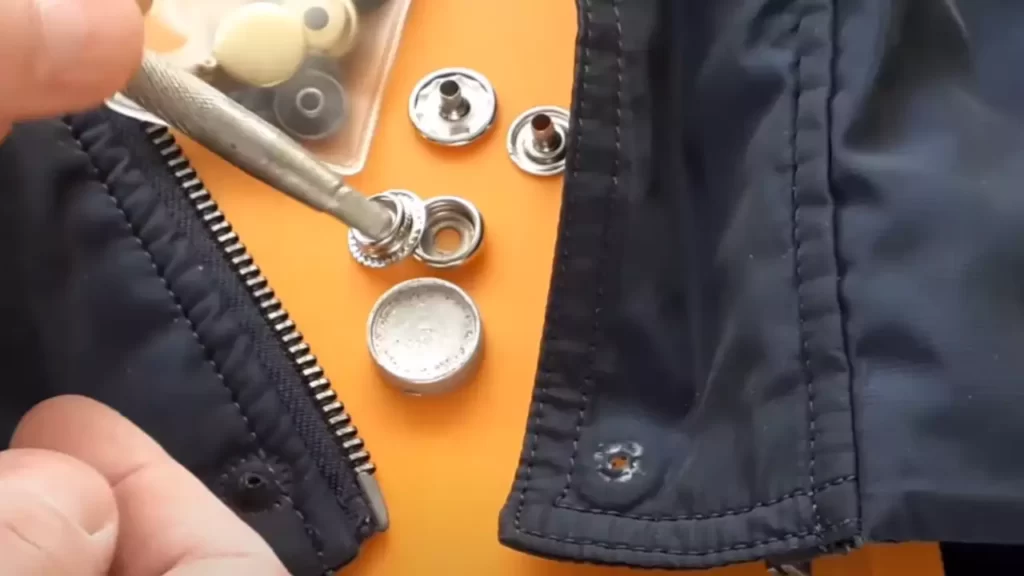
Attaching the snap and socket
Now it’s time to attach the snap components to the fabric. Start with the snap and socket, which are the female parts of the metal snap. Take the socket, which is the piece with a shallow indentation, and push it through the pilot hole from the front side of the fabric. Flip the fabric over, and on the backside, place the snap over the socket. Press down firmly to secure the two components in place. You should feel a satisfying click, indicating that the snap is securely attached.
Installing the stud and eyelet
Next, it’s time to install the stud and eyelet, the male parts of the metal snap. Insert the stud, which has a protruding front, through the pilot hole from the backside of the fabric. Then, place the eyelet, which is the piece with a hole, over the stud on the front side of the fabric. Press down firmly to lock the two components together. Again, you should hear a distinct click, ensuring a secure attachment.
Securing the snaps together
With both the snap and socket, as well as the stud and eyelet attached to the fabric, it’s time to secure them together. Align the snap and socket components, making sure they are properly aligned. Press them together firmly until you hear a satisfying click, indicating that the snap is securely fastened. Repeat this process for all the installed snaps, ensuring each one is properly aligned and secured.
Congratulations! You have successfully installed metal snaps on your fabric. With this step-by-step guide, you can confidently complete any sewing project or repair broken snaps with ease. Enjoy the convenience and durability that metal snaps provide, while adding a professional touch to your creations.
Troubleshooting Common Installation Issues
Installing metal snaps can be a great way to add functionality and style to your projects. However, like any other DIY task, it’s not uncommon to encounter a few hiccups along the way. In this section, we’ll address some of the most common installation issues you may come across and provide solutions to help you overcome them with ease.
Snap won’t stay closed
One frustrating issue you may encounter is when the snap won’t stay closed. This can happen due to a variety of reasons, but the most common culprit is incorrect alignment during installation. Here’s what you can do to fix it:
- Ensure that the male and female parts of the snap are properly aligned. Use a ruler or measuring tape to double-check the placement before snapping them together.
- If the snap is still not staying closed, it’s possible that the socket or stud is too loose. In this case, you can try gently squeezing the prongs with pliers to tighten them, making sure not to apply excessive pressure.
- Lastly, check if any fabric or other materials are obstructing the snap’s closure. Remove any obstructions that might hinder the proper functioning of the snap, and try closing it again.
Difficulty aligning the snaps
Aligning the snaps during installation can be tricky, especially when working with thicker or layered fabrics. If you’re experiencing difficulty in aligning the snaps, follow these steps:
- Make sure you’re using the correct snap size for your project. Trying to force a larger snap into a smaller opening will only lead to misalignment.
- Consider creating pilot holes with an awl or a small punch tool before inserting the snaps. These starter holes will make it easier to align the snaps accurately.
- Take your time and be patient. It’s better to be cautious and align the snap correctly rather than rushing and making a mistake.
Snaps coming loose or falling off
Having snaps come loose or fall off after installation can be frustrating and defeating. To prevent this issue, follow these recommendations:
- Ensure that you’re using the correct tools for secure installation. A professional snap installation kit can provide the necessary pressure to keep the snaps in place.
- Consider reinforcing the snap area with an additional layer of fabric or interfacing behind the installation site. This extra support can improve the snap’s grip on the material.
- If the issue persists, you may want to explore alternative snap options, such as heavy-duty or sew-on snaps, which can offer greater durability.
Fabric tearing near snap installation
It’s not uncommon for fabric to tear or fray near the snap installation area, particularly when dealing with delicate or thin fabrics. Follow these steps to prevent fabric tearing:
- Using a stabilizer or backing fabric beneath the installation site can help distribute the pressure and minimize the risk of tearing.
- Avoid pulling or tugging excessively on the snap during installation. Apply gentle and even pressure to prevent unnecessary strain on the fabric.
- If you notice any fraying or tearing, consider reinforcing the area with a small fabric patch or interfacing to strengthen it and prevent further damage.
By troubleshooting these common installation issues, you can ensure that your metal snaps are secure and functional, adding the perfect finishing touch to your projects. Remember to take your time, use proper tools, and be gentle during the installation process to achieve the best results.
Tips For Proper Maintenance And Care
Proper maintenance and care are essential to ensure the longevity and functionality of metal snaps. By following these useful tips, you can keep your snaps in optimum condition for years to come.
Cleaning Metal Snaps
Regular cleaning is vital to keep metal snaps looking their best and operating smoothly. Here’s a simple step-by-step guide to help you clean your snaps effectively:
- Start by preparing a solution of warm water and mild detergent.
- Dip a soft cloth or a toothbrush into the solution and gently scrub the snaps.
- Rinse the snaps thoroughly with clean water and pat them dry with a soft towel.
- If there are stubborn stains or residue, you can use a non-abrasive metal cleaner specifically designed for snaps. Just make sure to follow the manufacturer’s instructions carefully.
Regular cleaning not only enhances the appearance of your snaps but also prevents grime and dirt from affecting their functionality.
Preventing Rust and Corrosion
Preventing rust and corrosion is crucial to maintain the integrity of metal snaps. Follow these tips to keep your snaps free from rust:
- Avoid exposing snaps to excessive moisture, as it can accelerate rust formation. If your snaps come into contact with water, make sure to dry them thoroughly.
- Apply a thin coat of clear lacquer or protective sealant to the snaps. This coating acts as a barrier against moisture and prevents oxidation.
- Store your snaps in a dry and well-ventilated area to minimize the chance of rust and corrosion.
By taking these preventative measures, you can prolong the lifespan of your snaps and ensure their smooth functioning.
Replacing Damaged or Worn Out Snaps
Over time, metal snaps may become damaged or worn out due to regular usage. When this happens, it’s important to replace them promptly to maintain the functionality of your garments or accessories. Follow these steps to replace damaged or worn out snaps:
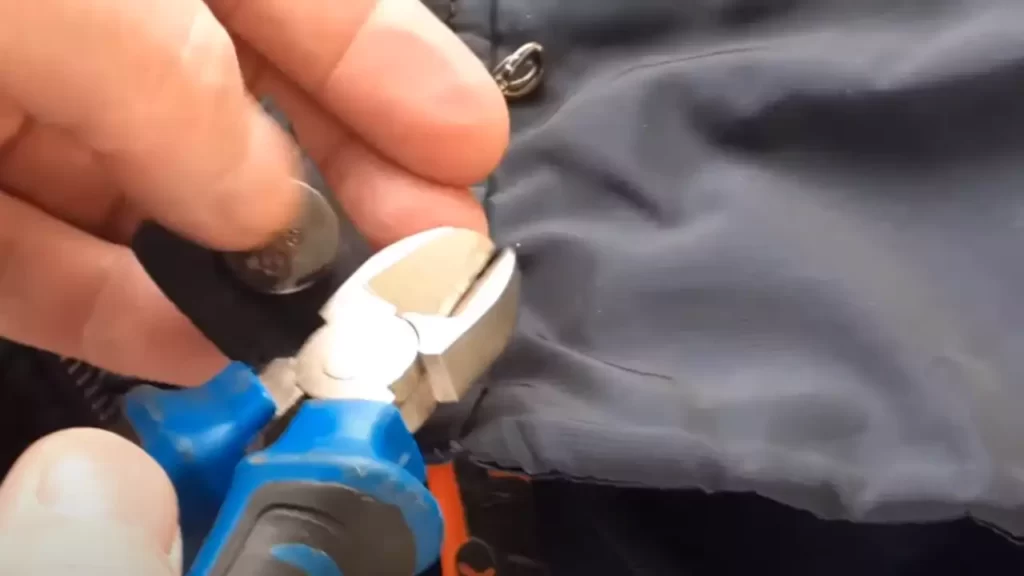
- Start by removing the old snaps using a snap removal tool or small pliers.
- Clean the area where the old snaps were attached to remove any adhesive residue.
- Choose new snaps of the same size and style that fit your needs.
- Position the new snaps on the fabric and secure them according to the manufacturer’s instructions.
Replacing damaged or worn out snaps ensures that your items continue to function properly and maintain a professional appearance.
Remember, regular cleaning, rust prevention, and timely replacement of snaps are essential for their proper maintenance and care. By following these tips, you can extend the lifespan of your snaps and enjoy their functionality for a long time.
Creative Uses Of Metal Snaps
Metal snaps are not just for fastening clothing or accessories together. They offer a world of creative possibilities that can truly elevate your DIY projects. From adding decorative flair to speedy repairs, metal snaps bring a unique touch to any crafting endeavor.
Adding decorative snaps to clothing and accessories
Do you have a plain jacket or bag that needs a little extra pizazz? Metal snaps are the perfect solution to spruce up your wardrobe or accessories. With a wide variety of colors, shapes, and sizes available, you can mix and match to create eye-catching designs. Simply select your desired snaps, attach them strategically, and instantly transform your item into a fashion statement. Whether you prefer a subtle pattern or a bold display, decorative snaps are an effortless way to express your style and upgrade your favorite pieces.
Using snaps for quick and easy repairs
In a fast-paced world, nobody has time for complicated repairs. That’s where metal snaps come to the rescue! If your shirt is missing a button or your bag strap has unexpectedly detached, metal snaps can save the day. With their simple installation process, you can quickly fix your damaged items and get back to your daily routine. No sewing required! Just align the snaps, apply pressure, and watch the magic happen. Say goodbye to lost buttons and hello to convenient repairs with metal snaps.
Incorporating snaps into craft and DIY projects
Crafting enthusiasts will adore the versatility of metal snaps. These nifty fasteners can be seamlessly integrated into various projects, such as fabric-based crafts, home decor, and even jewelry making. Create functional and stylish accessories like wallets, keychains, or headbands, using metal snaps to add both functionality and aesthetic appeal. Additionally, if you enjoy upcycling or repurposing old items, incorporating metal snaps into your DIY projects can breathe new life into otherwise forgotten treasures. With their sturdy grip and durability, metal snaps ensure your creations stand the test of time.
Explore the boundless opportunities and unleash your creativity with metal snaps. Whether you want to add a touch of personalization to your clothing, expedite repairs, or embark on exciting DIY ventures, these versatile fasteners are here to inspire and simplify your creative journey.
Frequently Asked Questions
How Do You Attach Metal Snaps?
To attach metal snaps, follow these guidelines: 1. Prepare fabric and snaps. 2. Mark desired snap placement. 3. Use a punch tool to create holes. 4. Insert snap parts through holes. 5. Secure snaps using a snap setter tool.
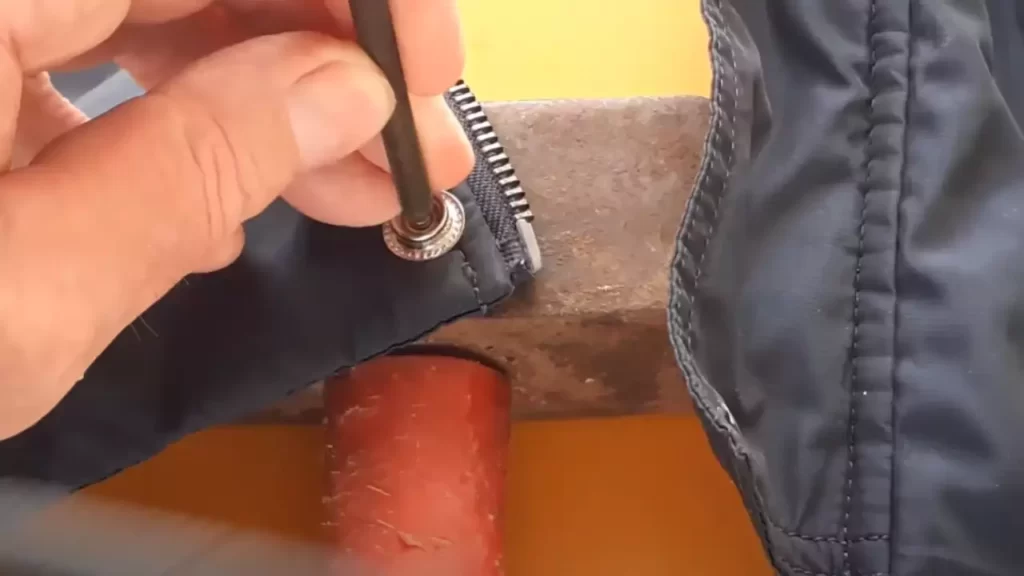
How Do You Install Heavy Duty Snaps With Hammer?
To install heavy duty snaps with a hammer, follow these steps: 1. Place the male snap component on the fabric, making sure it aligns with the female counterpart. 2. Position the anvil underneath the fabric, supporting it from the underside. 3.
Position the snap cap over the male component. 4. Use a hammer to strike the snap cap forcefully, ensuring it securely attaches the snap without damaging the fabric. 5. Repeat the process for all snaps needed.
How Do I Install Snaps Without Tools?
To install snaps without tools, simply follow these steps: 1. Position the snaps on the fabric where you want them to be. 2. Apply pressure with your fingers to push the snaps through the fabric layers. 3. Flip the fabric over and place the snap’s socket and stud components.
4. Press down firmly on the socket and stud to secure the snap. 5. Repeat the process for any additional snaps. No tools necessary!
Are Metal Snaps Better Than Plastic?
Metal snaps are generally considered better than plastic snaps due to their durability and strength. They provide a more secure fastening option and are less likely to break or wear out over time. Metal snaps also have a more professional appearance and are suitable for heavy-duty applications.
Conclusion
To sum up, installing metal snaps is a simple yet essential skill to have for various projects. By following the step-by-step instructions highlighted in this blog post, you can easily achieve professional-looking results. Remember to gather the necessary tools, measure accurately, and apply proper pressure for a secure attachment.
With this knowledge in hand, you can confidently add metal snaps to your sewing, crafting, or repair projects. Happy snapping!