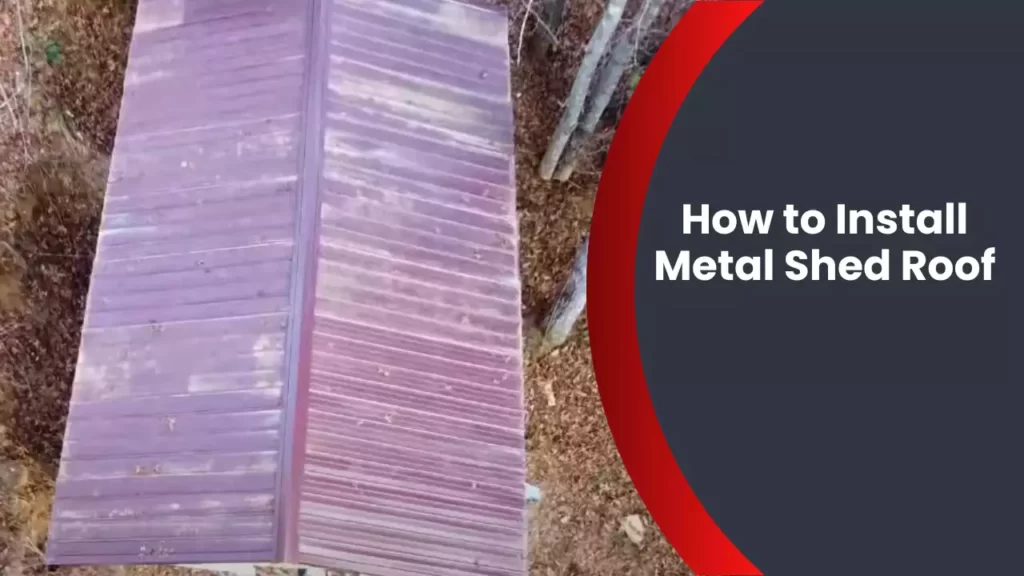
To install a metal shed roof, first, ensure that the surface is clean and free of debris. Lay the roofing materials starting from the lowest point, making sure they overlap properly.
Lift and secure each sheet in place using screws, ensuring they’re tight but not over-tightened.
Preparing For Installation
Before you embark on installing a metal shed roof, it’s crucial to adequately prepare for the process. Making sure your roof is compatible, gathering the necessary tools and materials, and taking accurate measurements are essential steps to ensure a successful installation. By following these steps, you’ll be well on your way to a sturdy and secure metal shed roof.
Checking the Roof Compatibility
Before you begin the installation, it’s essential to check the compatibility of your roof with a metal shed roof. Not all roofs are suitable for this type of installation, so it’s important to ensure that your existing roof can support the weight and structure of a metal shed roof. Here are a few factors to consider:
- Roof Type: Metal shed roofs are typically compatible with pitched roofs, but it’s crucial to check if your roof is suitable. Sloped roofs allow for proper drainage and minimize the risk of water pooling, ensuring the longevity of your metal shed roof.
- Roof Condition: Inspect your existing roof for any signs of damage, such as leaks or weak spots. It’s crucial to address any issues before installing the metal shed roof to prevent further damage or the need for future repairs.
- Roof Load-Bearing Capacity: Metal shed roofs can be heavier than traditional roofing materials. Ensure that your roof has the necessary load-bearing capacity to support the weight of the metal shed roof without compromising its structural integrity.
Gathering the Tools and Materials Needed
Once you’ve confirmed the compatibility of your roof, gather all the necessary tools and materials for the installation. Having everything prepared in advance will streamline the process and prevent any interruptions. Here’s a list of the essential tools and materials you’ll need:
| Tools | Materials |
|---|---|
|
|
Taking Accurate Measurements
Precision is key when determining the measurements for your metal shed roof. Taking accurate measurements ensures a proper fit and reduces the risk of leaks or installation complications. Follow these steps to obtain precise measurements:
- Measure the length and width of your roof area where the metal shed roof will be installed.
- Consider the roof pitch, as this will determine the layout and placement of the metal shed roof panels.
- Add an additional allowance for overhangs to account for any water runoff and ensure adequate coverage.
By meticulously measuring your roof area and factoring in the pitch, you’ll be able to purchase the correct amount of materials and ensure a seamless installation process.
Installing The Metal Roofing Material
Installing the metal roofing material is a crucial step in the process of constructing a metal shed roof. This is where the protective layer that shields your shed from the elements is applied. To ensure a successful installation, it is important to follow the correct steps and techniques. In this section, we will walk you through each step of installing the metal roofing material, from securing the underlayment to installing flashing and ventilation components. Let’s get started!
Securing the Underlayment
The first step in installing the metal roofing material is to secure the underlayment. The underlayment acts as a barrier between the metal panels and the roof deck, providing added protection against leaks. It also helps to reduce noise and regulate temperature inside the shed. To secure the underlayment, follow these steps:
- Clean the roof deck to remove any debris or sharp objects that could damage the underlayment.
- Roll out the underlayment over the roof deck, ensuring it extends beyond the edges of the roof.
- Secure the underlayment using roofing nails or staples, making sure to leave space for overlapping.
- Overlap the underlayment sheets by at least 6 inches to ensure proper protection against leaks.
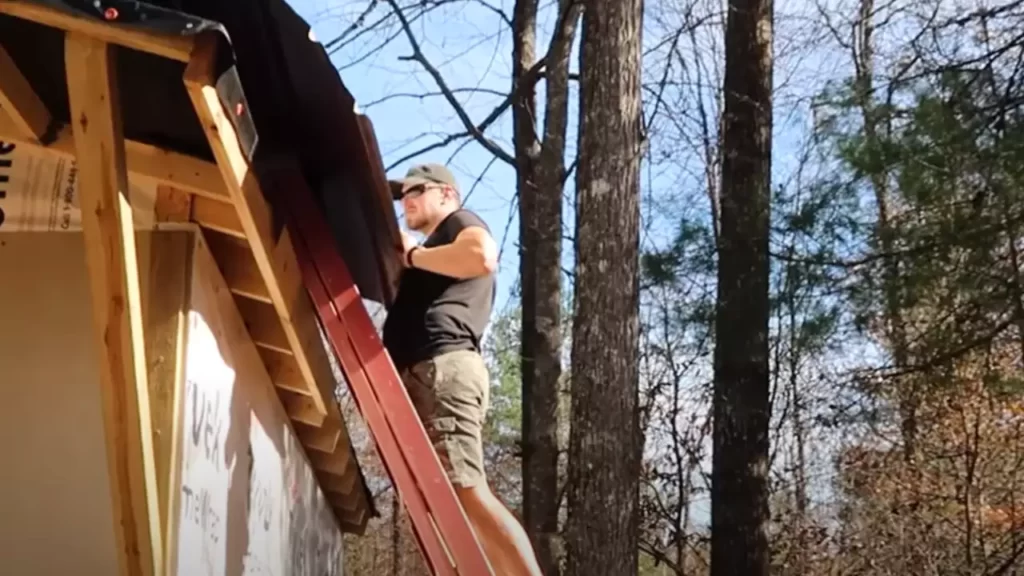
Placing the First Metal Panel
Once the underlayment is securely in place, it’s time to start placing the metal panels. The first panel is critical as it sets the foundation for the rest of the roof. Follow these steps to ensure a proper placement:
- Position the first metal panel at the bottom corner of the roof, aligning it with the edge.
- Use roofing screws to fasten the panel to the roof deck, making sure to leave enough space for expansion and contraction.
- Continue fastening the panel every few feet along the side and bottom edges, ensuring it is securely attached.
- Ensure the panel is level and straight by using a level and adjusting as necessary.
Attaching the Remaining Metal Panels
With the first panel in place, it’s time to attach the remaining metal panels. Follow these steps to ensure a proper attachment:
- Align the next panel with the previous one, overlapping the edges according to the manufacturer’s instructions.
- Secure the panel to the roof deck using roofing screws, ensuring it is evenly spaced and aligned.
- Continue attaching the remaining panels, overlapping the edges and securing them in place.
- Ensure each panel is level and straight, making any necessary adjustments as you go.
Cutting and Trimming Panels as Needed
During the installation process, it may be necessary to cut and trim the metal panels to fit certain areas of the roof. Follow these steps to properly cut and trim the panels:
- Measure the area that needs to be cut or trimmed, taking into account any required overlaps or allowances.
- Use tin snips or a metal cutting blade to carefully cut the panel to the appropriate size and shape.
- Ensure that the cut or trimmed panel fits snugly into place, making any necessary adjustments or modifications.
- Repeat the process for any additional panels that need to be cut or trimmed.
Properly Sealing Joints and Gaps
To ensure the roof is watertight and protected against leaks, it is essential to properly seal all joints and gaps between the metal panels. Follow these steps to ensure a proper seal:
- Apply a generous amount of roofing sealant to the joints and gaps between the metal panels.
- Use a putty knife or caulking gun to spread the sealant evenly and fill any voids.
- Ensure that the sealant covers all areas of potential water entry, including intersections, edges, and corners.
- Smooth out the sealant to create a watertight seal and allow it to dry according to the manufacturer’s instructions.
Installing Flashing and Ventilation Components
To further enhance the durability and functionality of your metal shed roof, it is important to install flashing and ventilation components. Follow these steps to properly install these components:
- Position the flashing at areas where the roof meets walls, chimneys, or other structures.
- Secure the flashing to the roof deck using roofing screws or nails, ensuring it is properly aligned and sealed.
- Install roof vents or other ventilation components according to the manufacturer’s instructions.
- Ensure that all flashing and ventilation components are securely in place, providing proper protection and airflow.
Congratulations! You have successfully installed the metal roofing material for your shed roof. By following these steps and techniques, you’ve ensured a durable and reliable roof that will protect your shed for years to come.
Ensuring Structural Integrity And Safety
When it comes to installing a metal shed roof, one of the most crucial factors to consider is ensuring the structural integrity and safety of the entire installation. By following a systematic approach and paying attention to key aspects, you can have peace of mind knowing that your metal shed roof is secure and protected against potential hazards.
Reinforcing Roof Supports as Necessary
Before starting the installation process, examine the existing roof supports to ensure they are sturdy enough to support the weight of the metal shed roof. Reinforce any weak or compromised supports to avoid any potential collapse or structural failure.
Here are some steps to follow while reinforcing the roof supports:
- Inspect each support beam for signs of damage or deterioration.
- Replace any damaged or rotted beams with new, structurally sound ones.
- Check the spacing between the beams and adjust as necessary for optimal support.
- Consider adding additional support beams if required, especially for larger metal shed roofs.
Confirming Adequate Drainage
Proper drainage is crucial for a metal shed roof, as it prevents the accumulation of water that could lead to leaks or structural damage. Confirming adequate drainage ensures the long-term durability of your metal shed roof.
Here’s how you can confirm adequate drainage:
- Ensure the roof design includes a slight slope to allow water to flow towards gutters or drainpipes.
- Clean and unclog any existing gutters or drains to ensure the proper flow of water.
- Consider installing additional gutters or drainpipes if needed to handle excessive water runoff.
- Inspect the roof after heavy rainfall to ensure there are no areas of standing water or pooling.
Inspecting and Fastening Roof Connections
Strong and secure connections between the metal shed roof and the underlying structure are essential for structural integrity. Regularly inspecting and fastening these connections will help prevent any potential damage or loosening.
Follow these guidelines when inspecting and fastening roof connections:
- Check all screws, bolts, or fasteners to ensure they are tightly secured and in good condition.
- Replace any damaged or missing fasteners promptly.
- Inspect roof panels for any signs of lifting or detachment.
- Tighten any loose panels and secure them in place with appropriate fasteners.
Securing the Roof Against Severe Weather
Metal shed roofs are designed to withstand various weather conditions, but it’s crucial to take extra precautions to secure them against severe weather. This will help minimize the risk of damage or displacement during storms or high winds.
Consider the following steps to secure your roof against severe weather:
- Use appropriate metal roof sealants or caulking to reinforce the seams and joints, preventing water penetration.
- Install hurricane clips or similar reinforcements to strengthen the roof’s attachment to the underlying structure.
- Consider adding additional bracing or support in areas prone to high winds or heavy snowfall.
- Regularly inspect and maintain the roof after severe weather events to identify any damage or potential weak points.
Conducting a Final Inspection and Cleanup
Once the metal shed roof installation is complete, it’s essential to conduct a final inspection to ensure everything is in order and perform any necessary cleanup. This will help guarantee the longevity and safety of your roof.
Here’s what you need to do during the final inspection and cleanup:
- Inspect the entire roof surface for any potential issues, such as loose panels or damaged areas.
- Remove any debris or construction materials from the roof surface and gutters.
- Ensure all fasteners and connections are properly secured.
- Check for any signs of leaks or water infiltration.
By following these steps and ensuring structural integrity and safety throughout the installation process, you can have confidence in the long-term durability and performance of your metal shed roof. Remember to regularly inspect, maintain, and address any issues promptly to maximize its lifespan and protect your investment.
Frequently Asked Questions
What Do You Put Under Metal Roofing On A Shed?
Under a metal roofing on a shed, you should use an underlayment or insulation material like felt or synthetic fabric to protect against moisture, condensation, and heat. This layer adds extra durability and helps to keep the shed’s interior dry and comfortable.
Can You Put Metal Roofing Directly On Rafters?
Yes, you can install metal roofing directly on rafters. This method provides a solid and secure foundation for the metal panels, ensuring durability and stability for your roof.
What Do You Put Under Metal Roofing?
You can put under metal roofing a layer of insulation or underlayment, which acts as a protective barrier against moisture and enhances energy efficiency. Insulation helps regulate temperature and reduces noise, while underlayment provides additional waterproofing. Both are essential for maximizing the benefits of metal roofing.
Can I Install A Metal Roof Myself?
Yes, you can install a metal roof yourself. Just make sure to follow proper guidelines and instructions. Take necessary safety precautions and ensure you have the required tools and skills. It is advisable to consult experts or professionals for advice and assistance.
Conclusion
Installing a metal shed roof may seem like a daunting task, but with the right guidance and tools, it can be a manageable project. By following the step-by-step instructions in this blog post, you will be able to successfully install a metal shed roof and protect your belongings from the elements.
Remember to prioritize safety and take your time throughout the process for the best results. Don’t let the idea of installing a metal shed roof intimidate you – with the right approach, you can achieve a durable and long-lasting roof that will serve you well for years to come.
Happy building!