To install metal roof drip edge, first, determine the desired overhang and cut the material accordingly. Then, secure it to the roof deck using roofing nails or screws, making sure to position it at the edge of the roof.
Installing a metal roof drip edge is an essential step in protecting your roof from water damage and ensuring proper drainage. This flashing component acts as a barrier against water and redirects it away from the underlying structure. By preventing water from seeping into the roof deck and eaves, the drip edge helps extend the lifespan of your roof and prevents costly repairs.
We will guide you through the process of installing a metal roof drip edge, providing you with the necessary steps and tips to ensure a successful installation.
Understanding The Importance Of Metal Roof Drip Edge
Understanding the Importance of Metal Roof Drip Edge
Installing a metal roof drip edge is a crucial step in ensuring the longevity and protection of your roof system. This small but mighty component plays a significant role in redirecting water away from vulnerable areas, preventing potential damage caused by water infiltration. Moreover, it enhances the overall lifespan of your metal roof by safeguarding it against various weather elements. In this section, we will delve deeper into the importance of metal roof drip edge, elaborating on how it protects the roof system, prevents water damage, and enhances its longevity.
Protecting the Roof System
The primary function of a metal roof drip edge is to protect the overall roof system from potential damage. By creating a barrier between the edge of the roof and the underlying structure, it shields against water intrusion, insects, and dirt accumulation. By properly installing a metal roof drip edge, you can effectively prevent moisture from seeping into the roof structure, which could lead to rot, mold, and structural compromise. With this protective layer, your metal roof is fortified against potential hazards, ensuring its durability and longevity.
Preventing Water Damage
Excessive water accumulation on and around your roof can wreak havoc on the entire structure. When rainwater or snowmelt is not properly directed away from the roof’s edge, it can seep into the underlying materials, causing extensive damage. By installing a metal roof drip edge, you create a channel that directs water away from vulnerable areas, such as the fascia and soffit. This prevents water from infiltrating the roof deck and the interior of your home, safeguarding against costly repairs and potential health hazards associated with water damage, such as mold growth.
Enhancing Longevity
A metal roof is a long-term investment in your property, and by installing a metal roof drip edge, you can significantly enhance its longevity. By redirecting water away from critical components such as the fascia and soffit, the drip edge helps prevent premature deterioration and degradation of these areas. Moreover, it minimizes the risk of ice dams during harsh winter conditions, which can cause extensive roof damage. With proper installation and maintenance of a metal roof drip edge, your roof can weather the elements and remain structurally sound for many years to come.
In conclusion, understanding the importance of metal roof drip edge is crucial for every homeowner or property owner considering a metal roof installation. By protecting the roof system, preventing water damage, and enhancing its longevity, the metal roof drip edge ensures optimal performance and durability. Don’t overlook this small but crucial component, as it plays a pivotal role in safeguarding your investment and providing peace of mind.

Factors To Consider When Selecting A Metal Roof Drip Edge
Factors to Consider When Selecting a Metal Roof Drip Edge
When it comes to installing a metal roof drip edge, it’s important to consider a few factors to ensure you select the right one for your project. The metal roof drip edge plays a crucial role in directing water away from the roof edge and preventing any potential damage to the structure. So, let’s take a closer look at the key factors you need to consider when selecting a metal roof drip edge.
Material Options
The first factor to consider is the material options available for metal roof drip edges. There are several materials commonly used, each with its own pros and cons. These materials include aluminum, galvanized steel, and stainless steel.
- Aluminum: Known for its lightweight and excellent corrosion resistance, aluminum is a popular choice for metal roof drip edges, particularly in coastal areas.
- Galvanized steel: This durable material is coated with a layer of zinc to protect against rust and corrosion. Galvanized steel is an affordable option suitable for various weather conditions.
- Stainless steel: Offering superior corrosion resistance and longevity, stainless steel is the most expensive option. It is an excellent choice for harsh climates and long-term durability.
Size and Profile
Another crucial factor to consider is the size and profile of the metal roof drip edge. The size of the drip edge should match the width of the roof edge, ensuring proper water runoff and protection. The profile refers to the shape and design of the drip edge, which can vary depending on the aesthetic preferences and the type of roof system being installed. Common profile options include L-shaped, T-shaped, and hemmed edges. It’s important to choose a drip edge with a size and profile that aligns with your specific roofing needs.
Compatibility with Roof System
Lastly, it’s essential to ensure that the metal roof drip edge is compatible with your roof system. Depending on the type of roofing material used, such as asphalt shingles, metal panels, or tiles, you need to select a drip edge that is designed to work seamlessly with your chosen roof system. This ensures proper installation and optimal protection against water intrusion. Additionally, consider the slope of your roof and select a drip edge that accommodates the pitch to provide effective water drainage.
In conclusion, when selecting a metal roof drip edge, pay attention to the material options, size and profile, and compatibility with your roof system. These factors will help you choose the right drip edge that ensures adequate water runoff, protection, and overall longevity of your metal roof. From aluminum to galvanized steel and stainless steel, carefully evaluate the pros and cons of each material option. Additionally, choose the appropriate size and profile that matches your roof edge specifications. By considering these factors, you can confidently install a metal roof drip edge that meets your needs and safeguards your roof against potential damage.
Assessing The Roof Conditions
When it comes to installing a metal roof drip edge, it is essential to assess the roof conditions before getting started. Properly evaluating the roof structures and identifying any potential issues will help ensure a smooth installation process.
Inspecting the Roof Structure
Before installing the metal roof drip edge, take some time to thoroughly inspect the roof structure. This will help you determine the current condition of the roof and identify any areas that might require additional attention. Here are a few key aspects to focus on during the inspection:
- Roofing Material: Determine what type of roofing material is currently in place. Different roofing materials may require specific installation techniques for the drip edge.
- Roof Pitch: Consider the pitch or slope of the roof. Steeper roofs may require additional safety measures or special installation techniques.
- Flashing: Examine the existing flashing around roof penetrations such as chimneys, vents, and skylights. Damaged or improperly installed flashing can lead to water leaks and should be addressed before installing the drip edge.
Identifying Potential Issues
During the inspection, be on the lookout for any potential issues that could affect the installation of the metal roof drip edge. Some common problems to watch for include:
- Rot or Decay: Look for signs of rot or decay on the roof structure, especially around the eaves or where water may collect. These areas may need repairs or reinforcement before installing the drip edge.
- Water Damage: Check for any water stains or damage on the roof, which could indicate leaks or poor water drainage. Addressing these issues will help prevent future problems with the metal roof.
- Missing Shingles or Tiles: Note any missing or damaged shingles or tiles that may need replacement. A solid foundation is crucial for the proper installation of the drip edge.
Addressing Repairs or Replacements
If you encounter any issues or potential problems during the inspection, it is important to address them before proceeding with the installation of the metal roof drip edge. Failure to do so may compromise the effectiveness of the drip edge and lead to further damage in the future. Here are some steps to take:
- Repairing Damaged Areas: Fix any areas that show signs of rot, decay, or water damage. This may involve replacing damaged wood, reinforcing weak spots, or sealing leaks.
- Replacing Missing Shingles or Tiles: If there are any missing or damaged shingles or tiles, be sure to replace them before installing the drip edge. This will ensure a solid foundation and proper water drainage.
- Improving Flashing: If flashing is damaged or improperly installed, improve its effectiveness by repairing or replacing it. Properly sealed flashing will help prevent water leaks and extend the lifespan of your metal roof.
By thoroughly assessing the roof conditions, identifying potential issues, and addressing any necessary repairs or replacements, you can ensure a strong foundation for installing the metal roof drip edge. Taking these steps will help safeguard your roof against water damage and maintain its integrity for years to come.
Gathering The Necessary Tools And Materials
Gathering the necessary tools and materials is an important first step when it comes to installing a metal roof drip edge. Having everything you need before you begin the installation process will help ensure a smooth and efficient workflow. In this section, we will discuss the essential tools and materials needed for this project.
Safety Equipment
First and foremost, it’s crucial to prioritize safety when working on any construction project. This includes installing a metal roof drip edge. To protect yourself, make sure to have the following safety equipment on hand:
- Safety glasses or goggles
- Work gloves
- Hard hat
- Dust mask
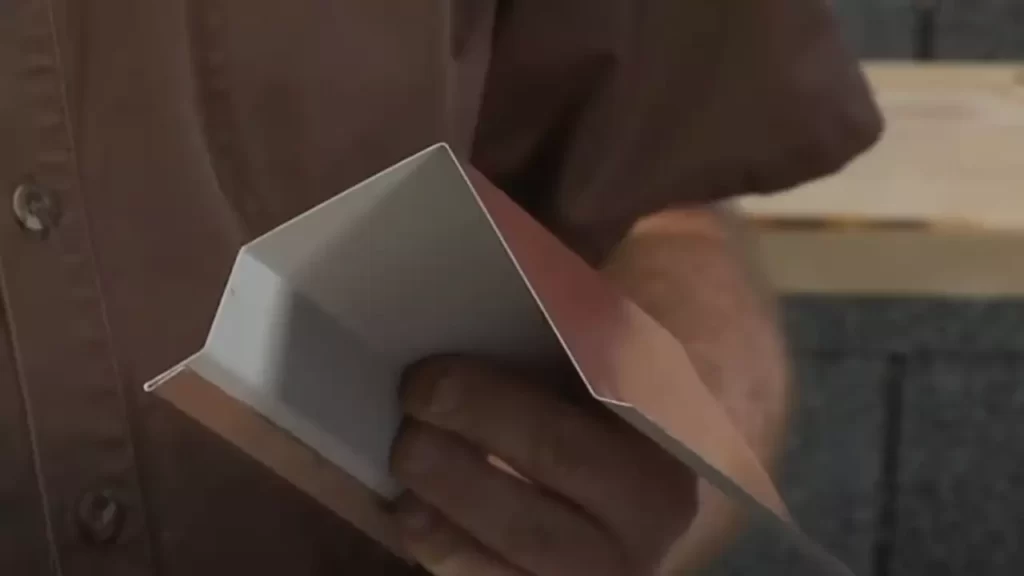
Metal Drip Edge
The main component of this installation is, of course, the metal drip edge. This is a metal strip designed to direct water away from the roof and into the gutter system. When purchasing the metal drip edge, be sure to consider the size and style that is appropriate for your roof type.
Adhesive or Fasteners
The next item on your checklist is choosing the method of attaching the metal drip edge to the roof. Two common options are adhesive and fasteners. If you decide to use adhesive, make sure to select a high-quality roofing adhesive that can withstand outdoor elements. If you prefer fasteners, consider using galvanized or stainless steel nails or screws that are compatible with the metal drip edge material.
Cutting Tools
Depending on the size and shape of your roof, you may need to trim the metal drip edge to fit properly. Ensure you have the following cutting tools handy:
- Tin snips or aviation snips
- Metal cutting shears
- A hacksaw with a carbide blade
Now that you have a clear understanding of the necessary tools and materials required for installing a metal roof drip edge, you can move forward with confidence to the next steps of the installation process.
Step 1: Prepping The Roof Surface
Clearing Debris
Before installing the metal roof drip edge, it is crucial to clear the roof surface of any debris. This step ensures that the drip edge adheres properly and avoids any potential damage to your roof in the future. Begin by closely examining the roof for any loose shingles, nails, or debris.
Important: Keep in mind that working on a roof can be dangerous, so it’s recommended to use proper safety equipment, such as a harness or safety ropes.
To clear the debris:
- Start at one end of the roof and use a broom or a brush to sweep away loose leaves, twigs, or dirt. Be careful not to damage the roof surface while doing so.
- Use a roofing shovel or a putty knife to gently remove any stubborn debris stuck in the gaps between shingles or in the corners of the roof.
- If you encounter any loose shingles or nails, secure them on the roof or replace them if necessary.
Cleaning the Roof Surface
Once the debris is cleared from the roof surface, it’s time to clean it thoroughly. This step ensures that the metal roof drip edge will adhere properly and maintain its longevity. Here’s how to clean the roof surface:
- Fill a bucket with warm water and add a mild detergent suitable for roof cleaning.
- Using a soft-bristled brush or a scrubber, dip it into the soapy water and gently scrub the roof surface in small sections.
- Rinse the cleaned section thoroughly with clean water to remove any soap residue.
- Move to the next section and repeat the process until the entire roof surface is clean.
- Allow the roof surface to dry completely before proceeding to the next step.
Ensuring Proper Adhesion
To ensure that the metal roof drip edge adheres properly, it’s essential to prepare the roof surface adequately. Follow these steps to ensure proper adhesion:
- Inspect the cleaned roof surface for any remaining debris or loose materials and remove them using a broom or brush.
- Check for any damaged or peeling shingles around the edges of the roof. Replace or repair them if necessary to create a smooth surface for the drip edge to adhere to.
- Before installing the drip edge, make sure the roof surface is dry. Moisture can compromise the effectiveness of the adhesive.
- If there are any existing membrane or underlayment on the roof surface, ensure it is intact and in good condition before proceeding with the installation.
Note: It’s always recommended to refer to the manufacturer’s instructions for specific adhesion requirements and recommendations for your metal roof drip edge.
Once you have successfully prepped the roof surface, you are ready to move on to the next step in the process of installing your metal roof drip edge. Stay tuned for Step 2: Placing and Securing the Drip Edge to learn how to position and secure the drip edge on your roof.
Step 2: Measuring And Cutting The Drip Edge
Now that you have gathered all the necessary tools and materials for installing a metal roof drip edge, it’s time to move on to the next step: measuring and cutting the drip edge. This step plays a crucial role in ensuring a proper fit and a successful installation. Follow these guidelines to accurately measure and cut the drip edge.
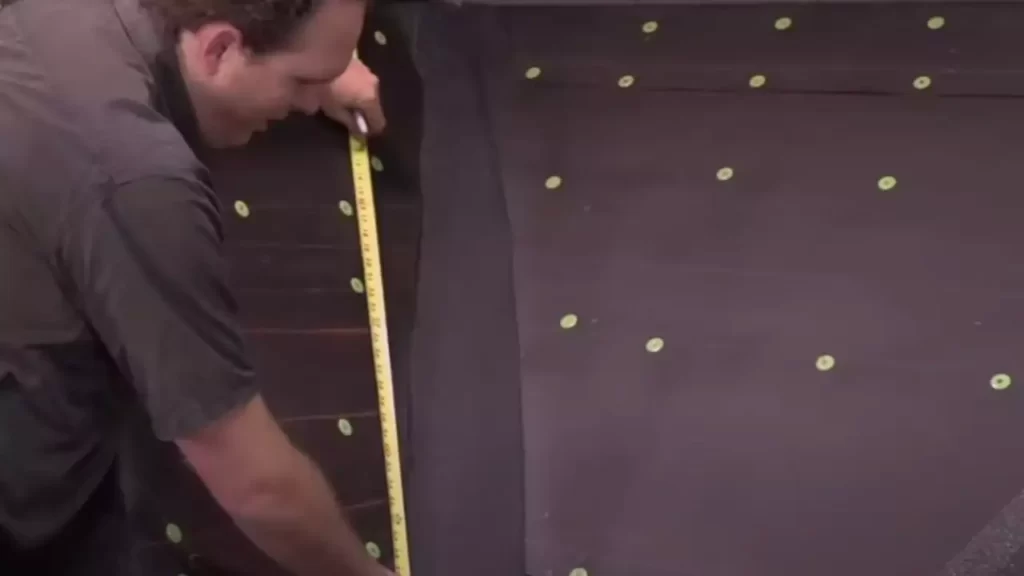
Taking Accurate Measurements
Before cutting the drip edge, it’s important to take accurate measurements to ensure a seamless fit. Here’s how you can do it:
- Measure the roof overhang: Start by measuring the length of the overhang on each side of the roof. Use a measuring tape and record the measurements for reference.
- Account for the corner angles: If your roof has corner angles, measure each angle carefully and note down the measurements. Be sure to account for any variations in corner angles to ensure a precise fit.
- Calculate the needed drip edge length: Once you have the measurements for the roof overhang and corner angles, add them together to calculate the total length of the drip edge needed for installation. It’s always better to have a slightly longer piece of drip edge, as it can be trimmed down to size later.
Using Cutting Tools
After obtaining the correct measurements, it’s time to move on to cutting the drip edge. Here’s how you can do it using the right cutting tools:
- Choose the appropriate cutting tool: Depending on the type of metal drip edge you are using, you may need snips, tin snips, or shears. Select the cutting tool that is best suited for the material you are working with.
- Mark the measurements: Use a pencil or marker to mark the drip edge according to the measurements you previously calculated. Double-check your markings to ensure accuracy.
- Make the cuts: With the drip edge securely held in place, use your cutting tool to make smooth and precise cuts along the marked lines. Take your time to ensure clean cuts and avoid any jagged edges that may impact the installation.
Ensuring Proper Fit
Once you have the drip edge cut to the appropriate size, it’s essential to check for a proper fit before proceeding with the installation. Here’s what you need to do:
- Place the drip edge: Carefully position the cut drip edge along the roof edge, ensuring it aligns accurately with the measurements you took earlier.
- Check for proper overhang: Make sure that the drip edge extends adequately beyond the roof edge to provide sufficient protection against water damage.
- Adjust if necessary: If the drip edge doesn’t fit perfectly or the overhang is not sufficient, make necessary adjustments by trimming or recutting the drip edge.
By following these measurement, cutting, and fitting steps, you’ll be well on your way to installing a metal roof drip edge with precision and confidence. Stay tuned for the next step in our guide!
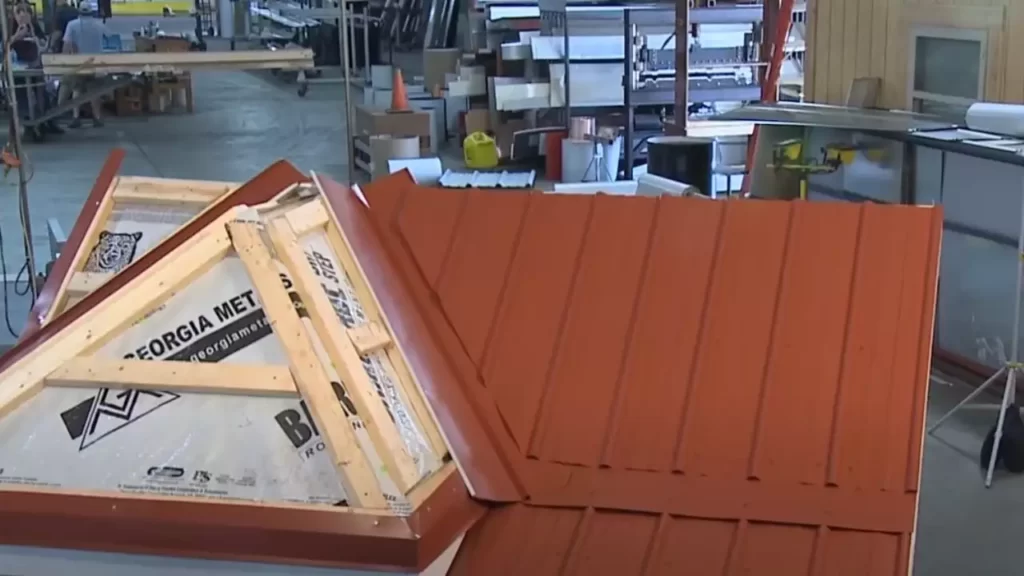
Step 3: Installing The Drip Edge At The Eaves
Metal roof drip edge installation is a crucial step in ensuring the longevity and performance of your roof. In this step, we will guide you through the process of positioning the drip edge correctly, fastening it to the roof edge, and overlapping sections for a secure installation.
Positioning the Drip Edge Correctly
Before attaching the drip edge, it is essential to position it correctly along the eaves of your roof. The drip edge should extend over the edge of the roof deck by about 3/4 to 1 inch to allow water to run off without damaging the fascia or underlying structure. Additionally, ensure that the bottom edge of the drip edge is aligned with the bottom edge of the roof deck. This will create a seamless transition and prevent water from seeping underneath.
Fastening to the Roof Edge
Once the drip edge is positioned correctly, it’s time to secure it in place. Using roofing nails or screws, fasten the drip edge approximately every 12 inches along the roof edge. Make sure to drive the fasteners through the drip edge and into the roof deck, ensuring a secure attachment. Choose fasteners that are suitable for your specific roofing material and climate conditions. This will prevent the drip edge from loosening or pulling away during strong winds or heavy rain.
Overlapping Sections
To provide full coverage and maximum protection, it is necessary to overlap the sections of the drip edge. When installing the second piece of drip edge, be sure to overlap it with the first piece by at least 2 inches. This overlap will create a watertight seal and prevent any water from penetrating between the sections. Repeat the overlapping process for subsequent sections until you reach the end of the roof eaves.
In conclusion, properly installing the metal roof drip edge at the eaves is critical for the overall effectiveness and durability of your roof. By positioning the drip edge correctly, fastening it securely to the roof edge, and overlapping sections, you ensure optimal protection against water damage and prolong the lifespan of your roof. Follow these steps carefully, and you’ll have a professionally installed drip edge that enhances the performance and aesthetics of your metal roof.
Step 4: Installing The Drip Edge At The Rake
Step 4: Installing the Drip Edge at the Rake
Installing the drip edge at the rake is an essential step in ensuring the longevity and effectiveness of your metal roof. The rake is the sloping edge of the roof, and having a properly installed drip edge at this location helps to prevent water from seeping under the roof and causing damage to your home. In this step-by-step guide, we will walk you through the process of cutting and fitting the drip edge, attaching it to the roof edge, and overlapping sections for a secure installation. Let’s get started!
1. Cutting and Fitting the Drip Edge
Before installing the drip edge, it is crucial to measure and cut it to the correct dimensions, ensuring a precise fit. Follow these steps:
- Start by measuring the length of the rake edge using a measuring tape.
- Using a pair of tin snips, cut the drip edge to match the measured length. Make sure to use straight, clean cuts for a professional finish.
- Once the drip edge is cut, position it along the rake edge to check the fit. It should overlap the roof edge by at least 1 inch and extend beyond the fascia board.
- If the drip edge is too long, trim it accordingly. Remember, it’s better to have a slightly shorter drip edge than one that extends too far beyond the roof edge.
2. Attaching to the Roof Edge
Now that you have the proper dimensions for your drip edge, it’s time to attach it to the roof edge. Follow these steps:
- Position the cut drip edge along the rake edge, ensuring it overlaps the roof edge and extends beyond the fascia board.
- Using roofing nails or screws, secure the drip edge to the roof edge. Place the fasteners at regular intervals, approximately 6 to 12 inches apart.
- Make sure to drive the fasteners through the top portion of the drip edge, avoiding the bottom lip to prevent water from backing up.
- Continue attaching the drip edge along the entire length of the rake edge, ensuring a secure and snug fit.
3. Overlapping Sections
To ensure maximum protection against water infiltration, it is essential to properly overlap the sections of the drip edge. Follow these steps:
- Once the first section of the drip edge is installed, place the next section overlapping the previous one by at least 1 inch.
- Secure the overlapping sections together using roofing nails or screws, ensuring a tight connection.
- Continue this process along the entire length of the rake edge, overlapping and securing each section as you go.
By overlapping the sections, you create a continuous barrier that prevents water from entering underneath the roof, safeguarding your home from leaks and water damage.
Congratulations! You have successfully installed the drip edge at the rake. This crucial step helps to protect your metal roof and prolong its lifespan. Next, we will move on to the final step, Step 5: Installing the Drip Edge at the Eave. Stay tuned!
Step 5: Sealing And Securing The Drip Edge
Sealing and securing the drip edge is a crucial step in installing a metal roof. By properly sealing and fastening the drip edge, you can ensure that your roof has maximum protection against water damage and other weather elements. In this step-by-step guide, we will discuss two methods for sealing and securing the drip edge: applying adhesive or sealant and using fasteners for added security.
Applying Adhesive or Sealant
To create a watertight seal, you can apply adhesive or sealant along the inner edge of the drip edge. This helps prevent any water from seeping underneath the drip edge and causing damage to your roof.
Here’s how you can apply adhesive or sealant:
- Clean the surface of the drip edge with a wire brush to remove any dirt or debris.
- Apply a generous amount of adhesive or sealant along the inner edge of the drip edge using a caulking gun or a brush.
- Make sure the adhesive or sealant is evenly distributed along the entire length of the drip edge.
- Press the drip edge firmly onto the roof surface to ensure a secure bond.
- Wipe away any excess adhesive or sealant with a clean cloth or rag.
Using Fasteners for Added Security
In addition to adhesive or sealant, you can also use fasteners to provide extra security and stability to the drip edge. This helps prevent the drip edge from lifting or becoming loose during strong winds or heavy rain.
Here’s how you can use fasteners to secure the drip edge:
- Place the drip edge onto the roof surface, aligning it with the edge of the roof.
- Use a hammer or drill to insert fasteners, such as roofing nails or screws, through the pre-drilled holes in the drip edge. Make sure to space the fasteners evenly along the drip edge for optimal stability.
- Ensure that the fasteners penetrate through both the drip edge and the underlying roof surface.
- Tighten the fasteners securely, but be careful not to over-tighten as this could damage the drip edge or the roof surface.
Checking for Proper Installation
Once the drip edge has been sealed and secured, it’s important to check for proper installation to ensure that it is functioning correctly. Here are a few things to look out for:
- Make sure the drip edge is properly aligned with the edge of the roof and extends down over the eaves.
- Check for any gaps or spaces between the drip edge and the roof surface. If any are found, apply additional adhesive or sealant to fill them.
- Inspect the fasteners to ensure they are tightly secured and not protruding above the drip edge.
- Test the drip edge by pouring a small amount of water onto the roof surface and observe if the water flows smoothly into the gutter without any leakage.
By following these steps and checking for proper installation, you can ensure that your metal roof drip edge is effectively sealed and secured, providing reliable protection and longevity to your roof.
Ensuring Proper Roof Pitch And Alignment
Installing metal roof drip edge is an essential step in protecting your roof from water damage. One crucial aspect of the installation process is ensuring proper roof pitch and alignment. It is vital to understand the roof pitch requirements, align the drip edge with the roof slope accurately, and prevent water intrusion. In this section, we will delve into these aspects in detail to help you achieve a successful metal roof drip edge installation.
Understanding Roof Pitch Requirements
Roof pitch refers to the steepness or slope of your roof. It is crucial to understand the roof pitch requirements when installing metal roof drip edge. The most common way to express roof pitch is in a ratio format, such as 4:12 or 6:12, where the first number represents the rise (vertical distance) and the second number indicates the run (horizontal distance). For example, a 4:12 roof pitch means that for every 12 horizontal inches, the roof rises 4 vertical inches.
Different types of metal roof drip edges have specific recommendations for roof pitch requirements. These requirements ensure the proper function and effectiveness of the drip edge. Be sure to consult the manufacturer’s guidelines or seek professional advice to determine the appropriate drip edge for your specific roof pitch.
Aligning Drip Edge with Roof Slope
Once you have determined the correct drip edge for your roof pitch, aligning it with the roof slope is crucial for a secure installation. The drip edge should be positioned parallel to the roof’s edge, creating a seamless transition between the roof and the edge. Misalignment can lead to water pooling, which can ultimately cause leaks and damage to your roof and home.
To ensure proper alignment, start by marking reference points along the roof’s edge, where the drip edge will be installed. Use a measuring tape to measure and mark equal distances on both sides of the roof. This will create a guide for aligning the drip edge accurately.
Preventing Water Intrusion
Preventing water intrusion is a primary goal when installing a metal roof drip edge. Making sure the drip edge is properly aligned with the roof slope is a significant step in achieving this goal. In addition to correct alignment, other precautions can be taken to enhance water resistance.
One effective measure is to install a water-resistant membrane beneath the drip edge. This membrane acts as an additional barrier against water infiltration, providing extra protection for your roof. Ensure that the membrane extends beyond the drip edge to prevent water from seeping underneath.
Another crucial consideration is the installation of the drip edge overlapping adjacent sections. This overlapping creates a drip or water-shedding effect, guiding water away from vulnerable areas and preventing it from pooling or penetrating the roof structure.
By following these steps and guidelines, you can ensure a proper alignment of the drip edge with the roof slope, minimizing the risk of water intrusion and protecting your roof from potential damage. Taking the time to understand the roof pitch requirements, aligning the drip edge accurately, and implementing additional water-resistant measures will contribute to a successful metal roof drip edge installation.
Properly Connecting Drip Edge Sections
When it comes to installing a metal roof drip edge, one crucial step is properly connecting the drip edge sections. This ensures that your roof remains protected against water damage and that the drip edge functions effectively. In this section, we will discuss two key methods for connecting drip edge sections: overlapping correctly and using sealants or adhesives. Additionally, we will explore the importance of securing the drip edge with fasteners to ensure a solid and durable connection.
Overlapping Correctly
One of the essential steps in connecting metal roof drip edge sections is overlapping them correctly. By overlapping the sections, you create a barrier that prevents water from seeping through the gaps. To do this, follow these simple guidelines:
- Ensure that each section of the drip edge has a minimum overlap of 2 inches with the adjacent section.
- Align the bottom edge of the upper section with the top edge of the lower section to create a seamless connection.
- Use tin snips or shears to trim the overlapping sections, ensuring a clean and precise fit.
By overlapping the drip edge sections correctly, you create a watertight seal that enhances the overall effectiveness of your metal roof’s drainage system.
Using Sealants or Adhesives
In addition to overlapping the sections, you can further strengthen the connection by using sealants or adhesives. Sealants provide an extra layer of defense against water penetration and help seal any potential gaps between the drip edge sections. Here’s how you can use sealants or adhesives effectively:
- Clean the surfaces of the overlapping sections to remove any dirt, debris, or rust.
- Apply a thin, continuous bead of roofing sealant or adhesive along the contact area of the lower section.
- Place the upper section onto the lower section, pressing firmly to ensure proper adhesion.
- Wipe away any excess sealant or adhesive to maintain a neat and professional finish.
Using sealants or adhesives provides an added layer of protection that strengthens the connection between drip edge sections, minimizing the risk of water infiltration and increasing the longevity of your metal roof.
Securing with Fasteners
Fasteners play a crucial role in securing the drip edge sections to the roof’s fascia or decking. These ensure a sturdy connection that can withstand various weather conditions. When securing the drip edge with fasteners, keep the following steps in mind:
- Place the drip edge sections onto the roof, aligning them with the edge and ensuring proper overlap.
- Use a drill or screwdriver to insert the fasteners, such as roofing nails or screws, through the pre-drilled holes in the drip edge.
- Space the fasteners approximately 6 to 12 inches apart, ensuring they penetrate the roof’s decking or fascia securely.
- Avoid overdriving the fasteners to prevent damage to the drip edge or the roof’s structure.
Securing the drip edge with fasteners ensures a solid connection, preventing the sections from shifting or detaching during strong winds or heavy rain. This step adds an additional layer of protection to your metal roof, enhancing its overall durability.
By understanding how to properly connect metal roof drip edge sections, you can ensure that your roof remains well-protected from water damage. Remember to overlap the sections correctly, use sealants or adhesives for added security, and secure the drip edge with appropriate fasteners. By following these steps, you can enjoy a long-lasting and reliable metal roof that effectively directs water away from your home.
Regular Maintenance And Inspections
Regular maintenance and inspections are essential to ensure the longevity and performance of your metal roof drip edge. By taking the time to check for damage or dislodgment, replacing or repairing as needed, and preventing rust and corrosion, you can ensure that your metal roof drip edge remains in optimal condition for years to come.
Checking for Damage or Dislodgement
Regularly inspecting your metal roof drip edge for any signs of damage or dislodgement is crucial. Damaged or dislodged drip edge components can compromise the effectiveness and protection provided by your roof. To effectively check for damage or dislodgment, follow these steps:
- Visually inspect the full length of the drip edge, paying close attention to any visible signs of dents, bends, cracks, or separation from the roof or fascia board.
- Check for any gaps or openings between the drip edge and the roof or fascia board. These gaps can allow water to seep underneath the drip edge, leading to potential moisture damage.
- Ensure that the drip edge is securely fastened to the roof and fascia board with no loose or missing screws or nails.
Replacing or Repairing Drip Edge as Needed
If you find any damaged or dislodged sections of the drip edge during your inspection, it’s important to take immediate action to replace or repair them. Ignoring or delaying repairs can result in further damage to your roof and may compromise its integrity. Follow these steps to replace or repair the drip edge:
- Carefully remove any damaged or dislodged sections of the drip edge, ensuring you do not cause any additional damage to the roof or fascia board.
- Measure the dimensions of the removed section to ensure a proper fit for the replacement drip edge.
- Replace the damaged or dislodged drip edge with a new section, ensuring it is securely fastened and aligned with the existing drip edge components.
- If repair is necessary, use appropriate materials and techniques to fix any cracks, bends, or separations in the existing drip edge.
Preventing Rust and Corrosion
To maintain the durability and appearance of your metal roof drip edge, it is essential to prevent rust and corrosion. Rust and corrosion can weaken the structure of the drip edge, leading to potential leaks and damage to the roof and fascia board. Follow these preventive measures to keep your drip edge free from rust and corrosion:
- Regularly clean the drip edge using a mild detergent and water to remove dirt, debris, and corrosive substances such as salt or chemicals.
- Inspect the drip edge for any signs of rust or corrosion. If any are found, use a wire brush or sandpaper to remove the rust and apply a suitable primer and paint to protect the metal.
- Consider applying a protective coating or sealant designed specifically for metal surfaces to provide an extra layer of defense against rust and corrosion.
By regularly maintaining and inspecting your metal roof drip edge, you can ensure its effectiveness in diverting water away from your roof and protecting your home from potential water damage. Remember to address any damage or dislodgment promptly and take preventive measures against rust and corrosion. Taking care of your metal roof drip edge will help prolong the lifespan of your roof and maintain its optimal performance.
Frequently Asked Questions
How Do You Install Metal Drip Edge?
To install metal drip edge, follow these steps: 1. Begin by measuring and cutting the drip edge to fit the length of the roof’s perimeter. 2. Position the drip edge along the roof’s edge, ensuring the flange extends over the eaves.
3. Secure the drip edge using roofing nails or screws, placing them approximately 6 inches apart. 4. Repeat the process for each edge of the roof. 5. Lastly, double-check that the drip edge is properly aligned and securely fastened. Remember to take safety precautions and consult professional advice if needed.
How Far Should Metal Roof Overhang Drip Edge?
The metal roof overhang drip edge should extend 1 to 2 inches beyond the fascia board to ensure proper water drainage and protection against leaks.
Does Metal Drip Edge Go Over Or Under Felt?
Metal drip edge should be installed over the felt.
What Is The Best Drip Edge For A Metal Roof?
The best drip edge for a metal roof is typically made of galvanized steel or aluminum. It helps to protect the roof’s edges from water damage while providing a smooth transition between the roof and gutter system.
Conclusion
Installing a metal roof drip edge is a crucial step in ensuring the longevity and functionality of your roof. By following the simple steps outlined in this guide, you can easily install a metal roof drip edge on your own.
From measuring and cutting to securing and sealing, each step is vital to prevent water damage and protect your roof. With a properly installed metal roof drip edge, you can rest easy knowing your roof is safeguarded against the elements.
Taking the time to install a metal roof drip edge now can save you from costly repairs in the future. So, don’t wait any longer; get started with your installation project today!