To install metal edging for tile, measure and cut the edging to fit the desired length and use adhesive to attach the metal edging to the tile surface. Metal edging is a popular choice for tile installation as it provides a clean and professional finish to the edges.
It also helps protect the edges of the tile from damage and can enhance the overall aesthetic of the installation. By following a few simple steps, you can easily install metal edging for tile in your home or any other location.
This guide will walk you through the process of measuring, cutting, and attaching the edging using adhesive, ensuring a secure and attractive installation. So, let’s get started and make your tile project stand out with a stylish and durable metal edge.
Choosing The Right Metal Edging For Your Tile Project
Factors to consider when selecting metal edging
When it comes to installing metal edging for your tile project, choosing the right type of edging is essential. It not only enhances the overall look of your tiles but also ensures a durable and long-lasting installation. There are several factors you need to consider when selecting metal edging, including compatibility with tile type and thickness, durability, resistance to moisture, and style and aesthetics.
Compatibility with tile type and thickness
The first factor to consider when selecting metal edging is its compatibility with your tile type and thickness. Different types of tiles have different installation requirements, and not all metal edgings are suitable for every tile type. For instance, if you’re working with ceramic tiles, you’ll need a metal edging that can accommodate the thickness and shape of these tiles.
On the other hand, if you’re installing natural stone tiles, you’ll need an edging that can handle the weight and provide proper support. It’s important to choose a metal edging that is specifically designed for your tile type and thickness to ensure a seamless and secure installation.
Durability and resistance to moisture
Another crucial factor to consider is the durability and resistance to moisture of the metal edging. Since tiles are often exposed to water and other liquids, it’s important to choose an edging that can withstand moisture without rusting or corroding over time. Look for metal edgings that are made from materials such as stainless steel or aluminum, as these are known for their high durability and resistance to moisture. Additionally, consider the quality of the finish on the edging, as a well-coated surface can prevent water penetration and increase its lifespan.
Style and aesthetics
Apart from functionality, the style and aesthetics of the metal edging should also be taken into account. The edging you choose should complement the overall design and theme of your tile project. Whether you prefer a sleek and modern look or a more traditional and decorative style, there are metal edgings available in various finishes and designs to suit your preference. From brushed metal finishes to colorful powder-coated options, you can find a style that enhances the visual appeal of your tiles and ties the entire look together seamlessly.
In conclusion, choosing the right metal edging for your tile project is crucial for a successful installation. Consider factors such as compatibility with tile type and thickness, durability and resistance to moisture, and style and aesthetics. By carefully selecting the appropriate metal edging, you can ensure a long-lasting, visually pleasing, and functional tile installation.
Preparing The Tile Surface For Metal Edging Installation
Before installing metal edging for tile, it’s important to prepare the tile surface properly. This ensures a smooth and even installation, preventing any issues down the line. In this section, we will go over the steps involved in assessing the condition of the tile surface, repairing any cracks or damage, cleaning the tile surface, and removing dirt, grime, or adhesive residue.
Assessing the condition of the tile surface
To start, carefully examine the tile surface to assess its condition. Look for any cracks, chips, or loose tiles. These can affect the installation of the metal edging and may need to be addressed before proceeding. Pay close attention to any unevenness or inconsistencies in the tile surface, as these can impact the appearance and functionality of the edging.
Repairing any cracks or damage
If you come across any cracks or damage in the tile surface, it’s crucial to repair them before installing the metal edging. Using an appropriate tile adhesive or filler, carefully fill in any cracks or chips. Smooth out the repaired areas with a putty knife or sandpaper, ensuring a seamless surface for the edging. Allow ample time for the repairs to dry and cure before moving on to the next step.
Cleaning the tile surface
Prior to installing metal edging, it’s important to thoroughly clean the tile surface. Remove any loose dirt or debris using a broom or vacuum cleaner. Next, wipe the tile surface with a damp cloth or sponge to remove any surface grime. Be sure to pay attention to tight corners and edges, where dirt can accumulate. Allow the surface to air dry completely before proceeding.
Removing any dirt, grime, or adhesive residue
In some cases, the tile surface may have adhesive residue from previous installations or stubborn grime that regular cleaning won’t remove. In such situations, you may need to use a tile adhesive remover or a gentle solvent. Follow the manufacturer’s instructions for the specific product you choose and carefully remove any residue using a clean cloth or sponge. Afterward, rinse the tile surface with water and allow it to dry thoroughly.
Ensuring a smooth and even surface for installation
Once the tile surface is clean and free of any cracks, damage, or debris, it’s essential to ensure it is smooth and even before installing the metal edging. Run your hand across the surface to feel for any imperfections, and if necessary, use a fine-grit sandpaper to smooth out any high spots or rough areas. This step is crucial for achieving a professional and polished appearance for your metal edging installation.
By assessing the condition of the tile surface, repairing any cracks or damage, cleaning the tile surface thoroughly, removing any dirt, grime, or adhesive residue, and ensuring a smooth and even surface for installation, you are ready to proceed with installing metal edging for your tile. Following these steps will not only ensure a successful installation but also result in a long-lasting and visually appealing final product.
Installing Metal Edging For Tile
Installing metal edging for tile is an important step in achieving a professional and finished look for your tile installation. Metal edging not only provides a clean and polished appearance but also helps protect the edges of your tiles from chipping or cracking over time. This guide will walk you through the process of measuring, cutting, applying adhesive, and securing the metal edging for a successful tile installation.
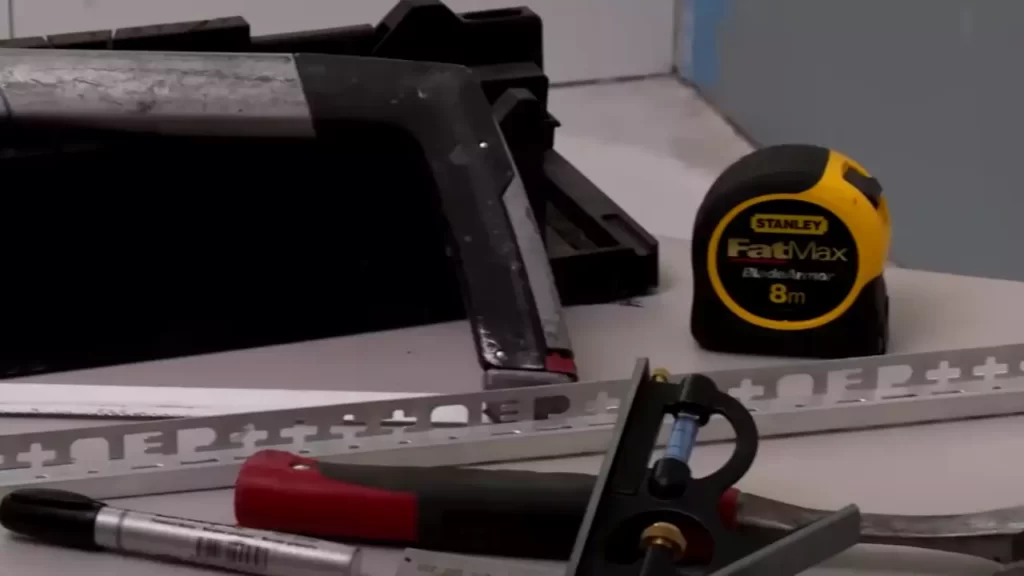
Measuring and Cutting the Metal Edging
Before you begin, it’s essential to measure the area where the metal edging will be installed accurately. Use a tape measure to determine the length needed for each section of edging. It’s crucial to measure twice and cut once to ensure a precise fit.
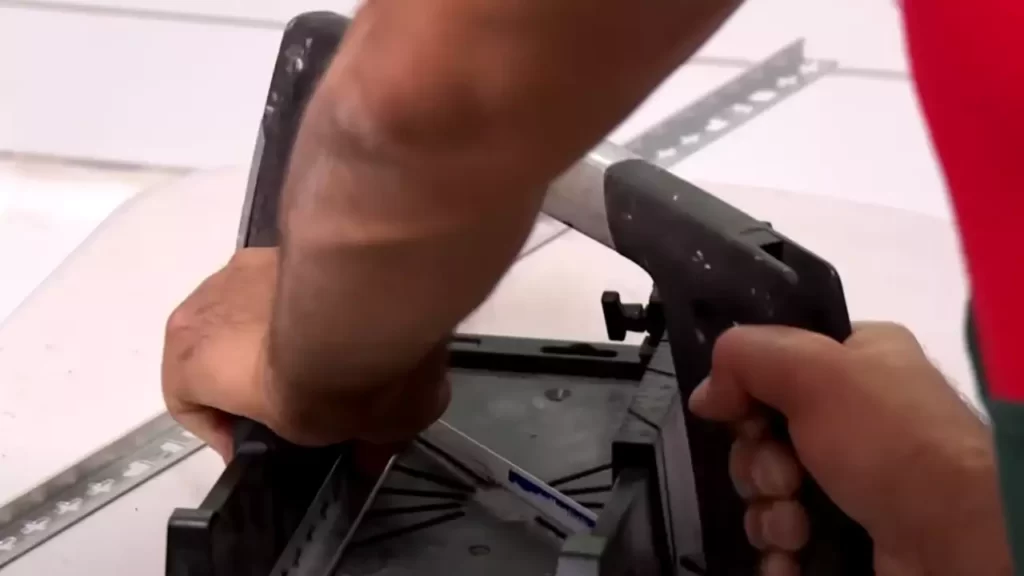
Once you have the correct measurements, you can proceed to cut the metal edging to the appropriate length. Use appropriate tools for cutting metal, such as tin snips or a metal saw, to make clean and accurate cuts.
Applying Adhesive to the Metal Edging
Before securing the metal edging to the tile, it’s important to apply adhesive to the backside of the edging. This will ensure a strong bond between the edging and the tile surface. Select a suitable adhesive based on the type of tile material you are working with.
When applying adhesive, follow the manufacturer’s instructions carefully. Use a trowel or a putty knife to spread an even layer of adhesive on the back of the metal edging, covering the entire surface.
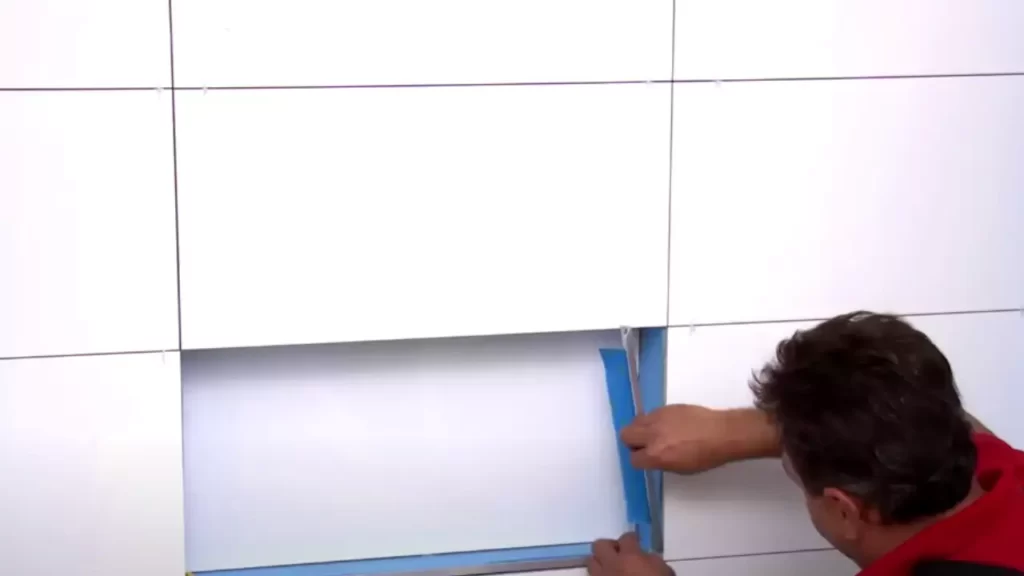
Securing the Metal Edging to the Tile Surface
Properly align the metal edging with the edges of the tile before securing it in place. Make sure the edging is flush with the tile surface and that there are no gaps or uneven areas.
To hold the edging in place while the adhesive dries, you can use clamps or weights. Attach the clamps to the edging, applying enough pressure to keep it securely against the tile surface. Alternatively, you can place weights on top of the edging to hold it down. This will ensure that the edging stays in position and doesn’t shift during the drying process.
Conclusion
Installing metal edging for tile is a straightforward process that can greatly enhance the overall look and durability of your tile installation. By measuring and cutting the edging accurately, using the appropriate adhesive, and properly securing the edging to the tile surface, you can achieve a professional and polished finish. Remember to follow manufacturer’s instructions and take your time to ensure a precise fit and secure adhesion. With these steps, you’ll be on your way to a beautifully finished tile project.
Tips For A Successful Metal Edging Installation
When it comes to installing metal edging for tile, following a few key tips can make all the difference in achieving a successful and seamless finish. From allowing sufficient drying time for the adhesive to ensuring proper alignment and positioning, each step is crucial in creating a professional look. In this article, we will discuss some important tips to keep in mind during the metal edging installation process.
Allowing Sufficient Drying Time for the Adhesive
One of the most important aspects of a successful metal edging installation is allowing ample drying time for the adhesive. This ensures that the metal edging firmly secures the tile and prevents any potential movement or shifting in the future. Consider the recommended drying time specified by the adhesive manufacturer, as it varies depending on the brand and type of adhesive. Rushing this step can result in compromised adhesion and an uneven appearance. Patience is key to achieving a long-lasting and professional installation.
Considering the Recommended Drying Time Specified by the Adhesive Manufacturer
Properly understanding and following the adhesive manufacturer’s recommended drying time is essential for a successful metal edging installation. This information can usually be found on the adhesive packaging or product manual. The recommended drying time varies based on factors such as humidity levels, temperature, and adhesive type. By adhering to these guidelines, you can ensure that your metal edging installation will have optimal adhesion and durability.
Ensuring Proper Alignment and Positioning of the Metal Edging
Another crucial factor in achieving a seamless metal edging installation is to ensure proper alignment and positioning. Before applying the adhesive, carefully measure and mark the desired placement of the metal edging along the tiled surface. Use a level and straight edge to verify that the edging is straight and level. Pay close attention to any corners or turns, as they require special attention to maintain a consistent alignment. Taking the time to properly position the metal edging will result in an aesthetically pleasing and professional finish.
If needed, use clips or temporary supports to hold the metal edging in place while the adhesive dries. This will prevent any unnecessary movement or shifting during the drying process, ensuring a seamless installation.
Checking for Any Gaps or Inconsistencies before the Adhesive Dries Completely
Before the adhesive dries completely, it’s crucial to thoroughly inspect the installation for any gaps or inconsistencies. Carefully examine the edges and joints to ensure they are tightly sealed and there are no visible gaps between the metal edging and the tile. Use a small tool or putty knife to remove excess adhesive that may have squeezed out during installation, creating a clean and polished look. Rectifying any issues before the adhesive dries completely will save you time and effort in the long run.
By following these tips for a successful metal edging installation, you can achieve a professional finish that enhances the overall appeal and longevity of your tiled surfaces. Taking the time to properly prepare and execute each step will ensure a seamless and visually pleasing result.
Maintaining And Caring For Metal Edging
Maintaining and Caring for Metal Edging
Metal edging is a popular choice for tile installations not only for its durability and sleek appearance but also for its ease of maintenance. Regular maintenance and care will ensure that your metal edging remains in top condition, enhancing both the lifespan and the overall aesthetic of your tile project. In this section, we will discuss the essential steps in maintaining and caring for metal edging, including cleaning, inspecting for damage, and applying protective coatings when necessary.
H3: Cleaning the Metal Edging Regularly
Regular cleaning is crucial to keep your metal edging looking its best. Over time, dirt, grime, and other residues can accumulate on the surface, dulling its shine. To clean the metal edging, follow these simple steps:
1. Start by removing any loose dirt or debris using a soft brush or cloth.
2. Prepare a solution of mild soap and warm water.
3. Dip a clean cloth or sponge in the soapy water and gently scrub the metal edging.
4. Rinse the edging thoroughly with clean water to remove any soap residue.
5. Wipe it dry with a clean, lint-free cloth to prevent water spots.
By cleaning the metal edging regularly, you can maintain its appearance and prevent any buildup that may be difficult to remove later on. It’s best to perform this cleaning routine every few weeks or as needed, especially in areas with high foot traffic or where the metal edging is exposed to contaminants.
H3: Removing Any Dirt or Debris to Maintain Its Appearance
To maintain the appearance of your metal edging, it’s essential to remove any dirt or debris that may accumulate. Here are some quick tips to effectively remove dirt and debris from your metal edging:
– Use a soft brush or cloth to sweep away loose dirt and debris.
– For stubborn dirt or grime, dampen a cloth with warm water and gently wipe the affected area.
– Avoid using abrasive cleaning agents or materials, as they can scratch or damage the metal surface.
By regularly removing dirt and debris, you can prevent them from causing stains or scratches on the metal edging, keeping it looking clean and polished.
H3: Inspecting for Any Signs of Damage or Corrosion
Regular inspections are essential to identify any signs of damage or corrosion on the metal edging. By addressing these issues promptly, you can prevent further damage and ensure the longevity of your installation. Here’s how you can inspect the metal edging:
1. Start by visually examining the edging for any signs of scratches, dents, or discoloration.
2. Pay close attention to areas where the metal comes into contact with moisture or chemicals, as they are more prone to corrosion.
3. Feel the surface to check for any rough spots or irregularities that may indicate underlying damage.
If you notice any signs of damage or corrosion, it’s important to take immediate action to prevent worsening of the problem.
H3: Addressing Any Issues Promptly to Prevent Further Damage
When issues or signs of damage are identified during the inspection, addressing them promptly can prevent further damage to the metal edging. Here are some steps you can take:
1. For minor scratches or surface damage, gently buff the affected area with a soft cloth. This can help restore the appearance and eliminate minor imperfections.
2. If corrosion is present, carefully remove it using a non-abrasive cleaner specifically designed for metal surfaces.
Remember, addressing issues promptly is crucial to maintain the integrity and appearance of your metal edging.
H3: Applying Protective Coatings, If Necessary, to Prolong the Lifespan of the Metal Edging
In some cases, applying protective coatings to the metal edging can help prolong its lifespan and prevent corrosion. These coatings act as a barrier against moisture, chemicals, and other elements that may cause damage. Here’s what you need to know:
1. Choose a suitable protective coating designed for metal surfaces.
2. Follow the manufacturer’s instructions for application. This may involve cleaning the edging thoroughly, applying the coating evenly, and allowing it to dry completely.
3. Periodically reapply the protective coating as recommended by the manufacturer to ensure ongoing protection.
By applying protective coatings, you can enhance the durability and longevity of your metal edging, ensuring it remains in pristine condition for years to come.
In conclusion, proper maintenance and care are vital for metal edging installed with tiles. By regularly cleaning the edging, removing dirt and debris, inspecting for damage, addressing issues promptly, and applying protective coatings when necessary, you can keep your metal edging looking polished and extend its lifespan. Following these simple steps will ensure a stunning and long-lasting tile installation for your space.
Troubleshooting Common Issues With Metal Edging Installation
Installing metal edging for tile can give your space a sleek and polished look. However, it’s not uncommon to run into a few challenges during the installation process. In this section, we will address some common issues that may arise and provide troubleshooting tips to help you achieve a smooth and successful installation.
Uneven/insufficient adhesive coverage
One of the primary reasons for metal edging not sticking properly to the tile surface is uneven or insufficient adhesive coverage. Without proper bonding, the edging may become loose over time, compromising the overall appearance of your tile installation. To ensure optimal adhesive coverage, follow these steps:
- Clean the tile surface thoroughly to remove any dirt, grime, or residue that could hinder adhesive bonding.
- Use a notched trowel to apply adhesive to the back of the metal edging, ensuring even coverage.
- Press the edging firmly onto the tile surface, applying gentle pressure to secure a strong bond.
If you find that the adhesive is not spreading evenly or is insufficient, consider using a different adhesive product recommended for metal edging installations. Additionally, double-check the manufacturer’s guidelines for adhesive application to ensure you are using the correct amount.
Edging not sticking to the tile surface
If the metal edging is not sticking to the tile surface, it is essential to identify the possible causes and address them accordingly. Here are a few troubleshooting steps to help resolve this issue:
- Ensure that the adhesive being used is compatible with both the tile and the metal edging. Different tile materials may require specific adhesives.
- Check the temperature and humidity levels in the installation area. Extreme temperature variations or excessive humidity can affect the adhesive’s bonding strength. Ideally, the installation should take place in a temperature-controlled environment.
- Verify that the tile surface is clean and free from any contaminants that may hinder the adhesive bond. Use a suitable cleaner or degreaser to remove any stubborn stains or residues.
- Consider roughening the tile surface slightly with sandpaper to enhance the adhesive’s grip.
If none of these troubleshooting steps resolve the issue, consult a professional installer or contact the adhesive manufacturer for further guidance.
Misaligned or uneven edging placement
One common issue during metal edging installation is misaligned or uneven placement, which can significantly affect the overall aesthetics of your tile installation. To ensure straight and even edges, follow these tips:
- Measure and mark the desired placement of the metal edging on the tile surface.
- Use a level or straightedge to guide you during installation, ensuring that the edging is perfectly aligned.
- Adjust the edging as necessary before the adhesive fully cures to achieve a precise and even placement.
If you encounter difficulty aligning the edging, it may be helpful to seek assistance from another person or use clamps to hold the edging in place until the adhesive sets.
Dealing with gaps or inconsistencies in edging attachment
Gaps or inconsistencies in the attachment of the metal edging can be a common issue, affecting the overall appearance and functionality of the installation. To address such problems:
- Before applying adhesive, ensure that the back of the metal edging and the tile surface are clean and free from any debris.
- Apply the adhesive in a consistent and even manner to ensure proper contact between the edging and the tile.
- After placing the edging, gently tap it with a rubber mallet or a similar tool to ensure a secure attachment.
If gaps or inconsistencies still persist, carefully remove the edging, clean the surfaces again, and repeat the installation process, ensuring proper adhesive application and alignment.
By troubleshooting these common issues during metal edging installation, you can achieve a professional and seamless finish that enhances the overall appearance and longevity of your tile project.
Frequently Asked Questions
How Do You Install Metal Edge Trim On Tile?
To install metal edge trim on tile, follow these steps: 1. Measure and cut the trim to fit the edge of the tile. 2. Apply adhesive to the back of the trim and press it onto the tile edge. 3. Use a rubber mallet to secure the trim in place.
4. Wipe away any excess adhesive. 5. Allow the adhesive to dry completely before using the tiled area.
Can You Install Tile Edge Trim After Tiling?
Yes, you can install tile edge trim after tiling. It helps protect the tiled edges, provides a neat and finished look, and prevents chipping. Simply measure and cut the trim to fit, then use adhesive and screws to secure it in place.
Do You Need Metal Edging For Tile?
Metal edging is not necessary for tile installation, but it can provide a clean and professional finish. It helps protect the tile edges from damage and creates a polished look. However, it is a personal preference and depends on the style and design preference of the homeowner or installer.
What Is The Metal Strip At Edge Of Tile Called?
The metal strip at the edge of a tile is called a tile trim. It provides a finished look and protects the exposed edge.
Conclusion
To summarize, installing metal edging for tile requires thorough preparation and precise execution. By following the step-by-step instructions outlined in this post, you can achieve professional-looking results. Remember to choose the appropriate metal edging for your project and use the recommended tools for a seamless installation.
With proper care and maintenance, your tiled area will not only look visually appealing but also be durable and long-lasting. Don’t hesitate to give it a try and elevate the look of your tile project!