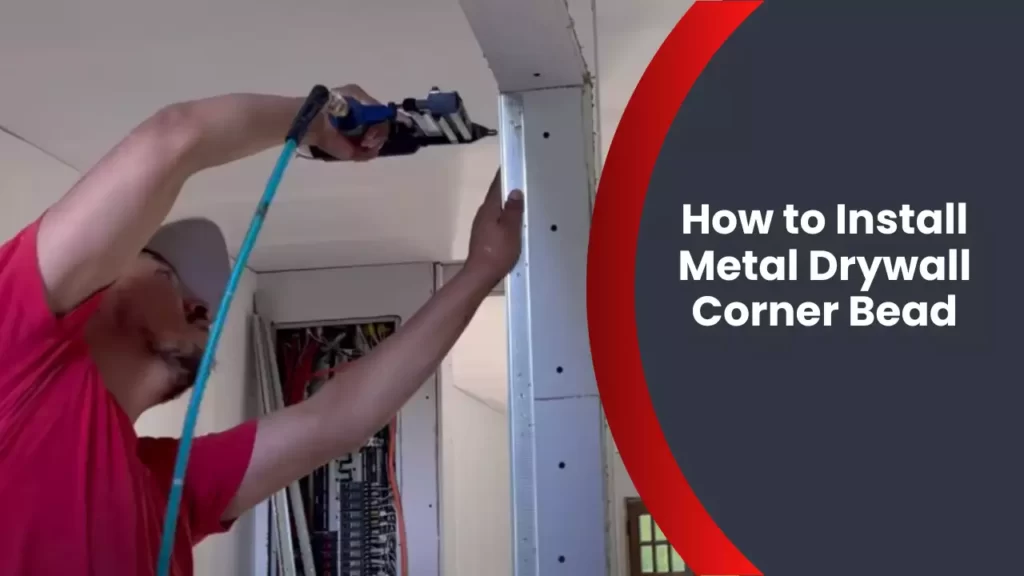
To install metal drywall corner bead, measure and cut the bead to fit the corner, place it over the drywall edge, and secure it with drywall screws or adhesive. Metal drywall corner bead is a popular choice for adding durability and strength to corners while providing a clean and professional finish.
Whether you’re a DIY enthusiast or a professional contractor, installing metal drywall corner bead is a straightforward process that can be completed with just a few tools and materials. By following these simple steps, you can achieve a seamless and polished look for your drywall corners.
So, let’s get started!
Preparing The Work Area
Before you embark on installing metal drywall corner bead, it’s crucial to properly prepare your work area. Taking the time to clear the workspace, gather the necessary tools and materials, measure and mark the drywall corners, and protect the surrounding area is essential for a smooth and successful installation. By following these steps, you can ensure accuracy, efficiency, and a clean work environment.
Clear the workspace and gather the necessary tools and materials
Start by clearing the workspace of any obstacles that may hinder your progress. Remove furniture, decorations, or any other items that could get in the way of the installation process. This will provide you with ample space to work comfortably and prevent any accidents or mishaps. Additionally, gather all the tools and materials you’ll need for the installation, ensuring everything is within easy reach. Here’s a list of essential tools and materials:
| Tools | Materials |
|---|---|
| Utility knife | Metal drywall corner bead |
| Tape measure | Drywall joint compound |
| Pencil or marker | Sanding block or sandpaper |
| Caulk gun | Dust mask |
Measure and mark the drywall corners for accurate installation
Accurate measurement and marking of the drywall corners are critical for a seamless installation of the metal drywall corner bead. Use a tape measure to determine the length of each corner, ensuring precise measurements. Take your time to measure each corner accurately, as any discrepancy can lead to a flawed installation. Once you have obtained the measurements, mark each corner with a pencil or marker to serve as a guide during the installation process.
Protect the surrounding area from drywall dust and debris
During the installation of metal drywall corner bead, dust and debris can be generated, which can be messy and hazardous. To prevent this, it’s essential to protect the surrounding area. Cover nearby furniture, flooring, and any other items with plastic sheets or drop cloths. This will help contain the dust and debris, making the cleanup process much easier. Additionally, don’t forget to wear a dust mask to protect yourself from inhaling any harmful particles.
By carefully adhering to the steps outlined above, you’ll be well on your way to preparing the work area for the installation of metal drywall corner bead. Clearing the workspace, gathering the necessary tools and materials, measuring and marking the drywall corners accurately, and protecting the surrounding area will set you up for a successful and efficient installation process.
Installing The Metal Drywall Corner Bead
When it comes to achieving a clean and professional appearance for your drywall corners, using a metal drywall corner bead is essential. Not only does it provide strength and durability, but it also helps protect the corners from damage. In this section, we will guide you through the step-by-step process of installing the metal drywall corner bead. By following these instructions, you can ensure a seamless finish for your drywall project.
Applying joint compound to the corner using a putty knife
The first step in installing the metal drywall corner bead is to prepare the corner by applying joint compound. This compound acts as an adhesive and helps create a smooth surface for the corner bead to adhere to. Grab your putty knife and apply a layer of joint compound to the corner, making sure to cover both sides of the corner evenly. Use long, smooth strokes to create an even layer of compound.
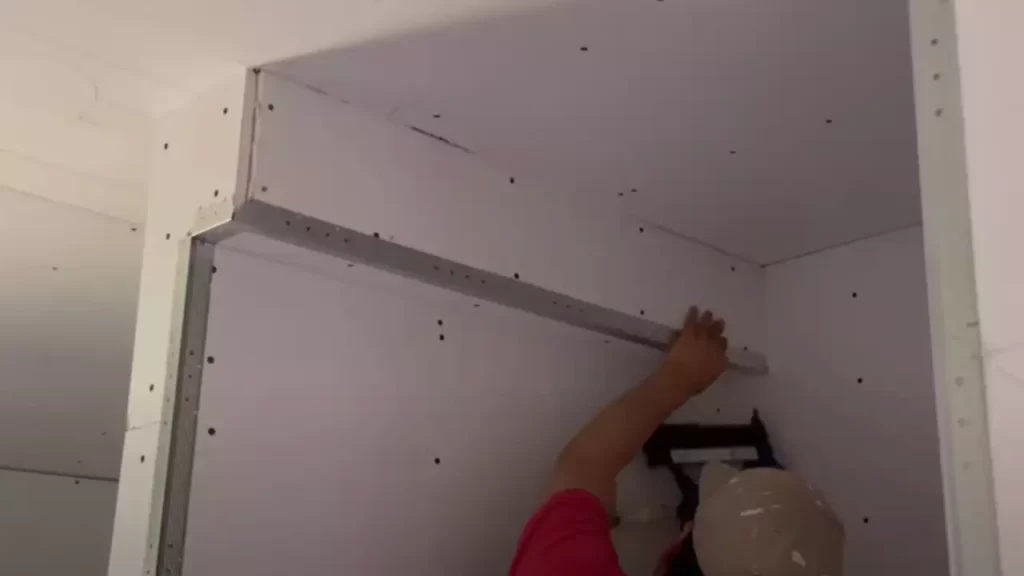
Positioning the metal drywall corner bead onto the joint compound
Once the joint compound is applied, it’s time to position the metal drywall corner bead onto the corner. Place the corner bead on top of the joint compound, ensuring that it aligns perfectly with the corner. The flanges of the corner bead should be flush against the wall surfaces on either side of the corner. Make sure to press firmly to secure the corner bead in place.
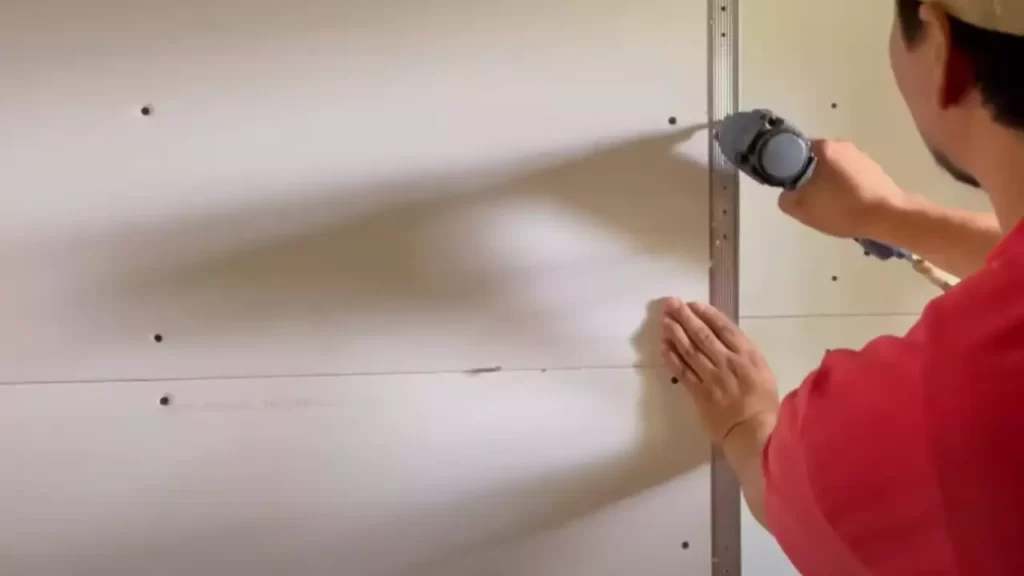
Securing the corner bead with drywall screws or nails
Now that the corner bead is positioned, it’s time to secure it using drywall screws or nails. If using screws, place them along the flanges of the corner bead, making sure to drive them into the wall studs or solid backing. If using nails, drive them through the flanges, ensuring they penetrate into the wall sufficiently. Space the screws or nails evenly along the length of the corner bead to provide proper support and prevent any movement.
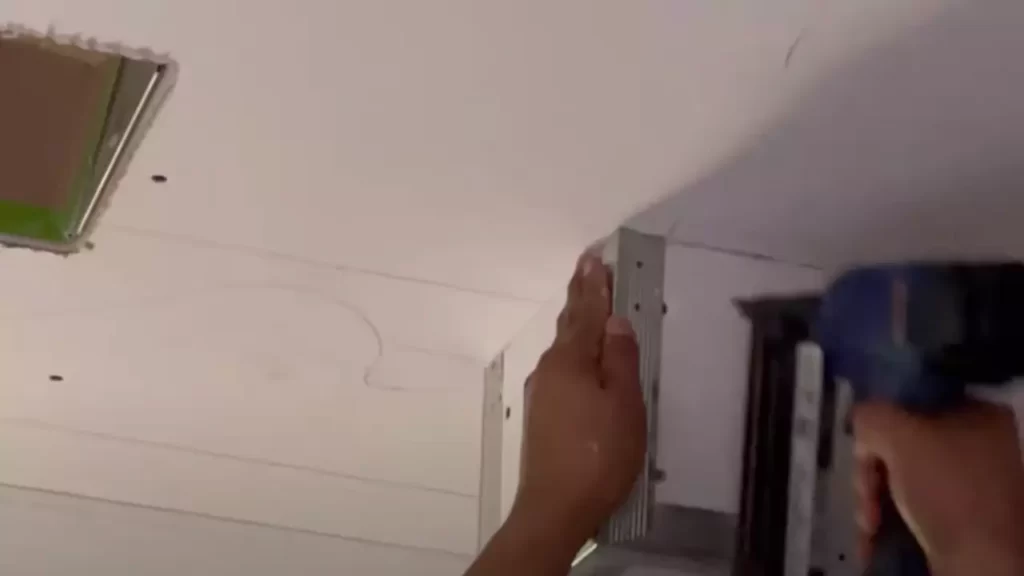
Checking for proper alignment and adjusting if necessary
After securing the corner bead, it’s important to double-check for proper alignment. Ensure that the corner bead is straight and aligned with the corner of the wall. Use a level or a straight-edge to verify and make any necessary adjustments. If the corner bead needs repositioning, carefully remove the screws or nails, reposition the corner bead, and secure it again. It’s essential to take the time to achieve proper alignment, as it will result in a flawless finish.
By following these steps, you will be able to expertly install the metal drywall corner bead. Remember to take your time and pay attention to detail to ensure a professional-looking finish. Now that you have completed this step, the next phase of your drywall project can proceed seamlessly.
Finishing The Installation
Once you have successfully installed the metal drywall corner bead, it’s time to move on to the next crucial step: finishing the installation. This stage involves applying joint compound, feathering and smoothing it, allowing it to dry completely, and finally sanding it for a smooth and seamless finish.
Applying joint compound over the metal drywall corner bead
Joint compound is a key component in achieving a professional-looking finish. It helps to hide the seams and imperfections, giving your walls a smooth and seamless appearance. To apply the joint compound, follow these steps:
- Carefully open a container of joint compound and use a putty knife to scoop out a generous amount.
- Apply the joint compound directly over the metal drywall corner bead, making sure to completely cover it.
- Use the putty knife to spread the compound evenly, ensuring it extends beyond the edges of the bead by a few inches.
Feathering and smoothing the joint compound for a seamless finish
Once you have applied the joint compound, the next step is to feather and smooth it for a seamless finish. This process helps to blend the edges of the compound with the surrounding wall, creating a smooth transition. Here’s how you can do it:
- Using a clean putty knife, gently feather the edges of the compound by applying light pressure and pulling the knife at an angle.
- Continue feathering until the compound blends seamlessly with the wall, without any noticeable bumps or ridges.
- Make sure to keep the pressure consistent and use long, smooth strokes for a professional finish.
Allowing the joint compound to dry completely
After feathering and smoothing the joint compound, it’s essential to allow it to dry completely. Drying times may vary depending on factors such as temperature and humidity, so it’s best to follow the manufacturer’s guidelines. In general, joint compound can take anywhere from 24 to 48 hours to dry fully.
Sanding the joint compound to achieve a smooth surface
Once the joint compound is completely dry, it’s time to sand it to achieve a smooth surface. Sanding helps to remove any imperfections, bumps, or uneven areas, giving your walls a flawless look. Follow these steps for effective sanding:
- Use a fine-grit sandpaper, such as 120 or 150-grit, to gently sand the joint compound.
- Hold the sandpaper at a slight angle and use smooth, even strokes. Avoid applying too much pressure to prevent damaging the drywall or bead.
- Continue sanding until the surface feels smooth to the touch and all imperfections have been removed.
- Wipe away any dust or debris with a clean cloth before proceeding with painting or further finishing.
By following these steps, you will be able to achieve a professional-looking finish after installing metal drywall corner bead. Remember, take your time, be patient, and pay attention to detail, and the end result will be well worth the effort.
Tips And Best Practices
When it comes to installing metal drywall corner bead, following the right tips and best practices can make a significant difference in achieving a professional finish. In this section, we will discuss some essential tips for your metal drywall corner bead installation project. From using a corner roller tool to avoiding excessive joint compound and properly cleaning and maintaining your tools, these tips will help you achieve a seamless and durable installation.
Using a corner roller tool for easier installation and a professional finish
One of the best techniques to ensure a smooth and professional finish while installing metal drywall corner bead is by using a corner roller tool. This tool not only makes the installation process easier but also helps to achieve a clean and polished look.
Here are a few steps to effectively use a corner roller tool:
- Start by applying a thin layer of joint compound to the corner where you will install the metal drywall corner bead.
- Position the metal drywall corner bead over the joint compound.
- Hold the corner roller tool at a slight angle and firmly press it against the metal drywall corner bead.
- Slowly move the corner roller tool along the entire length of the metal drywall corner bead, exerting even pressure.
- Repeat the process to ensure complete coverage and a smooth finish.
Avoiding excessive joint compound on the metal drywall corner bead
While applying joint compound is necessary for securing the metal drywall corner bead, it’s important to avoid excessive amounts as it can lead to a messy and unprofessional appearance. Following these tips will help you achieve a cleaner installation:
- Apply a thin layer of joint compound to the corner before installing the metal drywall corner bead.
- Once the metal drywall corner bead is in place, use a drywall knife to scrape off any excess compound that may squeeze out.
- Smooth out the joint compound along the edges of the corner bead using a clean putty knife or a corner trowel.
- Allow the joint compound to dry completely before sanding and finishing.
Properly cleaning and maintaining tools for future use
After completing your metal drywall corner bead installation, it is essential to properly clean and maintain your tools to ensure their longevity and optimal performance for future projects.
| Tools | Cleaning and Maintenance Tips |
|---|---|
| Corner roller tool | Remove any excess joint compound using a putty knife or a brush. Wipe the tool with a damp cloth to remove any remaining residue. Allow it to dry thoroughly before storing it. |
| Drywall knife, putty knife, or corner trowel | Scrape off any dried joint compound using a wire brush or abrasive pad. Clean the tools with warm soapy water, rinse, and dry them completely. |
By following these cleaning and maintenance tips, you can ensure that your tools stay in top condition, making future installation projects a breeze.
Remember, practicing these tips and best practices will not only make your metal drywall corner bead installation easier but also result in a professional and visually appealing finish. Take the time to learn and implement these techniques, and you’ll be rewarded with durable and seamless corners that enhance the overall look of your drywall.
Troubleshooting Common Issues
Installing metal drywall corner bead can be a straightforward process, but sometimes issues can arise. Don’t worry, though! Here are some common problems that might occur during installation and how to tackle them:
Dealing with corner bead that has shifted during installation
If you notice that your corner bead has shifted out of place during installation, you’ll need to fix it right away. Here’s what you can do:
- Start by assessing the extent of the shift. If it’s only a minor shift, you may be able to gently push or tap the corner bead back into its proper position.
- If the shift is more significant, you may need to remove the corner bead and re-install it. To do this, use a utility knife to cut through the joint compound along the edges of the corner bead. Then, carefully pry the bead away from the wall using a putty knife.
- Once the bead is removed, inspect the condition of the drywall underneath. Repair any damage, such as torn paper or gouges, using joint compound and a putty knife.
- Before re-installing the corner bead, make sure the surface is clean and free of dust. Apply a fresh layer of joint compound to the area where the bead will be placed.
- Position the corner bead back in place and press it firmly into the joint compound. Use a drywall knife to smooth out any excess compound and create a seamless transition between the bead and the wall.
- Allow the joint compound to dry completely before sanding and painting the corner bead to match the surrounding wall.
Fixing corner bead that is not aligned properly
It’s important to ensure that your corner bead is aligned properly during installation to achieve a neat and professional finish. Here’s how you can fix it:
- If you notice that the corner bead is not aligned properly, evaluate the extent of misalignment. If it’s only a slight deviation, you may be able to adjust it by gently tapping the bead with a rubber mallet or a hammer.
- If the misalignment is significant, you’ll need to remove the corner bead. Use a utility knife to cut through the joint compound along the edges of the bead, and then carefully pry it away from the wall using a putty knife.
- After removing the bead, clean the wall surface by scraping off any remaining joint compound and sanding it smooth.
- Measure and mark the proper location for the corner bead, ensuring it aligns perfectly with the adjacent walls.
- Apply a fresh layer of joint compound to the wall where the bead will be placed.
- Position the corner bead accurately and press it firmly into the joint compound. Use a drywall knife to scrape off any excess compound and create a seamless transition between the bead and the wall.
- Allow the joint compound to dry completely before sanding and painting the corner bead to match the surrounding wall.
Repairing cracks or damage in the corner bead after installation
Despite your best efforts, corner bead can sometimes become cracked or damaged after installation. Here’s what you can do to repair it:
- Start by assessing the extent of the damage. If it’s only a small crack, you may be able to fix it without removing the entire bead.
- Carefully remove any loose or damaged joint compound around the cracked area using a putty knife.
- Apply a fresh layer of joint compound to the damaged area, ensuring it fully covers the crack and blends smoothly with the surrounding bead.
- Smooth out the compound with a drywall knife and feather the edges to create a seamless finish.
- Allow the joint compound to dry completely before sanding and painting the repaired section of the corner bead.
By following these troubleshooting tips, you’ll be able to overcome common issues that may arise during the installation of metal drywall corner bead. Remember, patience and attention to detail are key to achieving a professional-looking finish for your walls.
Frequently Asked Questions
Do You Nail Or Screw Metal Corner Beads?
Nail metal corner beads for secure installation. Avoid sagging or cracking by using screws instead.
How Do You Install Metal Inside Corner Beads?
To install metal inside corner beads, follow these steps: 1. Measure and cut the bead to the required length. 2. Apply a coat of joint compound to the corner of the wall. 3. Press the bead firmly into the compound, ensuring it is aligned.
4. Use drywall screws or nails to secure the bead in place. 5. Apply a layer of joint compound over the bead, feathering the edges for a smooth finish.
How Do You Fasten Metal Corners On Drywall?
To fasten metal corners on drywall, follow these steps: 1. Position the metal corner along the edge of the drywall. 2. Use drywall screws or nails to secure the metal corner in place, ensuring it is flush with the wall. 3.
Repeat the process for all corners, making sure they are aligned correctly. 4. Fill any gaps between the metal corner and drywall with joint compound. 5. Smooth the joint compound, let it dry, and then sand it for a professional finish.
Do You Mud Under Metal Corner Bead?
Yes, you should mud under metal corner bead. Mudding helps secure the bead in place and creates a smooth finish on the corners.
Conclusion
Learning how to install metal drywall corner bead is a valuable skill for any DIY enthusiast or professional contractor. By following the step-by-step instructions provided in this blog post, you can achieve a smooth and professional finish to your drywall corners.
Remember to use the right tools and materials, take your time, and pay attention to detail. With practice, you’ll be able to complete this task with confidence and precision. Happy renovating!