To install a Hunter ceiling fan remote control, follow these steps: 1. Turn off the power to the ceiling fan at the circuit breaker.
2. Remove the battery cover on the remote and insert the batteries, then put the cover back on. 3. Locate the receiver inside the fan canopy and connect the receiver wires to the corresponding wires in the fan. 4. Replace the canopy cover, turn the power back on, and test the remote control.
This simple process allows you to conveniently control your Hunter ceiling fan with a remote. Now you can easily adjust the fan speed and lighting without leaving your seat.
Understanding The Importance Of A Remote Control
Installing a Hunter ceiling fan remote control not only enhances your comfort but also adds a significant level of convenience to your daily life. With just a click of a button, you can effortlessly control the fan’s speed, direction, and lighting settings without having to manually adjust them each time. Let’s explore how a remote control can enhance convenience and comfort while eliminating the need for manual operation.
Enhancing convenience and comfort
One of the key advantages of installing a Hunter ceiling fan remote control is the unparalleled convenience it brings to your fingertips. The remote control allows you to adjust the fan’s settings from anywhere in the room, providing an effortless and hassle-free experience. Whether you’re sitting on your sofa, lying in bed, or working at your desk, you can conveniently control the fan’s speed, change the direction of the blades, or adjust the lighting without having to leave your comfort zone.
The remote control also eliminates the need for additional switches or pull chains often found on traditional ceiling fans. This not only streamlines the fan’s appearance but also eliminates any confusion or frustration that may arise from multiple switches or pull chains. With a Hunter ceiling fan remote control, you have all the functions right at your fingertips, allowing you to create the perfect indoor environment with ease.
Eliminating the need for manual operation
Gone are the days of having to manually get up or use a step-stool to adjust your ceiling fan’s settings. With a Hunter ceiling fan remote control, you can effortlessly control the fan without any physical effort. This is particularly beneficial for individuals with mobility issues or those who simply prefer a more convenient way of operating their ceiling fan.
The remote control not only saves you time and effort but also ensures that you can easily create the ideal indoor climate without any inconvenience. You can adjust the fan’s speed to suit the temperature, change the direction of the blades to maximize airflow, and even control the lighting to set the desired ambiance, all from the palm of your hand.
Installation of the Hunter ceiling fan remote control is a straightforward process that can be easily accomplished by following the manufacturer’s instructions. Once installed, you can start enjoying the convenience and comfort it brings, making your ceiling fan operation a breeze.
In conclusion, investing in a Hunter ceiling fan remote control not only enhances your comfort and convenience but also eliminates the need for manual operation. It provides an effortless way to control your fan’s settings from anywhere in the room, allowing you to create the perfect indoor environment without any hassle. Say goodbye to manual adjustments and welcome a new level of convenience with a Hunter ceiling fan remote control.
Preparing For Installation
Before you start installing a Hunter ceiling fan remote control, it’s important to ensure that you are well-prepared for the task at hand. This involves gathering the necessary tools and materials, as well as checking the compatibility with your Hunter ceiling fan. By following these steps, you can ensure a smooth and hassle-free installation process.
Below, we will walk you through the process of preparing for installation, including gathering the necessary tools and materials and checking compatibility with your Hunter ceiling fan.
Gathering the necessary tools and materials
Before you begin the installation process, it’s crucial to have all the tools and materials you’ll need readily available. This will save you time and frustration later on. Here’s a list of what you’ll need:
| 1. Screwdriver |
| 2. Wire cutters |
| 3. Wire connectors |
| 4. Electrical tape |
| 5. Remote control receiver kit (compatible with your Hunter ceiling fan) |
| 6. Batteries |
Make sure you have all these tools and materials within reach before you start the installation process, as it can be frustrating to have to stop midway and search for something you need.
Checking compatibility with your Hunter ceiling fan
Not all Hunter ceiling fans are compatible with remote controls. Therefore, it is essential to check the compatibility of your fan before proceeding with the installation. Here’s what you need to do:
- Check the owner’s manual: Start by referring to the owner’s manual of your Hunter ceiling fan. Look for any information about compatibility with remote controls. If your fan is compatible, it should be clearly stated in the manual.
- Visit the Hunter website: If the owner’s manual does not provide clear information or if you don’t have access to it, you can visit the official Hunter website. Look for the specific model of your ceiling fan and check the product details to see if remote control compatibility is mentioned.
- Contact Hunter customer service: If you’re still unsure about the compatibility, it’s best to reach out to Hunter customer service. They will be able to provide you with accurate information regarding whether or not your ceiling fan can be paired with a remote control.
Checking compatibility in advance will save you from the frustration of installing the remote control only to find out it’s not compatible with your fan. It’s an important step that shouldn’t be overlooked.
Once you’ve gathered all the necessary tools and materials and confirmed the compatibility, you’re ready to move on to the next step – the actual installation process. Stay tuned for our upcoming blog post to guide you through the installation of the Hunter ceiling fan remote control.
Step-By-Step Installation Process
Step-by-Step Installation Process
Installing a remote control for your Hunter ceiling fan can greatly enhance its convenience and functionality. With a remote control, you can easily adjust the fan speed, dim the lights, and even set timers from the comfort of your seat. In this step-by-step guide, we will walk you through the installation process for a Hunter ceiling fan remote control.
Identifying the receiver and transmitter
Before you begin the installation process, it’s important to identify the receiver and transmitter for your Hunter ceiling fan remote control. The receiver is a small device that is installed inside the fan canopy, while the transmitter is the handheld device that you will use to control the fan. Both the receiver and transmitter are usually included in the remote control kit.
When identifying the receiver, look for a device that is small and rectangular in shape, with multiple wires extending from it. The receiver is typically located inside the canopy of the ceiling fan, which is the part of the fan that attaches directly to the ceiling. You may need to remove the canopy cover to access the receiver.
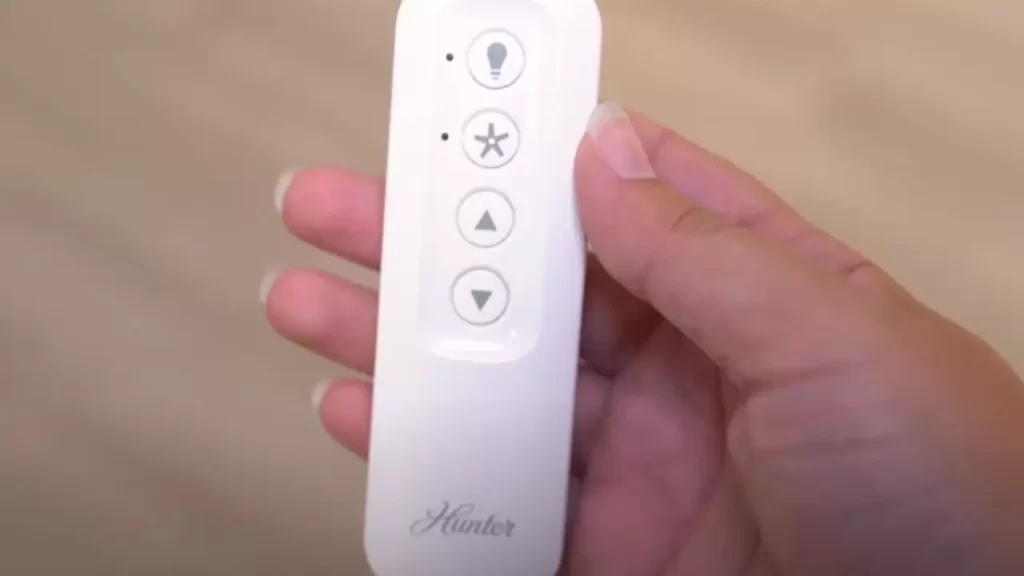
The transmitter, on the other hand, is the handheld device that sends signals to the receiver. It is usually a small device that fits comfortably in your hand and has buttons for controlling the fan speed, light dimming, and other functions.
Mounting the receiver in the ceiling fan
To mount the receiver in your Hunter ceiling fan, follow these simple steps:
- Turn off the power to the fan at the circuit breaker to ensure your safety.
- Remove the canopy cover from the fan by unscrewing the screws that hold it in place.
- Locate the mounting bracket inside the canopy. This is the part of the fan that holds the receiver.
- Secure the receiver to the mounting bracket using the provided screws. Make sure it is positioned securely and doesn’t move around.
- Reattach the canopy cover to the fan by screwing it back into place.
Connecting the wires properly
Connecting the wires properly is crucial for the remote control to function correctly. To connect the wires, follow these steps:
- Turn off the power to the fan at the circuit breaker to avoid any electrical shocks.
- Locate the wires that extend from the receiver and the fan motor. The wires from the receiver should be color-coded to match the wires from the fan motor.
- Twist the corresponding wires from the receiver and the fan motor together, starting with the black wire, then the white wire, and finally the blue wire (if applicable). Secure each connection with a wire nut.
- Tuck the connected wires into the fan canopy and ensure they are not interfering with any moving parts of the fan.
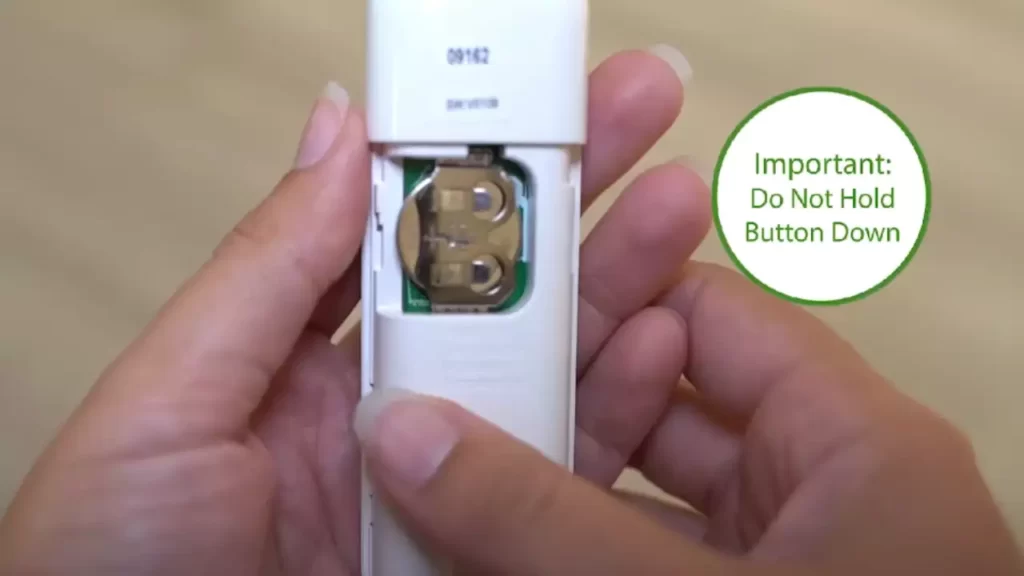
Installing the batteries in the transmitter
The final step in the installation process is to install the batteries in the transmitter. Follow these steps:
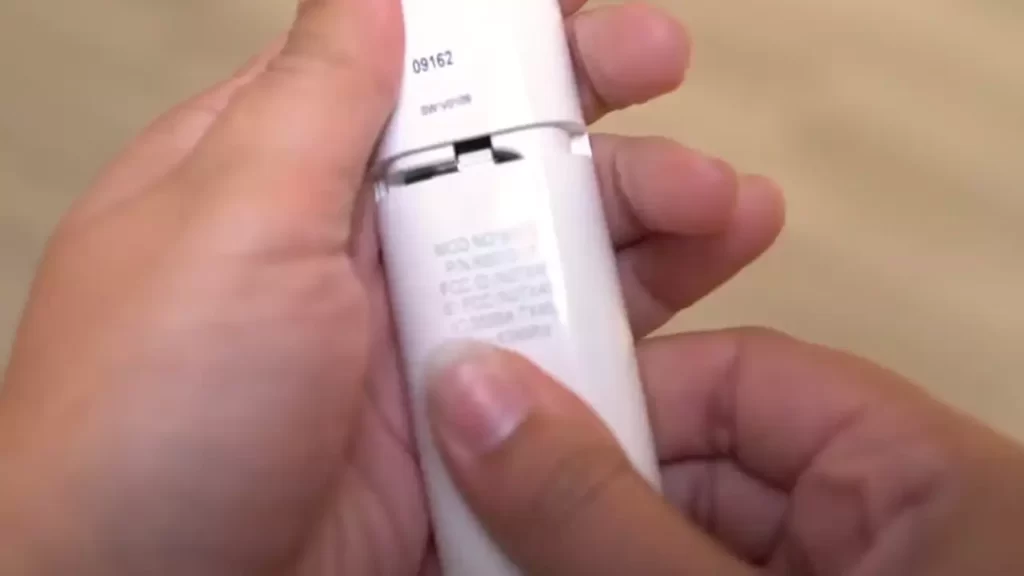
- Locate the battery compartment on the back of the transmitter.
- Remove the battery compartment cover by sliding it off or using a small screwdriver to pry it open.
- Insert the batteries into the compartment, ensuring you follow the correct polarity (positive and negative ends).
- Replace the battery compartment cover and ensure it is securely closed.
Once you have completed these steps, your Hunter ceiling fan remote control should be ready for use. Remember to test the remote control to ensure it is working properly before turning the power back on to the fan.
Testing And Troubleshooting
Introduction
Testing and troubleshooting are crucial steps when installing a Hunter ceiling fan remote control. These steps ensure that the remote control is functioning properly and any potential connectivity issues are identified and resolved. By following these steps, you can ensure a seamless and efficient installation process for your Hunter ceiling fan remote control.
Verifying the fan’s functionality with the remote control
Before proceeding with the installation of the Hunter ceiling fan remote control, it is essential to verify the fan’s functionality with the remote control. This will ensure that the remote control is compatible with the fan and is able to control its various features effectively.
Here’s how you can verify the fan’s functionality:
- Ensure that the fan is properly installed and connected to a power source.
- Hold the remote control close to the fan and press the power button.
- Observe if the fan responds to the command by starting and adjusting its speed accordingly.
- If the fan does not respond or does not function as expected, check the batteries in the remote control and replace them if necessary. Additionally, ensure that the fan’s installation is correct and all connections are secure.
Checking for any connectivity issues
Connectivity issues can arise during the installation of a Hunter ceiling fan remote control, preventing it from properly communicating with the fan. By checking for connectivity issues, you can address any potential problems and ensure a successful installation.
Here’s how you can check for connectivity issues:
- Inspect the wiring connections between the fan and the remote control receiver. Ensure that all connections are securely fastened.
- Check for any obstructions or interference that may be blocking the signal between the remote control and the receiver. Remove any obstacles that may be hindering the connectivity.
- Ensure that the remote control and the receiver are within the recommended range. If the distance between them is too far, the signal strength may weaken, resulting in connectivity issues.
Troubleshooting common problems and solutions
During the installation process, you may encounter common problems that can be easily resolved with troubleshooting techniques. By troubleshooting these issues, you can ensure a smooth operation of your Hunter ceiling fan remote control.
Here are common problems and their solutions:
| Problem | Solution |
|---|---|
| The remote control is not responding. | Check the batteries and replace them if necessary. Ensure that the remote control and receiver are properly synced. If the issue persists, contact Hunter customer support for further assistance. |
| The fan is not changing speed or direction. | Confirm that the remote control is set to the correct speed and direction settings. Ensure that the receiver is properly connected to the fan. If needed, reset the remote control and reprogram it according to the manufacturer’s instructions. |
| The fan is making unusual noises. | Inspect the fan blades and ensure that they are clean and properly aligned. Tighten any loose screws or connections. If the issue persists, contact Hunter customer support for further guidance. |
By following these troubleshooting tips, you can address common problems and ensure a smooth and hassle-free operation of your Hunter ceiling fan remote control. If you encounter any persistent issues, don’t hesitate to reach out to Hunter’s customer support for professional assistance.
Additional Tips And Recommendations
Maintaining the remote control for optimal performance
To ensure that your Hunter ceiling fan remote control continues to work smoothly and efficiently, it’s important to take proper care and perform regular maintenance. Here are some tips to help you maintain the remote control for optimal performance:
- Keep the remote control clean: Dust and dirt can accumulate on the buttons and sensors of the remote control, leading to malfunctioning. Use a soft, lint-free cloth to wipe the remote control regularly and remove any dust or dirt that may have accumulated.
- Replace the batteries as needed: The remote control operates on batteries, so it’s essential to replace them when they run out of power. Check the battery levels periodically and replace them with fresh batteries to ensure reliable performance.
- Store the remote control properly: When not in use, store the remote control in a safe and dry place. Avoid exposing it to extreme temperatures or humidity, as this can damage the internal components.
Customizing the remote control settings
Your Hunter ceiling fan remote control comes with several settings that you can customize to match your preferences. Here are some ways you can personalize the remote control settings:
- Adjust the fan speed: Most Hunter ceiling fan remote controls allow you to adjust the fan speed to your desired level of comfort. Experiment with different speed settings to find the one that suits you best.
- Set the timer: If you want your ceiling fan to turn off automatically after a certain period, you can set the timer on the remote control. This feature can help you save energy and ensure optimal comfort without having to remember to turn off the fan manually.
- Enable the light control: Many Hunter ceiling fan remote controls also have the option to control the lights on the fan. You can turn the lights on/off or adjust their brightness levels using the remote control.
Exploring advanced features and functionalities
Hunter ceiling fan remote controls often come with advanced features and functionalities that can enhance your overall fan experience. Here are some advanced features you can explore:
- Reverse mode: Some remote controls have a reverse mode that allows you to change the direction of the fan blades. This feature is particularly useful during colder months, as it helps to circulate warm air downwards and improve heating efficiency.
- Programmable settings: Certain Hunter ceiling fan remote controls offer programmable settings, allowing you to create custom fan and light settings. You can set different fan speeds, timer durations, and lighting preferences for various times of the day or specific occasions.
- Smart home integration: If you have a smart home system, check if your Hunter ceiling fan remote control is compatible with it. By integrating your fan control into your smart home setup, you can enjoy the convenience of voice commands or remote control from your smartphone or tablet.
Exploring these advanced features and functionalities can add convenience and versatility to your ceiling fan experience, allowing you to tailor the settings according to your specific needs and preferences. Take the time to familiarize yourself with the remote control’s capabilities and make the most of its advanced features.
Safety Precautions And Guidelines
Switching off the power supply before installation
Before starting the installation process for your Hunter Ceiling Fan Remote Control, it is imperative to prioritize safety. One of the key safety precautions is switching off the power supply to the area where the fan will be installed. This step ensures that there is no electricity flowing through the wires and eliminates the risk of electrical shock.
Handling electrical components with caution
When it comes to working with electrical components, it is crucial to exercise caution at all times. Before touching any wires or components, make sure to follow these safety guidelines:
- Use insulated gloves and tools when handling any electrical components to prevent any direct contact with live wires.
- Avoid pulling or tugging on wires forcefully as it can cause damage to the internal connections.
- Ensure that all connections are secure and tight to avoid any loose connections that may lead to malfunctions or accidents.
To further ensure safety, it is recommended to read the instruction manual provided by Hunter, as it contains specific guidelines for handling the remote control and its components.
Seeking professional assistance if necessary
Although it is possible to install the Hunter Ceiling Fan Remote Control on your own, seeking professional assistance is always an option if you are unsure about any step of the installation process. This is particularly important if you have little to no experience with electrical installations.
Professional electricians have the expertise and knowledge to safely and efficiently install the remote control, ensuring that your ceiling fan operates flawlessly. It’s always better to seek their assistance rather than risking mistakes or compromising your safety.
By adhering to these safety precautions and guidelines, you can ensure a smooth and secure installation of your Hunter Ceiling Fan Remote Control. Remember to always prioritize safety when dealing with electrical systems and components.
Frequently Asked Questions
How To Wire Hunter Ceiling Fan With Remote?
To wire a Hunter ceiling fan with a remote, follow these steps: 1. Turn off the power. 2. Connect the fan’s black wire to the live wire in the ceiling. 3. Connect the white wire to the neutral wire. 4.
Connect the blue wire to the light wire. 5. Connect the green wire to the ground wire.
How Do I Pair My New Hunter Fan Remote?
To pair your new Hunter fan remote, follow these steps: 1. Turn on the power to the fan. 2. Locate the receiver in the fan’s canopy. 3. Press and hold the reset button on the receiver for 5 seconds. 4. Within 30 seconds, press and release the pairing button on the remote.
5. The fan and remote should now be paired and ready to use.
Can You Add A Remote Control To An Existing Ceiling Fan?
Yes, you can add a remote control to an existing ceiling fan. It’s a simple process that allows you to control the fan’s speed and direction from a distance. Just purchase a compatible remote control kit and follow the instructions for installation.
Why Is My Hunter Ceiling Fan Wall Remote Not Working?
Check if the battery of your Hunter ceiling fan wall remote is in good condition and properly installed. Ensure the remote is within range of the fan. If the issue persists, try resetting the remote by turning off the fan’s power and removing the battery for a few minutes.
Conclusion
Installing a Hunter ceiling fan remote control is a straightforward process that can greatly enhance your comfort and convenience. By following the step-by-step instructions provided in this guide, you can seamlessly integrate the remote control into your ceiling fan system.
With the ability to adjust speed, lighting, and other settings from the palm of your hand, you’ll enjoy a more enjoyable and tailored cooling experience. So, why wait? Get ready to control your Hunter ceiling fan with ease and elevate your comfort to new heights.