To install Helicoil thread inserts, follow these steps: Drill out the damaged threads with a suitable sized drill bit. Tap the hole with a Helicoil tap to create new threads.
Insert the Helicoil thread insert into the hole and use the installation tool to drive it in until it is flush with the surface.
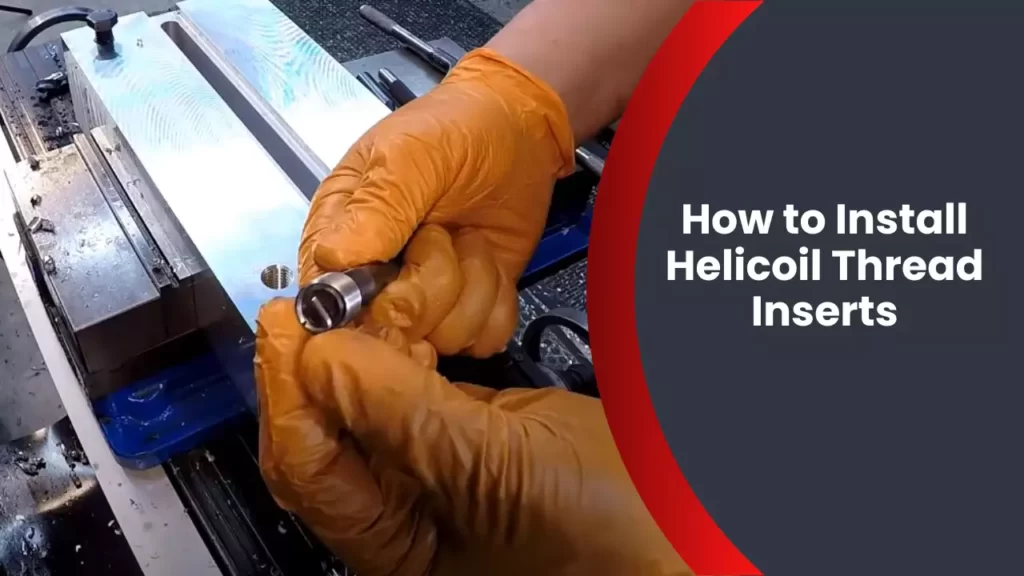
Understanding Helicoil Thread Inserts
What are Helicoil thread inserts?
Helicoil thread inserts are innovative and highly effective solutions for repairing stripped, damaged, or worn-out threads in various materials, including metal, plastic, and even wood. These inserts provide a cost-efficient alternative to replacing entire parts or components that have damaged threads.
Benefits of using Helicoil thread inserts
Using Helicoil thread inserts offers a multitude of advantages, making them a preferred choice for many industries and applications. Some key benefits of using these inserts include:
- Restoration of damaged threads: When screws, bolts, or other threaded connections no longer hold tightly due to wear or stripping, Helicoil inserts can effectively restore the original thread strength, ensuring a secure and reliable connection.
- Increased durability: By reinforcing weakened threads, Helicoil inserts enhance the overall durability and lifespan of the assembly or component, reducing the risk of future thread damage and the need for frequent repairs.
- Improved load distribution: Helicoil inserts distribute the load evenly along the entire length of the thread, reducing stress concentration on specific points. This balanced load distribution enhances the strength and performance of the threaded connection.
- Wide compatibility: These inserts are available in various sizes and types, compatible with a range of thread sizes and materials, enabling their application in diverse industries and environments.
- Time and cost savings: Repairing damaged threads with Helicoil inserts is generally quicker and more cost-effective than alternative methods, such as re-tapping or replacing entire components. It minimizes downtime and keeps production or operations running smoothly.
Different types of Helicoil thread inserts
Helicoil thread inserts come in different types, each suited to specific thread repair or reinforcement needs. The main types include:
| Type | Description |
| Free Running Inserts | Designed for easy installation and removal, these inserts provide a strong, reliable thread without damaging the surrounding material. |
| Screw Locking Inserts | These inserts feature positive locking, which prevents unintentional loosening caused by vibrations or other factors. They are ideal for critical applications requiring high thread reliability. |
| Wire Inserts | Wire thread inserts are versatile and offer excellent resilience against high temperatures and corrosive environments. They are commonly used in industries with demanding operating conditions. |
Understanding the different types of Helicoil thread inserts allows you to select the most suitable option for your specific project or repair needs.
Tools And Materials Needed
Installing Helicoil thread inserts requires the use of specific tools and materials to ensure a successful installation. Being prepared and having the right equipment is key to achieving a strong and durable threaded connection. In this section, we will discuss the tools and materials needed for a smooth installation process.
List of Tools Needed for Installing Helicoil Thread Inserts
To install Helicoil thread inserts, you will need the following tools:
- Tap: A tap is used to create the initial threaded hole in the material. It is essential to match the tap size with the selected Helicoil insert size.
- Drill: A drill is necessary to create a hole in the material prior to tapping. The drill size should correspond to the recommended drill size for the Helicoil insert being used.
- Helicoil Insert: The Helicoil insert is the threaded coil that will be inserted into the tapped hole. Make sure to choose the correct size and thread pitch to match the requirements of your application.
- Tang Removal Tool: After the insert is screwed into the hole, the tang at the bottom of the insert needs to be removed. A tang removal tool, such as a special hook or pin, is necessary to safely and effectively remove the tang.
- Threadlocking Compound: Depending on the application, it may be important to apply a threadlocking compound to the Helicoil insert. This compound helps prevent the insert from loosening over time, ensuring a secure connection.
- Insertion Tool: An insertion tool, such as an installation mandrel or a special wrench, is used to thread the Helicoil insert into the tapped hole. This tool ensures the insert is correctly positioned and properly seated within the hole.
List of Materials Needed for Installing Helicoil Thread Inserts
Alongside the tools, you will also need the following materials:
- Helicoil Inserts: In addition to the tool, you will need the actual Helicoil inserts themselves. These inserts are typically made from stainless steel or other robust materials to ensure durability and resistance to corrosion.
- Cutting Oil: While not always necessary, cutting oil can facilitate the drilling and tapping process, making it smoother and reducing the chance of overheating. Applying cutting oil can help prolong the life of your tools as well.
- Cleaner/Degreaser: Before installing the Helicoil insert, it is important to ensure the hole and surrounding area are clean and free of debris. Using a suitable cleaner or degreaser will help remove any surface contaminants.
- Threadlocker: If your application requires additional thread security, a threadlocker compound may be needed. This adhesive helps maintain the proper torque on the threaded connection, preventing unintentional loosening.
- Lubricant: Applying a lubricant to the insert can assist with the insertion process, reducing friction and ensuring smooth operation. Select a lubricant suitable for your specific application and material.
By having these tools and materials readily available, you can confidently proceed with installing Helicoil thread inserts, promoting a strong and reliable threaded connection.
Step-By-Step Guide To Installing Helicoil Thread Inserts
Helicoil thread inserts are a popular solution for repairing damaged threads. These inserts provide a stronger, more durable threading system, ensuring that your fasteners stay securely in place. Installing Helicoil thread inserts may seem daunting at first, but with the right tools and a step-by-step approach, you can easily complete the process. In this guide, we will walk you through the installation process, from preparing the damaged thread to ensuring proper insertion depth. Let’s get started!
Preparing the damaged thread
The first step in installing Helicoil thread inserts is to prepare the damaged thread. This involves inspecting the thread for any signs of wear or damage and clearing out any debris or foreign objects that may be obstructing the hole. Inspecting the damaged thread allows you to assess the extent of the damage and determine if a Helicoil thread insert is the appropriate solution.
Clearing out any debris or foreign objects
Before tapping the hole to the appropriate size, it is crucial to clear out any debris or foreign objects that may have accumulated. This can be done using compressed air or a thread-cleaning tool. Ensuring that the hole is clear of any obstructions will help facilitate a smooth installation process.
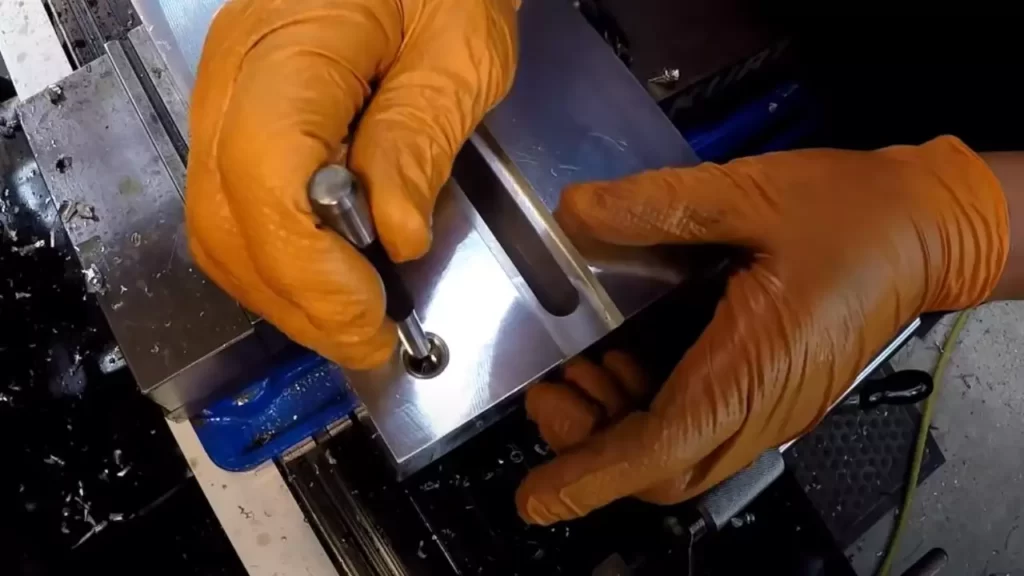
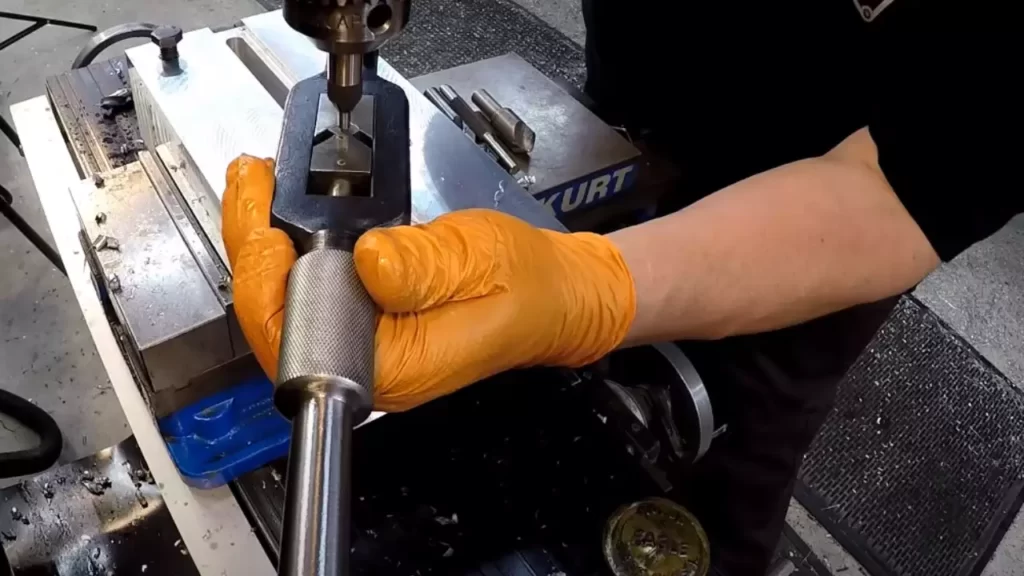
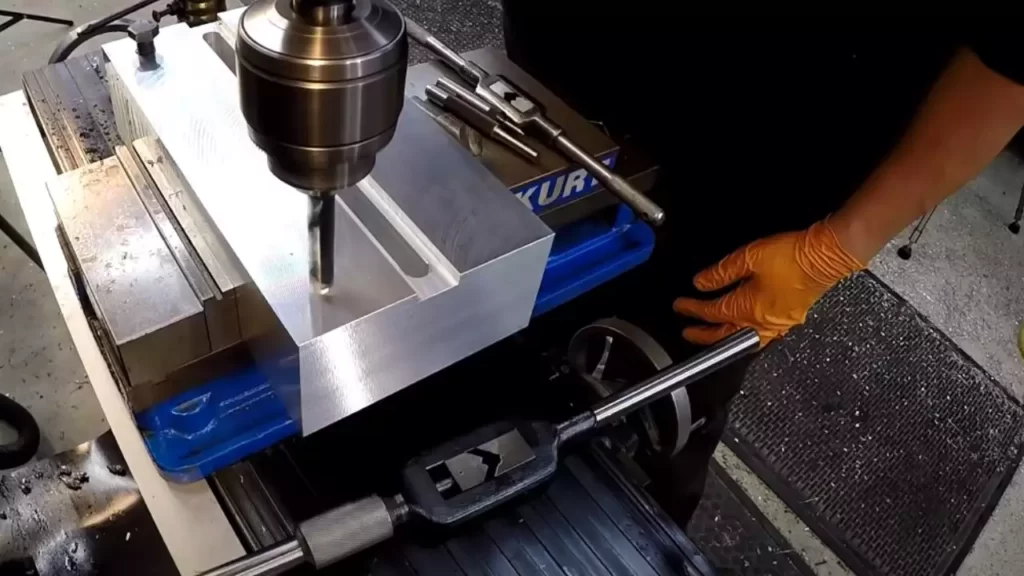
Tapping the hole to the appropriate size
Once the damaged thread is prepared, it’s time to tap the hole to the appropriate size. This involves using a tapping tool to create new threads within the hole. It’s essential to choose the correct size tap to match the Helicoil thread insert that will be installed. Refer to the manufacturer’s instructions or consult a thread gauge to ensure accuracy.
Installing the Helicoil thread insert
With the hole tapped to the appropriate size, it’s time to install the Helicoil thread insert. Begin by selecting the correct Helicoil size. This can be determined by matching the insert to the tapped hole size. Once you have the appropriate size insert, you will need to prepare the thread.
Thread preparation
Thread preparation is an important step in the installation process. Thread the Helicoil insert onto the installation tool, making sure it is securely attached. Apply a thread locking compound to the outside of the insert to enhance its stability and prevent it from loosening over time.
Inserting the Helicoil using the installation tool
Now that the thread is prepared, it’s time to insert the Helicoil using the installation tool. Carefully thread the insert into the hole while gently turning the installation tool clockwise. Be sure to apply a consistent amount of pressure to ensure proper installation. Once the insert is fully inserted, reverse the direction of the installation tool to remove it from the insert.
Ensuring proper insertion depth
After the Helicoil thread insert is installed, it’s important to ensure it is inserted at the proper depth. This can be done by using a depth gauge to measure the depth of the insert below the surface of the material. Adjust the installation depth if necessary, ensuring that the insert sits flush with the surface or slightly below it.
Finishing touches
Finally, it’s time to add the finishing touches to the installation process. This involves breaking off the tang, which is the small tab at the top of the insert that helps during installation. Use a pair of pliers to grip the tang and bend it back and forth until it breaks away cleanly.
With the tang removed, take a moment to inspect the installed Helicoil thread insert. Ensure that it is securely in place and that the threads are aligned correctly. This will provide you with confidence that the repair has been completed successfully.
Tips And Best Practices
The successful installation of Helicoil thread inserts requires careful attention to tips and best practices. By following these guidelines, you can ensure a secure and long-lasting threaded connection. In this section, we will discuss the tips for ensuring successful installation, common mistakes to avoid, and the best practices for maximizing the effectiveness of Helicoil thread inserts.
Tips for ensuring successful installation
When it comes to installing Helicoil thread inserts, it’s crucial to follow these tips to achieve optimal results:
- Choose the right insert size: Selecting the correct size of Helicoil insert is vital for successful installation. Refer to the manufacturer’s specifications or consult a thread specialist to determine the appropriate insert diameter and pitch.
- Use the proper installation tools: Utilizing the right tools is essential for a smooth and precise installation. Ensure that you have a quality tap, insertion tool, tang removal tool, and thread locking compound, if required.
- Prepare the hole: Before inserting the Helicoil, thoroughly clean the hole to eliminate any debris, rust, or paint. Use a tap to create a clean, accurate, and properly sized threaded hole.
- Apply lubricant: Applying a lubricant, such as cutting oil or a thread lubricant, while tapping the hole enhances the ease and precision of the process. It minimizes the chances of galling or damaging the threads.
Common mistakes to avoid during installation
While installing Helicoil thread inserts, it’s important to be aware of the following common mistakes and avoid them:
- Insufficient tang break-off: Make sure to break off the tang properly once the insert is installed. Leaving any part of the tang may cause interference and compromise the effectiveness of the insert.
- Over-torquing: Avoid excessive tightening of the bolt or screw that is threaded into the Helicoil insert. Over-torquing can lead to thread deformation, weakening the connection and potentially causing failure.
- Failure to properly align the insert: Ensure that the insert is aligned correctly with the hole. Misaligning the insert may result in cross-threading or stripping of the threads.
- Skipping the tang break-off process: Neglecting to break off the tang after installation can impede the effectiveness of the Helicoil insert. Take care to complete this step for optimal performance.
Best practices for maximizing the effectiveness of Helicoil thread inserts
To make the most of your Helicoil thread inserts, consider implementing these best practices:
- Follow the manufacturer’s instructions: Always refer to the manufacturer’s guidelines and instructions during the installation process. These instructions are tailored to the specific insert and offer valuable insights for a successful installation.
- Regularly inspect the threaded connection: Periodically inspect the insert and the threaded connection for any signs of wear, damage, or loosening. Detecting issues early can help prevent more significant problems down the line.
- Use thread locking compound when necessary: If the application involves frequent vibration or high loads, consider using a thread locking compound to enhance the strength and stability of the threaded connection.
- Train personnel on proper installation techniques: Provide training to individuals responsible for installing Helicoil thread inserts. Educating them on the correct techniques and best practices will ensure consistent and accurate installations.
By following these tips and best practices, you can install Helicoil thread inserts confidently, knowing that you have taken the necessary steps to achieve a reliable and durable threaded connection.
Maintenance And Care
Proper care and maintenance of Helicoil thread inserts are crucial to ensure their optimal performance and longevity. By following some simple guidelines, you can prevent potential issues and troubleshoot common problems, saving you time and money in the long run.
Proper care and maintenance of Helicoil thread inserts
To extend the lifespan of your Helicoil thread inserts, it is essential to implement proper care and maintenance measures. Here are some important steps to follow:
- Regular inspection: Periodically inspect the Helicoil thread inserts for any signs of wear, damage, or looseness. This inspection will help you detect potential issues early on and take prompt action to resolve them.
- Keep the inserts clean: Cleanliness is key to maintaining the performance of Helicoil thread inserts. Make sure to remove any debris, dirt, or oil buildup from the inserts regularly. Use a soft brush or compressed air to clean the threads, and avoid abrasive materials that could damage the inserts.
- Lubrication: Lubricating the Helicoil thread inserts is essential to enhance their performance and reduce friction. Apply a suitable lubricant to the threads before installation and regularly as part of your maintenance routine.
- Take preventive measures: To avoid potential issues, it is advisable to use thread-locking compounds, such as Loctite, during the installation process. This helps prevent loosening of the inserts due to vibration or other factors.
Signs of potential issues with the thread inserts
It is important to be aware of potential issues that can arise with Helicoil thread inserts. By recognizing the signs early on, you can take necessary action to prevent further damage. Here are some common signs to watch for:
- Loosening: If you notice a decrease in torque or frequent loosening of the Helicoil thread inserts, it could indicate issues with the installation or improper maintenance. Inspect the inserts and follow the troubleshooting steps below to rectify the problem.
- Inefficient tightening: Difficulty in achieving the desired torque during tightening can be a sign of thread insert damage or incorrect installation. Investigate the issue promptly to ensure the inserts are functioning as intended.
- Visible damage: Any visible damage to the Helicoil thread inserts, such as worn or stripped threads, should be addressed immediately. Neglecting these issues can result in further damage and potential failure of the inserts.
Troubleshooting common problems
If you encounter common problems with your Helicoil thread inserts, follow these troubleshooting steps:
- Check installation: Ensure that the inserts are installed correctly, following the manufacturer’s instructions. Verify the thread alignment and depth to ensure a secure and tight fit.
- Inspect the mating parts: Examine the mating parts to ensure they are free from damage or irregularities that may affect the functioning of the inserts.
- Replace damaged inserts: If you identify any signs of damage or wear on the Helicoil thread inserts, replace them promptly. Continuing to use damaged inserts can lead to further complications and potential failure of the threaded assembly.
- Follow proper maintenance: Adhere to the recommended maintenance measures outlined earlier in this article to prevent future issues and ensure the optimal performance of the inserts.
By implementing proper care, regularly inspecting the inserts, and taking prompt action when issues arise, you can maximize the lifespan and performance of your Helicoil thread inserts. Following the recommended maintenance guidelines will save you both time and money, while ensuring the functionality of your threaded assemblies remains intact.
Frequently Asked Questions
How Do You Install Helicoil Inserts?
To install helicoil inserts, follow these steps: 1. Drill a hole of the appropriate size in the damaged threaded hole. 2. Tap the hole with the specified tap size for the helicoil insert. 3. Use the installation tool to screw the helicoil into the tapped hole.
4. Apply a thread-locking adhesive to secure the insert in place. 5. Allow the adhesive to dry and your helicoil insert is installed.
Do You Need A Special Tool To Install A Heli Coil?
No, a special tool is required to install a heli coil. It is essential for ensuring accurate and secure installation.
Do You Use Loctite On Helicoils?
No, Loctite is not required for Helicoils.
How Does A Helicoil Stay In Place?
A helicoil stays in place by utilizing its thread design and friction with the surrounding material. The helical shape of the coil provides a secure hold, while the threaded insertion creates resistance against rotational and axial forces, preventing loosening or displacement.
Conclusion
Installing helicoil thread inserts is a straightforward process that can greatly improve the durability and performance of threaded holes. By following the steps outlined in this guide, you can ensure a proper installation and avoid common mistakes. Remember to choose the right size, prepare the hole, install the insert correctly, and use the appropriate tools.
With a little practice, you’ll be able to confidently install helicoil thread inserts and enjoy the benefits they provide. So why wait? Start incorporating helicoil thread inserts into your projects today and experience stronger, more reliable connections.