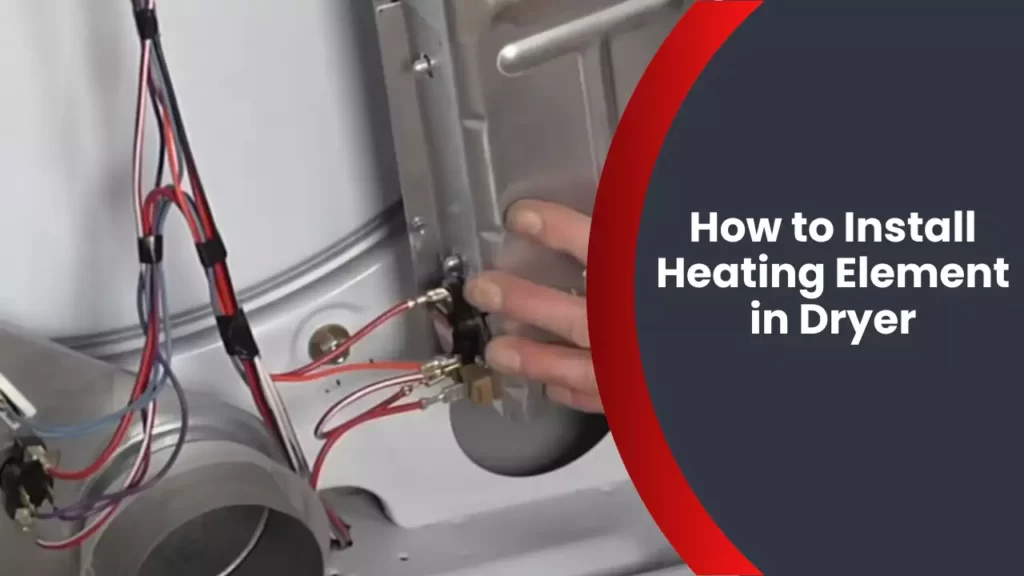
To install a heating element in a dryer, follow these steps: remove the dryer back panel, disconnect wires from the old heating element, remove the mounting screws, replace with the new heating element, reattach wires, and then replace the back panel. Transform your dryer into a more efficient and effective machine by installing a heating element properly.
Adding a heating element to your dryer can significantly enhance its performance and efficiency. By understanding the installation process, you can easily accomplish this task and ensure that your dryer effectively dries your clothes. We will guide you through the steps required to install a heating element in your dryer.
By following these straightforward instructions, you will be able to upgrade your dryer’s capabilities and enjoy more efficient drying cycles. So, let’s get started and learn how to seamlessly install a heating element in a dryer.
Reasons To Replace A Faulty Heating Element
Replacing a faulty heating element in your dryer is crucial to maintain its optimal performance and ensure that your clothes are dried efficiently. Neglecting a malfunctioning heating element can lead to various issues that can impact both your wallet and the overall functionality of your dryer. Let’s explore the main reasons why you should replace a faulty heating element.
Save money on electricity bills
A faulty heating element can significantly increase your electricity bills. When the heating element malfunctions, it may not generate enough heat to dry your clothes effectively, resulting in longer drying cycles. These extended cycles consume more energy and drive up your electricity costs. By replacing the faulty heating element, you can restore the efficient drying process, reducing the time needed to dry your clothes and ultimately lowering your energy consumption.
Prevent damage to other dryer components
A malfunctioning heating element can cause stress on other components in your dryer. As the heating element struggles to operate efficiently, it may overheat and put excessive strain on the electrical circuits and wiring. This can lead to electrical failures or even fire hazards. By promptly replacing the faulty heating element, you can prevent further damage to other vital components and ensure the safety of your dryer.
Ensure efficient drying performance
Efficiency matters when it comes to drying your clothes. A faulty heating element may provide inconsistent heat or fail to generate enough heat altogether. This can result in damp or partially dried clothes, leaving you with additional drying cycles or the need to air-dry certain items. By replacing the faulty heating element, you can ensure that your dryer operates at its peak efficiency, delivering thoroughly dried clothes in a shorter period. This not only saves you time but also enhances the overall performance of the dryer.
Tools And Materials Needed
Before you start installing a heating element in your dryer, it’s important to gather all the necessary tools and materials to ensure a smooth and efficient process. Make sure you have the following items on hand:
Screwdriver
A screwdriver is an essential tool for removing and replacing screws that hold the dryer’s heating element in place. You’ll need both a flathead and a Phillips head screwdriver to accommodate different types of screws.
Multimeter
A multimeter is used for testing electrical connections and determining if the heating element is functioning properly. It measures voltage, current, and resistance, enabling you to identify any issues that may arise during the installation process.
Replacement heating element
Make sure to have a replacement heating element that is compatible with your dryer model. It’s crucial to choose a high-quality heating element to ensure optimal performance and longevity.
Gloves
Wearing gloves is important for your safety and protection during the installation process. They provide a barrier between your hands and any sharp edges or hot surfaces, reducing the risk of injury.
Safety goggles
Protecting your eyes should be a top priority when working with any electrical appliance. Safety goggles shield your eyes from potential debris and prevent any foreign objects from causing harm during the installation.
By having these tools and materials ready, you’ll be fully equipped to install a heating element in your dryer efficiently and safely.
Step-By-Step Guide To Installing The Heating Element
Installing a heating element in your dryer may seem like a daunting task, but with a step-by-step guide, you can accomplish it successfully. Whether you are a DIY enthusiast or just want to save some money on repairs, this guide will walk you through the process from start to finish. Follow these steps carefully to ensure a safe and efficient installation.
1. Remove the dryer’s top panel
The first step is to remove the top panel of the dryer. This can usually be done by using a screwdriver to remove the screws holding it in place. Once the screws are removed, lift the top panel and set it aside.
2. Take out the control panel
Next, locate the control panel and remove it. This step may require disconnecting any wires or clips that are holding it in place. Consult your dryer’s manual for specific instructions on how to remove the control panel safely.
3. Detach the front panel
After removing the control panel, you can proceed to detach the front panel of the dryer. This is typically done by removing a series of screws or clips. Once the front panel is detached, carefully set it aside.
4. Using a multimeter, check for resistance
Before replacing the heating element, it is important to check for resistance using a multimeter. This tool will help you determine if the heating element is working properly and is within the manufacturer’s specifications.
5. Compare the readings with the manufacturer’s specifications
Once you have obtained the resistance readings, compare them with the manufacturer’s specifications. This information can usually be found in your dryer’s manual. Ensure that the readings fall within the acceptable range for your specific dryer model.
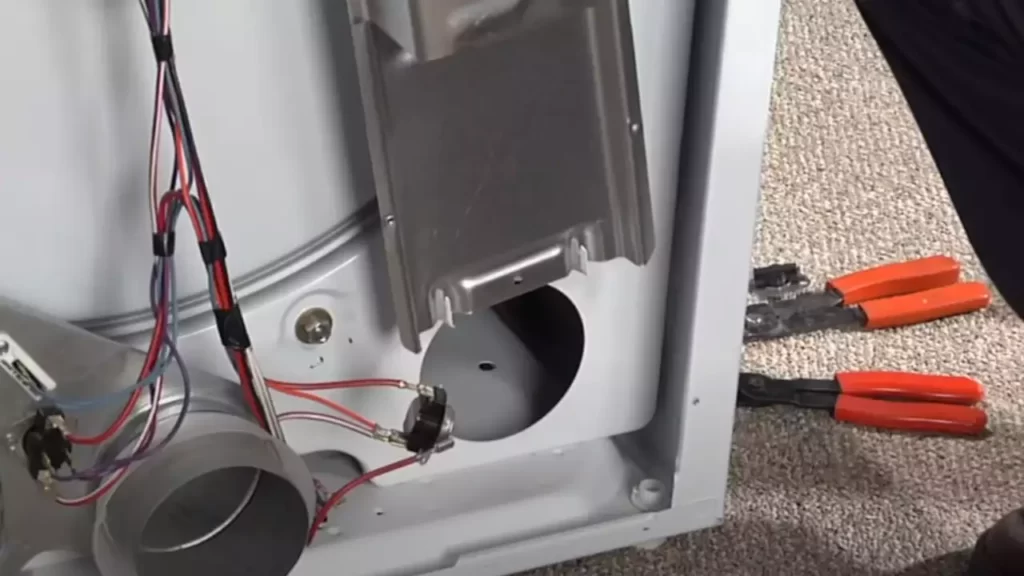
6. Disconnect the wires
If the resistance readings are not within the specified range, it is time to disconnect the wires connected to the heating element. Make sure to turn off the power supply to the dryer before proceeding with this step.
7. Unscrew the mounting screws
After disconnecting the wires, locate the mounting screws that hold the heating element in place. Use a screwdriver to unscrew these screws and remove the old heating element.
8. Connect the wires to the terminal
With the old heating element removed, it is time to connect the wires to the terminal of the new heating element. Make sure to match the correct wires to their corresponding terminals.
9. Secure the element with mounting screws
After connecting the wires, secure the new heating element in place by using the mounting screws. Tighten the screws properly to ensure the element is securely fastened.
10. Attach the front panel
With the heating element securely in place, reattach the front panel of the dryer. Make sure it is properly aligned and use the screws or clips to fasten it back into position.
11. Replace the control panel
Once the front panel is securely attached, you can proceed to replace the control panel. Carefully reconnect any wires or clips that were disconnected earlier, ensuring they are properly connected.
12. Put the top panel back on
Now it’s time to put the top panel back on. Align it properly and use the screws to secure it in place. Make sure all the screws are tightened properly.
13. Plug in the dryer and turn on the power supply (if applicable)
Once the top panel is secured, plug in the dryer and turn on the power supply. If your dryer is gas-powered, don’t forget to turn on the gas supply as well.
14. Run a drying cycle and check for heat
After completing the installation, run a drying cycle to test the heating element. Make sure to check if the dryer is producing heat as expected. If there is no heat, double-check the installation steps and ensure everything is connected properly.
15. Ensure the wiring is correct
Confirm that all the wiring is correctly connected and secured. Loose or improperly connected wires can cause issues with the heating element and other components of the dryer.
16. Verify the power supply
Double-check the power supply to the dryer to ensure it is functioning properly. Faulty power supply can affect the performance of the heating element and may require professional assistance.
17. Test the thermal fuse and thermostat
While installing the heating element, it is a good idea to test the thermal fuse and thermostat as well. These components are critical for the proper functioning of the dryer and should be checked regularly.
18. Clean the lint trap regularly
Regularly cleaning the lint trap is essential to maintain the efficiency and safety of your dryer. Make it a habit to clean the lint trap before each drying cycle to prevent lint buildup and potential hazards.
19. Inspect the venting system for blockages
Inspect the venting system of your dryer for any blockages or obstructions. Blockages can restrict airflow and increase the risk of overheating. If you notice any blockages, remove them promptly.
20. Schedule professional dryer maintenance annually
To ensure the longevity and optimal performance of your dryer, schedule professional maintenance annually. A certified technician can inspect and clean your dryer thoroughly, addressing any potential issues before they become major problems.
By following this step-by-step guide, you can successfully install a heating element in your dryer. Remember to prioritize safety, double-check your work, and consult your dryer’s manual for specific instructions. With proper installation and regular maintenance, your dryer will continue to provide efficient and reliable performance for years to come.
https://www.youtube.com/watch?v=R7UPpZTxEnU&pp=ygUnSG93IHRvIEluc3RhbGwgSGVhdGluZyBFbGVtZW50IGluIERyeWVy
Frequently Asked Questions
Are Dryer Heating Elements Hard To Replace?
Replacing dryer heating elements is not difficult. It may require basic mechanical skills, but with the right instructions, it can be done easily. Take caution to disconnect power, remove the back panel, detach old element, and replace it with a new one.
How Do I Know If My Dryer Needs A New Heating Element?
Check if your dryer is taking longer than usual to dry clothes or not producing heat. If the dryer runs but doesn’t heat up, it’s likely the heating element needs replacing. Also, look for visible signs like burnt-out spots or breaks in the element.
How Do I Install A Heat Element In My Samsung Dryer?
To install a heat element in your Samsung dryer: 1. Unplug the dryer and turn off the gas supply (if applicable). 2. Remove the dryer’s top and front panels. 3. Locate the heat element, usually at the back of the dryer.
4. Disconnect the wires and remove the old heat element. 5. Install the new heat element and reconnect the wires. Remember to follow the manufacturer’s instructions and exercise caution during the process.
Are Dryer Heating Elements Universal?
No, dryer heating elements are not universal. Different dryer models and brands have specific heating elements designed to fit their machines. It is essential to check the specifications and compatibility of the heating element before purchasing or replacing one for your dryer.
Conclusion
To sum up, installing a heating element in your dryer may seem intimidating at first, but by following the right steps and taking necessary precautions, it can be a straightforward process. Remember to disconnect the power, gather the right tools, and refer to the manufacturer’s instructions for specific details.
With some patience and careful attention, you’ll have your dryer up and running efficiently in no time. Enjoy the convenience of a properly functioning dryer and the peace of mind knowing you tackled the task successfully.